Table of Contents
Advertisement
Advertisement
Table of Contents

Related Manuals for The Splash Lab MONOLITH


Summary of Contents for The Splash Lab MONOLITH
- Page 1 MONOLITH Basin System...
-
Page 2: Table Of Contents
Before you Install Installation Monolith - 150 Components List Technical Data Before you Install Installation Monolith - 200 Components List Technical Data Before you Install Installation Operation Maintenance Cleaning Repairs Damage Prevention Taps Soap Dispensers Warranty MONOLITH BASIN SYSTEM MANUAL... -
Page 3: Monolith - 105
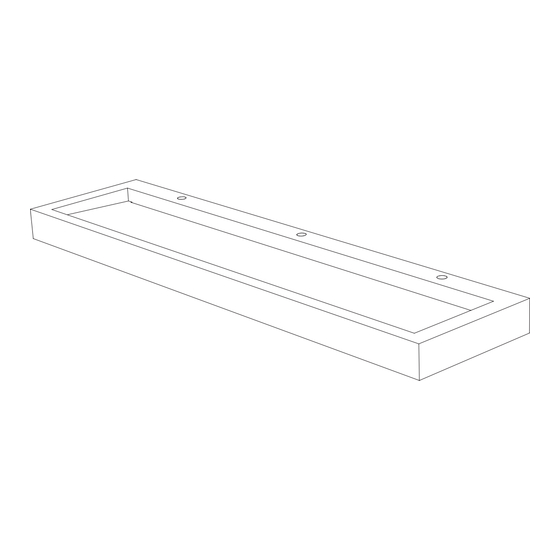
105 Monolith System 105 The Splash Lab Monolith System 105 is a slim profile multi-user basin, constructed from solid surface material, well suited to commercial and public washrooms. MONOLITH BASIN SYSTEM MANUAL... -
Page 4: Components List
Please check that all components are included and advise The Splash Lab if any parts are missing. Fixings are not included for fastening the brackets to the wall as each location is different. The Splash Lab recommend that you consult a fixings specialist for advice on the most appropriate fixing method for your project. -
Page 5: Technical Data
Weight (Kg) Overall 600 x 450 x 105 1200 x 450 x 105 1800 x 450 x 105 2400 x 450 x 105 3000 x 450 x 105 dimensions (mm) Waste connections Bottle traps not included. MONOLITH BASIN SYSTEM MANUAL... -
Page 6: Before You Install
The studwork should be set out to suit the suggested spacing of the brackets (see table on page 18). The Splash Lab recommend that a void of at least 100mm is included behind the fixing wall for ease of access to the plumbing connections. It is also recommended that access panels are created as part of the wall construction to allow for initial installation and maintenance of the plumbing fittings. - Page 7 105 before you install 600mm 1-1/4" Bottle Trap T.M.V. Hot Feed Cold Feed Waste Water 1800mm 1-1/4" Bottle Trap T.M.V. Hot Feed Cold Feed Waste Water MONOLITH BASIN SYSTEM MANUAL...
-
Page 8: Installation
105 installation The brackets are to be installed with an appropriate fixing, depending on the substrate of the wall the Slim Monolith is to be mounted to. The recommended fixing centres and heights are given in the table below Length... - Page 9 The outer end brackets should be fitted 75mm in from each end; the next bracket in is to be fitted at 600mm from end of the Monolith. All other brackets are to be at 600mm centres between the 2nd bracket in from each end.
- Page 10 Ensure that the sealing gasket is correctly fitted into the recess on the funnel and tighten the 4 fixing bolts. Once the Monolith is in place, mount it to the wall When rear of the Monolith is resting on brackets, brackets through the mounting rail R using the slide towards the wall until the tabs are sitting M6 x 40 screws and nuts provided.
- Page 11 105 installation Fit waste trap to drain funnel and connect to waste pipe previously installed. 600mm 1800mm MONOLITH BASIN SYSTEM MANUAL...
- Page 12 MONOLITH BASIN SYSTEM MANUAL...
- Page 13 150 Monolith System 150mm The Splash Lab Monolith System 150 is a slim basin design well suited to smaller washrooms and superloos MONOLITH BASIN SYSTEM MANUAL...
-
Page 14: Monolith - 150 Components List
Please check that all the components are included and advise The Splash Lab if any parts are missing. Fixings are not included for fastening the brackets to the wall as each location is different. The Splash Lab recommend that you consult a fixings specialist for advice on the most appropriate fixing method for your project. -
Page 15: Technical Data
39.5 (Kg) Overall 600 x 300 x 150 1200 x 300 x 150 1800 x 300 x 150 2400 x 300 x 150 3000 x 300 x 150 dimensions (mm) Waste connections Bottle traps not included. MONOLITH BASIN SYSTEM MANUAL... - Page 16 A timber stud or similar framework should be prepared that will support the weight of the Monolith. The studwork should be set out to suit the suggested spacing of the brackets (see table on page 8). The Splash Lab recommend that a void of at least 100mm is included behind the fixing wall for ease of access to the plumbing connections.
-
Page 17: Before You Install
150 before you install 600mm 1-1/4" Bottle Trap T.M.V. Hot Feed Cold Feed Waste Water MONOLITH BASIN SYSTEM MANUAL... -
Page 18: Installation
150 installation The brackets are to be installed with an appropriate fixing, depending on the substrate of the wall the Monolith is to be mounted to. The recommended fixing centres and heights are given in the table below Length... -
Page 19: Monolith - 200
Ensure all the brackets are level along their length height adjustment to ensure that all the brackets are so that there will not be a gap between the Monolith all level and fitted at the same height. It is critical and the wall. - Page 20 4 fixing bolts. When rear of the Monolith is resting on brackets, Once the Monolith is in place, mount it to the wall brackets through the rear mounting rail R using the slide towards the wall until the tabs are sitting M6 x 40 screws and nuts provided.
- Page 21 150 installation Fit waste trap to drain funnel and connect to the waste pipe previously installed. MONOLITH BASIN SYSTEM MANUAL...
- Page 22 MONOLITH BASIN SYSTEM MANUAL...
- Page 23 200 Monolith System 200 The Splash Lab Monolith System 200 is a multi-user basin, constructed from solid surface material, well suited to larger commercial and public washrooms. MONOLITH BASIN SYSTEM MANUAL...
-
Page 24: Components List
Please check that all components are included and advise The Splash Lab if any parts are missing. Fixings are not included for fastening the brackets to the wall as each location is different. The Splash Lab recommend that you consult a fixings specialist for advice on the most appropriate fixing method for your project. -
Page 25: Technical Data
Weight (Kg) Overall 600 x 600 x 200 1200 x 600 x 200 1800 x 600 x 200 2400 x 600 x 200 3000 x 600 x 200 dimensions (mm) Waste connections Bottle traps not included. MONOLITH BASIN SYSTEM MANUAL... - Page 26 The studwork should be set out to suit the suggested spacing of the brackets (see table on page 28) The Splash Lab recommend that a void of at least 100mm is included behind the fixing wall for ease of access to the plumbing connections. It is also recommended that access panels are created as part of the wall construction to allow for initial installation and maintenance of the plumbing fittings.
- Page 27 200 before you install 1800mm 32mm (1-1/4") Bottle Trap T.M.V. Hot Feed Cold Feed Waste Water MONOLITH BASIN SYSTEM MANUAL...
-
Page 28: Installation
200 installation The brackets are to be installed with an appropriate fixing, depending on the substrate of the wall the Monolith is to be mounted to. The recommended fixing centres and heights are given in the table below Length... - Page 29 Ensure all the brackets are level along their length height adjustment to ensure that all the brackets are so that there will not be a gap between the Monolith all level and fitted at the same height. It is critical and the wall.
- Page 30 4 fixing bolts. Once the Monolith is in place, mount it to the wall When rear of the Monolith is resting on brackets, brackets through the mounting rails using the M6 x slide towards the wall until the tabs are sitting 40 screws and nuts provided.
- Page 31 200 installation Fit waste trap to drain funnel and connect to the waste pipe already installed. MONOLITH BASIN SYSTEM MANUAL...
-
Page 32: Operation
The Monolith should be periodically inspected for any damage. Also, the Monolith should be tested to ensure that the water drains out of the basin, and that the drainage waterways are not blocked with any debris. -
Page 33: Cleaning
The Splash Lab Monoliths are finished in a matt / satin finish, unless otherwise specified at manufacture. The surface can be cleaned with a mild solution of soapy water, ammonia-based cleaners or most commercially available solid-surface cleaners. These will remove most dirt and other residue from the surface. -
Page 34: Damage Prevention
Some chemicals are not compatible with The Splash Lab solid surface. Contact should be avoided with the following chemicals: Strong chlorinated solvents Chloroform Ketones Methylene chloride (paint removers) Very strong acids such as concentrated sulphuric and hydrochloric acids Acid drain cleaners should not be used. -
Page 35: Warranty
1 year for manufactured product; 10 years for material used If a defect is found in normal use, The Splash Lab will, at their discretion, repair, provide a replacement part or product, or make appropriate adjustments. Damage caused by accident, misuse, or abuse is not covered by this warranty. - Page 36 contact General information info@thesplashlab.com +44 (0) 161 482 7000 Pavilion View, Newby Rd, Stockport SK7 5DA Technical support technical@thesplashlab.com For further contact information visit: www.thesplashlab.com...
Need help?
Do you have a question about the MONOLITH and is the answer not in the manual?
Questions and answers