Tandem t:slim X2 User Manual
Insulin pump with basal-iq technology
Hide thumbs
Also See for t:slim X2:
- User manual (448 pages) ,
- Training manual (142 pages) ,
- Manual (11 pages)

Related Manuals for Tandem t:slim X2


Summary of Contents for Tandem t:slim X2
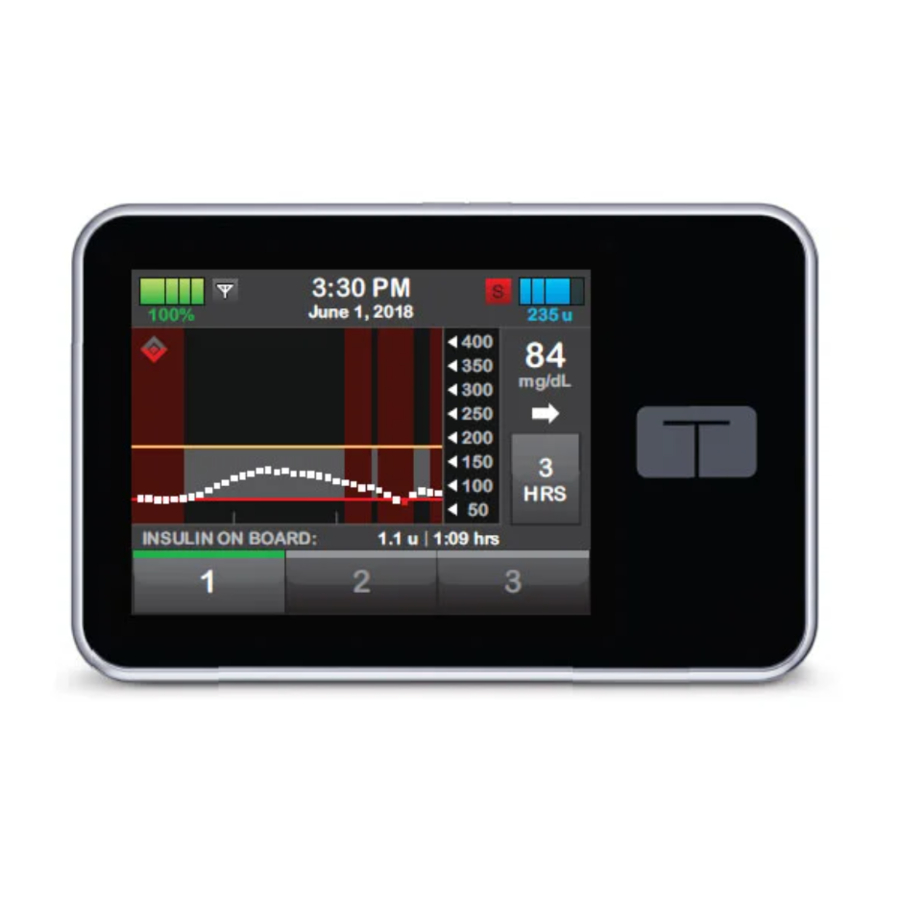
- Page 1 10:20 14 Nov 2019 100% 235 u mmol/L INSULIN ON BOARD: 1.1 u 1:09 hrs with Basal-IQ Technology ™ User Guide...
- Page 3 X2 Insulin Pump with Basal-IQ Technology User Guide Software Version: Carlsbad Congratulations on the purchase of Please contact Customer Technical your new t:slim X2 insulin pump with Support to obtain a replacement copy Basal-IQ technology. of the user guide that is the correct version for your pump.
-
Page 4: Table Of Contents
X2 Insulin Pump Precautions ........ - Page 5 Pump Terminology ........... 38 Explanation of t:slim X2 Insulin Pump Icons ....... 40 Explanation of Pump Colors .
- Page 6 Unlocking the t:slim X2 Pump Screen ........
- Page 7 Table of Contents Chapter 7 – Bolus Bolus Overview ........... . . 90 Correction Bolus Calculation .
- Page 8 X2 Pump History ........
- Page 9 Table of Contents Chapter 15 – t:slim X2 Insulin Pump Alerts 15.1 Low Insulin Alert ........... 123 15.2...
- Page 10 Reset Alarm ............157 Chapter 17 – t:slim X2 Insulin Pump Malfunction 17.1...
- Page 11 22.2 Receiver (t:slim X2 Insulin Pump) Overview ....... 190 22.3 Transmitter Overview .
- Page 12 Table of Contents Chapter 23 – CGM Settings 23.1 About Bluetooth ........... . 194 23.2 Disconnecting from the Dexcom Receiver .
- Page 13 Other Reasons You May Need to Calibrate ......215 Chapter 27 – Viewing CGM Data on Your t:slim X2 Insulin Pump 27.1...
- Page 14 Table of Contents 29.4 Incomplete Calibration ..........232 29.5 Calibration Timeout .
- Page 15 Turn Basal-IQ On and Off ..........269 Chapter 33 – Viewing Basal-IQ Technology Status on Your t:slim X2 Pump 33.1...
- Page 16 Table of Contents 33.2 Basal-IQ Status Indicators ..........272 33.3 Basal-IQ History .
- Page 17 X2 Pump Options and Settings ........
- Page 18 Section 1 Overview...
- Page 19 Before You Begin Chapter 1 Introduction...
-
Page 20: Conventions Of This Guide
Chapter 1 – Introduction Conventions of this Guide The following are conventions used in this user guide (such as terms, icons, text formatting, and other conventions) along with their explanations. Formatting Conventions Convention Explanation Bolded Text Text that is in bold and in a different font than the rest of the sentence or step indicates an on-screen icon or physical button name. Italic Text Text that is in italics indicates the name of a screen or menu on the pump display. -
Page 21: Explanation Of Symbols
The following are symbols (and their descriptions), which you may find on your pump, pump supplies and/or their packaging. These symbols tell you about the proper and safe use of the pump. Some of these symbols may not be relevant in your region, and are listed for informational purposes only. Explanation of t:slim X2 Insulin Pump Symbols Symbol Meaning... - Page 22 Chapter 1 – Introduction Explanation of t:slim X2 Insulin Pump Symbols (Continued) Symbol Meaning Symbol Meaning Direct Current (DC) voltage Two-Sided Humidity Limits European Union WEEE Directive 2006/66/EC Two-sided Temperature Limits Electric Equipment Designed Primarily for Indoor Use IEC Class II Equipment...
-
Page 23: System Description
Basal-IQ change arrows. The t:slim X2 insulin pump is made up technology. The addition of this feature of the t:slim X2 insulin pump, the t:slim The sensor measures glucose in the... -
Page 24: Indications For Use
Test blood glucose (BG) levels as Pump screens used in this user guide continuous insulin delivery and as part recommended by a healthcare of the t:slim X2 insulin pump with Basal- to demonstrate how to use features are provider examples only. They should not be IQ technology System. -
Page 25: Compatible Icgms
It is the responsibility of the healthcare you are familiar with CGM usage. t:slim X2 pump or the Dexcom receiver), but you provider and caregiver to determine if can still use the Dexcom G6 CGM app and your... -
Page 26: Emergency Kit
Chapter 1 – Introduction the user is appropriate for treatment risk of strangulation. ENSURE that these parts 1.10 Emergency Kit with this device. are stored in a secure place when not in use. We recommend reviewing the Quick Make sure that you always have an WARNING Bolus and Security PIN capabilities of insulin syringe and vial of insulin or a... - Page 27 Chapter 1 – Introduction • Infusion site preparation products (antiseptic wipes, skin adhesive) • Diabetes identification card or jewelry...
-
Page 28: Section 2 - T:slim X2 Insulin Pump
Section 2 t:slim X2 Insulin Pump... - Page 29 Before You Begin Chapter 2 Important Safety Information...
-
Page 30: T:slim X2 Insulin Pump Warnings
The following includes important safety available online if you are updating your pump. determine and help you adjust your basal information related to your t:slim X2 Consult with your healthcare provider for your rate(s), carb ratio(s), correction factor(s), target pump and its components. The individual training needs for the pump. - Page 31 Care. Use of cartridges not manufactured by WARNING used by a caregiver. The Security PIN function is Tandem Diabetes Care or reuse of cartridges DO NOT deliver a bolus until you have reviewed intended to prevent inadvertent screen taps or...
- Page 32 There is no need to disconnect for electrocardiograms (EKGs) or colonoscopies. If Radiology and Medical Procedures In addition to the above, DO NOT expose your you have questions, contact Customer Technical and Your t:slim X2 System pump, transmitter, or sensor to: Support. » Pacemaker/Automatic Implantable WARNING...
-
Page 33: T:slim X2 Insulin Pump Precautions
The pump is a sealed device that should Improperly placed sites or leaks around the the Empty Cartridge Alarm and miss part of your be opened and repaired only by Tandem infusion site can result in under delivery of basal insulin delivery. - Page 34 Chapter 2 – Important Safety Information the beep/vibration commands to program the entry, discontinue use of the pump and contact PRECAUTION intended bolus amount. Customer Technical Support. CONFIRM that the screen display turns on, you can hear audible beeps, feel the pump vibrate, PRECAUTION PRECAUTION and see the green LED light blinking around the...
-
Page 35: Potential Benefits From Using Your Pump
Chapter 2 – Important Safety Information changes in altitude or gravity can affect insulin levels as recommended by your healthcare insulin. Delivery can be fine-tuned delivery and cause injury. provider. based on up to 6 customizable Personal Profiles, each with up to PRECAUTION PRECAUTION 16 time-based settings for basal... -
Page 36: Possible Risks From Using Your Pump
Chapter 2 – Important Safety Information carbohydrates entered, which can into basal, food bolus, and skin, contact your healthcare provider help eliminate guesswork. correction bolus. and call Customer Technical Support. • The insulin pump keeps track of the Other risks associated with infusion Possible Risks From Using amount of active insulin from food sets include occlusions and air bubbles... -
Page 37: Verification Of Proper Functionality
Chapter 2 – Important Safety Information provider can help you establish • You see the green light illuminate diabetes management guidelines that from the edge around the Screen best fit your lifestyle and needs. On/Quick Bolus button Consult your healthcare provider before •... - Page 38 Chapter 2 – Important Safety Information THIS PAGE IS INTENTIONALLY LEFT BLANK...
- Page 39 Before You Begin Chapter 3 Getting to Know Your t:slim X2 Insulin Pump...
-
Page 40: Chapter 3 - Getting To Know Your T:slim X2 Insulin Pump
Chapter 3 – Getting to Know Your t:slim X2 Insulin Pump removed and replaced with a cartridge What your t:slim X2 Pump prior to initiating insulin delivery. BG is the abbreviation for blood Package Includes glucose, which is the level of glucose in Your pump also includes consumable the blood, measured in mmol/L. - Page 41 Chapter 3 – Getting to Know Your t:slim X2 Insulin Pump Carb Ratio Insulin Duration Temp Rate The carb ratio is the number of grams Insulin duration is the amount of time Temp rate is an abbreviation for a of carbohydrate that 1 unit of insulin will that insulin is active and available in the temporary basal rate.
-
Page 42: Explanation Of T:slim X2 Insulin Pump Icons
Chapter 3 – Getting to Know Your t:slim X2 Insulin Pump Explanation of t:slim X2 Insulin Pump Icons The following icons may appear on your pump screen: Pump Icon Definitions Symbol Meaning Symbol Meaning The amount of charge left in the pump battery. - Page 43 Chapter 3 – Getting to Know Your t:slim X2 Insulin Pump Pump Icon Definitions (Continued) Symbol Meaning Symbol Meaning Delete. Tap to delete characters or digits on a keypad. Total. Tap to total values on a keypad. OK. Tap to confirm the current instruction or setting on the Space.
-
Page 44: Explanation Of Pump Colors
Chapter 3 – Getting to Know Your t:slim X2 Insulin Pump Explanation of Pump Colors Red LED 1 red blink every 30 seconds indicates a malfunction or alarm condition. Yellow LED 1 yellow blink every 30 seconds indicates an alert or reminder condition. - Page 45 Chapter 3 – Getting to Know Your t:slim X2 Insulin Pump THIS PAGE IS INTENTIONALLY LEFT BLANK...
-
Page 46: Lock Screen
Chapter 3 – Getting to Know Your t:slim X2 Insulin Pump 9. Tandem Logo: Returns to the Lock Screen Home screen. The Lock screen appears anytime you turn on the screen. You must tap 1–2–3 in sequential order to unlock the pump. - Page 47 Chapter 3 – Getting to Know Your t:slim X2 Insulin Pump 10:20 100% 14 Nov 2019 235 u INSULIN ON BOARD (IOB) Units 1.1 u Time Remaining 1:09 hrs...
-
Page 48: Home Screen
Chapter 3 – Getting to Know Your t:slim X2 Insulin Pump 9. Tandem Logo: Returns to the Home Screen Home screen. 10. Cartridge Tubing: Tubing that is 1. Battery Level: Displays the level of battery power remaining. When attached to the cartridge. - Page 49 Chapter 3 – Getting to Know Your t:slim X2 Insulin Pump 10:20 100% 14 Nov 2019 235 u BOLUS OPTIONS INSULIN ON BOARD (IOB) Units 1.1 u Time Remaining 1:09 hrs...
-
Page 50: Status Screen
Chapter 3 – Getting to Know Your t:slim X2 Insulin Pump 9. Insulin Duration: Displays current Status Screen insulin duration setting used to calculate insulin on board. The Status screen can be accessed from the Lock screen and the Home 10. - Page 51 Chapter 3 – Getting to Know Your t:slim X2 Insulin Pump Current Status Current Status Correction 1u: 2.8 Weekday mmol/L Factor 1u: 10 g Basal Rate u/hr Carb Ratio Last Bolus Target BG mmol/L 14 Nov - 10:20 Basal-IQ Insulin Duration...
-
Page 52: Bolus Screen
Chapter 3 – Getting to Know Your t:slim X2 Insulin Pump 10. View Calculation: Displays how the Bolus Screen insulin dose was calculated using the current settings. : Returns to the Home screen. 11. Add BG: Enter blood glucose level. - Page 53 Chapter 3 – Getting to Know Your t:slim X2 Insulin Pump Using Grams Using Units units units CARBS GLUCOSE INSULIN GLUCOSE Add BG Add BG grams units View Calculation View Calculation...
-
Page 54: Options Screen
Chapter 3 – Getting to Know Your t:slim X2 Insulin Pump Options Screen : Returns to the Home screen. 2. Stop Insulin: Stops insulin delivery. If insulin delivery is stopped, RESUME INSULIN will be displayed. 3. Load: Change Cartridge, Fill Tubing, Fill Cannula, and Site Reminder. - Page 55 Chapter 3 – Getting to Know Your t:slim X2 Insulin Pump Options Options STOP INSULIN My CGM Load Device Settings Temp Rate History My Pump...
-
Page 56: My Pump Screen
Chapter 3 – Getting to Know Your t:slim X2 Insulin Pump 3.10 My Pump Screen : Returns to the Home screen. 2. Personal Profiles: A group of settings that define basal and bolus delivery. 3. Basal-IQ: Turn on/off Basal-IQ Technology, and Basal-IQ Alerts. - Page 57 Chapter 3 – Getting to Know Your t:slim X2 Insulin Pump My Pump My Pump Personal Profiles Pump Info Basal-IQ Alerts & Reminders Pump Settings...
-
Page 58: Device Settings Screen
Chapter 3 – Getting to Know Your t:slim X2 Insulin Pump 3.11 Device Settings Screen 1. Display Settings: Customize the Screen Timeout and Language settings. 2. Bluetooth Settings: Turn on/off mobile connection. The mobile connection may not yet be available in your region. - Page 59 Chapter 3 – Getting to Know Your t:slim X2 Insulin Pump Device Settings Device Settings Display Settings Security PIN Bluetooth Settings Time and Date Sound Volume...
-
Page 60: Number Keypad Screen
Chapter 3 – Getting to Know Your t:slim X2 Insulin Pump 3.12 Number Keypad Screen 1. Value Entered. : Returns to previous screen. 3. Keypad Numbers. : Allows numbers to be added on gram screen. If in units, this displays as a decimal point. - Page 61 Chapter 3 – Getting to Know Your t:slim X2 Insulin Pump grams...
-
Page 62: Letter Keypad Screen
Chapter 3 – Getting to Know Your t:slim X2 Insulin Pump 3.13 Letter Keypad Screen 1. Name of Profile. : Returns to previous screen. 3. Space: Enters a space. 4. 123: Changes keypad mode from letters (ABC) to numbers (123). - Page 63 Chapter 3 – Getting to Know Your t:slim X2 Insulin Pump Weekday name...
- Page 64 Chapter 3 – Getting to Know Your t:slim X2 Insulin Pump THIS PAGE IS INTENTIONALLY LEFT BLANK...
-
Page 65: Chapter 4 - Getting Started
Key Pump Features Chapter 4 Getting Started... -
Page 66: Charging The T:slim X2 Pump
Chapter 4 – Getting Started 90%, 85%). When the charge amount replace missed basal and/or bolus Charging the t:slim X2 Pump is less than 5%, it will begin decreasing insulin. Check your BG before 1% at a time (for example, you will see... -
Page 67: Using The Touchscreen
If these features are not working, quick and easy access to the functions diabetes management application may not yet discontinue use of the t:slim X2 pump and that you will use in your day-to-day be available in your region. -
Page 68: Turning On The T:slim X2 Pump Screen
Refer back to this section if you need to The Lock screen appears anytime you When using the pump, tap the Tandem logo to edit the time for either traveling in a turn on the screen, and after a bolus or... -
Page 69: Edit Date
8. Tap Time of Day to set AM or PM, or tap 24-hour Time to toggle that setting on. Tap the Tandem logo to return to the Home screen. 9. Verify the correct time is set and tap Any edits to Time or Date will not be... - Page 70 Chapter 4 – Getting Started THIS PAGE IS INTENTIONALLY LEFT BLANK...
-
Page 71: Chapter 5 - Infusion Site Care And Loading Cartridge
Key Pump Features Chapter 5 Infusion Site Care and Loading Cartridge... -
Page 72: Infusion Site Selection And Care
Chapter 5 – Infusion Site Care and Loading Cartridge Improperly placed sites or leaks around the tissue. If using the abdominal area, Infusion Site Selection and infusion site can result in under delivery of AVOID: Care insulin. Areas that would constrict the site such as the belt line, PRECAUTION WARNING... -
Page 73: Cartridge Instructions For Use
Chapter 5 – Infusion Site Care and Loading Cartridge • With experience, you will find areas that not only provide better absorption, but are more Areas of Body for Infusion Set Insertion comfortable. Keep in mind, using the same areas may cause scarring or lumps which can affect insulin absorption. -
Page 74: Filling And Loading A T:slim Cartridge
Insulin • 1 unopened cartridge cartridge into your t:slim X2 pump. The Fill Port single-use disposable cartridge can • 3.0 mL syringe and fill needle hold up to 300 units (3.0 mL) of insulin. - Page 75 Chapter 5 – Infusion Site Care and Loading Cartridge Instructions for Drawing Insulin from protective cap from needle by 7. With needle still inserted into vial, Vial into Syringe pulling outward. turn vial and syringe upside down. Release syringe plunger. Insulin will 5.
- Page 76 Chapter 5 – Infusion Site Care and Loading Cartridge plunger upwards, forcing any air 3. Hold the cartridge upright and Bubbles will rise toward the bubbles back into the vial. gently insert the needle into the plunger. white insulin fill port on the cartridge.
- Page 77 8. Gently press on the plunger to remove air bubbles until insulin fills 1. From the Home screen, tap OPTIONS. 2. Tap Load. During the load sequence, the Tandem logo is disabled. Tapping it will not return to the Home screen. 3. Tap Change Cartridge.
-
Page 78: Filling Tubing
Chapter 5 – Infusion Site Care and Loading Cartridge Detecting Cartridge screen is 4. Screen will display that all insulin cartridge is lined up to both guide deliveries will be stopped. Tap tracks. displayed. to continue. After completing the cartridge change, the pump will automatically NOTE: First Time Use prompt you to fill the tubing. - Page 79 Chapter 5 – Infusion Site Care and Loading Cartridge This section describes how to fill the of a turn to ensure a secure PRECAUTION infusion set tubing with insulin after you connection. CHECK your infusion set tubing daily for any change the cartridge.
- Page 80 Chapter 5 – Infusion Site Care and Loading Cartridge Stopping Fill screen is displayed. pump will beep and vibrate regularly NOTE: Initial Display of Insulin while the tubing is being filled. After tubing fill is complete, when the pump ...
-
Page 81: Filling Cannula
Chapter 5 – Infusion Site Care and Loading Cartridge 4. Select amount needed for cannula the Site Reminder screen (see the Filling Cannula fill. next section). See your infusion set instructions Filling the Infusion Set Cannula with Setting Site Reminder Insulin for use for proper cannula fill amount. - Page 82 Chapter 5 – Infusion Site Care and Loading Cartridge Setting Saved screen is displayed. Load screen is displayed. 6. Tap A reminder to test BG in 1 to 2 hours will display. 7. Tap NOTE: First Time Use If this is the first time using your pump and a Personal Profile has not been defined, a screen will notify you that a profile must be...
- Page 83 Key Pump Features Chapter 6 Personal Profiles...
-
Page 84: Personal Profiles Overview
Max Bolus and Carbohydrates setting (on/off). Creating Personal Profiles WARNING The t:slim X2 pump uses the settings in DO NOT start to use your pump before You can create up to six Personal Pro- your active profile to calculate the consulting with your healthcare provider to files;... - Page 85 Chapter 6 – Personal Profiles The ranges you can set for Timed The default settings and ranges for When a glucose value is entered during Settings are: Bolus Settings are as follows: bolus programming, your pump will consider any active IOB and calculate •...
-
Page 86: Programming A New Personal Profile
Chapter 6 – Personal Profiles 6. Tap Press to Set Up to begin • Be sure to tap after entering or 3. Using the on-screen keypad, enter setting insulin delivery settings. changing a value. your correction factor (the mmol/L that 1 unit of insulin will lower BG) PRECAUTION and tap Weekday... - Page 87 Chapter 6 – Personal Profiles to create additional time 3. On the Add Segment screen, tap 2. Tap Insulin Duration. segments. Time of Day to select AM or PM, if applicable. Bolus Settings Timed Settings Once a time segment is set beyond Insulin Duration 5 hrs 12:00 PM, the default will change to...
-
Page 88: Editing Or Reviewing An Existing Profile
10. Confirm Settings. Tap NO to make changes. 1. From the Home screen, tap OPTIONS. Tap if entered data is 9. Tap Tandem logo to return to the correct. 2. Tap My Pump. Home screen. Tap to make changes. -
Page 89: Duplicating An Existing Profile
7. Using the on-screen keypad, enter If you have only 1 profile defined, the name (up to 16 characters) for 15. Tap Tandem logo to return to the the new profile and tap you do not need to activate it Home screen. -
Page 90: Deleting An Existing Profile
Chapter 6 – Personal Profiles 6. Using the on-screen keypad, rename the profile name (up to 16 characters) and tap 7. Tap Tandem logo to return to the Home screen. Deleting an Existing Profile 1. From the Home screen, tap OPTIONS. -
Page 91: Chapter 7 - Bolus
Key Pump Features Chapter 7 Bolus... -
Page 92: Bolus Overview
Correction Bolus Calculation Your t:slim X2 pump offers you the healthcare provider and then re-test ability to deliver different boluses to your BG to ensure that the treatment... - Page 93 Chapter 7 – Bolus Glucose Value Auto-Population with on the glucose value on the Bolus Target BG, your pump will again screen. present you with the Above Target or Below Target confirmation screen If you have a CGM session active, and if where you can choose to accept the 2.98 there is both a CGM value and a CGM...
-
Page 94: Bolus Override
Chapter 7 – Bolus • To decline the correction bolus, be subtracted from any food bolus 3. Using the on-screen keypad, enter press . No correction bolus will you request on the Bolus screen. your BG value and tap . Once be added to any food bolus you is tapped, the BG value is Within Target... -
Page 95: Food Bolus Using Units
Chapter 7 – Bolus 6. Tap You can always tap View Food Bolus Using Units Calculation to display the Delivery The BOLUS INITIATED screen is Calculation screen. temporarily displayed. If bolusing using a carb ratio, skip to the section 7.5 Food Bolus Using Grams. - Page 96 Chapter 7 – Bolus Tap for recommendations on the split if entered data is The DELIVER LATER portion of the between now and later and the duration correct. extended bolus also has minimum for the later portion. and maximum rates. If you program ...
-
Page 97: Canceling Or Stopping A Bolus
Chapter 7 – Bolus The BOLUS STOPPED screen is Only 1 extended bolus can be active at 2. Tap X (stop icon) to cancel the any given time. However, if the bolus. displayed and the units delivered DELIVER LATER portion of an extend- are calculated. - Page 98 Chapter 7 – Bolus THIS PAGE IS INTENTIONALLY LEFT BLANK...
-
Page 99: Chapter 8 - Stop/Resume Insulin
Key Pump Features Chapter 8 Stop/Resume Insulin... -
Page 100: Stopping Insulin Delivery
When you stop all insulin delivery, On/Quick Bolus button once to turn on any active bolus and any active temp your t:slim X2 pump screen. rate are immediately stopped. No 1. Tap 1–2–3. insulin delivery can take place while your pump is stopped. -
Page 101: Chapter 9 - Temporary Basal Rate
Additional Pump Operations Chapter 9 Temporary Basal Rate... -
Page 102: Setting A Temp Rate
Chapter 9 – Temporary Basal Rate The TEMP RATE STARTED screen be set to the maximum allowable rate Setting a Temp Rate for delivery. is temporarily displayed. A Temp Rate is used to increase or NOTE: Temp Rate with Basal-IQ ... - Page 103 Chapter 9 – Temporary Basal Rate 2. On the Options screen, tap X (stop icon) on the right side of Temp Rate. 3. On the confirmation screen, tap The TEMP RATE STOPPED screen appears before returning to the Options screen.
- Page 104 Chapter 9 – Temporary Basal Rate THIS PAGE IS INTENTIONALLY LEFT BLANK...
-
Page 105: Chapter 10 - Quick Bolus
Additional Pump Operations Chapter 10 Quick Bolus... -
Page 106: Setting Up Quick Bolus
If the Quick Bolus function is turned On, you can deliver a bolus without having 5. Tap Increment Type. 4. After the pump beeps/vibrates, to look at the t:slim X2 pump’s screen. press and hold the Screen On/ Simply use the Screen On/Quick Bolus... - Page 107 Chapter 10 – Quick Bolus Quick Bolus button for several If you hear a different tone at any point seconds to deliver the bolus. during programming or the pump stops vibrating in response to button presses, NOTE: Safety Features look at the screen to confirm the bolus If you want to cancel the bolus and return to amount.
- Page 108 Chapter 10 – Quick Bolus THIS PAGE IS INTENTIONALLY LEFT BLANK...
-
Page 109: Chapter 11 - Device Settings
Additional Pump Operations Chapter 11 Device Settings... -
Page 110: Display Settings
This chapter contains explanations and 6. Select preferred time and tap 3. Tap Device Settings. instructions for the device settings that 7. Tap Tandem logo to return to the 4. Tap Bluetooth Settings. are accessible through the Device Home screen. -
Page 111: Time And Date
Sound Volume can be complete. zero. made in Device Settings. Tap Tandem logo to return to the 9. Tap Sound Volume can be personalized for Home screen. Alarms, Alerts, Reminders, Keypad, 10. - Page 112 Chapter 11 – Device Settings A PIN CREATED screen is changes to another PIN. It can be used displayed. to unlock the pump when the Security PIN feature is on. If desired, you may use 13. Tap to turn the Security PIN this as a valid Security PIN.
- Page 113 Additional Pump Operations Chapter 12 t:slim X2 Insulin Pump Information and History...
-
Page 114: T:slim X2 Pump Information
Chapter 12 – t:slim X2 Insulin Pump Information and History history log and replaced with the most Bolus history shows the bolus request, 12.1 t:slim X2 Pump Info recent events. The following can be the bolus start time, and the bolus viewed in History: completion time. - Page 115 Additional Pump Operations Chapter 13 t:slim X2 Insulin Pump Reminders...
-
Page 116: Low Bg Reminders
Chapter 13 – t:slim X2 Insulin Pump Reminders Your pump lets you know important acknowledged. Reminders do not a. Tap Remind Me Below and information about the System with escalate. using the on-screen keypad, Reminders, Alerts, and Alarms. enter a Low BG value (from 3.9 Reminders are displayed to notify you to 6.7 mmol/L) that you want to... -
Page 117: After Bolus Bg Reminder
Chapter 13 – t:slim X2 Insulin Pump Reminders should pass before the reminder c. Tap when all changes are 6. After Bolus BG is set to on; to turn occurs. complete. off, tap After Bolus BG. The default for this reminder is preset to 7. -
Page 118: Site Reminder
Chapter 13 – t:slim X2 Insulin Pump Reminders 1. From the Home screen, tap Tap End Time, tap Time and To Respond to the Site Reminder OPTIONS. using the on-screen keypad To clear the reminder tap enter the end time, then tap 2. -
Page 119: Chapter 14 - User Settable Alerts And Alarms
Additional Pump Operations Chapter 14 User Settable Alerts and Alarms... -
Page 120: Low Insulin Alert
Screen On/Quick Bolus button and tapped any inter- To Respond to the Low Insulin Alert Your t:slim X2 Pump keeps track of active screen option or delivered a how much insulin remains in the Quick Bolus passes the set value, the To clear the alert, tap cartridge and alerts you when it is low. - Page 121 Chapter 14 – User Settable Alerts and Alarms 9. Tap , then tap when all Auto-Off Alarm Screen changes are complete. 10. Tap Tandem logo to return to the Home screen. AUTO-OFF ALARM To Respond to Auto-Off Warning ALL DELIVERIES STOPPED! Tap DO NOT SHUT DOWN.
- Page 122 Chapter 14 – User Settable Alerts and Alarms THIS PAGE IS INTENTIONALLY LEFT BLANK...
-
Page 123: Chapter 15 - T:slim X2 Insulin Pump Alerts
Pump Safety Alerts and Alarms Chapter 15 t:slim X2 Insulin Pump Alerts... - Page 124 Chapter 15 – t:slim X2 Insulin Pump Alerts Your pump lets you know important until acknowledged. Alerts do not information about the System with escalate. Reminders, Alerts, and Alarms. NOTE: CGM Alerts Reminders are displayed to notify you There is an additional list of alerts and errors...
-
Page 125: Low Insulin Alert
Chapter 15 – t:slim X2 Insulin Pump Alerts 15.1 Low Insulin Alert What will I see on the screen? What does it mean? 5 units or less of insulin remain in the cartridge. LOW INSULIN ALERT Change cartridge or pump will stop How will the System notify me? all deliveries. -
Page 126: Low Power Alerts
Chapter 15 – t:slim X2 Insulin Pump Alerts 15.2 Low Power Alerts Low Power Alert 1 What will I see on the screen? What does it mean? Less than 25% of battery power remains. LOW POWER ALERT Power Level: How will the System notify me? Less than 25% remaining. - Page 127 Chapter 15 – t:slim X2 Insulin Pump Alerts Low Power Alert 2 What will I see on the screen? What does it mean? Less than 5% of battery power remains. Insulin delivery will continue for 30 minutes and LOW POWER ALERT then the pump will power off and insulin delivery will stop.
-
Page 128: Incomplete Bolus Alert
Chapter 15 – t:slim X2 Insulin Pump Alerts 15.3 Incomplete Bolus Alert What will I see on the screen? What does it mean? You started a bolus request but did not complete the request within 90 seconds. INCOMPLETE BOLUS ALERT This bolus has not been delivered. -
Page 129: Incomplete Temp Rate Alert
Chapter 15 – t:slim X2 Insulin Pump Alerts 15.4 Incomplete Temp Rate Alert What will I see on the screen? What does it mean? You started to set up a temp rate but did not complete the request within 90 seconds. -
Page 130: Incomplete Load Sequence Alerts
Chapter 15 – t:slim X2 Insulin Pump Alerts 15.5 Incomplete Load Sequence Alerts Incomplete Cartridge Change Alert What will I see on the screen? What does it mean? You selected Change Cartridge from the Load menu but did not complete the process within 3 minutes. - Page 131 Chapter 15 – t:slim X2 Insulin Pump Alerts Incomplete Fill Tubing Alert What will I see on the Screen? What does it mean? You selected Fill Tubing from the Load menu but did not complete the process within 3 FILL TUBING ALERT minutes.
- Page 132 Chapter 15 – t:slim X2 Insulin Pump Alerts Incomplete Fill Cannula Alert What will I see on the Screen? What does it mean? You selected Fill Cannula from the Load menu but did not complete the process within FILL CANNULA ALERT 3 minutes.
-
Page 133: Incomplete Setting Alert
Chapter 15 – t:slim X2 Insulin Pump Alerts 15.6 Incomplete Setting Alert What will I see on the screen? What does it mean? You started to set up a new Personal Profile but did not save or complete the INCOMPLETE SETTING programming within 5 minutes. -
Page 134: Basal Rate Required Alert
Chapter 15 – t:slim X2 Insulin Pump Alerts 15.7 Basal Rate Required Alert What will I see on the screen? What does it mean? You did not enter a basal rate in a time segment in Personal Profiles. A basal rate must Basal Rate Required be entered in each time segment (rate can be 0 u/hr). -
Page 135: Max Hourly Bolus Alert
Chapter 15 – t:slim X2 Insulin Pump Alerts 15.8 Max Hourly Bolus Alert What will I see on the screen? What does it mean? In the previous 60 minutes, you requested total bolus delivery that is more than 1.5 MAX HOURLY BOLUS ALERT times your Max Bolus setting. -
Page 136: Max Bolus Alerts
Chapter 15 – t:slim X2 Insulin Pump Alerts 15.9 Max Bolus Alerts Max Bolus Alert 1 What will I see on the screen? What does it mean? You requested a bolus larger than the Max Bolus setting in your active Personal Profile. - Page 137 Chapter 15 – t:slim X2 Insulin Pump Alerts Max Bolus Alert 2 The following applies only if you have Carbs turned on in your active Personal Profile and your Max Bolus amount is set to 25 units. What will I see on the screen? What does it mean? Your Max Bolus is set to 25 units and you requested a bolus larger than 25 units.
-
Page 138: Max Basal Alert
Chapter 15 – t:slim X2 Insulin Pump Alerts 15.10 Max Basal Alert What will I see on the screen? What does it mean? When entering a basal rate or requesting a temp rate, you requested a basal rate more MAX BASAL ALERT than 2 times the highest basal rate defined in your Personal Profile. - Page 139 Chapter 15 – t:slim X2 Insulin Pump Alerts Max Basal Alert 2 What will I see on the screen? What does it mean? An active temp rate exceeded 2 times your highest basal setting defined in your MAX BASAL ALERT Personal Profile.
-
Page 140: Min Basal Alerts
Chapter 15 – t:slim X2 Insulin Pump Alerts 15.11 Min Basal Alerts Min Basal Alert 1 What will I see on the screen? What does it mean? When entering a basal rate or requesting a temp rate, you requested a basal rate less than half of the lowest basal rate defined in your Personal Profile. - Page 141 Chapter 15 – t:slim X2 Insulin Pump Alerts Min Basal Alert 2 What will I see on the screen? What does it mean? An active temp rate dropped below half of your lowest basal setting defined in your MIN BASAL ALERT Personal Profile.
-
Page 142: Connection Error Alert
Chapter 15 – t:slim X2 Insulin Pump Alerts 15.12 Connection Error Alert What will I see on the screen? What does it mean? You connected pump to a computer with the USB cable to charge it or upload data to CONNECTION ERROR ALERT the t:connect diabetes management application* and a connection could not be made. -
Page 143: Pairing Code Timeout
Chapter 15 – t:slim X2 Insulin Pump Alerts 15.13 Pairing Code TImeout What will I see on the screen? What does it mean? You attempted to connect a mobile device to the pump, but the pairing process took PAIRING CODE TIMEOUT too long (more than 5 minutes) and was unsuccessful. -
Page 144: Power Source Alert
Chapter 15 – t:slim X2 Insulin Pump Alerts 15.14 Power Source Alert What will I see on the screen? What does it mean? You connected your pump to a power source that does not have enough power to POWER SOURCE ALERT charge the pump. -
Page 145: Data Error Alert
Chapter 15 – t:slim X2 Insulin Pump Alerts 15.15 Data Error Alert What will I see on the screen? What does it mean? Your pump encountered a condition that could potentially result in a loss of data. DATA ERROR ALERT... - Page 146 Chapter 15 – t:slim X2 Insulin Pump Alerts THIS PAGE IS INTENTIONALLY LEFT BLANK...
- Page 147 Pump Safety Alerts & Alarms Chapter 16 t:slim X2 Insulin Pump Alarms...
-
Page 148: Chapter 16 - T:slim X2 Insulin Pump Alarms
Chapter 16 – t:slim X2 Insulin Pump Alarms Information in this section will help you PRECAUTION learn how to respond to Alarms. CHECK your pump regularly for potential alarm conditions that may display. It is important to be Alarms notify you with 3 sequences of 3... -
Page 149: Resume Pump Alarm
Chapter 16 – t:slim X2 Insulin Pump Alarms 16.1 Resume Pump Alarm What will I see on the screen? What does it mean? You selected STOP INSULIN in the Options menu and insulin delivery has been RESUME PUMP ALARM stopped for more than 15 minutes. -
Page 150: Low Power Alarms
Chapter 16 – t:slim X2 Insulin Pump Alarms 16.2 Low Power Alarms What will I see on the screen? What does it mean? Your pump detected a power level of 1% or less remaining and all deliveries have LOW POWER ALARM stopped. -
Page 151: Empty Cartridge Alarm
Chapter 16 – t:slim X2 Insulin Pump Alarms 16.3 Empty Cartridge Alarm What will I see on the screen? What does it mean? Your pump detected that the cartridge is empty and all deliveries have stopped. EMPTY CARTRIDGE ALARM ALL DELIVERIES STOPPED! -
Page 152: Cartridge Error Alarm
Chapter 16 – t:slim X2 Insulin Pump Alarms 16.4 Cartridge Error Alarm What will I see on the screen? What does it mean? Your pump detected that the cartridge could not be used and all deliveries have CARTRIDGE ALARM stopped. This can be caused by cartridge defect, not following the proper procedure to load the cartridge, or over filling the cartridge (with more than 300 units of insulin). -
Page 153: Cartridge Removal Alarm
Chapter 16 – t:slim X2 Insulin Pump Alarms 16.5 Cartridge Removal Alarm What will I see on the screen? What does it mean? Your pump detected that the cartridge has been removed and all deliveries have CARTRIDGE ALARM stopped. ALL DELIVERIES STOPPED! How will the System notify me? The cartridge cannot be detected. -
Page 154: Temperature Alarm
Chapter 16 – t:slim X2 Insulin Pump Alarms 16.6 Temperature Alarm What will I see on the screen? What does it mean? Your pump detected an internal temperature below 35 º F (2 º C) or above 113 º F (45 º... -
Page 155: Occlusion Alarm 1
Chapter 16 – t:slim X2 Insulin Pump Alarms 16.7 Occlusion Alarm 1 What will I see on the screen? What does it mean? Your pump detected that insulin delivery is blocked and all deliveries have stopped. See OCCLUSION ALARM Section 36.4 t:slim X2 Pump Performance Characteristics for more information on how long it can take the system to detect an occlusion. -
Page 156: Occlusion Alarm 2
Chapter 16 – t:slim X2 Insulin Pump Alarms 16.8 Occlusion Alarm 2 What will I see on the screen? What does it mean? Your pump detected a second occlusion alarm shortly after the first occlusion alarm and all deliveries have stopped. -
Page 157: Screen On/Quick Bolus Button Alarm
Chapter 16 – t:slim X2 Insulin Pump Alarms 16.9 Screen On/Quick Bolus Button Alarm What will I see on the screen? What does it mean? The Screen On/Quick Bolus button (on the top of your pump) is stuck or not BUTTON ALARM functioning properly and all deliveries have stopped. -
Page 158: Altitude Alarm
Chapter 16 – t:slim X2 Insulin Pump Alarms 16.10 Altitude Alarm What will I see on the screen? What does it mean? Your pump detected a pressure difference between inside the cartridge and the ALTITUDE ALARM surrounding air within the validated operating range of -1,300 feet to 10,000 feet (-369 meters to 3,048 meters) and all deliveries have stopped. -
Page 159: Reset Alarm
Chapter 16 – t:slim X2 Insulin Pump Alarms 16.11 Reset Alarm What will I see on the screen? What does it mean? Your pump detected that one if its micro-processors experienced a reset and all PUMP HAS BEEN RESET deliveries have been stopped. - Page 160 Chapter 16 – t:slim X2 Insulin Pump Alarms THIS PAGE IS INTENTIONALLY LEFT BLANK...
- Page 161 Pump Safety Alerts and Alarms Chapter 17 t:slim X2 Insulin Pump Malfunction...
-
Page 162: Chapter 17 - T:slim X2 Insulin Pump Malfunction
Chapter 17 – t:slim X2 Insulin Pump Malfunction 17.1 Malfunction If your pump detects a system error, the MALFUNCTION screen appears and all deliveries are stopped. Contact Customer Technical Support. Malfunctions notify you with 3 sequences of 3 notes at highest volume and 3 vibrations. - Page 163 Chapter 17 – t:slim X2 Insulin Pump Malfunction What will I see on the screen? What does it mean? Your pump detected a system error and all deliveries have been stopped. MALFUNCTION This pump cannot operate. Visit How will the System notify me? tandemdiabetes.com/contact.
- Page 164 Chapter 17 – t:slim X2 Insulin Pump Malfunction THIS PAGE IS INTENTIONALLY LEFT BLANK...
- Page 165 Living with and Caring for Your System Chapter 18 Lifestyle Issues and Travel...
-
Page 166: Chapter 18 - Lifestyle Issues And Travel
There are other activities, such as Customer Technical Support. During exercise, the t:slim X2 pump can bathing and intimacy, when it may be be worn in the provided case, your Your pump is watertight to a depth of 3 more convenient for you to remove your pocket, or other third-party “sport... - Page 167 Newer Travel travel loaner pump in case your pump full body scanners used in airport security malfunctions outside of Tandem’s screening are also a form of X-ray and your The flexibility afforded by an insulin replacement area.
- Page 168 Chapter 18 – Lifestyle Issues and Travel THIS PAGE IS INTENTIONALLY LEFT BLANK...
- Page 169 Living with and Caring for Your System Chapter 19 Taking Care of Your Pump...
-
Page 170: Chapter 19 - Taking Care Of Your Pump
Chapter 19 – Taking Care of Your Pump a hard surface. Check that the pump is working going into storage mode. Disconnect 19.1 Overview properly by plugging a power source into the the pump from the power source. USB port and confirming that the display turns Keep the pump protected when not in This section provides information on on, you hear audible beeps, feel the pump... - Page 171 Chapter 19 – Taking Care of Your Pump THIS PAGE IS INTENTIONALLY LEFT BLANK...
- Page 172 Section 3 CGM Features...
- Page 173 Before You Begin Chapter 20 Important CGM Safety Information...
-
Page 174: Chapter 20 - Important Cgm Safety Information
Chapter 20 – Important CGM Safety Information The following includes important safety broken sensor wire, please report this to could result in you missing severe hypoglycemia information related to your CGM its Customer Technical Support. (low BG) or hyperglycemia (high BG) events. components. -
Page 175: Cgm Precautions
Using Dexcom G6 CGM with Your Insertion in those areas might affect accuracy L per minute. Do not calibrate when your t:slim X2 Insulin Pump and could result in you missing severe receiver screen is showing the rising or falling... -
Page 176: Potential Benefits From Using The T:slim X2 System
20.3 Potential Benefits From Using range. Subjects in these studies those taken from a fingerstick BG value and may the t:slim X2 System had better diabetes control not represent the timeliest BG value. Use a BG (lowered A1C values, reduced value taken only from a fingerstick for •... -
Page 177: Possible Risks From Using The T:slim X2 System
1 diabetes. 20.4 Possible Risks From Using takes readings from fluid below the skin Diabetes Care 2011; 34(4):795-800. the t:slim X2 System (interstitial fluid) instead of blood. There are differences in how glucose is mea- The Diabetes Control and... - Page 178 Chapter 20 – Important CGM Safety Information blood, which can cause CGM readings to lag behind readings from a blood glucose meter.
- Page 179 Before You Begin Chapter 21 Getting to Know Your CGM System...
-
Page 180: Chapter 21 - Getting To Know Your Cgm System
Chapter 21 – Getting to Know Your CGM System Glucose Data Gaps be used in addition to the pump to 21.1 CGM Terminology Glucose data gaps occur when your receive sensor readings. System is unable to provide a sensor Rise and Fall (Rate of Change) Alerts Alternate Site BG Testing glucose reading. - Page 181 Chapter 21 – Getting to Know Your CGM System Startup Period Trend (Rate of Change) Arrows The startup period is the 2-hour period Trend arrows show how fast your after you tell the System you inserted a glucose levels are changing. There are new sensor.
-
Page 182: Explanation Of Cgm Pump Icons
Chapter 21 – Getting to Know Your CGM System 21.2 Explanation of CGM Pump Icons The following CGM icons may appear on your pump screen: CGM Icon Definitions Symbol Meaning Symbol Meaning Unknown sensor reading. Transmitter error. mmol/L CGM sensor session is active, but the transmitter is not Sensor startup 0–30 minutes. - Page 183 Chapter 21 – Getting to Know Your CGM System THIS PAGE IS INTENTIONALLY LEFT BLANK...
-
Page 184: Cgm Lock Screen
Chapter 21 – Getting to Know Your CGM System 10. Status: Displays current system 21.3 CGM Lock Screen settings and insulin delivery status. 11. Insulin Level: Displays the current The CGM Lock screen appears anytime you turn on the screen and you are amount of insulin in the cartridge. - Page 185 Chapter 21 – Getting to Know Your CGM System 10:20 5 Mar 2017 100% 235 u 10.5 mmol/L INSULIN ON BOARD: 1.1 u 1:09 hrs...
-
Page 186: Cgm Home Screen
Chapter 21 – Getting to Know Your CGM System 11. Insulin Level: Displays the current Tap the “minimize” icon to return to the 21.4 CGM Home Screen amount of insulin in the cartridge. Home screen. 12. Most Recent 5-Minute Glucose 1. - Page 187 Chapter 21 – Getting to Know Your CGM System 10:20 5 Mar 2017 100% 235 u 10.5 mmol/L INSULIN ON BOARD: 1.1 u 1:09 hrs OPTIONS BOLUS...
-
Page 188: My Cgm Screen
Chapter 21 – Getting to Know Your CGM System 21.5 My CGM Screen 1. Start Sensor: Starts a CGM session. If sensor is active, STOP SENSOR will be displayed. 2. Calibrate CGM: Enter a calibration BG value. Only active when sensor session is active. - Page 189 Chapter 21 – Getting to Know Your CGM System My CGM My CGM START SENSOR CGM Info Calibrate CGM Calibrate CGM CGM Alerts 80000A Transmitter ID...
- Page 190 Chapter 21 – Getting to Know Your CGM System THIS PAGE IS INTENTIONALLY LEFT BLANK...
- Page 191 Getting Started with Your CGM System Chapter 22 CGM Overview...
-
Page 192: Chapter 22 - Cgm Overview
CGM with your the pump display every 5 minutes. The only a blood glucose meter. t:slim X2 pump. Use of a CGM is pump display shows sensor glucose optional, but in order to use Basal-IQ readings, a trend graph, and the 22.2 Receiver (t:slim X2 Insulin... - Page 193 Chapter 22 – CGM Overview new transmitter, only open the package • Battery lasts approximately 90 when you are ready to use it. days. Receiver or smart device prompts you when battery is Even if you disconnect your tubing from running low.
-
Page 194: Sensor Overview
Chapter 22 – CGM Overview 22.4 Sensor Overview This section provides information about CGM devices that have a separate sensor. The information contained in this section is specific to the Dexcom G6 CGM and is provided as an example. For information about the Dexcom G6 sensor, visit the manufacturer’s website for applicable user guides. - Page 195 Getting Started with Your CGM System Chapter 23 CGM Settings...
-
Page 196: Chapter 23 - Cgm Settings
4. Tap My CGM. cell phones and many other devices. Your t:slim X2 pump and a CGM You may still use a smartphone with the 5. Tap Transmitter ID. transmitter wirelessly pair together... -
Page 197: Setting Cgm Volume
Chapter 23 – CGM Settings Once matching values have been Soft • If the alert is not confirmed in 5 entered, you will be returned to the When you want your alert to be less minutes, the system vibrates and CGM Settings screen and the noticeable. - Page 198 Chapter 23 – CGM Settings Sound Option Descriptions CGM Volume Vibrate Soft Normal HypoRepeat High Alert 2 long vibrates 2 long vibrates + 2 long vibrates + 2 long vibrates + 2 low beeps 2 medium beeps 2 medium beeps Low Alert 3 short vibrates 3 short vibrates +...
-
Page 199: Cgm Info
Chapter 23 – CGM Settings To Select Your CGM Volume: You can view this information at any time. 1. From the Home screen, tap 1. From the Home screen, tap OPTIONS. OPTIONS. 2. Tap the Down Arrow. 2. Tap the Down Arrow. 3. - Page 200 Chapter 23 – CGM Settings THIS PAGE IS INTENTIONALLY LEFT BLANK...
- Page 201 Getting Started with Your CGM System Chapter 24 Setting CGM Alerts...
-
Page 202: Chapter 24 - Setting Cgm Alerts
Chapter 24 – Setting CGM Alerts Setting Your CGM Alerts glucose readings are outside of your NOTE: Turning the Alert Off target glucose range. When you have To turn off the High Alert, tap the on/off You can create personal settings for both your High and Low Alerts turned toggle. -
Page 203: Setting Your Low Glucose Alert And Repeat Feature
Chapter 24 – Setting CGM Alerts 11. To select the repeat time, tap the The default setting for the Low Alert To Set Up the Repeat Feature: time you want the alert to sound is 4.4 mmol/L. 10. Tap Repeat. again. -
Page 204: Setting Your Rise Alert
Chapter 24 – Setting CGM Alerts healthcare provider before setting the or beeps according to your CGM NOTE: Turning the Alert Off Rise and Fall Alerts. Volume selection. To turn off the Rise Alert, tap the on/off toggle. Examples If you set your Fall Alert to 0.11 mmol/L CGM RISE ALERT 8. -
Page 205: Setting Your Out Of Range Alert
Chapter 24 – Setting CGM Alerts alerts. The default value is on and will hours and 20 minutes) then tap NOTE: Turning the Alert Off alert after 20 minutes. To turn off the Fall Alert, tap the on/off toggle. The Out Of Range symbol appears on 8. - Page 206 Chapter 24 – Setting CGM Alerts THIS PAGE IS INTENTIONALLY LEFT BLANK...
- Page 207 Getting Started with Your CGM System Chapter 25 Starting a CGM Sensor Session...
-
Page 208: Chapter 25 - Starting A Cgm Sensor Session
If you don't enter a code into either you choose to enter the sensor the t:slim X2 pump or the Dexcom code, you will not be prompted to a. Make sure your pump and G6 CGM app you will need to... - Page 209 Chapter 25 – Starting a CGM Sensor Session sure the correct transmitter ID is entered. c. If the correct transmitter ID is entered and the pump and transmitter are still not communicating, contact Customer Technical Support.
-
Page 210: Sensor Startup Period
Chapter 25 – Starting a CGM Sensor Session 25.2 Sensor Startup Period As an example, the Dexcom G6 sensor needs a 2-hour startup period to adjust to being under your skin. You will not get sensor glucose readings or alerts until the 2-hour startup period ends and you complete your first calibrations. For information about Dexcom G6 CGM sensor startup periods, visit the manufacturer’s website for applicable user guides. - Page 211 Chapter 25 – Starting a CGM Sensor Session Examples If you did not enter a sensor code, then 10:20 follow the instructions in the next 14 Nov 2019 100% 235 u For example, if you started your sensor section to calibrate your sensor. Skip session 20 minutes ago, you would see the calibration instructions if you this countdown symbol on the CGM...
- Page 212 Chapter 25 – Starting a CGM Sensor Session THIS PAGE IS INTENTIONALLY LEFT BLANK...
- Page 213 Getting Started with Your CGM System Chapter 26 Calibrating Your CGM System...
-
Page 214: Chapter 26 - Calibrating Your Cgm System
Chapter 26 – Calibrating Your CGM System portion of the CGM Home screen PRECAUTION 26.1 Calibration Overview before calibrating. DO NOT calibrate when your trend arrow is up, double-up, down, or double-down because your • Make sure the antenna symbol is If you did not enter a CGM sensor code BG is changing at more than 0.11 mmol/L per when starting a sensor session, you will... - Page 215 Chapter 26 – Calibrating Your CGM System strip following your meter 9. Tap NOTE: Sensor Code manufacturer’s instructions. The instructions in this section do not apply if 10. Tap to confirm the calibration. you entered the sensor code when you started PRECAUTION the sensor session.
-
Page 216: Calibration Bg Value And Correction Bolus
26.3 Calibration BG Value and Correction Bolus 26.4 24 Hour Calibration Update 2. Tap OPTIONS. Your t:slim X2 pump uses the BG value Calibrate your CGM System when 3. Tap the Down Arrow. entered for calibration to determine if a prompted. -
Page 217: Other Reasons You May Need To Calibrate
Chapter 26 – Calibrating Your CGM System The CALIBRATION ACCEPTED match the current CGM readings, you may screen will appear, followed by the choose to enter a calibration. CGM Home screen. 26.5 Other Reasons You May Need to Calibrate You may need to calibrate when your System did not accept the last calibration, or when the BG value you... - Page 218 Chapter 26 – Calibrating Your CGM System THIS PAGE IS INTENTIONALLY LEFT BLANK...
- Page 219 Getting Started with Your CGM System Chapter 27 Viewing CGM Data on Your t:slim X2 Insulin Pump...
-
Page 220: Overview
Chapter 27 – Viewing CGM Data on Your t:slim X2 Insulin Pump The greatest benefit you get from using • Your High Alert setting shows as an 27.1 Overview continuous glucose monitoring will orange line across the trend graph. come from trending information. It is •... -
Page 221: Cgm Trend Graphs
Chapter 27 – Viewing CGM Data on Your t:slim X2 Insulin Pump settings, orange if above High Alert reading along with the last 3 hours of last 12 hours of sensor glucose setting, red if below Low Alert sensor glucose readings. -
Page 222: Rate Of Change Arrows
Chapter 27 – Viewing CGM Data on Your t:slim X2 Insulin Pump 1 Hour Trend Graph shows you your HIGH shows when your most recent The trend arrows show below your sensor glucose reading is greater than current glucose reading along with the current sensor glucose reading. - Page 223 Chapter 27 – Viewing CGM Data on Your t:slim X2 Insulin Pump The table below shows the different trend arrows your receiver displays: Trend Arrow Definitions Constant: Your glucose is steady (not increasing/decreasing Slowly falling: Your glucose is falling 0.06–0.11 mmol/L more than 0.06 mmol/L each minute).
-
Page 224: Cgm History
Chapter 27 – Viewing CGM Data on Your t:slim X2 Insulin Pump the time it was declared. The letter “C” screen and on the CGM Lock screen. 27.4 CGM History (C: Alert) indicates the time it was The system will automatically attempt cleared. - Page 225 Getting Started with Your CGM System Chapter 28 Ending Your CGM Sensor Session...
-
Page 226: Chapter 28 - Ending Your Cgm Sensor Session
You must remove your sensor and insert a new sensor. show on your pump after your sensor Your t:slim X2 Pump tells you how session ends. You must remove your much time you have left until your sensor and insert a new sensor. - Page 227 Chapter 28 – Ending Your CGM Sensor Session For information about removing the Dexcom G6 sensor and Dexcom G6 transmitter, visit the manufacturer’s website for applicable user guides.
- Page 228 Chapter 28 – Ending Your CGM Sensor Session THIS PAGE IS INTENTIONALLY LEFT BLANK...
- Page 229 CGM Alerts, Errors, and Troubleshooting Chapter 29 CGM Alerts and Errors...
-
Page 230: Chapter 29 - Cgm Alerts And Errors
PRECAUTION You must customize the CGM alert settings on your t:slim X2 pump and the Dexcom G6 CGM app separately. The alert settings apply to the phone and pump separately. -
Page 231: Startup Calibration Alert
Chapter 29 – CGM Alerts and Errors 29.1 Startup Calibration Alert What will I see on the screen? What does it mean? 2-hour CGM startup period is complete. This will only appear if you did not enter a CALIBRATE CGM sensor code. -
Page 232: Second Startup Calibration Alert
Chapter 29 – CGM Alerts and Errors 29.2 Second Startup Calibration Alert What will I see on the screen? What does it mean? The System needs an additional BG value to complete startup calibration. This will only CALIBRATE CGM appear if you did not enter a sensor code. How will the System notify me? Enter 1 BG to calibrate CGM sensor. -
Page 233: Hour Calibration Alert
Chapter 29 – CGM Alerts and Errors 29.3 12 Hour Calibration Alert What will I see on the screen? What does it mean? The System needs a BG value to calibrate. This will only appear if you did not enter a CALIBRATE CGM sensor code. -
Page 234: Incomplete Calibration
Chapter 29 – CGM Alerts and Errors 29.4 Incomplete Calibration What will I see on the screen? What does it mean? If you start to enter a calibration value using the keypad and do not complete the entry INCOMPLETE CALIBRATION within 90 seconds, this screen appears. -
Page 235: Calibration Timeout
Chapter 29 – CGM Alerts and Errors 29.5 Calibration Timeout What will I see on the screen? What does it mean? If you start to enter a calibration value using the keypad and do not complete the entry CALIBRATION TIMEOUT within 5 minutes, this screen appears. -
Page 236: Wait 15 Minute Calibration Error Alert
Chapter 29 – CGM Alerts and Errors 29.6 Wait 15 Minute Calibration Error Alert What will I see on the screen? What does it mean? The sensor cannot calibrate. CALIBRATION ERROR How will the System notify me? Enter a calibration 1 vibration, then vibration/beep every 5 minutes until confirmed. -
Page 237: Calibration Required Alert
Chapter 29 – CGM Alerts and Errors 29.7 Calibration Required Alert What will I see on the screen? What does it mean? The System needs a BG value to calibrate. Sensor glucose readings will not be CALIBRATE CGM displayed at this time. How will the System notify me? Enter a BG to calibrate CGM sensor. -
Page 238: Cgm High Alert
Chapter 29 – CGM Alerts and Errors 29.8 CGM High Alert What will I see on the screen? What does it mean? Your most recent sensor glucose reading is at or above the High Alert setting. CGM HIGH ALERT How will the System notify me? Sensor reading 2 vibrations, then 2 vibrations/beeps every 5 minutes until confirmed or your glucose 11.3... -
Page 239: Cgm Low Alert
Chapter 29 – CGM Alerts and Errors 29.9 CGM Low Alert What will I see on the screen? What does it mean? Your most recent sensor glucose reading is at or below the Low Alert setting. CGM LOW ALERT How will the System notify me? Sensor reading 3 vibrations, then 3 vibrations/beeps every 5 minutes until confirmed or your glucose is 3.7 mmol/L. -
Page 240: Cgm Fixed Low Alert
Chapter 29 – CGM Alerts and Errors 29.10 CGM Fixed Low Alert What will I see on the screen? What does it mean? Your most recent sensor glucose reading is at or below 3.1 mmol/L. CGM LOW ALERT How will the System notify me? Check BG and eat 4 Vibrations, then 4 vibrations/beeps every 5 minutes until confirmed or your glucose carbs if necessary. -
Page 241: Cgm Rise Alert
Chapter 29 – CGM Alerts and Errors 29.11 CGM Rise Alert What will I see on the screen? What does it mean? Your glucose levels are rising at 0.11 mmol/L per minute or faster (at least 1.7 mmol/L in CGM RISE ALERT 15 minutes). -
Page 242: Cgm Rapid Rise Alert
Chapter 29 – CGM Alerts and Errors 29.12 CGM Rapid Rise Alert What will I see on the screen? What does it mean? Your glucose levels are rising at 0.17 mmol/L per minute or faster (at least 2.5 mmol/L in CGM RISE ALERT 15 minutes). -
Page 243: Cgm Fall Alert
Chapter 29 – CGM Alerts and Errors 29.13 CGM Fall Alert What will I see on the screen? What does it mean? Your glucose levels are falling at 0.11 mmol/L per minute or faster (at least 1.7 mmol/L CGM FALL ALERT in 15 minutes). -
Page 244: Cgm Rapid Fall Alert
Chapter 29 – CGM Alerts and Errors 29.14 CGM Rapid Fall Alert What will I see on the screen? What does it mean? Your glucose levels are falling at 0.17 mmol/L per minute or faster (at least 2.5 mmol/L CGM FALL ALERT in 15 minutes). -
Page 245: Unknown Sensor Reading
Chapter 29 – CGM Alerts and Errors 29.15 Unknown Sensor Reading What will I see on the screen? What does it mean? The sensor is sending sensor glucose readings that the System does not understand. 10:20 5 Mar 2017 100% 235 u You will not receive sensor glucose readings. -
Page 246: Out Of Range Alert
Chapter 29 – CGM Alerts and Errors 29.16 Out of Range Alert What will I see on the screen? What does it mean? The transmitter and pump are not communicating. You will not receive sensor glucose OUT OF RANGE ALERT readings, and Basal-IQ technology is not able to predict low glucose or adjust insulin delivery. -
Page 247: Low Transmitter Battery Alert
Chapter 29 – CGM Alerts and Errors 29.17 Low Transmitter Battery Alert What will I see on the screen? What does it mean? Transmitter battery is low. LOW TRANSMITTER BATTERY How will the System notify me? Please replace your 1 vibration, then vibration/beep every 5 minutes until confirmed. transmitter soon. -
Page 248: Transmitter Error
Chapter 29 – CGM Alerts and Errors 29.18 Transmitter Error What will I see on the screen? What does it mean? The transmitter has failed and the CGM session has stopped. TRANSMITTER ERROR How will the System notify me? Please replace your 1 vibration, then vibration/beep every 5 minutes. -
Page 249: Failed Sensor Error
Chapter 29 – CGM Alerts and Errors 29.19 Failed Sensor Error What will I see on the screen? What does it mean? The sensor is not working properly and the CGM session has stopped. FAILED SENSOR How will the System notify me? Please replace your 1 vibration, then vibration/beep every 5 minutes. -
Page 250: Cgm System Error
Chapter 29 – CGM Alerts and Errors 29.20 CGM System Error What will I see on the screen? What does it mean? Your CGM System is not working properly; the CGM session has stopped and the CGM ERROR CGM can no longer be used. Bluetooth cannot operate. - Page 251 CGM Alerts, Errors, and Troubleshooting Chapter 30 CGM Troubleshooting...
-
Page 252: Cgm Pairing Troubleshooting
Chapter 30 – CGM Troubleshooting This chapter provides helpful tips and G6 CGM app and your t:slim X2 insulin Do not calibrate if your BG value is instructions to help you fix issues you pump simultaneously with the same below 2.2 mmol/L or above 22.2 mmol/ may have while using the CGM portion transmitter ID. -
Page 253: Out Of Range/No Antenna Troubleshooting
If you are still having trouble getting sensor glucose reading normally 2–3 minutes. sensor glucose readings, contact shows, then your t:slim X2 pump is not Customer Technical Support. communicating with your transmitter 30.4 Out of Range/No Antenna and sensor glucose readings will not Troubleshooting 30.5 Failed Sensor... -
Page 254: Sensor Inaccuracies
FAILED SENSOR are meant to be used for trending readings < 4.4 mmol/L, recalibrate your screen shows on your t:slim X2 pump. purposes only. The sensor measures sensor using the second BG value. The If you see this screen, it means your glucose in the fluid under the skin—not... - Page 255 Chapter 30 – CGM Troubleshooting • Use the same meter you routinely use to measure your BG to calibrate. Do not switch your meter in the middle of a sensor session. Blood glucose meter and strip accuracy vary between blood glucose meter brands.
-
Page 256: Section 4 - Basal-Iq Technology Features
Section 4 Basal-IQ Technology Features... -
Page 257: Chapter 31 - Getting To Know Basal-Iq Technology
Before You Begin Chapter 31 Getting to Know Basal-IQ Technology... -
Page 258: Responsible Use Of Basal-Iq Technology
31.1 Responsible Use of Basal-IQ Technology Systems like the t:slim X2 insulin pump with Basal-IQ technology are not substitutes for active diabetes management, as there are common scenarios in which automated systems cannot prevent hypoglycemia. The Basal-IQ technology feature relies on continuous CGM readings and will not be able to predict glucose levels and suspend insulin delivery if your CGM is not working properly or is unable to communicate with your pump. - Page 259 Chapter 31 – Getting to Know Basal-IQ Technology THIS PAGE IS INTENTIONALLY LEFT BLANK...
-
Page 260: Basal-Iq Lock Screen
Chapter 31 – Getting to Know Basal-IQ Technology 31.3 Basal-IQ Lock Screen The Basal-IQ Lock screen appears any time you turn on the screen and you are using your pump with a CGM and the Basal-IQ technology enabled. The Basal-IQ Lock screen is the same as the CGM Lock screen, with the following additions. - Page 261 Chapter 31 – Getting to Know Basal-IQ Technology 10:20 14 Nov 2019 100% 235 u mmol/L INSULIN ON BOARD: 1.1 u 1:09 hrs...
-
Page 262: Basal-Iq Home Screen
Chapter 31 – Getting to Know Basal-IQ Technology 31.4 Basal-IQ Home Screen The Home screen with Basal-IQ technology enabled is identical to the CGM Home screen, with the following additions. See Section 21.4 CGM Home Screen. 1. Basal-IQ Technology Status: Indicates the status of the Basal-IQ technology. - Page 263 Chapter 31 – Getting to Know Basal-IQ Technology 10:20 14 Nov 2019 100% 235 u mmol/L INSULIN ON BOARD: 1.1 u 1:09 hrs OPTIONS BOLUS...
-
Page 264: Basal-Iq Screen
Chapter 31 – Getting to Know Basal-IQ Technology 31.5 Basal-IQ Screen 1. Basal-IQ Technology on/off: Turns on, or off, the Basal-IQ technology. 2. Suspend Alert on/off: Turns on, or off, the alert indicating when insulin has been suspended. 3. Resume Alert on/off: Turns on, or off, the alert indicating when insulin has been resumed after a suspension. - Page 265 Chapter 31 – Getting to Know Basal-IQ Technology Basal-IQ Basal-IQ Suspend Alert Resume Alert...
- Page 266 Chapter 31 – Getting to Know Basal-IQ Technology THIS PAGE IS INTENTIONALLY LEFT BLANK...
-
Page 267: Chapter 32 - Basal-Iq Technology Overview
Using Basal-IQ PLGS Technology Chapter 32 Basal-IQ Technology Overview... -
Page 268: Basal-Iq Overview
The status of insulin delivery 1. Insulin delivery is suspended if the Basal-IQ technology is not a substitute for active will be displayed on the t:slim X2 pump current CGM sensor reading is less management of your diabetes and is not screen. - Page 269 Chapter 32 – Basal-IQ Technology Overview 2. Insulin delivery is suspended if the glucose value is predicted to be less than 4.4 NOTE: Diagrams are mmol/L in 30 minutes. Representations Only The diagrams depicted here are sample representations only, and not to be interpreted Current 30 minute as actual system performance.
- Page 270 Chapter 32 – Basal-IQ Technology Overview 3. Basal insulin delivery is resumed once the current CGM sensor reading increases NOTE: Diagrams are compared to the previous reading. Representations Only The diagrams depicted here are sample representations only, and not to be interpreted as actual system performance.
-
Page 271: Turn Basal-Iq On And Off
Chapter 32 – Basal-IQ Technology Overview 5. Basal insulin delivery is resumed if 2. Tap My Pump. insulin delivery has been suspended for 2 hours in a 2.5 hour window. 3. Tap Basal-IQ. For example: If insulin is suspended for 4. - Page 272 Chapter 32 – Basal-IQ Technology Overview THIS PAGE IS INTENTIONALLY LEFT BLANK...
- Page 273 Using Basal-IQ PLGS Technology Chapter 33 Viewing Basal-IQ Technology Status on Your t:slim X2 Pump...
-
Page 274: Overview
Chapter 33 – Viewing Basal-IQ Technology Status on Your t:slim X2 Pump normally), the diamond icon will be gray BOLUS will no longer be available. 33.1 Overview as depicted below. 10:20 Status indicators and additional 14 Nov 2019 100% 235 u... -
Page 275: Basal-Iq History
Chapter 33 – Viewing Basal-IQ Technology Status on Your t:slim X2 Pump 6. Tap Basal-IQ. The dates that 33.3 Basal-IQ History contain Basal-IQ history are displayed. The historical log of the Basal-IQ technology events can be found under History the Pump History in the Options menu. - Page 276 Chapter 33 – Viewing Basal-IQ Technology Status on Your t:slim X2 Pump THIS PAGE IS INTENTIONALLY LEFT BLANK...
-
Page 277: Chapter 34 - Basal-Iq Alerts
Using Basal-IQ PLGS Technology Chapter 34 Basal-IQ Alerts... - Page 278 For information on insulin delivery reminders, alerts, and alarms see Chapters 15 t:slim X2 Insulin Pump Alerts, 16 t:slim X2 Insulin Pump Alarms, and 17 t:slim X2 Insulin Pump Malfunction. For information on CGM Alerts and Errors, see Chapter 29 CGM Alerts and Errors.
-
Page 279: Out Of Range Alert
Chapter 34 – Basal-IQ Alerts 34.1 Out of Range Alert What will I see on the screen? What does it mean? The transmitter and pump are not communicating and you will not receive sensor glucose readings, and Basal-IQ technology is not able to predict low glucose or adjust OUT OF RANGE ALERT insulin delivery. -
Page 280: Suspend Alert
Chapter 34 – Basal-IQ Alerts 34.2 Suspend Alert What will I see on the screen? What does it mean? The Basal-IQ technology has stopped all insulin delivery. INSULIN SUSPENDED All deliveries were automatically How will the System notify me? stopped. Insulin will resume when sensor readings start to rise. -
Page 281: Resume Alerts
Chapter 34 – Basal-IQ Alerts 34.3 Resume Alerts Resume Alert 1 What will I see on the screen? What does it mean? The pump has resumed basal insulin delivery. INSULIN RESUMED Insulin was automatically resumed. How will the System notify me? 2 sequences of 3 notes or 2 vibrations depending on the volume/vibrate setting selected in your Sound Volume setting. - Page 282 Chapter 34 – Basal-IQ Alerts Resume Alert 2 What will I see on the screen? What does it mean? This prompt will be displayed when insulin delivery is automatically resumed after being INSULIN RESUMED suspended for 2 hours in a 2.5 hour period. Your max insulin suspension has been reached.
- Page 283 Technical Specifications and Warranty Chapter 35 Basal-IQ Technology Clinical Study Overview...
-
Page 284: Introduction
The goal of this study was to assess the presented here describe the percent carbohydrate, glucagon, or engage in safety and efficacy of the t:slim X2 time below 3.9 mmol/L as the primary other resuscitative actions. There were insulin pump with Basal-IQ technology... -
Page 285: Demographics
Chapter 35 – Basal-IQ Technology Clinical Study Overview 35.3 Demographics Baseline demographics of the study cohort are provided in the table below. Demographics at Enrollment (N=103) Basal-IQ First SAP First Characteristic Unit of Measure Overall (N=52) (N=51) Average age ± std deviation 24 ±... -
Page 286: Intervention Compliance
Chapter 35 – Basal-IQ Technology Clinical Study Overview 35.4 Intervention Compliance The following two tables provide an outline of how often the t:slim X2 insulin pump with Basal-IQ technology and CGM were used during the study period respectively. Amount of t:slim X2 Insulin Pump with Basal-IQ Technology Use Over the 21-Day Period (N=102)*... - Page 287 Chapter 35 – Basal-IQ Technology Clinical Study Overview Amount of CGM Use Over the 21-Day Period by Treatment Arm (N=102) Study Arm (Basal-IQ Enabled) Control Arm (SAP) Percentage of Time Using the CGM* # participants % of population # participants % of population ≥...
-
Page 288: Primary Analysis
Chapter 35 – Basal-IQ Technology Clinical Study Overview 35.5 Primary Analysis The primary analysis of this study was to compare the CGM sensor readings less than 3.9 mmol/L between the study arm (Basal- IQ enabled) and the control arm (SAP). The following data in the table below provides a breakdown of the CGM sensor readings across both study arms and the number of participants whose sensor values were below 3.9 mmol/L for the given time period. - Page 289 Chapter 35 – Basal-IQ Technology Clinical Study Overview The average percent of CGM sensor readings less than 3.9 mmol/L, provided in the table below showed a reduction of 31% in the study arm (Basal-IQ enabled) compared to the control arm (SAP). The treatment difference between the two groups is shown in the table following.
-
Page 290: Secondary Analysis
Chapter 35 – Basal-IQ Technology Clinical Study Overview 35.6 Secondary Analysis The secondary outcomes measures of the clinical study represent characteristics of the glucose profile including time spent in the low (hypoglycemic) range, time spent high (hyperglycemic) range, and the time spent with glucose under control (between 3.9-10 mmol/L). - Page 291 Chapter 35 – Basal-IQ Technology Clinical Study Overview The table below provides details about the glucose levels during daytime (6 AM to 10 PM/6:00 to 22:00) versus nighttime (10 PM to 6 AM/22:00 to 6:00). The average glucose in the study arm during daytime was 8.9 (± 1.4) mmol/L, and 8.7 (± 1.6) mmol/L during nighttime.
-
Page 292: Insulin Delivery Differences
Chapter 35 – Basal-IQ Technology Clinical Study Overview 35.7 Insulin Delivery Differences The table below provides an overview of the how much insulin was used on average across the study arm (Basal-IQ Enabled) and the control arm (SAP). The amount of basal insulin used in 24 hours was 1.2 units less in the study arm versus the control arm. - Page 293 Chapter 35 – Basal-IQ Technology Clinical Study Overview Insulin Delivery Summary Statistics (N=102)* Study Arm Control Arm Characteristic Unit of Measure (Basal-IQ Enabled) (SAP) 24-hour period average ± std deviation 44.6 ± 20 45.9 ± 20.2 Total Insulin Units Daytime average ±...
-
Page 294: Basal-Iq Technology Performance Accuracy
Chapter 35 – Basal-IQ Technology Clinical Study Overview to be in one of three categories; True, 35.8 Basal-IQ Technology False, or Missed relative to the Performance Accuracy corresponding YSI values. True indicating that the suspension or The following data tables characterize resumption occurrence matched Basal-IQ technology accuracy in corresponding YSI values and False or... - Page 295 Chapter 35 – Basal-IQ Technology Clinical Study Overview Percent of CGM Sensor Readings < 3.9 mmol/L Predicted Suspend Actions (%) All Suspend Actions (%) TRUE Suspends 8,257 (77.55%) 8,276 (77.54%) FALSE Suspends 2,133 (20.03%) 2,140 (20.05%) MISSED Suspends 258 (2.42%) 257 (2.41%) Total Events 10,648 (100.00%)
-
Page 296: Section 5 - Technical Specifications And Warranty
Section 5 Technical Specifications and Warranty... - Page 297 Technical Specifications and Warranty Chapter 36 Technical Specifications...
-
Page 298: Overview
Chapter 36 – Technical Specifications 36.1 Overview This section provides tables of technical specifications, performance characteristics, options, settings, and electromagnetic compliance information for the t:slim X2 pump. The specifications in this section meet the international standards set forth in IEC 60601-1 and IEC 60601-2-24. -
Page 299: T:slim X2 Pump Specifications
External PSU: Class II, Infusion Pump. Internally-powered equipment, Type BF applied part. The risk of ignition of flammable anesthetics and explosive gases by the pump is remote. While this risk is remote, it is not recommended to operate the t:slim X2 pump in the presence of flammable anesthetics or explosive gases. Size 3.13”... - Page 300 Chapter 36 – Technical Specifications t:slim X2 Pump Specifications (Continued) Specification Type Specification Details Basal Delivery Accuracy at all Flow ±5% Rates (tested per IEC 60601-2-24) The pump is designed to vent automatically when there is a pressure difference between inside the cartridge and the surrounding air.
- Page 301 45 dBA at 1 meter NOTE: Delivery Accuracies Accuracies stated in this table are valid for all Tandem Diabetes Care, Inc. branded infusion sets including: AutoSoft 90, AutoSoft XC, AutoSoft 30, VariSoft, TruSteel, Comfort, Contact, t:90, Inset, and t:30 branded infusion sets.
- Page 302 Chapter 36 – Technical Specifications USB Charging/Download Cable Specifications Specification Type Specification Detail Tandem P/N 004113 Length 6 feet (2 meters) Type USB A to USB Micro B Power Supply/Charger, AC, Wall Mount, USB Specifications Specification Type Specification Detail Tandem P/N...
- Page 303 Chapter 36 – Technical Specifications Car Adapter (sold separately), Specifications (Continued) Specification Type Specification Detail Output Voltage 5 Volts DC Max Output Power 5 Watts minimum Output Connector USB type A PC, USB Connector, Specifications Specification Type Specification Detail Output Voltage 5 Volts DC Output Connector USB type A...
- Page 304 Chapter 36 – Technical Specifications Requirements for Charging from a Computer The t:slim X2 pump is designed to be connected to a host computer for battery charging and data transfer. The following minimum characteristics are required of the host computer: •...
-
Page 305: T:slim X2 Pump Options And Settings
Chapter 36 – Technical Specifications 36.3 t:slim X2 Pump Options and Settings t:slim X2 Pump Options and Settings Option/Setting Type Option/Setting Detail Time May be set to 12-hour or 24-hour clock (default is 12-hour clock) Maximum Basal Rate 0.1 – 15 units/hr... - Page 306 Chapter 36 – Technical Specifications t:slim X2 Pump Options and Settings (Continued) Option/Setting Type Option/Setting Detail Maximum Extended Bolus Time 8 hours Maximum Bolus Size 25 units Low Reservoir Volume Indicator Status indicator visible on Home screen; Low Insulin Alert is user adjustable from 10 to 40 units (default is 20 units).
-
Page 307: T:slim X2 Pump Performance Characteristics
Chapter 36 – Technical Specifications 36.4 t:slim X2 Pump Performance Characteristics Rate of Delivery Characteristic Value 25 Unit Bolus Delivery Speed 2.97 Units/min Typical 2.5 Unit Bolus Delivery Speed 1.43 Units/min Typical 20 Unit Prime 9.88 Units/min Typical Bolus Duration... - Page 308 Chapter 36 – Technical Specifications Time to Occlusion Alarm* Operating Rate Typical Maximum Bolus (3 units or Greater) 1 minute 2 seconds 3 Minutes Basal (2 units/hr) 1 Hour 4 Minutes 2 Hours Basal (0.1 units/hr) 19 Hours 43 Minutes 36 Hours *The time to occlusion alarm is based on insulin volume not delivered.
-
Page 309: Electromagnetic Compatibility
If the System must be used Section 36.9 Distances Between the insulin without notification to the in close proximity with other electrical t:slim X2 Pump and RF Equipment user. equipment, the System should be more information. observed in this environment to verify •... -
Page 310: Electromagnetic Emissions
Chapter 36 – Technical Specifications 36.7 Electromagnetic Emissions The System is intended for use in the electromagnetic environment specified below. Always make sure that the System is used in such an environment. Guidance and Manufacturer’s Declaration – Electromagnetic Emissions Emissions Test Compliance Electromagnetic Environment –... -
Page 311: Electromagnetic Immunity
Chapter 36 – Technical Specifications 36.8 Electromagnetic Immunity The System is intended for use in the electromagnetic environment specified below. Always make sure that the System is used in such an environment. Guidance and Manufacturer’s Declaration – Electromagnetic Immunity Electromagnetic Environment Immunity Test IEC 60601 Test Level Compliance Level... - Page 312 Chapter 36 – Technical Specifications Guidance and Manufacturer’s Declaration – Electromagnetic Immunity (Continued) Electromagnetic Environment Immunity Test IEC 60601 Test Level Compliance Level – Guidance Voltage Dips, Short Interruptions, 70% UR (30% dip in Ur) for 25 cycles 70% UR (30% dip in Ur) for 25 cycles Mains power quality should be that of and Voltage Variations on Power 0% Ur (100% dip in Ur) for 1 cycle at...
- Page 313 Chapter 36 – Technical Specifications Guidance and Manufacturer’s Declaration – Electromagnetic Immunity (Continued) Electromagnetic Environment Immunity Test IEC 60601 Test Level Compliance Level – Guidance Conducted RF IEC 61000-4-6 3 Vrms 150 kHz to 80 MHz 10 Vrms Portable and mobile RF communications equipment should Radiated RF IEC 61000-4-3 10 V/m...
- Page 314 Chapter 36 – Technical Specifications Guidance and Manufacturer’s Declaration – Electromagnetic Immunity (Continued) Electromagnetic Environment Immunity Test IEC 60601 Test Level Compliance Level – Guidance NOTE 1: At 80 MHz and 800 MHz, the higher frequency range applies. NOTE 2: These guidelines may not apply in all situations. Electromagnetic propagation is affected by absorption and reflection from structures, objects, and people. *Field strengths from fixed transmitters, such as base stations for radio (cellular/cordless) telephones and land mobile radios, amateur radio, AM and FM radio broadcast, and TV broadcast cannot be predicted theoretically with accuracy.
-
Page 315: Distances Between The T:slim X2 Pump And Rf Equipment
Chapter 36 – Technical Specifications 36.9 Distances Between the t:slim X2 Pump and RF Equipment The System is intended for use in an electromagnetic environment typically found in the home, at work, retail stores, and places of leisure, where daily activities occur. The chart below can be used as a guideline for determining the recommended minimum distance to maintain between a radio frequency (RF) transmitter and the System. - Page 316 Chapter 36 – Technical Specifications The table below provides a list of typical devices for various levels of transmitter power and frequency, and the recommended separation distances from the transmitter and the System. Recommended Distances Between the System and Devices Rated Maximum Output Power Recommended Separation Distance Typical Devices...
-
Page 317: Quality Of Wireless Service
Dexcom G6 interference, and other devices operating in the 2.4 GHz transmitter to the user without band are around, the t:slim X2 insulin 2. This device must accept any notification. pump uses the built-in coexistence interference received, including... -
Page 318: Warranty Information
This portable transmitter with its equipment generates uses and can with a new or refurbished t:slim X2 antenna complies with FCC/IC RF radiate radio frequency energy and, if Pump, subject to the conditions and... - Page 319 Neither Tandem nor its suppliers or t:slim X2 Pump by any person or determined at a future date. To the distributors shall be liable for losses, entity other than Tandem;...
- Page 320 United States. No employee for one use during the period of 3 days by the user or third persons after of Tandem or any other party is after the individual infusion set sterile the date of manufacture;...
-
Page 321: Returned Goods Policy
X2 insulin pump. For more outlined in the accompanying to immediately terminate. This warranty information about CGM warranty instructions for use;... -
Page 322: T:slim X2 Insulin Pump Event Data (Black Box)
Period, if the customer experiences an supports use of the t:slim X2 pump, or if Tandem is not responsible for lost or issue with the Pump that is covered by the pump is returned for any reason. - Page 323 Chapter 36 – Technical Specifications THIS PAGE IS INTENTIONALLY LEFT BLANK...
-
Page 324: Index
Index Index Alert Icon, Where to Find 44 CGM, System Error 248 Alerts & Reminders 54 CGM, Transmitter Error 246 Basal Rate Required Alert 132 Connection Error Alert 140, 141 Basal-IQ, Resume Alerts 279 Data Error Alert 143 AC power adapter 64 Basal-IQ, Suspend Alert 278 High Glucose Alert, Set 200 CGM Rise and Fall 201... - Page 325 Index Altitude 164 Battery 64 Quick Bolus 39, 103 Rate of Delivery Specifications Altitude Alarm 156, 157 Battery Level 44, 46 Charging Tips 65 Aquatic Activities, Pump 164 Stop a Bolus 95 Battery, Charge 64 Arrows Timed Settings 83 BG 38 Up/Down Arrows 52 High BG Reminder 114 Low BG Reminder, Set 114...
- Page 326 Index turn on in Personal Profiles 86 CGM Alerts 199 Low Transmitter Battery Alert 245 Carbs 38 CGM Fall Alert 241, 242 My CGM Screen 186 CGM High Alert 236 Out of Range Alert 244, 277 Carbs, on Bolus Screen 50 CGM Info 197 Out of Range Alert, Set 203 Caring for Your Pump 167...
- Page 327 Index Troubleshooting 249 Contents, of System 38 Quick Bolus 104 Unknown Sensor Reading 243 Screen Timeout 108 Contraindications 22 Unknown Sensor Reading, Site Reminder 116 Correction Bolus 39 Troubleshooting 250 Delete Personal Profile 88 Correction Factor 39, 83 View Data on Pump, Overview Delivery Summary 112 in Personal Profiles 84 Device Settings 56, 108...
- Page 328 Index Home Screen, CGM 184 Resume Insulin Delivery 98 Stop Insulin Delivery 98 Failed Sensor Error 247 Insulin Duration, in Personal Profiles Fall Alert, Set 202 Icons Fill Insulin on Board (IOB), in Personal Explanation of Icons 40, 180, Fill Cannula 79 Profiles 83 Fill Cartridge 74 Incomplete Bolus Alert 126...
- Page 329 Index Malfunction 160 Activate a Profile 87 Add Profiles 86 Max Basal Alert 136 Receiver, CGM 190 Copy an Existing 87 Max Bolus Alerts 134 Reminder Create a New Profile 82 Max Bolus, in Personal Profiles 83 Site Reminder 79 Delete a Profile 88 Max Hourly Bolus Alert 133 Reminders 113...
- Page 330 Index Verification of Proper Functionality Pediatric 24 Site Reminder, Set 79 Sensor Sound 109 Screen On/Quick Bolus Button Alarm Applicator 178 Specifications Automatic Shut-Off 224 Car Adapter 300 Screen Protector 38 Calibration Update 214 Computer Charging 302 Screen Timeout, set 108 CGM Clinical Studies 283 Distance Between CGM, Pump, Screens...
- Page 331 Personal Profiles 84 USB Adapter 64 Transmitter USB Cable 38, 64 USB Port 46, 64 Safety Lock 178 Tandem Logo 46, 66 Transmitter Error 246 Target BG 38 Transmitter ID 194 Verification of Proper Functionality in Personal Profiles 84...
- Page 332 Covered by one or more patents. For a list of patents, see www.tandemdiabetes.com/legal/patents. Tandem Diabetes Care, the Tandem Diabetes Care logo, t:connect, touch simplicity, t:slim, t:slim X2, and Basal-IQ are either registered trademarks or trademarks of Tandem Diabetes Care, Inc. in the United States and/or other countries.
- Page 334 © 2019 Tandem Diabetes Care, Inc. All rights reserved. For more information on the t:slim X2 insulin pump with Basal-IQ technology, please contact us on 1300 851 056 or at diabetes@amsl.com.au amsldiabetes.com.au ARTG 304681. 1003860 July 2020...
Need help?
Do you have a question about the t:slim X2 and is the answer not in the manual?
Questions and answers