
Related Manuals for Hitachi AXM950E


Summary of Contents for Hitachi AXM950E
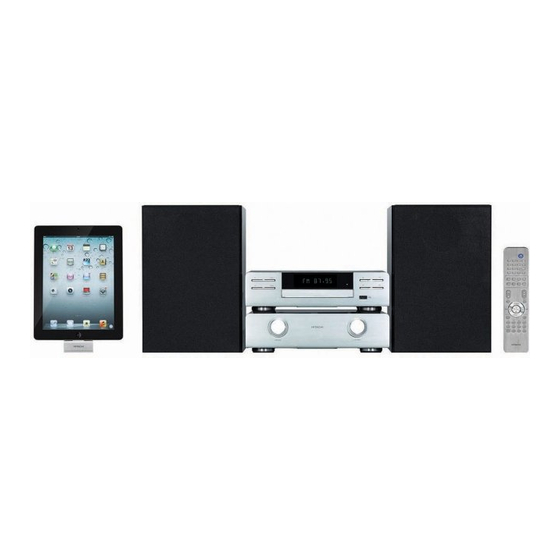
- Page 1 Instruction Manual AXM950E Wireless Hifi with Docking for iPad/iPhone/iPod iPad, iPhone and iPod not included...
-
Page 3: Table Of Contents
Contents Safety Warnings ........................7 Unpacking ..........................9 Product Overview .......................10 Main Unit ..............................10 Amplifier ............................... 12 Remote Control ........................13 Operating Your Remote Control ..................15 Handling the Remote Control ......................15 Remote Control Operation Range ..................15 Connections ........................16 Speaker Connections ..........................16 Connecting Control Cable........................ - Page 4 FM Operation ........................26 Selecting the FM Mode ........................... 26 Searching for a Station Automatically ....................26 Searching for a Station Manually ......................26 Audio Mode ..............................26 Presetting Stations ............................ 26 Recalling a Preset Station ........................27 System Reset ............................... 27 FM Display modes ......................28 Compatible Disc Types .......................29 CD/MP3/WMA Operation ....................29...
- Page 5 SOME DOS AND DON’TS ON THE SAFE USE OF EQUIPMENT This equipment has been designed and manufactured to meet international safety standards but, like any electrical equipment, care must be taken if you are to obtain the best results and safety is to be assured. read the operating instructions before you attempt to use the equipment.
- Page 6 Battery Safety Guidelines Used correctly, domestic batteries are a safe and dependable source of portable power. Problems can occur if they are misused or abused – resulting in leakage or, in extreme cases, re or explosion. Here are some simple guidelines to safe battery use designed to eliminate any such problems.
-
Page 7: Safety Warnings
Safety Warnings Ventilation • Read all the instructions carefully before using the unit and keep them for future • To prevent the risk of electric shock or reference. fire hazard due to overheating, ensure • Retain the manual. If you pass the unit that curtains and other materials do not obstruct the ventilation vents. - Page 8 Supervision Service • Children should be supervised to ensure • To reduce the risk of electric shock, do not that they do not play with the unit and the remove screws. The unit does not contain remote control. any user-serviceable parts. Please leave all maintenance work to qualified personnel.
-
Page 9: Unpacking
Thank you for purchasing your new HITACHI HI-FI System. We recommend that you spend some time reading this instruction manual so that you fully understand all the operational features it offers. You will also find some hints and tips to help you resolve any issues. -
Page 10: Product Overview
Product Overview Main Unit Front View MODE CLOCK STANDBY Button Display Switches the unit between the ON and 10. Remote Control Sensor STANDBY modes. USB Socket MODE Button Button Repeats a CD track or a music file. • Skips backwards to the beginning of Button the track or to the previous track. - Page 11 Rear View CABLE Control Cable Connector...
-
Page 12: Amplifier
Amplifier Front View FUNCTION Dial VOLUME Dial Switch between USB, TUNER, DAB, Adjusts the volume. DOCK, BT, AUX, and DISC mode. Rear View CABLE SPEAKER OUT Control Cable Connector iPod/iPhone/iPad Socket Connect to iPod/iPhone/iPad. DAB Aerial Socket Connect to a DAB Aerial. SPEAKER Sockets Connect to speakers. -
Page 13: Remote Control
Remote Control STANDBY Button Switches the unit between the ON and STANDBY modes. 0-9 Buttons Selects a soundtrack. Button Ejects a disc from CD compartment. PROG Button • Programme soundtracks. PROG • Presets radio stations. PRESET – TU– TU + / – Buttons Searches for a radio station going forwards/backwards through JAZZ... - Page 14 Button • Skips backwards to the beginning of the track or to the previous track. • Allows fast reversing of the current track. Button • Skips forwards to the next track. • Allows fast forwarding of the PROG current track. PRESET 19.
-
Page 15: Operating Your Remote Control
Operating Your Remote Control Press and slide the back cover to open the battery compartment of the remote control. Insert two AAA size batteries (not included). Make sure the (+) and (–) ends of the batteries match the (+) and (–) ends indicated in the battery compartment. -
Page 16: Connections
Connections Speaker Connections Connect the speaker cables at the back of the speakers to the SPEAKER OUT (L/R) Sockets at the rear of the unit. Rear of the Amplifier CABLE SPEAKER OUT Connecting Control Cable Connect the control cable between the CD player and the amplifier. Rear of the Amplifier CABLE SPEAKER OUT... -
Page 17: Connecting To The Ipod / Iphone / Ipad Dock
Connecting to the iPod / iPhone / iPad Dock Connect one end of the cable (included) to the socket at the rear of the unit. Rear of the Amplifier CABLE SPEAKER OUT DOCK CABLE Rear of the CD Player Using the AUX Connection to the main unit’s AUX IN Use a RCA stereo audio cable to connect an auxiliary equipment... -
Page 18: Connecting The Aerial
Connecting the Aerial Connect one end of the aerial cable (included) to the DAB socket at the rear of the unit. Then position the aerial to obtain optimum reception. Rear of the Amplifier CABLE SPEAKER OUT Connecting to the Mains Supply •... -
Page 19: Playing Mp3'S From A Usb Device
Playing MP3’s from a USB Device When a USB device is connected to the unit, turn the FUNCTION dial on the unit or press the USB button on the remote control to select the USB mode. MODE CLOCK • The unit can only play MP3 and WMA file formats in USB operation. • If your USB device is loaded with MP3’s but the display keeps showing ‘NO DATA”... -
Page 20: General Operation
General Operation Powering ON/OFF When you first connect the unit to the mains socket. The unit will be in STANDBY mode and the STANDBY button will be red. Press the STANDBY button on the unit or the remote control to switch the unit on. •... -
Page 21: Auto Setting The Clock
Auto Setting the Clock In DAB mode, press RDS button repeatedly until RDS CLOCK shows on the display. Once RDS CLOCK has selected, clock will automatically update. Manual Setting the Clock Manual Setting the clock can only be done in STANDBY mode. In STANDBY mode, press and hold the CLOCK button on the remote control until the hour digits are flashing. -
Page 22: Setting The Sleep Timer
Setting the Sleep Timer Use the sleep timer to turn the system off after a certain number of minutes in play mode. By setting the sleep timer, you can fall asleep to music and know that your system will turn off by itself rather than play all night. -
Page 23: Dab Operation
DAB Operation DAB Auto Scan The auto scan will search for the entire DAB Band III channels. After the scan has finished, the first alphanumerically found station will be automatically selected. Full auto scan will not replace the DAB stations in memory. If you want to remove all the previously scanned stations, a system reset is required. -
Page 24: Presetting Stations
Presetting Stations You can store up to 20 of your favourite DAB stations to the memory. This will enable you to access your favourite stations quickly and easily. To store a preset, you must first be listening to the station that you would like to save, press and hold the PROG button. -
Page 25: Dab Display Modes
DAB Display Modes The station name will be displayed on the top line of the LCD display. Every time you press the RDS button, the bottom line of the display will cycle through the following display modes: DLS, Service Name, Prgramme Type, Birate, Mode, Ensemble Name, Date and Clock, Signal Strength. -
Page 26: Fm Operation
FM Operation Selecting the FM Mode The unit will automatically select a FM radio station with a good signal. Select the TUNER mode by turning the FUNCTION dial on the unit or pressing the FM/DAB button on the remote control until the display reads “TUNER”. Searching for a Station Automatically In TUNER mode, press and hold the TU + / –... -
Page 27: Recalling A Preset Station
Recalling a Preset Station Once you have saved a station, you can recall it by pressing the PRESET+/– or the 0-9 buttons to select your desired preset number. The stored stations will be saved into the memory and power off will not erase it. Storing a new station in a preset location will erase the previously stored station in that location. -
Page 28: Fm Display Modes
FM Display modes Every time you press the RDS button, the display will cycle through the following display modes: the Station Name, PTY, Frequency, Audio Mode, RDS CLOCK, Date, TEXT. The information is displayed on the lower segment of the display. Station Name Station Name When an RDS station is received, the “RDS”... -
Page 29: Compatible Disc Types
Compatible Disc Types Disc Types Disc Logo Recorded Content CD-R (CD Recordable) AUDIO CD-RW (CD-Rewritable) AUDIO AUDIO-CD (Compact Disc Digital Audio) AUDIO CD/MP3/WMA Operation Turn the FUNCTION dial on the unit or press the DISC button on the remote control to select DISC mode. -
Page 30: To Pause Playback
To Pause Playback Press the button on the unit or the remote control to pause the playback, the word “PAUSE“ will show on the display. To resume playback, press the button on the unit or the remote control again. To Stop Playback Press the button on the remote control to stop playback. -
Page 31: Programme Cancel
Programme Cancel Press and hold the button on the remote control, or open the CD tray and close it again to erase the memory. During Programme Mode • Press the REPEAT button once on the remote control, “RPT ONE” will show on the display. The CD will play the current track repeatedly. -
Page 32: Ipod/Iphone/Ipad* Operation
iPod/iPhone/iPad* Operation Using the iPod/iPhone/iPad dock you can use the unit to play music files stored on your iPod/iPhone/iPad. This unit can support the following iPod/iPhone/iPad models. Type Support Model iPhone • iPhone (with 30-pin dock • iPhone 3G/3GS connectors) • iPhone 4/4S iPod • iPod touch 1... -
Page 33: Control Iphone/Ipod Menu
Turn the VOLUME + / – dial on the unit or press the VOLUME + / – buttons on the • remote control to adjust the volume. • Press the button on the unit or the remote control to stop the playback and to go to the previous iPhone/iPod menu. -
Page 34: Bluetooth® Operation
Bluetooth® Operation The unit has a Bluetooth function that can receive a signal within 8 metres. Pairing the unit with a Bluetooth device to listen to music: While in the ON mode, turn the FUNCTION dial on the unit or press the DOCK/BT button on the remote control to select BT mode. -
Page 35: Aux Operation
AUX Operation There are AUX IN (L/R) sockets located at the rear of the unit. Analogue audio sound signals from other sources can be connected to the unit through these sockets. Connect to another audio device using the AUX IN (L/R) sockets via a RCA stereo audio cable (not included). -
Page 36: Maintenance
Maintenance Cleaning the Unit Ensure the unit is fully unplugged from the mains socket before cleaning. • To clean the unit, wipe the case with a slightly moist, lint-free cloth. • Do not use any cleaning fluids containing alcohol, ammonia or abrasives. •... -
Page 37: Hints And Tips
Hints and Tips If a problem occurs, it may often be due to something very minor. The following table contains various tips: Problem Solution No power • Ensure the mains cable is connected securely at both ends. • Make sure that the ON mode is selected. The remote control • Use the remote control near the unit. - Page 38 Problem Solution iPod/iPhone/iPad iPod/ iPhone/iPad • iPod/iPhone/iPad may not be docked properly or installed does not respond to properly. Remove your iPhone/iPod from the dock and check the speaker system for obstructions on the connectors in the dock and on your iPod/iPhone/iPad.
-
Page 39: Specifications
Specifications AXM950E Model Disc Format CD, CD-R, CD-RW, MP3, WMA Terminals: iPod/iPhone/iPad Docking, CD Tray x 1, USB 2.0 x 1, AUX IN (L/R) Sockets x 1, Aerial Socket x 1 Frequency Range FM: 87.5 – 108 MHz DAB: Band III... - Page 40 Importer: Elkjøp, Solheimsveien 6-8, PB 153, NO 1471 Lørenskog, Norge Norge: 815 32 000 Sverige: 0771 115 115 Danmark: 70 80 70 70 Suomi: 020321321 Manufacturer: Hitachi Europe Ltd., Whitebrook Park, Lower Cookham Road, Maidenhead, Berkshire SL6 8YA U.K. IB-AXM950E-GB-130510V3...
Need help?
Do you have a question about the AXM950E and is the answer not in the manual?
Questions and answers