Table of Contents
Advertisement
Quick Links
BEFORE YOU BEGIN
BEFORE YOU BEGIN
·
Please read these instructions carefully to familiarize
yourself with the required tools, materials, and installation
sequences. Follow the sections that pertain to your
particular installation. This will help you avoid costly
mistakes. In addition to proper installation, read all
operating and safety instructions.
·
All information in these instructions is based upon the
latest product information available at the time of
publication. Kohler China reserves the right to make
changes in product characteristics, packaging, or
availability at any time without notice.
·
These instructions contain important care, cleaning, and
warranty information -
consumer
.
·
Observe all local plumbing and building codes.
·
Carefully inspect the new urinal for damage.
·
Site preparation may require additional tools and
hardware.
CAUTION: Risk of personal injury or product
damage.
Handle with care. Vitreous china can break
or chip if the product is handled carelessly.
RECOMMENDED TOOLS AND MATERIALS (NOT SUPPLIED)
RECOMMENDED TOOLS AND MATERIALS (NOT SUPPLIED)
·
Open end/adjustable wrenches
·
Tape measure
·
Basin wrench
·
Pipe wrench
·
Square
·
Level
·
Pliers
·
Socket wrench with sockets
·
Screw driver
·
Seal tape
·
Connection wire
·
Wire cutter
·
Insulation tape
·
Bushing
·
Drill
·
Sealant
1237458-T01-A
please leave instructions for the
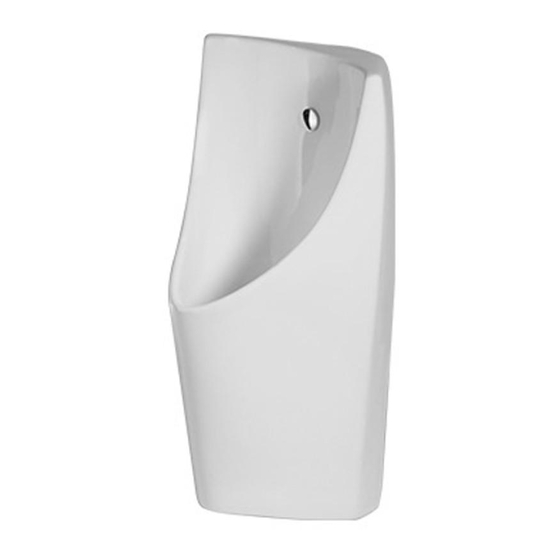
TOUCHLESS URINAL(REAR INLET)
K-5888T(3L/DC)/K-5888T-C05(3L/AC)
K-5888T-W(1L/DC)/K-5888T-WC05(1L/AC)
K-5888T-Y(0.5L/DC)/K-5888T-YC05(0.5L/AC)
·
·
·
·
·
·
·
/
·
·
·
·
·
·
·
·
·
·
·
·
·
·
·
-1-
STRUKTURA
INSTALLATION INSTRUCTIONS
(
)
Copyright Kohler China Ltd., 2014
(
)
-
, 2014
Advertisement
Table of Contents

Subscribe to Our Youtube Channel
Related Manuals for Kohler STRUKTURA K-5888T


Summary of Contents for Kohler STRUKTURA K-5888T
- Page 1 · · All information in these instructions is based upon the latest product information available at the time of publication. Kohler China reserves the right to make changes in product characteristics, packaging, or availability at any time without notice. ·...
-
Page 2: Specifications
Supply 2" NPT Tap 2" *600 *447 Wall Floor Kohler reserves the right to change marked dimensions without prior notice. Fig.1 · · Roughing-in dimensions are identical if using an optional 3" 3"outlet spud. 1237458-T01-A... -
Page 3: Prepare The Site
Notice: To ensure an effective flush performance, strongly recommended inner diameter of 25mm water supply (including water meter, valve, etc.) ) 0.18MPa ~0.55MPa is no less than 25mm, and supplied water pressure (sensor inlet dynamic pressure) is 0.18MPa ~0.55MPa. PREPARE THE SITE PREPARE THE SITE NOTE: If a pre-existing waste pipe will be used and will result... - Page 4 B. Install urinal 1. Test flushing. Remove regulator (supplied only for 3L urinal) when water pressure is too low. Back of Urinal Regulator Nozzle Fig.4 2. Connect inlet pipe and fill valve. 3. Hang the urinal onto the hangers. 4. Loosen the nut and drag the clamp towards center. Take out the fixture, valve and battery box assembly at the bottom.
- Page 5 C. Adjust the hanger 1. As shown in the picture below, firmly press the hanger with the bolt through the waist-shaped hole. Waist-shaped Hole Fixing Hole Fig.7 2. As shown in the picture below, if the position of the urinal needs to be adjusted, please take down the urinal and knock the hanger slightly to adjust its position upwards and downwards.
- Page 6 6. Screw on the drain lid(For first-time installation, the water may drain slowly. It can be improved by loosening the drain cover). The drain after being loosened is as shown. Fig.11 E. Install the manual button and magnetic valve 1. Install the magnetic valve. Fig.12 2.
- Page 7 G. Install and uninstall the Fixture, Valve Battery Box Assembly Unscrew the screws on the Fixture, Valve, Battery Box Assembly and withdraw the clamp. Remove the Fixture, Valve Battery Box Assembly from the urinal by moving it rightwards and then downwards. Fix the Fixture, Valve Battery Box Assembly back to the urinal by doing the above steps inversely.
- Page 8 B. When installing the power uint on the ceiling, please layout AC Power Unit Ceiling bushing according to Fig.19 and thread wire through the bushing. Fig.19: Connection sketch while installing power uint on the ceiling. Bushing CAUTION: One AC power unit can supply two sensors at most.
- Page 9 USER S GUIDE USER S GUIDE Illustrations The urinal will automatically flush after using. Fig.20 Replacement of Batteries When the batteries run out, please remove the Battery Box Assembly by following the instructions in step C and then replace the batteries. Screw M3 22 M3 22 Cover of Battery Box...
-
Page 10: Maintenance
Manual Flushing Press the manual button for about 1 second and the urinal will automatically flush once. Sensorless Cleaning Mode Enter the sensorless cleaning mode by pressing the manual button for about 3 seconds after the flushing is finished. The controller will ring twice every 2 seconds. -
Page 11: Troubleshooting
TROUBLESHOOTING Please make following checks before repair: Symptoms Probable causes Corrective actions 1. No power or mistake connected. 1. Check the power connect. No flushing 2. Not able to detect the urine. 2. See user's guide. 3. Out of electricity. 3.
Need help?
Do you have a question about the STRUKTURA K-5888T and is the answer not in the manual?
Questions and answers