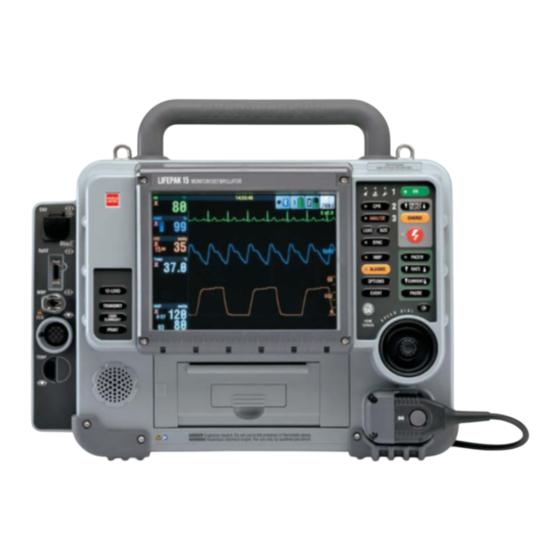
Physio Control LIFEPAK 15 Service Work Instructions
Hide thumbs
Also See for LIFEPAK 15:
- Service manual (527 pages) ,
- Operating instructions manual (285 pages) ,
- Upgrade manual (52 pages)
Advertisement
Quick Links
Title
Service Process Work Instruction LIFEPAK 15 V4 CO2 Upgrade
Doc Type
Service Process Document
Doc State
Released
Ref. Product
DMR:
This document is electronically signed in the Physio-Control, Inc. Product Lifecycle Management (PLM) System. Approvals can be
obtained from the PLM system which displays the selected approvers, their approval roles, and approval dates.
PROPRIETARY AND CONFIDENTIAL DOCUMENT FOR PHYSIO-CONTROL, INC. USE ONLY. This document is property of Physio-
Control and may not be used, reproduced, published or disclosed to others without authorization from Physio-Control.
Attachments (Optional):
Clarify step to set CO2 option to ON in Combined Loader "Configure" Operations section
Add image for LP15 Settings CO2 Option
Add image for step 15.3.3
Added Torque Driver conversion for 2 in-lbs.
Added Warnings and Cautions and General Requirements section
Remove steps that are included in the business process 7000180
Minor typographical edits and process reorder for clarification and alignment with Service Manual and other Process Work Instructions.
Update template to 7000743 Rev B
Refer to redlines for details of change
Template: 7000743_B
3313182
Ref. PFMEA:
Doc ID
3333964
State Date
3333967
Owner
Qty
Change Description
Page
1 of 43
Doc Rev
B
6/27/2019
Ref. PFMEA Rev:
B
Pages
Page Sequencing
Corporate
Advertisement

Related Manuals for Physio Control LIFEPAK 15


Summary of Contents for Physio Control LIFEPAK 15
- Page 1 Title Service Process Work Instruction LIFEPAK 15 V4 CO2 Upgrade Page 1 of 43 Doc Type Service Process Document Doc ID 3333964 Doc Rev Doc State Released State Date 6/27/2019 Ref. Product DMR: 3313182 Ref. PFMEA: 3333967 Ref. PFMEA Rev: This document is electronically signed in the Physio-Control, Inc.
- Page 2 These instructions are intended for authorized field service personnel who have reviewed the upgrade procedure and who are familiar with the LIFEPAK 15 device. The LIFEPAK 15 V4 Service Manual and the applicable Performance Inspection Procedure will be used in conjunction with this Service Upgrade Process Work Instruction.
-
Page 3: Documentation Required
Title Service Process Work Instruction LIFEPAK 15 V4 CO2 Upgrade Page 3 of 43 Doc Type Service Process Document Doc ID 3333964 Doc Rev Doc State Released State Date 6/27/2019 Ref. Product DMR: 3313182 Ref. PFMEA: 3333967 Ref. PFMEA Rev:... - Page 4 3333964 Rev: Title: Service Process Work Instruction LIFEPAK 15 V4 CO2 Upgrade 4 of 43 Shock Work Verify Tool Caution Orient Clean Scan Verify Hazard 1. Verify the Device Serial Number Verify that the device’s serial number label matches the serial number listed in the upgrade kit documentation.
- Page 5 3333964 Rev: Title: Service Process Work Instruction LIFEPAK 15 V4 CO2 Upgrade 5 of 43 Shock Work Verify Tool Caution Orient Clean Scan Verify Hazard 3. Disassembling the Case If applicable, remove the carrying case. Remove all cables and patient connections, and then remove the batteries.
- Page 6 3333964 Rev: Title: Service Process Work Instruction LIFEPAK 15 V4 CO2 Upgrade 6 of 43 Shock Work Verify Tool Caution Orient Clean Scan Verify Hazard 3. Disassembling the Case (continued) Remove Screws Lay the defibrillator face-down on a (7 places)
- Page 7 3333964 Rev: Title: Service Process Work Instruction LIFEPAK 15 V4 CO2 Upgrade 7 of 43 Shock Work Verify Tool Caution Orient Clean Scan Verify Hazard 3. Disassembling the Case (continued) Disconnect the P2 system/interface flex cable connector (W04) from the system PCB in the rear case.
- Page 8 3333964 Rev: Title: Service Process Work Instruction LIFEPAK 15 V4 CO2 Upgrade 8 of 43 Shock Work Verify Tool Caution Orient Clean Scan Verify Hazard 3. Disassembling the Case (continued) DANGER SHOCK HAZARD: Lethal voltages may be present even without operator action.
- Page 9 3333964 Rev: Title: Service Process Work Instruction LIFEPAK 15 V4 CO2 Upgrade 9 of 43 Shock Work Verify Tool Caution Orient Clean Scan Verify Hazard 4. Removing the System (A01) /Therapy (A04) PCB Assembly Disconnect ECG cable from J6 Disconnect the ECG Cable from J6 of the System PCBA.
- Page 10 3333964 Rev: Title: Service Process Work Instruction LIFEPAK 15 V4 CO2 Upgrade 10 of 43 Shock Work Verify Tool Caution Orient Clean Scan Verify Hazard 4. Removing the System (A01)/Therapy Screws (Scrap) (A04) PCB Assembly (Continued) 21300-001038 7 Places Remove the seven screws (REF 21300-...
- Page 11 3333964 Rev: Title: Service Process Work Instruction LIFEPAK 15 V4 CO2 Upgrade 11 of 43 Shock Work Verify Tool Caution Orient Clean Scan Verify Hazard 4. Removing the System (A01)/Therapy (A04) PCB Assembly (Continued) Disconnect PWR/SYS J1 – Press the connector locking tabs and...
- Page 12 3333964 Rev: Title: Service Process Work Instruction LIFEPAK 15 V4 CO2 Upgrade 12 of 43 Shock Work Verify Tool Caution Orient Clean Scan Verify Hazard 4. Removing the System (A01)/Therapy (A04) PCB Assembly (Continued) Carefully lift system/therapy PCB assembly to gain access to the cables below.
- Page 13 3333964 Rev: Title: Service Process Work Instruction LIFEPAK 15 V4 CO2 Upgrade 13 of 43 Shock Work Verify Tool Caution Orient Clean Scan Verify Hazard 5. Removing the OEM PCB Disconnect Power/ Disconnect Power/Therapy Cable (W02) Therapy Cable (REF 21300-001373) from J8 on the power...
- Page 14 3333964 Rev: Title: Service Process Work Instruction LIFEPAK 15 V4 CO2 Upgrade 14 of 43 Shock Work Verify Tool Caution Orient Clean Scan Verify Hazard 5. Removing the OEM PCB (Continued) SpO2 Option ONLY Disconnect SpO2/OEM Cable Disconnect the SpO2/OEM Cable (W21), if present.
- Page 15 3333964 Rev: Title: Service Process Work Instruction LIFEPAK 15 V4 CO2 Upgrade 15 of 43 Shock Work Verify Tool Caution Orient Clean Scan Verify Hazard 5. Removing the OEM PCB (Continued) Remove Nylon Standoff 21300-001402 Remove the nylon standoff from the OEM (Scrap) PCB.
- Page 16 3333964 Rev: Title: Service Process Work Instruction LIFEPAK 15 V4 CO2 Upgrade 16 of 43 Shock Work Verify Tool Caution Orient Clean Scan Verify Hazard 5. Removing the OEM PCB (Continued) J16 Connector Disconnect OEM Board from J16 Connector OEM PCBA on Power Board.
- Page 17 3333964 Rev: Title: Service Process Work Instruction LIFEPAK 15 V4 CO2 Upgrade 17 of 43 Shock Work Verify Tool Caution Orient Clean Scan Verify Hazard 6. Removing the Parameter Bezel Disconnect the power/contact PCB cable (W05) from the power board at J12.
- Page 18 3333964 Rev: Title: Service Process Work Instruction LIFEPAK 15 V4 CO2 Upgrade 18 of 43 Shock Work Verify Tool Caution Orient Clean Scan Verify Hazard J1 connection 6. Removing the Parameter Bezel (Continued) NIBP Option Only If present, disconnect the NIBP tube at connector fitting.
- Page 19 3333964 Rev: Title: Service Process Work Instruction LIFEPAK 15 V4 CO2 Upgrade 19 of 43 Shock Work Verify Tool Caution Orient Clean Scan Verify Hazard 6. Removing the Parameter Bezel (Continued) Remove the parameter bezel label from the bezel. Remove Parameter Remove the two bezel mounting screws.
- Page 20 3333964 Rev: Title: Service Process Work Instruction LIFEPAK 15 V4 CO2 Upgrade 20 of 43 Shock Work Verify Tool Caution Orient Clean Scan Verify Hazard 7. Installing the CO2 Inlet Connector CO2 Connector Cable Retainer 21300-007998 Set the CO2 connector adapter (REF 21300-...
- Page 21 3333964 Rev: Title: Service Process Work Instruction LIFEPAK 15 V4 CO2 Upgrade 21 of 43 Shock Work Verify Tool Caution Orient Clean Scan Verify Hazard 8. Removing the OEM Modules Bracket Remove 3 Assembly Screws Remove the three mounting bracket screws.
- Page 22 3333964 Rev: Title: Service Process Work Instruction LIFEPAK 15 V4 CO2 Upgrade 22 of 43 Shock Work Verify Tool Caution Orient Clean Scan Verify Hazard OEM/CO2 Cable 9. Installing the CO2 Module CO2 Module 21330-001217 21330-001535 Note: Shown with NIBP installed...
- Page 23 3333964 Rev: Title: Service Process Work Instruction LIFEPAK 15 V4 CO2 Upgrade 23 of 43 Shock Work Verify Tool Caution Orient Clean Scan Verify Hazard NIBP Option 9. Installing the CO2 Module (Continued) NIBP Option Only For the NIBP option, route the NIBP Cable...
- Page 24 3333964 Rev: Title: Service Process Work Instruction LIFEPAK 15 V4 CO2 Upgrade 24 of 43 Shock Work Verify Tool Caution Orient Clean Scan Verify Hazard 4.0 In- 9. Installing the CO2 Module (Continued) Place the OEM bracket into rear case and secure with three new mounting screws (REF 21300-007297);...
- Page 25 3333964 Rev: Title: Service Process Work Instruction LIFEPAK 15 V4 CO2 Upgrade 25 of 43 Shock Work Verify Tool Caution Orient Clean Scan Verify Hazard 9. Installing the CO2 Module (Continued) 9.10 Connect the exhaust tube to the rear case Connect CO2 outlet connector.
- Page 26 3333964 Rev: Title: Service Process Work Instruction LIFEPAK 15 V4 CO2 Upgrade 26 of 43 Shock Work Verify Tool Caution Orient Clean Scan Verify Hazard Place Parameter 10. Installing the Parameter Bezel Connect CO2 bezel on the rear Connectors 10.1 Clean away any adhesive residue on the...
- Page 27 3333964 Rev: Title: Service Process Work Instruction LIFEPAK 15 V4 CO2 Upgrade 27 of 43 Shock Work Verify Tool Caution Orient Clean Scan Verify Hazard 10. Installing the Parameter Bezel (Continued) SpO2 Option Only 10.4 If present, connect the SpO2 connector cable (W22) to SpO2 PCB (A16) at JP1.
- Page 28 3333964 Rev: Title: Service Process Work Instruction LIFEPAK 15 V4 CO2 Upgrade 28 of 43 Shock Work Verify Tool Caution Orient Clean Scan Verify Hazard 10. Installing the Parameter Bezel (Continued) 10.7 Reinstall the parameter bezel onto rear case with two new screws (REF 21300-006965);...
- Page 29 3333964 Rev: Title: Service Process Work Instruction LIFEPAK 15 V4 CO2 Upgrade 29 of 43 Shock Work Verify Tool Caution Orient Clean Scan Verify Hazard 11. Installing the OEM PCB Power PCBA 11.1 Position OEM PCBA inside the case and...
- Page 30 3333964 Rev: Title: Service Process Work Instruction LIFEPAK 15 V4 CO2 Upgrade 30 of 43 Shock Work Verify Tool Caution Orient Clean Scan Verify Hazard 11. Installing the OEM PCB (Continued) 11.3 Install four new screws (REF 21300- 001038); torque to 6.8 in-lb.
- Page 31 3333964 Rev: Title: Service Process Work Instruction LIFEPAK 15 V4 CO2 Upgrade 31 of 43 Shock Work Verify Tool Caution Orient Clean Scan Verify Hazard 11. Installing the OEM PCB (Continued) 11.5 Connect the CO2/OEM cable (W26) (REF 21330-001217) to J27 and ensure locking feature is engaged.
- Page 32 3333964 Rev: Title: Service Process Work Instruction LIFEPAK 15 V4 CO2 Upgrade 32 of 43 Shock Work Verify Tool Caution Orient Clean Scan Verify Hazard 11. Installing the OEM PCB (Continued) Note: The W01 – power/system PCB cable is OEM Shield (V4) under the OEM shield.
- Page 33 3333964 Rev: Title: Service Process Work Instruction LIFEPAK 15 V4 CO2 Upgrade 33 of 43 Shock Work Verify Tool Caution Orient Clean Scan Verify Hazard 12. Installing the System (A01)/ Therapy Connect PWR/SYS Cable to J1 (A04) PCB Assembly 12.1 Line up the system/therapy assembly with rear case.
- Page 34 3333964 Rev: Title: Service Process Work Instruction LIFEPAK 15 V4 CO2 Upgrade 34 of 43 Shock Work Verify Tool Caution Orient Clean Scan Verify Hazard 12. Installing the System (A01)/Therapy (A04) PCB Assembly (Continued) 12.5 Connect P22 of the therapy cap wire harness (W24) to J22 of cap discharge PCB assembly.
- Page 35 3333964 Rev: Title: Service Process Work Instruction LIFEPAK 15 V4 CO2 Upgrade 35 of 43 Shock Work Verify Tool Caution Orient Clean Scan Verify Hazard 12. Installing the System (A01)/Therapy (A04) PCB Assembly (Continued) 12.6 Align System/Therapy PCB with inserts in Rear Cases.
- Page 36 3333964 Rev: Title: Service Process Work Instruction LIFEPAK 15 V4 CO2 Upgrade 36 of 43 Shock Work Verify Tool Caution Orient Clean Scan Verify Hazard Screws 21300-001038 7 Places 12. Installing the System (A01)/Therapy (A04) PCB Assembly (Continued) In-Lbs. 12.9 Line up the system PCB with the inserts in the rear case, and secure with seven new screws (REF 21300-001038);...
- Page 37 3333964 Rev: Title: Service Process Work Instruction LIFEPAK 15 V4 CO2 Upgrade 37 of 43 Shock Work Verify Tool Caution Orient Clean Scan Verify Hazard 12. Installing the System (A01)/Therapy (A04) PCB Assembly (Continued) 12.11 Connect the W07 – ECG cable from the Connect ECG parameter bezel to J6 of the system PCB.
- Page 38 3333964 Rev: Title: Service Process Work Instruction LIFEPAK 15 V4 CO2 Upgrade 38 of 43 Shock Work Verify Tool Caution Orient Clean Scan Verify Hazard 13. Reassembling the Case Therapy Ribbon 13.1 Position the front case over the rear case.
- Page 39 3333964 Rev: Title: Service Process Work Instruction LIFEPAK 15 V4 CO2 Upgrade 39 of 43 Shock Work Verify Tool Caution Orient Clean Scan Verify Hazard 13. Reassembling the Case (Continued) 13.6 Install 14 new screws (REF 21300-000777); torque to 10.0 in-lb using a P2 bit.
- Page 40 3333964 Rev: Title: Service Process Work Instruction LIFEPAK 15 V4 CO2 Upgrade 40 of 43 Shock Work Verify Tool Caution Orient Clean Scan Verify Hazard 14. Installing the Label Set 14.1 Clean away any adhesive residue on the parameter bezel with isopropyl alcohol.
- Page 41 3333964 Rev: Title: Service Process Work Instruction LIFEPAK 15 V4 CO2 Upgrade 41 of 43 Shock Work Verify Tool Caution Orient Clean Scan Verify Hazard 15. Configuration Upgrade – CO2 Installation 15.1 Install a fully charged battery onto the Images are examples only LIFEPAK 15 monitor/defibrillator 15.2 Turn the device on.
- Page 42 3333964 Rev: Title: Service Process Work Instruction LIFEPAK 15 V4 CO2 Upgrade 42 of 43 Shock Work Verify Tool Caution Orient Clean Scan Verify Hazard 15. Configuration Upgrade -CO2 Installation (Continued) 15.3.3 For the Loader Operation section, select menu options Modules, and then select software dash number.
- Page 43 3333964 Rev: Title: Service Process Work Instruction LIFEPAK 15 V4 CO2 Upgrade 43 of 43 Shock Work Verify Tool Caution Orient Clean Scan Verify Hazard 15. Configuration Upgrade -CO2 Installation (Continued) 15.3.5 Select the CO2 pull-down and select B=CO2. 15.3.6 A requirement for LIFEPAK 15 Version 4...
Need help?
Do you have a question about the LIFEPAK 15 and is the answer not in the manual?
Questions and answers