
Related Manuals for Anritsu MD1230B


Summary of Contents for Anritsu MD1230B
- Page 1 Quick Start Guide MU120131A/32A PON Quick Start Guide MD1230B Data Quality Analyzer...
-
Page 2: Table Of Contents
MU120131A/32A PON Quck Start Guide Contents Introduction ..........................2 1.1. Structure of Guide ......................2 Starting ............................3 2.1. Installing MD1230B ......................3 2.2. Installing Modules ......................3 2.3. Power-on/off ........................3 2.4. Starting ..........................4 Shared Settings ......................... 5 3.1. -
Page 3: Introduction
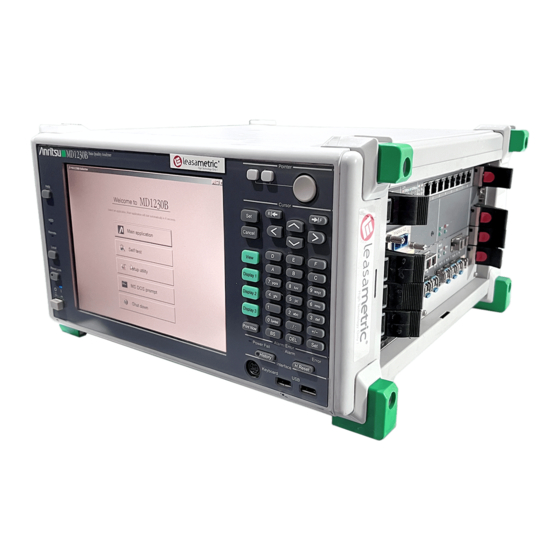
MU120131A/32A PON Quck Start Guide 1. Introduction The MD1230/MP1590 family (hereafter MD1230B) is a measuring instruments designed for next-generation networks. This documents explains its applications for PON used in increasingly common FTTH networks (B-PON, E-PON (GE-PON), G-PON). First, it explains the methods for performing simultaneous one-way and two-way End-to-End measurement of all the ONU and OLT equipment in a 32-branch PON system with a single measuring instrument. -
Page 4: Starting
Install the MD1230B on a flat and stable surface. The MD1230B has a cooling fan in the back panel. Position the MD1230B so that it is at least 10 cm from walls and obstructions to allow sufficient cooling air flows. -
Page 5: Starting
MU120131A/32A PON Quck Start Guide 2.4. Starting Main start-up At power-on, the Selector screen shown above is displayed. Click “Main application”. The screen changes to the Measurement screen automatically after about 15 seconds. -
Page 6: Shared Settings
MU120131A/32A PON Quck Start Guide 3. Shared Settings This section explains the procedures for reserving and setting ports. 3.1. Obtaining Ownership Before starting measurement, the ports to be measured must be reserved. Right-click Unit1 and select “Reservation...” . The ports of usable modules that can be used are listed as shown below;... - Page 7 MU120131A/32A PON Quck Start Guide Right-click Port1(Unit1:2:1) and select “Port Setting...”. Open the “IPv4” selector screen and set “IPv4 Address:”, “Netmask:”, and ‘Gateway:”. (Any values can be set but here “192.168.0.1”, “255.255.255.0”, and “192.168.0.255:” are used as examples.) ...
-
Page 8: End-To-End Measurement
MU120131A/32A PON Quck Start Guide 4. End-to-End Measurement This section explains the end-to-end measurement procedure by connecting the measuring instrument to the OLT and the outside of each ONU. In concrete terms, this measurement checks that data is flowing normally to each ONU by measuring Throughput and Latency by counting Bit Rate and number of Frames. -
Page 9: Creating Olt-Side Tx Frames (And Setting Olt->Onu Stream (Down Signal))
MU120131A/32A PON Quck Start Guide 4.2. Creating OLT-side Tx Frames (and Setting OLT->ONU Stream (Down Signal)) (Objective) Using 32-branch PON, create test signal emulating real network with different payloads in each Frame (Procedure) Increment the MAC address for each ONU address and create a multiple-address stream. - Page 10 MU120131A/32A PON Quck Start Guide Select “Jump to Stream” at “Distribution:” of Stream Control and “Frame per Burst:” to 32. (This returns to the default stream after sending 32 streams.) Setting “Inter Frame Gap:” changes the Tx rate. Here, select “Fixed” at ”Inter Frame Gap:”...
- Page 11 MU120131A/32A PON Quck Start Guide service). Set Preamble and DA, SA at [Ethernet] of Frame Setting. Here Preamble is left unchanged as the default. Set “Destination Address” to “Increment”, “Value:” to “00-00-00-00-00-01” and “Mask:” to “FF-FF-FF-FF-FF-FF”. (Jump to Stream is performed for 32 streams; data can be set for 32 ONU addresses (00-00-00-00-00-01~00-00-00-00-00-20).) ...
- Page 12 MU120131A/32A PON Quck Start Guide “Mask:” to “255.255.255.255”. (IP addresses are incremented according to each MAC address increment.) Insert the PRBS pattern at [Data Fields] of Frame Setting. Put a checkmark in “Data Field1” at “Fields:”, and select “Test Frame” at “Pattern” of “Data Field1 Data”.
-
Page 13: Creating Onu-Side Tx Frames (And Setting Onu->Olt Stream (Up Signal))
MU120131A/32A PON Quck Start Guide 4.3. Creating ONU-side Tx Frames (and Setting ONU->OLT Stream (Up Signal)) (Objective) Using 32-branch PON, create test signal for when each ONU has 1/32 equal share of network bandwidth. (As in section 4.2. create a test signal emulating an actual network in which the payload of each frame is different.) (Procedure) Create an OLT address stream from each ONU Input PRBS pattern and perform BER measurement. - Page 14 MU120131A/32A PON Quck Start Guide Select “Continuous” at “Distribution:” of Stream Control. (For testing, the signal must be flowing.) Setting “Inter Frame Gap:” changes the send rate. Here, select “Fixed” at “Inter Frame Gap:”, and set “Unit” of “Value:” to “%” and set “3.125%”. (This setting divides the full wire rate bandwidth into 32 equal parts for the 32 ONU units.) ...
- Page 15 MU120131A/32A PON Quck Start Guide Set Preamble and DA, SA at [Ethernet] of Frame Setting. Here Preamble is left unchanged as the default. Set “Destination Address” to “Static”, and “Value:” to “00-00-00-00-00-24”. Set “Source Address” to “This port” (sets ONU port setting addresses at OLT address).
- Page 16 MU120131A/32A PON Quck Start Guide Insert the PRBS pattern at [Data Fields] of Frame Setting. Put a checkmark in “Data Field1” at “Fields:” and select “Test Frame” at “Pattern” of “Data Field1 Data”. Press “OK” to close the Setting screen. (2) Settings for ONU2~32 ...
- Page 17 MU120131A/32A PON Quck Start Guide Press “Paste” at the Unit2 Port2 □Tx Stream screen. Similarly, paste (the created stream) to Unit2 Port3~12, Unit3 Port1~12, and Unit4 Port1~8. (Copy & Paste is possible because MAC SA and IPv4 SA both reference shared port settings.)
-
Page 18: Checking Flow From Each Onu (Setting OltOnu Tx/Rx Counter)
MU120131A/32A PON Quck Start Guide 4.4. Checking Flow from Each ONU (Setting OLTONU Tx/Rx Counter) (Objective) Checking that throughput of signal from each ONU is at set value (flowing normally) (Procedure) Use the multiflow counter to count the Bit Rate and number of Frames of each stream at the OLT side. - Page 19 MU120131A/32A PON Quck Start Guide (2) Opening Field Setting Screen Open the Flow Counter screen and select either Tx Frame or Rx Frame. Here, we are performing settings for Rx Frames, so set “Tx/Rx:” to “Rx”. Open the “Mode:” tab and select either “Result” (displays Accumulate results when counter stops) or “Monitor”...
- Page 20 MU120131A/32A PON Quck Start Guide (3) Selecting Field Conditions At the [Field Setting] screen, select the allocation conditions. Here, first, allocation is performed using the destination address so select “MAC DA (32bit)” and press “Edit…”. When “MAC DA” is “00-00-00-00-00-24”, looking at the last 16 bits of “-00-24”, when “Format:”...
- Page 21 MU120131A/32A PON Quck Start Guide (4) Editing Field Conditions The following screen opens when the “Edit…” button is pressed, so set MAC DA. (5) Adding Field Conditions Press the “Add” button and add the Field conditions.
- Page 22 MU120131A/32A PON Quck Start Guide (6) Selecting Added Field Conditions Select additional allocation conditions at the [Field Setting] screen. Here, allocation is performed using MAC SA, so select “MAC SA (48bit)” and press the “Edit…” button. ...
- Page 23 Here 32 there are flows from 32 ONUs so set “Number of Flow ID” to 32 and press “Edit.. ”. *With one MD1230B unit, the Flow number can be set to 256 minus the number of ports selected at “Mode: Monitor” For example, when the monitored port number is 1, up to 255 flows can be...
- Page 24 MU120131A/32A PON Quick Start Guide Select “MAC DA” for “No.1” and copy the value by right-clicking. Select “MAC DA” for “No.2”~“No.32” and paste the copied value to set by right-clicking. Select “MAC SA” for “No.1”~“No.32” and the value incremented from 1 is input when “Increment”...
- Page 25 MU120131A/32A PON Quick Start Guide Setting Counter Display Press the “Display Option” icon at the □Counter screen to open the setting screen. Set which measurement items are to be displayed by placing checkmarks. Here, select “Flow” at “Category:” and place checkmarks at “Received Bit Rate [Mbit/s] (Flow)”, “Received Rate [%] (Flow)”...
- Page 26 MU120131A/32A PON Quick Start Guide Displaying Measurement Results The Counter Log starts. At the Counter screen, start Counter. Start Transmit at ONU1~32. Check that the Current value [%] for each Rx Frame of each flow is 3.125% and the same as the set value.
-
Page 27: Checking Olt→Onu (Down Signal) Flow~Setting Custom Counter
MU120131A/32A PON Quick Start Guide 4.5. Checking OLT→ONU (Down SIgnal) Flow~Setting Custom Counter (Objective) Check whether or not there is any Frame loss in the signal from OLT to ONU (the flow is normal). (Procedure) Group the ports and measure the Frame Loss using Custom counter. (Results, Goal) Count of total flow at multipe ports (OLT→ONU (Down signal) ... - Page 28 MU120131A/32A PON Quick Start Guide Press “OK” to close the screen. Setting Custom Counter Select Group1 and press the Custom counter display setting button (blue hammer icon) at the Counter screen to open the screen. At the “Custom Counter Setting” screen, place checkmarks in all items and press...
- Page 29 MU120131A/32A PON Quick Start Guide “OK”. When the Custom counter display is selected, the screen appears as follows. Displaying Measurement Results The Counter Log starts. At the Counter screen, start Counter and Transmit. If there is a difference between the counts of the OLT Tx Frames and total of Rx Frame counts for each of the ONUs, Frame loss has occurred and “Frame Loss”...
-
Page 30: Testing Load
MU120131A/32A PON Quick Start Guide 4.6. Testing Load (Objective) To perform network load testing to evaluate the PON system performance (Procedure) Vary the ONU1 Tx rate. (Results, Goal) Generate network load and measure BER Increasing load of OLT-side Tx Frames ... - Page 31 MU120131A/32A PON Quick Start Guide “Unit” of “Max:”. (This varies the band dynamically.) Put a checkmark in VLAN and press “Edit...”. The data transmission priority can be increased by increasing “User Priority:”. Here set the priority to 7 so as to secure the band maximum priority.
- Page 32 *If there is any difference between the OLT and total counts for the ONU Tx/Rx, errors have occurred. Monitor the “Sequence Error” counts and measure the BER at these times. Finishing Measurement Stop Transmit and counting. The logs are stored in the path C:¥Program Files¥Anritsu¥MX123001A¥Main¥LOG.
-
Page 33: Monitoring E-Pon Systems
MU120131A/32A PON Quick Start Guide 5. Monitoring E-PON Systems This part explains the procedure for monitoring E-PON systems. In concrete terms, we shall capture PON system Frames and check that MPCP (Multi-Point Control Protocol) control and the OAM (Operations, Administration, and Maintenance) function are operating correctly. -
Page 34: Checking Mpcp Control And Oam Function
MU120131A/32A PON Quick Start Guide impact on the optical signal. Ensure that all ONUs and couplers after the splitter are always connected to the equipment or are terminated. 5.2. Checking MPCP Control and OAM Function (Objective) Checking MPCP control (P2MP dicovery when new ONU added to PON system) and OAM function indicating problems when fault occurs (Procedure) Monitor the MCPC signal in the E-PON system and monitor the OAM signal while generating load at End-to End measurement and inserting errors. - Page 35 MU120131A/32A PON Quick Start Guide Checking MPCP Control (P2MP Discovery) Select the port to be monitored (Unit5 Port1 (Unit1:5:1) here). Open the □Capture screen and press the capture setting icon (hammer mark) to open the setting screen. ...
- Page 36 MU120131A/32A PON Quick Start Guide Open “Preset Pattern” of “Pattern 1” and select “MPMC”. Press “OK” to close the screen. Perform setting for Unit5 Port2 in the same manner. With the ONU not connected, start capture for the port to be monitored (link port) (Unit5 Port1, 2).
- Page 37 MU120131A/32A PON Quick Start Guide Group Unit5 Port1 and 2. The results appear as below. Checking OAM Function Select the port to be monitored (Unit5 Port1 (Unit1:5:1) here). Open the □Capture screen and press the capture setting icon (hammer mark) to open the setting screen.
- Page 38 MU120131A/32A PON Quick Start Guide Place a checkmark in “On” at the Filter screen and change “Pattern 1:” of “Condition” to “Match”. Press “Edit” at “Filter/Trigger/Counter Conditions” to perform setting. Open “Preset Pattern” of “Pattern 1” and select “802.3 OAM”. ...
- Page 39 MU120131A/32A PON Quick Start Guide Start capture of the port to be monitored (Unit5 Port1, 2). Perform the End-to-End load test described in section 4.6 and capture the fault notification signal at a fault. The results appear as below.
-
Page 40: Application Example 1: Verifying Dba Function
MU120131A/32A PON Quick Start Guide 5.3. Application Example 1: Verifying DBA Function (Objective) Verifying OLT DBA function (checking band priority operating normally) (Procedure) Count and monitor OAM signals while changing the priority of the VLAN tag for End-to-End measurement and performing QoS measurement. (Results, Goal) Counting E-PON Frames *For verification, perform monitoring with the PON system encoding set to off. - Page 41 MU120131A/32A PON Quick Start Guide (2) Opening Field Setting Screen Open the Other screen and choose “VLAN Tag” at “Quality of Service Counter”. Press “OK” to close the screen. Setting Counter Display Press the “Display Option” icon at the □Counter screen to open the setting screen.
- Page 42 MU120131A/32A PON Quick Start Guide Place checkmarks to set which measurement items to display. In this example, select “QoS” at “Category:” and either put checkmarks in all items at “Counters:” or press “Check All”. Press “OK” to close the screen. ...
-
Page 43: Application Example 2: Verifying Qos
MU120131A/32A PON Quick Start Guide 5.4. Application Example 2: Verifying QoS (Objective) Confirming whether service provider’s guaranteed delay (10 ms) is problematic with PON system (Procedure) Measure the Latency of each signal. (Results, Goal) Measuring Latency *For verification, perform monitoring with the PON system encoding set to off. ... - Page 44 MU120131A/32A PON Quick Start Guide Press the setting icon (blue hammer symbol) to open the setting screen. Place a checkmark in “On” at the Filter screen and change “Pattern 1:” for “Condition” to “Match”. Press “Edit...” at “Filter/Trigger/Counter Conditions” and perform setting.
- Page 45 MU120131A/32A PON Quick Start Guide...
- Page 46 MU120131A/32A PON Quick Start Guide Open “Preset Pattern” of “Pattern 1” and select “MAC SA”. Press “OK” to close the screen. Measurement starts. The service providers guaranteed delay time (10 ms or less) is verified.
-
Page 47: Summary
Product Features The MD1230B provides all-in-one support for evaluating the functions of all ONUs and the OLT in a 32-branch PON system. It supports capture and decoding of IEEEE802.3-compliant OAM and MPCP frames, including preamble in E-PON systems. - Page 48 No. 1 Science Museum Road, Tsim Sha Tsui East, Anritsu A/S (Service Assurance) Phone: +55-11-3283-2511 Kowloon, Hong Kong, P.R. China Fax: +55-11-3288-6940 Anritsu AB (Test & Measurement) Phone: +852-2301-4980 Fax: +852-2301-3545 • Kay Fiskers Plads 9, 2300 Copenhagen S, Denmark Mexico •...
Need help?
Do you have a question about the MD1230B and is the answer not in the manual?
Questions and answers