Advertisement
Quick Links
Advertisement

Subscribe to Our Youtube Channel
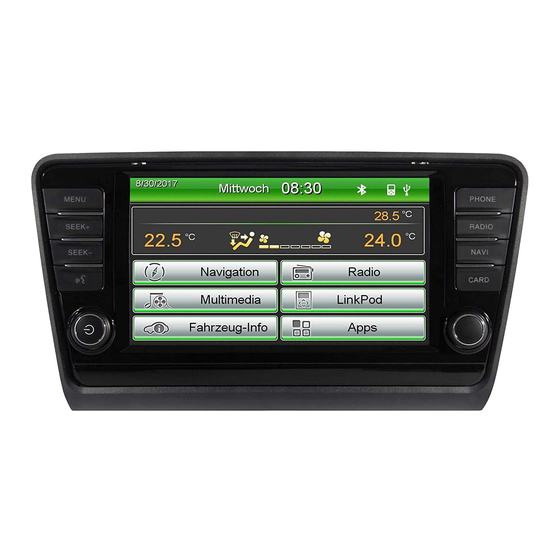
Summary of Contents for ESX VN830 SK-OC3
- Page 1 VN830 SK-OC3...
- Page 2 IMPORTANT NOTE FOR YOUR VEHICLE‘S SERVICE STATION After installation of the ESX Naviceiver inside the vehicle, the device is not recognized as the original radio and causes an error message in the fault memory of the vehicle (depending on the vehicle, for example „Infotainment...
- Page 3 „VNA-TM DAB/DAB2“ und der Verwendung der originalen Skoda DAB Antenne. WICHTIGER HINWEIS FÜR IHREN FAHRZEUGSERVICE/IHRE FAHRZEUGWERKSTATT Nach Installation des ESX Naviceivers im Fahrzeug wird dieser nicht als Original-Radio erkannt und verursacht im sogenannten Ereignis- oder Fehlerspeicher des Fahrzeuges eine Fehlermeldung (fahrzeugabhängig z.B. „Infotain- ment CAN, keine Kommunikation“).
- Page 4 SCOPE OF DELIVERY / Lieferumfang ITEM FIGURE QUANTITY Artikel Abbildung Anzahl MAIN DEVICE Hauptgerät STYLUS Markierstift MICRO SD CARD 8GB INKL: NAVIGATION SOFTWARE MicroSD Speicherkarte 8GB Navigationssoftware REMOTE CONTROL Fernbedienung G71-AUD0205 AUDIO / VIDEO / AV INPUTS Audio / Video / AV-Eingänge G71-MNV0012 AUDIO OUTPUTS 5.1 WITH REMOTE TURN ON Audio-Ausgänge 5.1 mit Einschaltleitung...
- Page 5 SCOPE OF DELIVERY / Lieferumfang ITEM FIGURE QUANTITY Artikel Abbildung Anzahl G71-CCD0072 CAMERA CONNECTIONS Kamera-Anschlüsse G71-MNV0011 AUDIO/VIDEO OUTPUTS 1/2 Audio/Video-Ausgänge G71-USB0107 USB PORT 1 W/QUICK CHARGE FUNCTION USB-Anschluss 1 mit Schnellldadefunktion G71-USB0078 USB PORT 2 USB-Anschluss 2 G71-USB0065 ADAPTOR FOR FACTORY USB PORT Adapter für werksseitigen USB-Anschluss GPS ANTENNA GPS Antenne...
- Page 6 CONNECTION DIAGRAM / Anschlussdiagramm AM/FM ANTENNA AM/FM Antenne AUDIO / VIDEO / AV INPUTS Audio / Video / AV-Eingänge AUDIO OUTPUTS 5.1 WITH REMOTE TURN ON USB PORT 1 QUICK CHARGE Audio-Ausgänge 5.1 mit Einschaltleitung USB-Anschluss 1 SPECIFIC CONNECTOR OF THE VEHICLE Schnellladefunktion Fahrzeugspezifischer Stecker USB PORT 2...
- Page 7 ENGLISH IMPORTANT NOTE: Usually the OEM quadlock plug of the vehicle can be used „plug and play“with the ESX Naviceiver, without chang- ing the PIN configuration in any way. Under certain circumstances, e.g. Installation in not appropriated vehicles, for functional testing outside a vehicle or for demonstration purposes, the device can also be operated without the CANBUS signal by using the terminals GND, ACC and BATT.
- Page 8 The „GND“ and „CCD POWER OUT“ cables must not be connected mandatory, but can be used as a power supply for the camera. Now activate the „CCD-Camera“ checkbox under APPS -> OPTIONS -> DISPLAY at the ESX device. IMPORTANT NOTE FOR ORIGINAL OEM CAMERAS: There is no need for a special interconnection by using some OEM rear view cameras (depending on the vehicle).
- Page 9 INSTALLATION NOTES / Installationshinweise DEUTSCH WICHTIGER HINWEIS: In der Regel wird der OEM Quadlock Stecker des Fahrzeugs „plug and play“ an den ESX Naviceiver ange- schlossen, ohne dass die PIN Belegung in irgendeiner Weise geändert werden muss. Unter bestimmten Umständen, z.B. Installation in nicht vorgesehenen Fahrzeugen, zur Funktionsprüfung außerhalb des Fahrzeugs oder zu Demonstrationszwecken kann das Gerät...
- Page 10 100mA. 12V werden ausgegeben, sobald an „REVERSE IN“ 12V anliegen. FRONT CCD-POWER OUT rot 12V Ausgang für Stromversorgung einer Nachrüst-Frontkamera, max. 500mA. 12V werden ausgegeben, sobald das ESX Gerät in Betrieb ist. Stellen Sie sicher, dass Ihre Kamera für den Dauerbetrieb geeignet ist. schwarz Masseanschluss der Stromversorgung einer optionalen Kamera (Front u.
- Page 11 USB flash drive. If it does not work, disconnect immediately to prevent damage. *Disclaimer: Audio Design GmbH and/or ESX Media Systems does not assume any warranty for defective electronics and their conse- quential damage if the connector is simply connected without testing.
- Page 12 Depending on the type of vehicle the CAN-BUS sends the information of the handbrake signal to the ESX device. If this is not the case, the included cable (5, BRAKE IN) needs to be connected. The signal must be connected with ground while the handbrake is applied.
- Page 13 INSTALLATION EXAMPLE / Einbaubeispiel ŠKODA OCTAVIA 3 (Typ 5E, 2012 - 2016) + OEM-RADIO BOLERO The following installation guide refers to a vehicle with a computing unit/CD drive in the glove compartment. If your vehicle does not have one, you can skip this section in the installation guide. Die folgende Einbaubeispiel bezieht sich auf ein Fahrzeug mit Recheneinheit/CD-Laufwerk im Handschuhfach.
- Page 14 INSTALLATION EXAMPLE / Einbaubeispiel ŠKODA OCTAVIA 3 (Typ 5E, 2012 - 2016) + OEM-RADIO BOLERO 5.) Remove the two upper and the two lower screws (Torx 20) of the glove compartment. 5.) Entfernen Sie die beiden oberen und die beiden unteren Schrauben (Torx 20) des Handschuhfaches.
- Page 15 USB-Anschluss und setzen Adapter “VNA-OC3-USB” in die originale Plastikblende ein. 11.) Now route the connection cable sets of new ESX device (refer to page 4-5) inside the vehicle to the desired location and connect these accordingly with the sockets on the new ESX device. If you want to use a maybe existing original microphone, use the provided cable #15.
- Page 16 ESX Car Media Systems · Audio Design GmbH Am Breilingsweg 3 · D-76709 Kronau/Germany Tel. +49 7253 - 9465-0 · Fax +49 7253 - 946510 www.esxnavi.de - www.audiodesign.de ©2017 All Rights Reserved...


Need help?
Do you have a question about the VN830 SK-OC3 and is the answer not in the manual?
Questions and answers