
Related Manuals for Addonics Technologies Jupiter ExDrive


Summary of Contents for Addonics Technologies Jupiter ExDrive
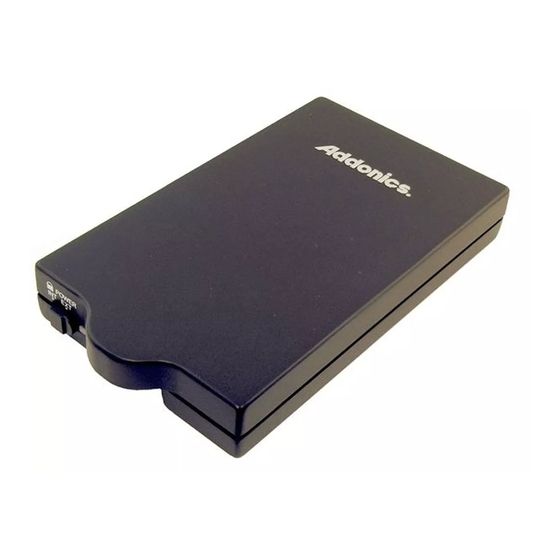
- Page 1 Addonics T E C H N O L O G I E S Jupiter ExDrive For the following models: AJEDIU, AJEDIF, AJEDIS, AJEDIC AJEDSAU, AJEDSAF, AJEDSAS, AJEDSAC User’s Guide Version 1.0...
-
Page 2: Fcc Warning
Addonics reserves the right to revise or update its products, software, or documentation without obligation to notify any individual or entity. Addonics Technologies – Jupiter ExDrive User’s Guide v1.0... -
Page 3: Table Of Contents
Contents.................... 2 Chapter 1 General Information ............3 Features................3 Chapter 2 Jumper Setting for Jupiter ExDrive ........ 4-5 For 2.5” IDE Hard Disk Drive ......... 4 For 2.5” SATA Hard Disk Drive ........5 Chapter 3 Hardware Installation Guide .......... 6-9 Chapter 4 Attaching USIB Interface Cable ........ -
Page 4: Chapter 1 General Information
Chapter 1 General Information The Addonics Technologies Jupiter ExDrive is a portable 2.5” Hard Disk Drive kit. The unit is external and uses the USB2.0, Firewire/iLink, CardBus and Serial ATA interfaces. Features • Stylished and rugged black anodized aluminum housing •... -
Page 5: Chapter 2 Jumper Setting For Jupiter Exdrive
Chapter 2 Jumper Settings Inside the Jupiter ExDrive Drive Case A. If the Jupiter ExDrive will be used externally with the external AC adapter, the switch from the case must be switch to the right, labeled EXT to grab power from external power supply. -
Page 6: For 2.5" Sata Hard Disk Drive
FOR 2.5” SATA HARD DISK DRIVE J2 Pin Definition for USIB Interface Pin 3 - Pin 5 shorted Addonics Technologies – Jupiter ExDrive User’s Guide v1.0... -
Page 7: Chapter 3 Hardware Installation Guide
2.5” hard drive shock absorbers IDE connector switch bottom cover screw FOR 2.5” SATA HARD DISK DRIVE top cover 2.5” SATA hard drive shock absorbers SATA connector switch bottom cover screw Addonics Technologies – Jupiter ExDrive User’s Guide v1.0... - Page 8 Align the SATA connector in the 2.5” hard drive with the SATA connector on the PCB. Push the hard drive till the connector pins on the har d drive is fully seated inside the connector on the PCB. Addonics Technologies – Jupiter ExDrive User’s Guide v1.0...
- Page 9 Step 6 Put the top cover on by holding it in near vertical position and sliding th e two metal clips inside the two small slots on the rear of the bottom cover. Addonics Technologies – Jupiter ExDrive User’s Guide v1.0...
- Page 10 Lower the front of the top cover and making sure the two covers lined up properly. Tighten the small retaining screw on the front of the bottom cover to close the enclosure. Addonics Technologies – Jupiter ExDrive User’s Guide v1.0...
-
Page 11: Chapter 4 Attaching Usib Interface Cable
Chapter 4 Attaching USIB interface cable USIB connector for use with the Addonics USIB interface cable External power input jack (for use as external hard drive) Addonics USIB interface cable Addonics Technologies – Jupiter ExDrive User’s Guide v1.0... -
Page 12: Chapter 5 Usb2.0 Usib Interface Cable Driver Installation
Chapter 5 USB2.0 USIB Cable (Model: AAUSBC-309) Note: USB Jupiter ExDrive is Plug and Play under Windows XP, 2000 and 98Me. There is no third party driver needed. • Since USB 2.0 Hi-Speed is an evolution of the existing USB 1.1 specification, it is fully forward and backward compatible with current USB systems. - Page 13 4. Click Yes to restart your system to make changes take effect. 5. Double click My Computer icon and there should be an extra drive letter for the Jupiter ExDrive drive. You may now access the drive. Addonics Technologies – Jupiter ExDrive User’s Guide v1.0...
-
Page 14: Serial Ata Usib Interface Cable Driver Installation
Serial ATA Controller card/chip. It is plug and play. Disk Management for Windows 98 Note: Refer to the SATARAID Management Utility Manual SATARAID Manual V1.30 (for non-RAID5 Controllers) found in the Addonics Technologies website Addonics Technologies – Jupiter ExDrive User’s Guide v1.0... -
Page 15: Firewire Usib Interface Cable Driver Installation
FIREWIRE USIB Cable (Model: AAFWC-406) Note: Firewire Jupiter ExDrive is Plug and Play under Windows XP, 2000 and 98Me. There is no third party driver needed. Driver Installation for Win98 and Win98SE After plugging in the cable some system might prompt you for Win98SE CD, in case you don’t have the Win98SE CD and the wizard prompts you for:... -
Page 16: Cardbus Usib Interface Cable Driver Installation
1. Insert the Addonics Driver Disk in the CDROM drive. The Addonics Driver Disk window opens. 2. Select Drivers > Interface Cables Drivers > CARDBUS. 3. The Winzip Self-Extractor –CardBus V617.exe window opens. Unzip file in My Documents. Addonics Technologies – Jupiter ExDrive User’s Guide v1.0... - Page 17 4. Click Yes to restart your system to make changes take effect. 5. Double click My Computer icon and there should be an extra drive letter for the Jupiter ExDrive drive. You may now access the drive. Addonics Technologies – Jupiter ExDrive User’s Guide v1.0...
- Page 18 8. The Locate File window opens, locate ‘C:\My Documents\CardBus V617\WINXP2K\addide2k.inf’ file, click Open, then click OK. 9. The Hardware installation windows opens, click Continue Anyway. 10. In the Wizard: Completing the Found New Hardware Wizard, click Finish. Addonics Technologies – Jupiter ExDrive User’s Guide v1.0...
-
Page 19: How To Use Disk Management
Click the file system that you want to use in the File system box. You can change the disk allocation unit siz e, and then specify whether to perform a quick format, or enable file and folder compression on NTFS volumes. Click Next. Addonics Technologies – Jupiter ExDrive User’s Guide v1.0... - Page 20 NTFS volumes. 4. Click OK. 5. Click OK when you are prompted to format the volume. The format process starts. Addonics Technologies – Jupiter ExDrive User’s Guide v1.0...
-
Page 21: Technical Support & Contact Information
World Wide Web Site: Contact Information Addonics Technologies 2466 Kruse Drive San Jose CA, 95131 Phone: 408-433-3899 Fax: 408-433-3898 Email: sales-team@addonics.com Internet: http://www.addonics.com TECHNICAL SUPPORT Phone: 408-433-3855 Hours: 9:00-6:00 PST Email: techinfo@addonics.com Addonics Technologies – Jupiter ExDrive User’s Guide v1.0...
Need help?
Do you have a question about the Jupiter ExDrive and is the answer not in the manual?
Questions and answers