Advertisement
Available languages
Available languages
Quick Links
INSTALLATION INSTRUCTIONS
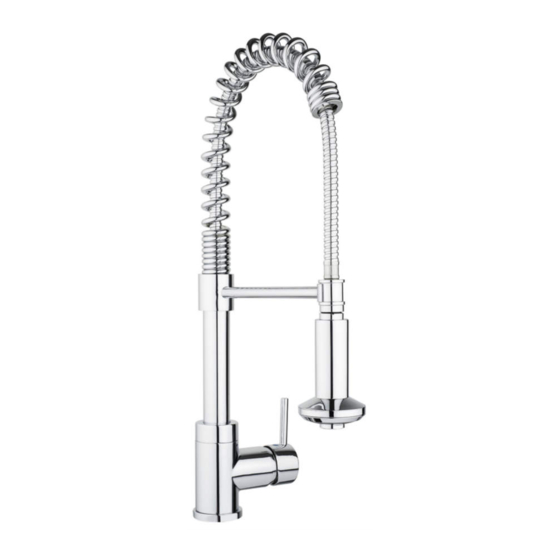
LUNA 06-8728S
MAGNETIC CATCH PULL DOWN SINGLE HANDLE KITCHEN FAUCET
THIS FAUCET MEETS OR EXCEEDS THE FOLLOWING STANDARDS:
cUPC, ASME A112.18.1, NSF-61 AND LOW LEAD COMPLIANT
THANK YOU FOR PURCHASING THIS TAYMOR PRODUCT. ALL TAYMOR PRODUCTS ARE CAREFULLY
ENGINEERED AND FACTORY TESTED TO PROVIDE LONG TROUBLE-FREE USE UNDER NORMAL CONDITIONS.
HAVE BASIC TOOLS READY
1
RECOMMENDED TOOLS:
Your installation may require new supply lines. (Supply lines are not included.)
Teflon tape Screwdrivers
Adjustable
Flashlight
wrench and
pipe wrench
WARNING: READ ALL the instructions completely before beginning.
READ ALL warnings, care and maintenance information.
Taymor recommends calling a professional if you are uncertain about installing this product!
This product should be installed in accordance with all local and provincial plumbing and building codes.
Need Help? Please call our toll-free Customer Support line at
(WEST) 1-800-267-4774
(EAST ) 1-800-387-7064 for additional assistance or service.
TURN OFF THE MAIN WATER SUPPLY
2
Locate water supply inlets and shut off water supply valves. These are usually found under
the sink.
TURN OFF
FAUCET INSTALLATION
3
A) Install faucet hoses through the hole of the sink. Centre the faucet body. Make sure that handle is properly
aligned to sink.
B) Screw the nuts and install the hot/cold hose to the corresponding hot/cold water inlet ends. Do not overtighten.
Don't use plumber's putty on cultured marble or other composite sinks.
Putty will discolour the sink.
A
Torque wrench
Safety goggles
Plumber's putty
TURN OFF
B
COLDHOT
FLUSHING & AERATOR CLEANING
4
Pull the hose assembly out of the spout and remove the spray head by unscrewing it from the hose in
a counterclockwise direction. Be sure to hold the end of the hose down into the sink and turn the fau-
cet on to the warm postion where it mixes hot and cold water. Flush the water lines for one minute.
This flushes away any debris that could cause damage to internal parts. Check for leaks. Re-tighten
any connections if necessary, but do not overtighten. Reinstall the spray hose. Note: Do not lose the
gasked (1) in the hose.
5
EXPLODED DIAGRAM FOR REFERENCE
MAINTENANCE Your new faucet is designed for years of trouble-free performance. Keep it looking
new by cleaning it periodically with a soft cloth. Avoid abrasive cleaners, steel wool and harsh
chemicals as these will dull the finish and void your warranty.
Silicone caulk
1 - MAGNET
2 - SCREW
3 - CHECK VALVE
4 - O-RING
5 - O-RING
6 - SCREW
7 - BODY
8 - BASE
SEAT
9 - WASHER
12 - BOLT
10 - HOSE
11 - SPRAY HEAD
13 - FLANGE
14 - NUT
CUSTOMER SERVICE
WEST 1-800-267-4774 | EAST 1-800-387-7064 | taymor.com
1
15 - SPRING
16 - NUT
17 - SCREW
18 - BRACKET POST
19 - SPOUT HOSE
20 - O-RING
21 - ESCUTCHEON
22 - TIE-IN
23 - BASE SEAT
24 - VALVE
25 - RETAINER
26 - COVER
28 - SCREW
31 - SPRAYER HOSE
32 - HOSE
® REGISTERED TRADEMARK OF TAYMOR INDUSTRIES LTD.
27 - CAP
29 - HANDLE
30 - WEIGHT ASSEMBLY
Advertisement

Related Manuals for Taymor LUNA 06-8728S


Summary of Contents for Taymor LUNA 06-8728S
- Page 1 WARNING: READ ALL the instructions completely before beginning. READ ALL warnings, care and maintenance information. Taymor recommends calling a professional if you are uncertain about installing this product! 15 - SPRING This product should be installed in accordance with all local and provincial plumbing and building codes.
- Page 2 LISEZ TOUS les avertissements et l’information d’entretien. 15 - RESSORT Taymor recommande de communiquer avec un expert si vous êtes incertain de la façon d’installer ce produit! Ce produit devrait être installé conformément aux codes du bâtiment et de plomberie provinciaux et locaux.
Need help?
Do you have a question about the LUNA 06-8728S and is the answer not in the manual?
Questions and answers