
Related Manuals for KKT KOLBE TEL350


Summary of Contents for KKT KOLBE TEL350
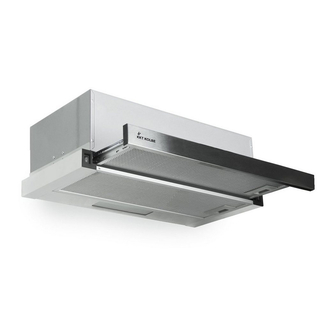
- Page 1 → Benutzerhandbuch für Ihre Dunstabzugshaube Modell: TEL350 Version: 1.4 / 190624...
- Page 2 Das Beachten der mit diesem Symbol versehenen Hinweise erspart Ihnen manches Problem. Konformitätserklärung Hiermit erklärt KKT KOLBE Küchentechnik GmbH & Co. KG, dass sich das in dieser Bedienungs- anleitung beschriebene Gerät in Übereinstimmung mit den grundlegenden Anforderungen und den übrigen einschlägigen Bestimmungen der Richtlinie 2014/53/EU befindet.
- Page 3 Sicherheitshinweise • Halten Sie Kleinkinder vom Gerät fern. Die Bedienung des Gerätes durch Kinder ist nur unter Aufsicht von Erwachsenen erlaubt. • Das Gerät ist nur für den Betrieb im Haushalt ausgelegt und ist aus- schließlich dafür zu verwenden. • Lesen Sie dieses Handbuch vor der Installation und Benutzung des Geräts gründlich durch.
- Page 4 Im Hinblick auf die ständige Weiterentwicklung behalten wir uns technische Änderungen, Abweichungen oder Fehler ohne Bekanntmachung vor. Dies gilt insbesondere auch hinsichtlich Maßangaben bzw. Ausschnittmaßen. Benutzerhandbuch Dunstabzugshaube TEL350 Version 1.4 © KKT KOLBE Küchentechnik GmbH & Co. KG KKT KOLBE ist eine eingetragene Handelsmarke.
-
Page 5: Table Of Contents
Inhaltsverzeichnis Übersicht 1. Allgemeine Hinweise ............1.1 Bestimmungsgemäße Verwendung 1.2 Hinweise zum Umweltschutz 1.3 Allgemeine Ratschläge... -
Page 6: Allgemeine Hinweise
Allgemeine Hinweise 1. Allgemeine Hinweise 1.2 Hinweise zum Umweltschutz 1.1 Bestimmungsgemäße Verwendung 1.2.1 Verpackung Das Verpackungsmaterial ist zu 100% wiederverwertbar . Beachten Sie bei der Entsorgung die örtlichen Vorschriften. Das Gerät ist für die Verwendung im Haushalt bestimmt. Der Hersteller haf- tet nicht für Schäden die durch bestim- mungswidrigen Gebrauch oder falsche Das Verpackungsmaterial (Plastikbeutel,... -
Page 7: Vor Benutzung Der Dunstabzugshaube
Benutzung der Dunstabzugshaube 2. Vor Benutzung der Heizung oder anderer, nicht elektrisch betriebenen Geräten abgeführt werden. Dunstabzugshaube c) Unter der Dunstabzugshaube dürfen keine flambierten Gerichte zubereitet werden. Die offene Flamme könnte die Haube zerstören oder gar einen Küchen- Prüfen Sie, ob die Abzugshaube wäh- brand Brand verursachen. -
Page 8: Im Abluftbetrieb
Benutzung der Dunstabzugshaube 3.3 Im Umluftbetrieb • Flambieren unter der Dunstabzugshau- be ist wegen Brandgefahr nicht erlaubt. Die angesaugte Luft wird durch einen Die aufsteigende Flamme kann das im Kohlefilter (auch Aktiv-Kohlefilter ge- Filter abgelagerte Fett entzünden. nannt) gefiltert und im Raum umgewälzt. •... - Page 9 Bedienung des Gerätes 4. Bedienung der Dunstabzugshaube Aufbau des Bediendisplays Licht Ein-/Ausschalten (Linke Seite der Dunstabzugshaube): Hier kann die Beleuchtung ein-/ausgeschaltet werden. Licht Ein-/Ausschalten: Die Dunstabzugshaube lässt sich in insgesamt 2 Leistungsstufen be- treiben. Nach unten: Leise (langsame) Leistungsstufe. Nach oben: Hohe Leistungsstufe für maximale Absaugung.
-
Page 10: Bedienung Des Gerätes
Reinigung und Pflege 5. Reinigung und Pflege Besondere Hinweise für Geräte mit Vor jeder Installations- Wartungs- oder Edelstahlgehäuse Reinigungsarbeit die Dunstabzugshaube vom Elektronetz trennen, indem Sie: Zur Reinigung der Edelstahlflächen eig- net sich ein im Handel erhältliches, nicht Den Netzstecker des Gerätes ziehen oder scheuerndes Edelstahl-Reinigungs- die Sicherung der Hausinstallation aus-... -
Page 11: Aktivkohlefilter
Sie wenden Sie sich bitte an: müssen bei normaler Benutzung alle 3 Monate oder je nach Kochgewohnheit KKT KOLBE Kundenservice früher ersetzt werden. Der Aktivkohle- filter neutralisiert unangenehme Gerü- Tel. 09502 667930 che aus der Raumluft - diesen benötigen Mail: info@kolbe.de... -
Page 12: Fehler, Mögliche Ursachen Und Lösungen
Fehlerbehebung 7.2 Fehler, mögliche Ursachen und Lösungen Fehler Mögliche Ursache Lösung Beleuchtung Kein Strom / Stromversorgung und Siche- funktioniert nicht, Gerätekabel nicht richtig rung kontrollieren, Motor läuft nicht angeschlossen Kabel richtig anschliessen Beleuchtung ist an, Lüftungsklappe blockiert Blockierung beheben aber Motor läuft nicht Motor defekt Motor ersetzen Motor riecht verdächtig... -
Page 13: Installation
Installation 8. Installation Die Dunstabzugshaube ist in der Regel für den Gebrauch der oberen Abzug- Vor der Installation des Geräts öffnung, zum Einsatz als Ablufthaube unbedingt beachten: vorgerüstet. • Installation des Gerätes nur an geeig- Die nicht benötigten Abzugöffnun- neter Stelle gen sind mit einem Kunststoffdeckel •... -
Page 14: Elektrischer Anschluss
Installation Schließen Sie das Gerät erst dann an das Installieren Sie das Gerät auf keinen Fall Stromnetz an, wenn es ordnungsgemäß wenn die Angaben auf dem Typenschild installiert ist. nicht mit Ihrer Netzspannung überein- stimmt. 8.2 Verwendung der Abzugshau- Das Typenschild befindet sich im Inne- be als Ablufthaube (mit Luftab- ren der Abzugshaube, hinter dem Fett- filter. -
Page 15: Montage Der Dunstabzugshaube
Montage 9. Montage der Dunstabzugshaube Methode 1: Wandmontage So installieren Sie auf die Wand: Bohren Sie 2x Ø 8 mm-Löcher an Ihrem gewünsch- ten Ort. Legen Sie die Muttern auf die Bohrlöcher. Heben Sie die Haube hoch. Befestigen Sie die Dunstabzugshaube mit Sicherheitsschrauben. Die beiden Sicherheitsentlüftungsöffnungen sind auf der Rückseite des Gehäuses (Ø... - Page 16 Montage Methode 2: Schrankmontage Bohren Sie 4 Löcher mit 6 mm Durchmesser an der Unterseite des Hängeschranks. Setzen Sie das den Abluftschlauch auf die Dunstabzugshaube, dann installieren Sie sie an die Unterseite des Hängeschranks, indem Sie die beiliegenden vier Schrau- ben benutzen.
-
Page 17: Informationen Zur Abluftleitung
Material. • Bei waagerechtem Verlegen der Abluftleitung muss ein Mindestgefälle von 1 cm je Meter bzw. ein Neigungs- KKT KOLBE ist nicht verantwortlich für winkel von 2° eingehalten werden. eventuelle Störungen, die durch Nicht- (Abb. 3) Es könnte sonst Kondens-... -
Page 18: Gewährleistung
KKT KOLBE nach Ermessen. Soweit nicht anders vereinbart, ist unsere Kundendienstzentrale zu benachrichtigen. Die Reparatur erfolgt ausschließlich in unserer Kundendienstwerkstatt. Während der ersten 6 Monate trägt KKT KOLBE die Kosten für Rückholung, Reparatur und Rückversand. Ab dem 7. Monat liegt dies im Ermessen von KKT KOLBE. - Page 21 User‘s manual for your cooker hood Model: TEL350 Version: 1.4 / 190624...
- Page 22 The observance of the notes marked with this icon may save you many problems. Declaration of comformity KKT KOLBE Küchentechnik GmbH & Co. KG hereby declares that the appliance described in this manual complies with the basic requirements and other relevant provisions of directive 2014/53/EU.
- Page 23 Safety informations • Keep children away from the appliance. The operation of the device by children is permitted only under adult supervision. • The appliance is designed for household operation and is to be used exclusively for that. • Read this manual thoroughly before installing and using the unit. •...
- Page 24 Due to continuous development, we reserve the right to make technical changes including errors or other aberrations without notice. This also applies in particular to dimensional data or cut-out dimensions. User’s manual Cooker hood TEL350 Version 1.4 © KKT KOLBE Küchentechnik GmbH & Co. KG KKT KOLBE is a registred trademark.
- Page 25 Table of content Overview 1. General notes ..............1.1 Intended use 1.2 Protection of the environment 1.3 General tips...
-
Page 26: General Notes
General notes 1. General notes 1.2 Protection of the environment 1.1 Intended use 1.2.1 Package The packing materials are 100% recyc- lable. Comply with local regulations for their disposal. The appliance is intended for domestic use. The manufacturer is not responsible for damage resulting from improper use or maloperation. -
Page 27: Before Using The Hood
Using the hood 2. Before using the hood of the heater or other non-electric opera- ted appliances. c) No flambé dishes are to be prepared under the extractor hood. The open flames could destroy the hood or even cause a kitchen fire. Ensure that the hood has not suffered d) Never leave pans unwatched when damage during transport. -
Page 28: In Exhaust Air Mode
Using the hood 3.3 In circulation air mode The streaming air is filtered through a • Due to the fire risk, frying or cooking carbon filter (also known as active car- with oils and fats under the hood bon filter) and circulated in the room. has only to take place under durable The carbon filter retains the odours pro- surveillance. -
Page 29: Operating The Appliance
Operating the appliance 4. Operating the appliance Control panel Lighting (right side of the hood): Here you can turn the lights on and off. Power levels (left side): The hood can be operated in a total of 2 power levels. Down: Quiet (slow) power level. -
Page 30: Care And Cleaning
Care and cleaning 5. Care and cleaning Special information for appliances with a stainless steel casing Prior to any maintenance or cleaning A commercially available non-abrasive work, isolate the hood from the electri- stainless steel cleaning agent should be cal supply by pulling out the appliance used for cleaning stainless steel surfaces. -
Page 31: Carbon Filters
Care and cleaning 6. Changing the lamps Due to possible fatty deposits on dishes or the accumulation of food particles in the mesh, the metal grea- se filters should be cleaned separately from dishes and glasses. Highly added When changing a lamp, make sure that metal grease filters should first be the new lamp does not have a higher soaked well in hot rinse water. -
Page 32: Faults, Possible Causes And Solutions
Troubleshooting 7.2 Faults, possible causes and solutions Fault Possible cause Solution Both light and fan No power / device cable not Check power supply and fuse, do not work connected properly connect cable correctly Light on, Ventilation flap blocked Eliminate blockage but fan does not work Motor is demaged Replace motor... -
Page 33: Installation
Installation 8. Installation Before installing the device, be The hood is normally initially fitted out for use of the top extractor opening, as an sure to observe the following: extractor hood. • Install the appliance in a suitable place only Openings not required are fitted with a plastic cover. -
Page 34: Using The Extractor Hood As An Exhaust Air Hood
Installation Only connect the appliance to the power Never install the appliance if the data supply once it is properly installed. on the rating plate does not agree with your supply voltage. You will find the rating plate inside the 8.2 Using the extractor hood as appliance, behind the grease filter. -
Page 35: Mounting The Hood
Mounting the hood 9. Mounting the cooker hood Method 1: Wall installation To install onto the wall: Drill 2x 8 mm diameter holes at your desired location. Place the nuts on the holes. Lift up the hood. Attach the hood with security screws. The two safety vents are (Ø 6mm) attached to the rear of the housing. - Page 36 Mounting the hood Method 2: Cabinet installation Drill 4 holes with 6 mm diameter at the bottom of the wall cabinet. Put the the exhaust hose on the hood, then install it to the bottom of the wall cabinet by using the included four screws. Note: 1.
-
Page 37: Informations On Air Flow
Informations on air flow 10. Informations on air flow • If the exhaust air pipeline is routed though cool rooms, lofts etc. there can be a large temperature drop within the individual parts of the pipeline, resulting in sweating or condensation water production. - Page 38 Notizen / Spacefor notes...
- Page 40 Vielen Dank fürs Lesen. Wir wünschen Ihnen viel Spaß beim Kochen. Thanks for reading. We wish you a lot of fun cooking. Version: 1.4 / 190624...
Need help?
Do you have a question about the TEL350 and is the answer not in the manual?
Questions and answers