
Related Manuals for NewAir NWC007SS00


Summary of Contents for NewAir NWC007SS00
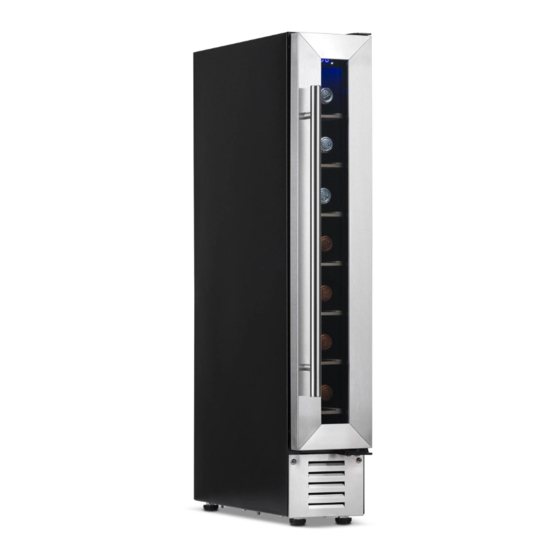
- Page 1 NWC007SS00 7 Bottle Built-in Wine Fridge OWNERS MANUAL Read and save these instructions. Manual v1.2...
-
Page 2: Table Of Contents
Safety Information & Warnings ................4 Parts List ....................... 7 Assembly & Installation ..................8 Operating Instructions ..................16 Cleaning & Maintenance ..................18 Troubleshooting ....................19 Limited Manufacturer’s Warranty ..............20 SPECIFICATIONS NWC007SS00 ODEL 110V OLTAGE 42dB OISE EVEL 60Hz... -
Page 3: Register Your Product Online
REGISTER YOUR PRODUCT ONLINE Register Your NewAir Product Online Today! Take advantage of all the benefits product registration has to offer: Service and Support Diagnose troubleshooting and service issues faster and more accurately Recall Notifications Stay up to date for safety, system updates and recall notifications... -
Page 4: Safety Information & Warnings
Use receptacles that cannot be turned off by a switch or pull-chain. • Never clean appliance parts with flammable fluids. These fumes can create a fire hazard or explosion. And do not store or use gasoline or other newair.com... - Page 5 • Use two or more people to move and install appliance. Failure to do so can result in back or other injury. • To ensure proper ventilation for your appliance, the front of the unit must be completely unobstructed. Choose a well-ventilated area with newair.com...
- Page 6 Childproof old refrigerators and other appliances you plan to discard or leave in storage. In many local jurisdictions, it is unlawful to discard old refrigerators without first removing the door. Use a screwdriver to take off the door of an old refrigerator or appliance completely. - SAVE THESE INSTRUCTIONS - newair.com...
-
Page 7: Parts List
It is recommended that you retain the packaging for future use. Check to make sure the following parts are included: • 1 instruction manual PARTS DIAGRAM 1. Control panel and light 5. Adjustable feet 2. Evaporator grid 6. Lower hinge 3. Shelf 7. Door 4. Plinth 8. Upper hinge newair.com... -
Page 8: Assembly & Installation
Improper use of the grounded plug can result in electrical shock. If the power cord is damaged, contact customer service immediately at support@newair.com. This appliance should be properly grounded for your safety. The power cord of this appliance is equipped with a three-prong plug. Fit with a standard three prong wall outlet only to minimize the possibility of electrical shock. - Page 9 Do not under any circumstances cut or remove the third (ground) prong from the power cord. Any questions concerning power and/or grounding should be directed toward a certified electrician or a service center authorized by Felix Storch, Inc. newair.com...
- Page 10 In the instruction manual bag, there is a left upper hinge and left lower hinge for you to reverse the door, please follow below instructions: Unscrew the bottom two screws fixed into the door axis of the lower left hinge, then remove the door. newair.com...
- Page 11 Remove the door axis from the door axis hole at the bottom left of the door. Remove right upper hinge by unscrewing three screws. Remove right lower hinge by unscrewing three screws. Remove the decorative plastic caps at left upper hinge hole. Remove the decorative plastic caps at left lower hinge hole. newair.com...
- Page 12 Install left lower hinge. Insert decorative caps to cover right upper hinge holes. 10. Insert decorative caps to cover right lower hinge holes. 11. Turn the door by 180°, and insert the door axis into bottom door axis hole. newair.com...
- Page 13 12. Put the door into left upper hinge axis, align the door with lower hinge, and fix door axis to left lower hinge. newair.com...
- Page 14 Tighten the screws using a Phillips head screwdriver until the handle sets both flush and secured tightly against the door frame. (DO NOT over- tighten as this will cause damage to the handle assembly). Replace the door gasket to its original position. ① Gasket ② Screwdriver ③ S/S handle newair.com...
- Page 15 WIRINGDIAGRAM newair.com...
-
Page 16: Operating Instructions
58 - 65 ºF 15 - 18 ºC Dry / White Wines 48 - 57 ºF 10 - 14 ºC Rosé Wines 49 - 51 ºF 9 – 11 ºC Sparkling Wines 40 - 47 ºF 5 - 8 ºC newair.com... - Page 17 Each press on the button will alter the temperature by 1°F or 1°C. Press together and hold for 3 seconds to change temperature display from Celsius to Fahrenheit or from Fahrenheit to Celsius newair.com...
-
Page 18: Cleaning & Maintenance
• Be sure the appliance stays secure in the upright position during transportation. Also protect outside of appliance with a blanket or similar item ENERGY-SAVING TIPS The appliance should be located in the coolest area of the room, away from heat producing appliances, and out of direct sunlight. newair.com... -
Page 19: Troubleshooting
• The appliance is not level. • The door seal is dirty or damaged. The door does • The shelves are not positioned correctly. not close • A part of the contents is preventing the door from properly closing. newair.com... -
Page 20: Limited Manufacturer's Warranty
When making a warranty claim, please have the original bill of purchase with purchase date available. Once confirmed that your appliance is eligible for warranty service, all repairs will be performed by a NewAir™ authorized repair facility. The purchaser will be responsible for any removal or transportation costs. Replacement parts and/or units will be new, re-manufactured or refurbished and is subject to the manufacturer’s discretion.
Need help?
Do you have a question about the NWC007SS00 and is the answer not in the manual?
Questions and answers