Table of Contents
Advertisement
Quick Links
Advertisement
Table of Contents

Subscribe to Our Youtube Channel
Related Manuals for Amewi NEON HORNET


Summary of Contents for Amewi NEON HORNET
- Page 1 Item No. 26090 NEON HORNET Instruction Manual...
- Page 2 Our distribution network contains over 600 specialist dealers and online shops. AMEWI Trade e.K. is an Wholesale Company. We only distribute our goods to retailers. IF you are an End-Customer who is buying AMEWI-Products , you contract with your retailer. In case of warranty please always contact your retailer.
-
Page 4: Table Of Contents
Catalogue Important Statement Safety Precautions Safe Notice for Battery Boat and Transmitter instruction Part installation and disassemble Checklist before Flight Sailing steps Boat function introduction Maintenance and Repair Troubleshooting Guide... -
Page 5: Important Statement
Important Statement Thank you for buying Udirc's product. Our product is special control substances and people who under 14 years old must not use the product. Please read this brochure carefully before using the product. You are regarded as accepting all contents in this user manual when using this product. -
Page 6: Safe Notice For Battery
(5) Safe operation Please operate the RC boat in accordance with your physical status and playing skill. Fatigue, listlessness and improper operation may increase the rate of accident. Before playing the boat, please make sure no water plants to avoid propeller from getting tangled as this may cause damage to boat. -
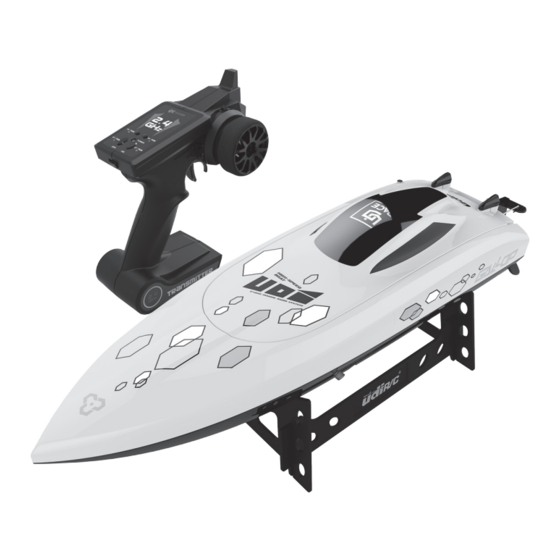
Page 7: Boat And Transmitter Instruction
Boat and Transmitter instruction Boat Deck Cabin outer cover Outer cover lock Right navigation Tail rudder Bracket Tail rudder Hull bottom Outlet Left navigation Spindle tube Rods Propeller Support bracket Main Parameter Hull spec 345x90x70mm Lipo Battery About 110mins charging time Hull weight About 333g (Battery no included) Boat battery... - Page 8 Exploded diagram Name Name Name Cabin outer cover Battery holder Spindle tube Cabin inner cover Short silicon tube Steering gear EVA waterproof ring Hull bottom Servo presses Boat surface cover Left navigation Waterproof tablet Stern rudder screw Silicone waterproof ring Spindle tube holder Tail rudder Right navigation...
- Page 9 Transmitter Forward trim Backward trim Power indicator Steering knob Left Rudder trim Right Rudder trim Throttle trigger Power switch Button Function Forward trim Press down this button to adjust the throttle forward deviation. Backward trim Press down this button to adjust the throttle backward deviation. Left Rudder trim Press down this button to adjust the tail rudder left turning deviation.
-
Page 10: Part Installation And Disassemble
Part installation and disassemble Charging Instruction for Lithium battery 1. Connect the lithium battery with USB cable rst and then choose one of the method as picture below shown to connect with USB plug. 2. The USB red indicator light keeps bright when charging. And the light turns green when fully charged. - Page 11 Steering gear replacement When the steering gear is damaged,remove the rudder set and rod screws,after the new steering gear plug is connected to the receiving box plug,electrify the boat and connect to the capsizing reset device. Install the servo arm vertically to the steering engine. Tighten the screw, install the new rudder set to the boat, lock the rudder set and rod screw.
-
Page 12: Checklist Before Flight
Checklist before Flight 1. Make sure the boat battery and transmitter battery are fully charged. 2. Please make sure the transmitter throttle stick and rudder knob can be reset. 3. Please strictly obey the order of turn on and turn o before operation. Turn on the transmitter power rst and then turn on the boat power before playing;... - Page 13 Picture 9 3. Put the lithium battery into the battery seat of the hull bottom(Picture 10). Put the battery power line by the side of the hull, and push the battery to the end. Connect the battery and the boat plug. Picture 10 Picture 11 4.
- Page 14 2. The silicone tube of water cooling system cannot be folded and must be unblocked. 3. The direction knob of transmitter turns counterclockwise, the tail rudder swings to the left (Picture 14);When turning clockwise, the rudder swings to the right. Picture 14 Picture 15 4.
- Page 15 3. In case of the boat yaws during the voyage, you can adjust it by using the transmitter trim button. Warming: 1. When calibration,keep away from the propeller to avoid danger and loss. 2. There are uncertain sundries on the water , the steering gear propeller is a ected by external forces, which is easy to cause damage.So please replace the propeller or the steering gear in time.
- Page 16 To turn right 4. Pull back the throttle trigger of the transmitter and move the steering knob clockwise then the boat turns right. Pull back 5. If the boat capsizes: Push forward and backward the throttle trigger of the transmitter and then pull back at once.
-
Page 17: Boat Function Introduction
Backward trim 8. If the boat still moves forward when the throttle trigger is in the middle position, press backward trim until the boat stops going forward. Forward trim 9. If the boat still moves backwards when the throttle trigger is in the middle position, press forward trim until the boat stops going backwards. -
Page 18: Maintenance And Repair
Maintenance and Repair 1. When RC boat stops running, the battery must be removed. 2. After playing the boat, if any water inside the hull, then you need to pick out the rubber stopper and tilt the boat to one side to pour out the water. Then put on the rubber stopper and press tightly. -
Page 19: Troubleshooting Guide
Troubleshooting Guide Problem Problem Cause Solution 1. Low battery. 1. Replace the transmitter battery. 2. Install the battery in accordance with 2. The battery positive pole and negative transmitter pole are in reverse order. the user manual. indicator light is o . 3.
Need help?
Do you have a question about the NEON HORNET and is the answer not in the manual?
Questions and answers