Table of Contents
Advertisement
Quick Links
Important safety instructions ............................................
1.
Accessories ...................................................................
2.
View of main unit ............................................................
3.
Device connections ............................................................
4.
Cautions on battery charging ..............................................
5.
Getting started ...............................................................
6.
7.
Device Settings................................................................
8.
Connecting to Wi-Fi...........................................................
9.
FM Transmitter................................................................
10. Navi Menu ........................................................................
11. Programme Interface............................................................
12. Autorouting ..........................................................................
13. Additional Features.........................................................
14. Troubleshooting .............................................................
Contents
EN-1
2
3
4
6
8
9
10
12
13
14
15
19
21
22
Advertisement
Table of Contents

Related Manuals for Prestigio GeoVision 5500


Summary of Contents for Prestigio GeoVision 5500
-
Page 1: Table Of Contents
Contents Important safety instructions ………………………………..…... Accessories …………………………………………………………. View of main unit …………………….…………………………….. Device connections ……………………….…………....Cautions on battery charging ………….……………....Getting started ……………………………………………………… Device Settings…………………………………………..………….. Connecting to Wi-Fi……………………….…………………..FM Transmitter………………………………………………………. 10. Navi Menu …………………….……………………………....11. Programme Interface………...……………….……....... 12. Autorouting …..……………………………........13. -
Page 2: Important Safety Instructions
Important Safety Instructions The exclamation point within an equilateral triangle is intended to alert the user to the presence of important operating and maintenance (servicing) instructions in the literature accompanying the appliance. CAUTION To reduce the risk of electric shock, do not remove the cover (or back). No user-serviceable parts inside. -
Page 3: Accessories
Accessories Accessories List ITEM NAME Car Charger USB Cable Stylus Pen Stylish Carry Case User Manual Warranty Card Driver/Document CD Smart Mount User guide (for smart mount) EN-3... -
Page 4: View Of Main Unit
View of Main Unit Front and Side View LCD Touch Screen Tap the screen with touch pen or finger to select menu commands or to enter information. Battery Status Indicator The indicator glows in bright green colour when battery is fully charged and in red color when charging. - Page 5 View of Main Unit Rear and Top View Speaker Emits sound, voice or music. Reset Button Press to reboot the device. Light Sensor Adjust the brightness of touch screen Power Button Press to power the device ON/OFF. EN-5...
-
Page 6: Device Connections
Device Connections Inserting microSD Card To insert a microSD card, place the connector towards the device and the card label towards the front side of the device. To remove a microSD card, gently press the edge of the card to release the safety lock and pull the card out of the slot. - Page 7 Device Connections Connecting to Car Charger Insert the USB connector into the appropriate USB port. Insert car charger connector into vehicle 12V accessory/cigarette socket to start charging. NOTE: Please connect the car charger to vehicle 12V accessory/cigarette socket after the vehicle engine is started to protect the device from sudden surges in current.
-
Page 8: Cautions On Battery Charging
Cautions on Battery Charging About Rechargeable Battery The device is equipped with a built-in rechargeable battery. Please fully charge the battery (for at least 5 hours) before initial use. The battery status indicator glows in red color when charging and turns bright green color when charging is complete. Charging time is approximately 4 hours. -
Page 9: Getting Started
Getting Started 1. Press and hold Power Button to turn on the device. 2. Shortly after the greeting screen is shown, the main menu will be displayed. 3. Tap the corresponding buttons with touch pen included to navigate through various functions. 4. -
Page 10: Device Settings
Device Settings In the main menu, tap on enter the device settings. Move up & down to display other settings. Wireless&network Configure the wireless connections,eg: Wi-Fi FM Transmit Transmit audio signals from the navigator to radio set Adjust sound volume, mute device, or enable warning Sound messages Set the screen brightness, auto-rotate, animation &... - Page 11 Device Settings In the main menu, tap on enter the device settings. Move up & down to display other settings. Choose what to search on the device & set Google search Search options Set the operating system language & onscreen keyboard Language&...
-
Page 12: Connecting To Wi-Fi
Connecting to Wi-Fi Connecting to Wi-Fi Select Settings icon to access the list of options. Select Wireless & networks. If the Wi-Fi is off, tap on and switch it to . Then select the Wi-Fi settings. The device will scan for available Wi-Fi networks and display them at the bottom of the ... -
Page 13: Fm Transmitter
FM Transmitter 1. FM radio frequency 2. Tap on or drag the cursor to tune FM frequency down. 3. Tap on or drag the cursor to tune FM frequency up. 4. Drag to tune in to a frequency on FM band 5. -
Page 14: Navi Menu
Navi Menu Tap on the icon on the Home screen to enter the following interface: Tap on the sub-menu ,the interface will show as below: In this interface, there is a list of navigation applications if you have loaded in the device, here the device comes with Navitel 5.0. -
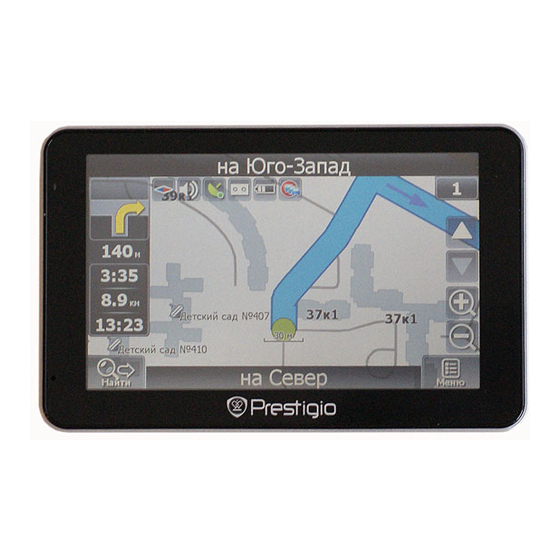
Page 15: Programme Interface
Program interface Name Function Next maneuver on the way and distance up to it. Press this Icon Next maneuver to open route options menu. Press the compass loon to edit map rotation mode, map view Compass and day/night mode. Sound Press this button to turn on/off voice and sound effects. - Page 16 Program interface Name Function Return to You can see the green arrow at the top of the screen if the map current was moved relative to your position. Press it to return view to location your current location. If you zoom In/out with ~Autozoom~ function activated, this Autoscale function will deactivate for a period according to settings.
- Page 17 Program interface Name Function Waypoints are manually created by the user and display with Waypoint red flags on a map. “SaveWP” Saves current mark on map as a waypoint. EN-17...
- Page 18 Program interface Name Function “Cursor” Shows the menu of mark on map Touch the screen with a stylus to set a mark. You can save this mark as a way point add it to the route or see object’s Mark on map characteristics the mark was set on.
-
Page 19: Autorouting
Autorouting Autorouting In order to create a route automatically, from the current position to the destination point, tap with the stylus pen on the place on the map where the final point is, tap on the ―Cursor‖ button and in the context menu choose "Go to" (Fig. 1). The calculated route will be shown on the map in blue color with highly visible dark border (Fig. - Page 20 Autorouting Autorouting using search Find an object of interest using ―Search‖ and press it with stylus, then select ―Go To‖ item from the menu. Apart from this item there are also ―Insert‖ — add a point between two points of existing route, and ―Add‖ — point is added to the end of a route and continues it.
-
Page 21: Additional Features
The special window will appear on the screen when you receive the Navitel.SMSI2]. Select ―Hide‖ to hide it or ‖Accept‖ to see options. Note: For more detailed information regarding the functionality of Navitel 5.0 software, please, refer to the complete user manual on CD, or to www.prestigio.com. EN-21... -
Page 22: Troubleshooting
Troubleshooting NOTE: Immediately turn off the device and disconnect the power adapter if the device is not working properly. Never try to repair the unit without authorized professionals for it may damage the unit. POSSIBLE SOLUTION POSSIBLE CAUSE PROBLEM Connect the adaptor The adaptor doesn’t Users can’t turn correctly. - Page 23 Avoid great swing of the Swing of the unit is too unit. great. Disclaimer As the Prestigio products are constantly updated and improved, your device may have a slightly different appearance or modified functionality than presented in this Quick start Guide. EN-23...
- Page 24 PC Connection To establish connection with PC for data access and synchronization, please execute setup file included in the Driver/Documentation CD or download the file from Microsoft website to install: Microsoft Active Sync® software for operating system Microsoft XP or earlier versions (http://www.microsoft.com/windowsmobile/en-us/downloads/microsoft/activesync-dow nload.mspx)
Need help?
Do you have a question about the GeoVision 5500 and is the answer not in the manual?
Questions and answers