Table of Contents
Advertisement
Advertisement
Table of Contents

Related Manuals for Gram IOP 20662-92 W


Summary of Contents for Gram IOP 20662-92 W
- Page 1 Type IOP 20662-92 W IOP 20662-92 B IOP 20662-92 X Instruction manual...
- Page 2 DEAR CUSTOMER, The oven is exceptionally easy to use and extremely efficient. After reading the instruction manual, operating the oven will be easy. Before being packaged and leaving the manufacturer, the oven was thoroughly checked with regard to safety and functionality. Before using the appliance, please read the instruction manual carefully.
- Page 3 TABLE OF CONTENTS Safety instructions ......................4 Description of the appliance ..................... 8 Installation ......................... 10 Operation ........................... 12 Baking in the oven – practical hints ................21 Test dishes.........................25 Cleaning and maintenance ....................27 Technical data ........................33...
- Page 4 SAFETY INSTRUCTIONS Warning: The appliance and its accessible parts become hot during use. Care should be taken to avoid touching heating elements. Children less than 8 years of age shall be kept away unless continuously supervised. This appliance can be used by children aged from 8 years and above and persons with reduced physical, sensory or mental capabilities or lack of experience and knowledge, if they have been given supervision or instruction concerning...
- Page 5 SAFETY INSTRUCTIONS During the pyrolytic oven cleaning process the oven cham- ber can reach a very high temperature. Consequently, the appliance outer surfaces can heat up more than usual, so keep children away at all times. ● Ensure that small items of household equipment, including connection leads, do not touch the hot oven as the insulation material of this equipment is usually not resistant to high temperatures.
- Page 6 HOW TO SAVE ENERGY Do not open the oven door unnecessarily often. Only use the oven when cooking larger dishes. Meat of up to 1 kg can be prepared more economically in a pan on the cooker hob. Make use of residual heat from the oven.
- Page 7 DISPOSAL OF THE APPLIANCE UNPACKING During transportation, pro- Old appliances should not sim- tective packaging was used ply be disposed of with normal to protect the appliance household waste, but should against any damage. After be delivered to a collection and unpacking, please dispose recycling centre for electric and of all elements of packaging...
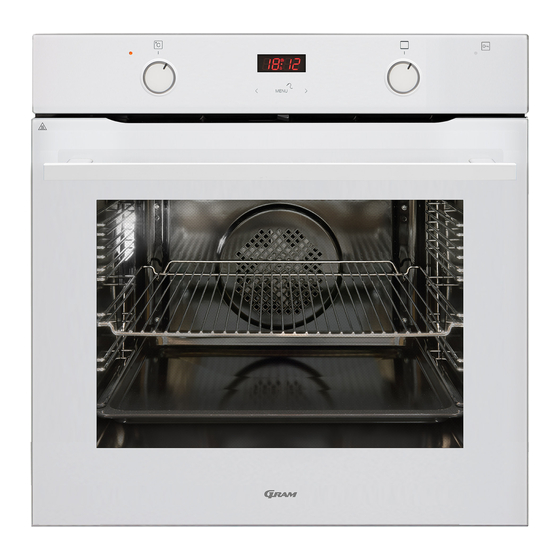
- Page 8 DESCRIPTION OF THE APPLIANCE 1 Temperature control knob 2 Oven function selection knob 3 Temperatureregulatorsignal light 4 Door lock indicator light 5 Electronic programmer...
- Page 9 SPECIFICATIONS OF THE APPLIANCE Oven fittings: Grill grate (drying rack) Baking tray Meat probe Roasting tray Sideracks...
- Page 10 INSTALLATION Installing the oven The kitchen area should be dry and aired and equipped with efficient ventillation. When installing the oven, easy access to all control elements should be ensured. This is a Y–type design built–in oven, which means that its back wall and one side wall can be placed next to a high piece of furniture or a wall.
- Page 11 INSTALLATION Electrical connection The oven is manufactured to work with a one-phase alternating current (230V 1N~50 Hz) and is equipped with a 3 x 1,5 connection lead of 1.5 m length with a plug including a protection contact. A connection socket for electricity supply should be equipped with a protection pin and may not be located above the oven.
- Page 12 OPERATION Important! Before using the oven for the first time In ovens equipped with the electronic Remove packaging, clean the interior of programmer Tts, the time “0.00” will the oven. start flashing in the display field upon connection to the power supply. ...
- Page 13 OPERATION Child safety lock Oven door features a child safety lock de- vice that prevents children from opening of the door. The appliance is supplied by the manufacturer with the door safety lock de- vice engaged. Release the child safety lock. The lock is released and you can open...
- Page 14 OPERATION Electronic programmer Timer The timer can be activated at any time, re- gardless of the status of other functions. The functions timer can be set for from 1 minute to up to 23 hours and 59 minutes. Touch sensors To set the timer you should: 1 –...
- Page 15 OPERATION Semi–automatic operation Automatic operation If the oven is to be switched off at a given If the oven is to be switched on for a specified time, then you should: period of time and switched off at a fixed hour then you should set the operation time and Set the oven function knob and the tem- the operation end time:...
- Page 16 OPERATION Change the timer beeps The function AUTO is now on; the oven will start operating from the point when the differ- The tone of the timer beeps may be ence between the set operation end time and changed as follows: the operation duration time occurs (e.g.
- Page 17 OPERATION Meat Probe The use of temperature probe is not recom- mended when cooking poultry and meat Adjustment and display range: 30°C till with bones. 99°C, Resolution: 1 Grad, Default set value: 80°C. When not in use, disconnect the temperature Meat probe is recognized automatically probe from its socket and remove from oven when temperature at meat probe is above...
- Page 18 OPERATION Oven is off Oven functions and operation. Rapid Preheating Oven with automatic air circulation Ring heater and roaster on. Use to (including a fan and an ultra-fan preheat the oven. heater) Defrosting The oven can be heated up using the bottom Only fan is on and all heaters are off.
- Page 19 OPERATION Top heater, bottom heater and fan Roaster on. are on. Roasting is used for cooking of small This knob setting is most suitable portions of meat: steaks, schnitzel, for baking cakes. Convection baking fish, toasts, Frankfurter sausages, (recommended for baking). (thickness of roasted dish should not When the functions have been...
- Page 20 OPERATION Use of the grill The grilling process operates through infrared rays emitted onto the dish by the incandes- cent grill heater. In order to switch on the grill you need to: Set the oven knob to the position marked grill ...
- Page 21 BAKING IN THE OVEN – PRACTICAL HINTS Baking we recommend using the baking trays which were provided with your oven; when using the ultra-fan function it is not necessary to initially heat up the oven chamber, for other types of heating you should warm up the oven chamber before the cake is inserted;...
- Page 22 BAKING IN THE OVEN – PRACTICAL HINTS ECO fan assisted heating ECO fan assisted heating is an optimised heating function designed to save energy when preparing food. You cannot reduce the cooking time by setting a higher temperature; preheating ...
- Page 23 BAKING IN THE OVEN – PRACTICAL HINTS Oven with automatic air circulation (including a fan and ring heater) Type of Type Temperature ( Level Time dish of heating (min.) Sponge cake 160 - 200 2 - 3 30 - 50 Yeast cake/ 160 - 170 25 - 40...
- Page 24 TEST DISHES. According to standard EN 60350-1. Baking Type of dish Accessory Level Type Temperature Baking of heating time (min.) Baking tray 29 - 32 Baking tray 31 - 34 Baking tray 34 - 37 Small cakes 2 + 4 Baking tray 2 - baking tray 40 - 43...
- Page 25 TEST DISHES. According to standard EN 60350-1. Grilling Type of dish Accessory Level Type Temperature Time of heating (min.) White bread Wire rack 3 - 7 toast Wire rack + 4 - wire rack roasting tray 1st side 13 - 18 Beef burgers 3 - roasting (to gather...
- Page 26 CLEANING AND MAINTENANCE By ensuring proper cleaning and mainte- nance of your cooker you can have a sig- nificant influence on the continuing fault-free operation of your appliance. Before you start cleaning, the cooker must be switched off and you should ensure that all knobs are set to the “”/“0”...
- Page 27 CLEANING AND MAINTENANCE Replacing the halogen bulb in the oven Ovens marked with the letter D are equipped with easily removable wire shelf Before replacing the halogen bulb, make supports. To remove them for cleaning sure the appliance is disconnected from use size 3 Allen key to undo the fixing the electric mains to avoid a possible screws from shelf support holders Once...
- Page 28 CLEANING AND MAINTENANCE Pyrolytic cleaning Important! During the pyrolytic oven cleaning process the oven chamber can reach a very high Oven pyrolytic self-cleaning. The oven heats temperature. Consequently, the appliance up to a temperature of about 480°C. Grilling or outer surfaces can heat up more than usual, baking residue is burnt into an easy to remove so keep children away at all times.
- Page 29 CLEANING AND MAINTENANCE Touch MENU again. The display will When the door is unlocked and you turn flash Pdur. off the oven, you can open the door and remove ash with a soft, damp cloth. Re- 88 08 place the side rail and other accessories.
- Page 30 CLEANING AND MAINTENANCE Removing the inner panel Door removal 1. Using a cross-head screwdriver undo the screws in the upper door slat (fig. B). In order to obtain easier access to the oven 2. Using a flat screwdriver remove the up- chamber for cleaning, it is possible to remove per door slat, prying it gently on the sides the door.
- Page 31 CLEANING AND MAINTENANCE 3. Pull the inner glass panel from its seat Regular inspections (in the lower section of the door). Important! Risk of damage to glass Besides keeping the oven clean, you should: panel mounting. Do not lift the glass ●...
- Page 32 disconnect the mains plug some minor faults can be fixed by referring to the instructions given in the table below. Before calling the customer support centre or the Gram service centre check the following points that are presented in the table.
- Page 33 TECHNICAL DATA Voltage rating 230V~50 Hz Power rating max. 3,6 kW Oven dimensions H/W/D 59,5 / 59,5 / 57,5 cm Basic Information: The product meets the requirements of European standards EN 60335- 1; EN60335-2-6. The data on the energy labels of electric ovens is given according to standard EN 60350-1 / IEC 60350-1.
- Page 36 Gram A/S Gram A/S Gram A/S Tel.: 22 07 26 30 Tel.: 040 38 08 40 Tel.: 020 7756 350 www.gram.no www.gram.se www.gram.fi Gram A/S Gejlhavegård 2B DK-6000 Kolding +45 73 20 10 00 www.gram.dk IO-CBI-1274 / 8506310 (01.2020 / v2)
Need help?
Do you have a question about the IOP 20662-92 W and is the answer not in the manual?
Questions and answers