Table of Contents
Advertisement
Quick Links
Quick Start Guide & Installation manual
Guide de d'emarrage et Guide d'installation
Guía de inicio rápido y Manual de instalación
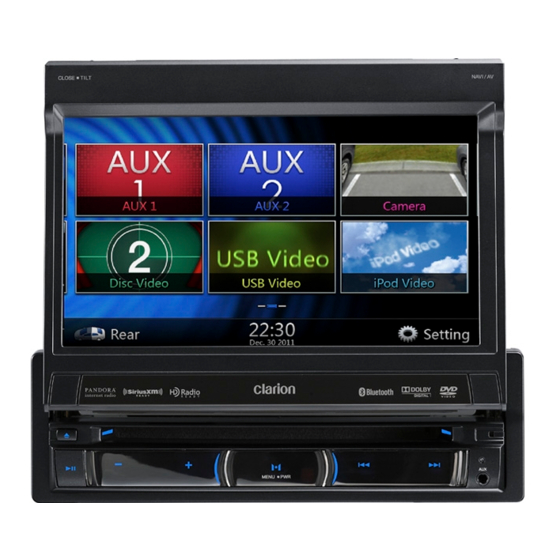
NZ502
Multimedia Station With Built-in Navigation & 7" Touch Panel Control
Station multimédia avec navigation intégrée et commande par
écran tactile de 7 pouces
Estación multimedia con navegación integrada y control de panel
táctil de 7 pulgadas
Advertisement
Table of Contents

Related Manuals for Clarion NZ502


Summary of Contents for Clarion NZ502
- Page 1 Quick Start Guide & Installation manual Guide de d’emarrage et Guide d’installation Guía de inicio rápido y Manual de instalación NZ502 Multimedia Station With Built-in Navigation & 7” Touch Panel Control Station multimédia avec navigation intégrée et commande par écran tactile de 7 pouces Estación multimedia con navegación integrada y control de panel...
- Page 2 NZ502 NX602...
-
Page 3: Table Of Contents
Contents PRECAUTIONS ......................4 1. OPERATIONAL PANEL ..................6 NZ502 Functions of Buttons .................6 2. TURNING THE POWER ON ................8 3. MAIN MENU OPERATIONS ................9 Front Zone Source ....................9 Rear Zone Source ....................9 4. DVD VIDEO PLAYER OPERATIONS ..............10 DVD Player mode screen ..................10 Search with a Chapter/Title Number ..............10... - Page 4 Navigation Setup Menu ..................28 Others Setup Menu .....................28 Set the Anti-Theft code ..................29 19. Start using Clarion Mobile Map ..............30 INSTALLATION / WIRE CONNECTION GUIDE ...........32 Notes • For details of functions and operation of this product, refer to “Owner’s manual”.
-
Page 5: Precautions
3. This unit uses precision parts and components for its operation. In the event that trouble arises,never open the case,disassemble the unit,or lubricate the rotaing parts ,Contact your Clarion dealer or service center. 4. This equipment has been tested and found to comply with the limits for a Class B digital device,prusuant to Part 15 of the FCC Rules. - Page 6 INFORMATION FOR USERS: Changes or modifications to this product unapproved by the manufacturer will viod the warranty and will violate FCC approval. NZ502 NZ502...
-
Page 7: Operational Panel
1. OPERATIONAL PANEL NZ502 Functions of Buttons [microSD] [ISR/SEND] [BND/END PS] [OPEN] [NAVI/AV] [MIC] [RESET] [ / ] [AUX 1 JACK] [VOL-] [VOL+] [IR] [MENU/POWER] [RESET] Button Note: Be sure to read this chapter while referring to front diagram “PANEL CONTROLS”. - Page 8 Note: The microSD card is only for navigation. Please don’t remove it, otherwise, the navigation function will END Function: be disabled. Only be available when a call incoming or in telephone talking. • Press to reject call when a call incoming. NZ502...
-
Page 9: Turning The Power On
Press [MENU/POWER] button on the PANEL to show main source menu. Change page by dragging left or right or touching other buttons. Touch the icons on the screen to enter corresponding work mode, such as Disc mode, Tuner mode, Telephone mode, etc. NZ502... -
Page 10: Main Menu Operations
1. Press any quadrate icon on mainmenu more than Press screen and scrolling to right or left it will 2 seconds, the icon will float on mainmenu. switch to next or previous page of mainmenu. 2. Scrolling the floating icon to any position you want. NZ502... -
Page 11: Dvd Video Player Operations
13- Repeat playback 14- Select audio language 15- Select subtitle language 16- Show playback information 1. Close operation button 17- Direct chapter or title searching 2. Select the items in the title menu screen 3. Fix on the selected item NZ502... -
Page 12: Play Disc Video Files
9- Show playback information 10- Previous page 11- Repeat playback 12- Select audio language 13- Select subtitle language Video files list Video files list operations is almost same as Disc Audio mode. Please refer to Disc Audio mode. Disc Audio mode NZ502... -
Page 13: Mp3/Wma /Cd Playback
8- Previous Track • Touch the [ ]button will close the numerical Playfrombeginning of currenttrack (Press while keypad. current track play over 5 seconds) • Touch [ ] Button will close the optionwindow and Fast Backward (long press) display playback screen. NZ502... -
Page 14: Usb Audio Mode Operations
16 - Close option menu Button 17- Back to option menu 18- Show password and Clear number 19- Close the option window and display playback screen 20-After input the track number that you want to playback then touch OK NZ502... -
Page 15: Usb Video Mode Operations
13- Elapsed playing time indicator/Seek bar 6- Repeat playback 14- Previous Track 7- System time Fast Backward (long press) 8- Bluetooth status 15- Folders area 9- Playback info 16- Display Direct Searching menu 17- Scan play USB Video Menu 18 - Close option menu NZ502... -
Page 16: Ipod Audio Mode Operations
6- Next Track Fast Forward (long press) 7- ID3 Information area, touch to hide ID3 Information. 8- Next Page / Previous Page 9- Category List 10-System Time display 11-Bluetooth Status 12-MUTE Status 13-Playback Status 14-Art Work 15-Progress bar 16-Touch todisplayID3 information NZ502... -
Page 17: Ipod Video Mode Operations
2 - Closed the List 3 - Search with the first alphabet in current list. iPod Video Settings mode screen 1. Display video settings mode screen 1. Enter Simple Control mode 2. Previous Track 2. Close the Settings Page Fast Backward (long press) NZ502... -
Page 18: Ipod Simple Control Mode
2- Display the video of iPod /iPhone. 3- Next Track 4- Play/Pause 5- Previous video 6- Play/Pause 7- Next video 8- Progress bar(not available on this screen) 9- Display the Simple Control Mode screen 10- The “Repeat” Button can’t operate on this screen NZ502... -
Page 19: Bluetooth Mode Operations
•Making a call using the Contacts 1. Touch the [ ] key to display the Phone Book screen. 2. Touch the desired Name key you wish to dial. • Flick the list up and down to scroll the list. NZ502... -
Page 20: Bluetooth Audio Mode
•Answering to an incoming call 7- Stop You can answer to the incoming call on this system by the following operation. 1.Touch the [ ]key to answer the call. 2. When the call is finished, touch the [ ]key to hang up. NZ502... -
Page 21: Pandora Mode Operations
11- Current title. Touch icon to store current title to track favorites list. 12- Currentartist. 1- Add a new Station Touch icon to store current artist to artist 2- Close the setting screen favorites list. 13- Current album name. NZ502... -
Page 22: Radio Mode Operations
5- Tune Previous 6 - Tune Next 7 - LO/DX Display 8 - Bluetooth status 9 - System time 10 - Information area Preset List mode 1- Play selected station in preset stations list Manual store station (Long Press) NZ502... -
Page 23: Hd Radio™ Receiver Operations
3- Display preset list 4- Display option menu 5- Manual tune forward 6- Manual tune backward 7- Band switch 8- Bluetooth Status Display 9- Time Display 10- Information area 11- Store the current music information 12- Select HD Radio Sub channel NZ502... -
Page 24: Siriusxm Mode Operations
7- Back to option menu program 8- Show password and Clear number 17- Playback Status 9- Set password interface 18- Fast Backward 10- Lock a program list 19- Play/Pause 20- Fast Forward 21- Go to Live mode 22- remain time 23- Buffer usage NZ502... -
Page 25: Aux 1 / Aux 2 Operations
Press Menu button on Operational Panel to return to the Main Menu. Note: If the reverse cable is connected correctly to the car, the center unit to switch to camera mode automatically when the car is in reverses. NZ502... -
Page 26: Rear Source Operations
8- Repeat playback 7- Switch to Front Source or Rear Source. 9- Select audio language 10- Select subtitle language 11- DVD playback info 12- Direct chapter or title searching Note: More detail please refer to DVD Video Front source. NZ502... - Page 27 Video Rear Source ID3 Mode Same as iPod function of front source NZ502...
-
Page 28: Setting Operations
Bluetooth: Set the Bluetooth ON or OFF. Wallpaper: Choose the desired wallpaper. This menu includes: DVD Wide Screen Mode; Brightness. DVD Wide Screen Mode: Set the DVD wide screen mode on or off. Brightness: Set brightness value from 0 to 20. NZ502... -
Page 29: Audio Setup Menu
GPS Time: Set the system time to be synchronized with GPS local time or not. Navi Interrupt: There are three choose: On/Popup/ Off. “On”: The navigation screen will cover to AV screen when reaching some key point. “Popup”: When NZ502... -
Page 30: Set The Anti-Theft Code
Click [Yes], the numerical keypad is displayed. Enter then 2 seconds, then the Anti-Theft setting mode will the new password twice, then anti-theft code is set display. The numerical keypad is displayed, enter the and your unit is secured. right code to unlock. NZ502... -
Page 31: Start Using Clarion Mobile Map
19. Start using Clarion Mobile Map When Clarion Mobile Map is started the first time,you need to do the following: 1. Select the written language of the application interface .Later you can change it in Setting. 2. Select the language and speaker used for voicd guidance massages. Later you can change it in Settings. - Page 32 30.My Route/Cancle Route(This button cancels the route and stops navigation.The button is replaced with the next on if waypoints are given) NZ502...
-
Page 33: Installation / Wire Connection Guide
Electro tap ..........2 Remote control unit ........1 Mounting Bracket key Battery (CR2025) ........1 Flush mount bolts ........4 Hexagon Head Screw ......5 (Installed in remote control) AV cable ........... 1 Trim ring ........... 1 Cleaning cloth........... 1 NZ502... - Page 34 On some types of cars, the operation panel may make contact with the dashboard or gearshift NZ502 lever, in which cause it cannot be installed. Before installing, check that the unit will not hamper operation of the gearshift lever or obstruct your view Figure 3 before selecting the installation location.
- Page 35 GPS antenna minimized. • Wire the GPS antenna cord. Fasten the cord using the cord holders. Cord holder Double-sided tape • Stick the double-sided tape to the bottom face of the GPS antenna. Bottom face of the GPS antenna NX502E NZ502...
- Page 36 Universal Mount Note: • Some car models require special mounting kits for 1. Place the universal mounting bracket into the proper installation. Consult your Clarion dealer for instrument panel, use a screwdriver to bend details. each stopper of the universal mounting •...
- Page 37 *2 The screws with this mark are enclosed in this set. *3 In some cases, the center panel may require some modification (trimming, filling, etc.). *4 If the hook on the installation bracket interferes with the unit, bend and flatten it with a nipper or a similar tool. NZ502...
- Page 38 There are various types of fuse holder. Do not let the battery side touch other metal parts. CAUTION After the connection, fix the cord by a clamp or insulation tape for protection. Fuse (15A FUSE) Fuse holder Figure 8 NZ502...
- Page 39 Rear R White Line Out Rear L Line Out Gray Front R White Line Out Front L Yellow Monitor Video Out Black Yellow Video Out Camera Rear Vision Camera White Audio/L Green Audio/R Gray Steering Wheel Remote Control Terminal NZ502 NX501/NZ501...
- Page 40 The phone interrupt will mute the audio if the lead receives a negative or ground signal. See next page for how to connect the parking brake cord. See next page for how to connect the parking brake cord. NX501/NZ501 NZ502...
- Page 41 • Connecting to SiriusXM Radio Receiver When SiriusXM Radio Receiver is to be connected, use the dedicated connector. For detailed information,refer to the instruction manual of the SiriusXM Radio Receiver. NZ502...
- Page 42 Clarion Co., Ltd. All Rights Reserved. Copyright 2012: Clarion Co., Ltd. © Printed in China / Imprime au Chiné / Impreso en China...
Need help?
Do you have a question about the NZ502 and is the answer not in the manual?
Questions and answers