Subscribe to Our Youtube Channel
Summary of Contents for Exmark PIONEER BAGGER
- Page 1 PIONEER BAGGER ® For Serial Nos. 316,000,000 & Higher (To fit Pioneer E-Series Units Serial Nos. 920,000 & Higher) Part No. 4502-768 Rev. A...
- Page 2 Exmark reserves the right to make changes or add improvements to its products at any time without incurring any obligation to make such changes to products manufactured previously. Exmark, or its distributors and dealers, accept no responsibility for variations which may be...
-
Page 3: Introduction
All Exmark parts are thoroughly tested and inspected before leaving the factory, however, attention is required on your part if you are to obtain the fullest measure of satisfaction and performance. -
Page 4: Table Of Contents
Contents Introduction ............3 Safety ..............5 Safety Alert Symbol ......... 5 Safe Operating Practices ........5 Safety and Instructional Decals ....... 8 Specifications ............9 Systems ............9 Dimensions............. 9 Product Overview ..........9 Operation ..............10 Pre-Start............10 Operating Instructions ........10 Transporting ..........12 Maintenance ............15 Recommended Maintenance Schedule(s) ....15... -
Page 5: Safety
Will result in death or perform the job. Only use on machines approved serious injury. by Exmark. WARNING: Indicates a potentially hazardous • Wear appropriate clothing including safety glasses, situation which, if not avoided, Could result in death substantial footwear, and hearing protection. - Page 6 Safety – After striking a foreign object or abnormal • Use a walk behind mower and/or a hand trimmer vibration occurs (inspect the mower for near drop-offs, ditches, steep banks or water. damage and make repairs before restarting (Figure 3). and operating the mower).
- Page 7 Unauthorized modifications to the original equipment or failure to use original Exmark parts could lead to serious injury or death. Unauthorized changes to the machine, engine, fuel or venting system, may violate applicable...
-
Page 8: Safety And Instructional Decals
Exmark equipment dealer or labels. distributor or from Exmark Mfg. Co. Inc. • Replace all worn, damaged, or missing safety • Safety signs may be affixed by peeling off the signs. -
Page 9: Specifications
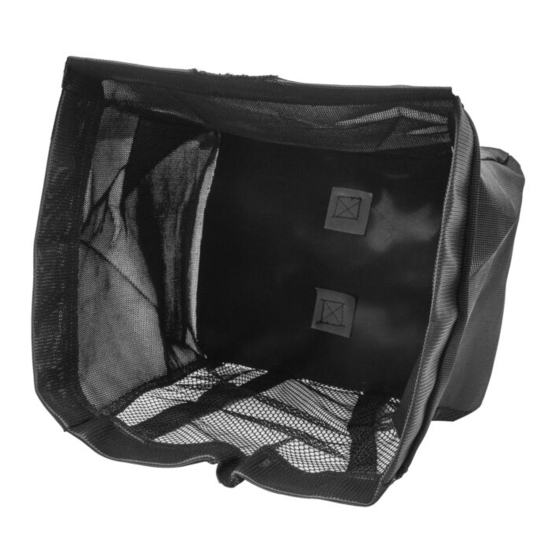
Product Overview Specifications Product Overview Systems Bagging System • Collection Bins: – Commercial grade, cloth mesh bags with reinforced bottoms. – Capacity: 6 bushels • Dump Mechanism: Manual lift off Dimensions Figure 4 1. Bag 4. Lower tube assembly Overall Width: 2. -
Page 10: Operation
Operation Operation Bagger Removal for Side Discharge 1. Stop engine, remove key, and wait for all moving Note: Determine the left and right sides of the parts to stop. Engage parking brake. machine from the normal operating position. 2. Release the latches on the lower tube assembly. Important: Due to the added weight of the Remove the upper tube from the lower tube Bagger, it is important to ensure the parking... - Page 11 Operation hopper mount brackets. Reinstall the hairpin back into the hopper frame. 9. The removable weights must be removed from the unit. Remove the retaining pins from the weight mount bracket and then lift off the weights. Reinsert the retaining pins back into the weight mount bracket.
-
Page 12: Transporting
Operation 3. Insert the hopper frame into the LH hopper position. Adjust the tension on the latch to hold mount bracket. Rest the other end of the hopper the assembly up to the deck, yet allow for release frame between the tabs on the RH hopper mount by hand. - Page 13 Operation WARNING WARNING Driving on the street or roadway without turn Loading a machine onto a trailer or truck signals, lights, reflective markings, or a slow increases the possibility of tip-over and could moving vehicle emblem is dangerous and can cause serious injury or death.
- Page 14 Operation g027996 Figure 10 1. Full-width ramp in 4. Ramp is at least four stowed position times (4X) as long as the height of the trailer or truck bed to the ground 2. Side view of full-width 5. H= height of the trailer or ramp in loading position truck bed to the ground 3.
-
Page 15: Maintenance
2. Tighten all nuts, bolts, and screws. Check bags frequently for tears and holes. Replace worn bags only with Exmark Check Bags replacement bags. Service Interval: Before each use or daily... -
Page 16: Cleaning
Maintenance Cleaning Clean Muffler and Rear Frame Area Service Interval: Before each use or daily Stop engine, wait for all moving parts to stop, and remove key. Engage parking brake. WARNING Operating engine parts, especially the muffler, become extremely hot. Severe burns can occur on contact and debris, such as leaves, grass, brush, etc. -
Page 17: Troubleshooting
Troubleshooting Troubleshooting Important: It is essential that all operator safety mechanisms be connected and in proper operating condition prior to mower use. When a problem occurs, Do Not overlook the simple causes. For example: starting problems could be caused by an empty fuel tank. The following table lists some of the common causes of trouble. - Page 18 No Claim of breach of warranty shall be cause for cancellation recommended in the operator's manual or other operational or rescission of the contract of sale of any Exmark attachment instructions provided by Exmark. or accessory.
- Page 19 G011841 Figure 11 This page may be copied for personal use. 1. The maximum slope you can safely operate the machine on is 15 degrees. Use the slope indicator to determine the degree of slope of hills before operating. Do Not operate this machine on a slope greater than 15 degrees. Fold along the appropriate line to match the recommended slope.
- Page 20 Place Model No. and Serial No. Date Purchased Label Here (Included in the Literature Pack) or Fill in Below Model No. Serial No. ©2015 Exmark Mfg. Co., Inc. Part No. 4502-768 Rev. A Industrial Park Box 808 (402) 223-6300 Beatrice, NE 68310 Fax (402) 223-5489...


Need help?
Do you have a question about the PIONEER BAGGER and is the answer not in the manual?
Questions and answers