Table of Contents
Advertisement
Advertisement
Table of Contents

Related Manuals for HIKVISION DS-MH6171I-A


Summary of Contents for HIKVISION DS-MH6171I-A
- Page 1 Network Portable IR Speed Dome Quick Start Guide...
- Page 2 DAMAGES, INCLUDING, AMONG OTHERS, DAMAGES FOR LOSS OF BUSINESS PROFITS, BUSINESS INTERRUPTION, OR LOSS OF DATA OR DOCUMENTATION, IN CONNECTION WITH THE USE OF THIS PRODUCT, EVEN IF HIKVISION HAS BEEN ADVISED OF THE POSSIBILITY OF SUCH DAMAGES. REGARDING TO THE PRODUCT WITH INTERNET ACCESS, THE USE OF PRODUCT SHALL BE...
- Page 3 SURVEILLANCE LAWS VARY BY JURISDICTION. PLEASE CHECK ALL RELEVANT LAWS IN YOUR JURISDICTION BEFORE USING THIS PRODUCT IN ORDER TO ENSURE THAT YOUR USE CONFORMS THE APPLICABLE LAW. HIKVISION SHALL NOT BE LIABLE IN THE EVENT THAT THIS PRODUCT IS USED WITH ILLEGITIMATE PURPOSES.
- Page 4 Network Portable IR Speed Dome Quick Start Guide Regulatory Information FCC Information FCC compliance: This equipment has been tested and found to comply with the limits for a digital device, pursuant to part 15 of the FCC Rules. These limits are designed to provide reasonable protection against harmful interference when the equipment is operated in a commercial environment.
- Page 5 Network Portable IR Speed Dome Quick Start Guide Available Models DS-MH6171I-A, DS-MH6171I-AS Safety Instruction These instructions are intended to ensure that user can use the product correctly to avoid danger or property loss. The precaution measure is divided into Warnings and Cautions: Warnings: Neglecting any of the warnings may cause serious injury or death.
- Page 6 Network Portable IR Speed Dome Quick Start Guide Do not place the speed dome in extremely hot (refer to the specification of the device for the detailed operating temperature), cold, dusty or damp locations, and do not expose it to high electromagnetic radiation. ...
-
Page 7: Table Of Contents
Network Portable IR Speed Dome Quick Start Guide Table of Contents 1 Introduction ....................7 1.1 Product Introduction ................... 7 1.2 Key Feature ......................7 1.3 Appearance ......................7 1.4 Indicator Description ................... 9 2 Installation ....................10 2.1 SIM Card Installation ..................10 2.2 SD Card Installation.................... -
Page 8: Introduction
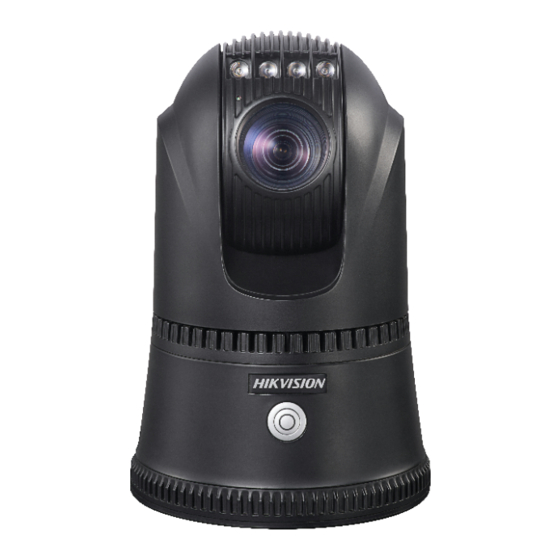
1.1 Product Introduction Embedded with 4G, Wi-Fi, GPS module, LPR (License Plate Recognition) and face capture algorithm, and deep learning algorithm, DS-MH6171I-A(S) network portable IR speed dome (hereinafter referred to as speed dome) is widely used in temporary events surveillance and license plate recognition for mobile scenes, e.g. parade, strike, outdoor concert, law enforcement, and onboard monitoring, etc. - Page 9 Network Portable IR Speed Dome Quick Start Guide Figure 1-1 Speed Dome Overview Table 1-1 Overview Description Description IR LED Light sensor Lens ON/OFF switch LED indicator Speed dome handle 9-PIN aviation plug (connectable to 5 VDC power...
-
Page 10: Indicator Description
Network Portable IR Speed Dome Quick Start Guide Description output, RS-485 interface, and alarm in/out) 10-PIN aviation plug (connectable to 12 VDC power input, serial port, and network interface) Safety rope ring Magnet Battery SD card slot SIM card slot 1.4 Indicator Description Refer to the following table for the description of the LED indicator. -
Page 11: Installation
Network Portable IR Speed Dome Quick Start Guide 2 Installation 2.1 SIM Card Installation There are two SIM card slots for the speed dome. Only one SIM card is supported by default. Two SIM cards can be used at the same time after the function is customized. When only one SIM card is required, install it into SIM1 card slot. -
Page 12: Sd Card Installation
Network Portable IR Speed Dome Quick Start Guide Insert the SIM card tray with SIM card into SIM1 card slot. Insert the battery container into the cavity of the speed dome by the direction shown in Figure 2-6. Figure 2-5 Insert SIM Card Tray Figure 2-6 Install Battery Container Press the four corners of the battery container until it is fixed. - Page 13 Network Portable IR Speed Dome Quick Start Guide Hold Battery Container Between Figures Figure 2-9 Drag Battery Container Figure 2-8 Uninstall Battery Container Insert the SD card into the SD card slot with the metallic surface of SD card facing the other side of the battery container by the direction shown in Figure 2-10.
-
Page 14: Speed Dome Installation
Network Portable IR Speed Dome Quick Start Guide 2.3 Speed Dome Installation The speed dome supports five mounting types: tripod mounting, vehicle roof mounting, wall mounting, pendant mounting, and vertical pole mounting. You can select appropriate mounting type according to the actual condition. Before you start: ... -
Page 15: Vehicle Roof Mounting
Network Portable IR Speed Dome Quick Start Guide Figure 2-14 Install Speed Dome 2.3.2 Vehicle Roof Mounting The speed dome can be used in the mobile environment in which the vehicle speed does not exceed 60 km/h (37.3 mile/h). Adsorb the four magnets on the base of the speed dome to the vehicle roof. Figure 2-15 Vehicle Roof Mounting Note: The vehicle roof cannot be too arc. - Page 16 Network Portable IR Speed Dome Quick Start Guide Make sure the wall can bear the weight which is at least 8 times of the speed dome with accessories such as mount. Steps: Install wall mount to the wall with hexagonal screwdriver and 4 M6 screws. M6 Screw Hexagonal Screwdriver...
-
Page 17: Pendant Mounting
Network Portable IR Speed Dome Quick Start Guide Figure 2-18 Install Speed Dome 2.3.4 Pendant Mounting Steps: Punch a hole on the wall according to the size of the pendant mount, and install the pendant mount to the wall with 4 M6 screws. Figure 2-19 Install Pendant Mount Loosen the 3 screws on the pendant mount, insert the adapter mount, and fasten the screws with hexagonal screwdriver. -
Page 18: Vertical Pole Mounting
Network Portable IR Speed Dome Quick Start Guide Adapter Mount Figure 2-20 Install Adapter Mount Place 4 M6 screws in the screw holes on the base of the speed dome, and fasten them with hexagonal screwdriver to fix the speed dome on the adapter mount. Figure 2-21 Install Speed Dome 2.3.5 Vertical Pole Mounting Steps:... - Page 19 Network Portable IR Speed Dome Quick Start Guide Figure 2-22 Assemble Hoop Mount and Adapter Mount Install hoops to the hoop mount. Hoop Figure 2-23 Install Hoops Fix the assembled hoop mount and adapter mount to the vertical pole.
- Page 20 Network Portable IR Speed Dome Quick Start Guide Figure 2-24 Fix on Vertical Pole Place 4 M6 screws in the screw holes on the base of the speed dome, and fasten them with hexagonal screwdriver to fix the speed dome on the adapter mount. Figure 2-25 Install Speed Dome...
-
Page 21: Network Connection
Network Portable IR Speed Dome Quick Start Guide 3 Network Connection Notes: You shall acknowledge that the use of the product with Internet access might be under network security risks. For avoidance of any network attacks and information leakage, please strengthen your own protection. If the product does not work properly, please contact with your dealer or the nearest service center. -
Page 22: Set Speed Dome Over Wan
Network Portable IR Speed Dome Quick Start Guide 3.2 Set Speed Dome over WAN You can connect the speed dome to WAN (Wide Area Network) with a static IP or a dynamic IP address. Refer to the user manual for details. -
Page 23: Activation
Network Portable IR Speed Dome Quick Start Guide 4 Activation You are required to activate the speed dome first by setting a strong password for it before you can use it. Activation via web browser, SADP, and client software are supported. In the following sections, activation via web browser and SADP will be taken as examples. -
Page 24: Activate Via Sadp Software
Network Portable IR Speed Dome Quick Start Guide 4.2 Activate via SADP Software SADP software is used for detecting the online device, activating the device, and resetting the password. Get the SADP software from the supplied disk or the official website, and install the SADP according to the prompts. - Page 25 Network Portable IR Speed Dome Quick Start Guide Figure 4-3 Modify IP Address Input the password and click Modify to activate your IP address modification.
-
Page 26: Access Via Web Browser
Network Portable IR Speed Dome Quick Start Guide 5 Access via Web Browser System Requirement: Operating System: Microsoft Windows XP SP1 and above version/Vista/Win7/Server 2003/Server 2008 32bits CPU: Intel Pentium IV 3.0 GHz or higher RAM: 1 GB or higher Display: 1024 ×... - Page 27 Network Portable IR Speed Dome Quick Start Guide Note: Refer to the user manual for detailed instructions of further configuration. 0502021090218...
- Page 28 Network Portable IR Speed Dome Quick Start Guide UD11867B...
Need help?
Do you have a question about the DS-MH6171I-A and is the answer not in the manual?
Questions and answers
How can i reset camera to default