Fass TITANIUM Series Installation Manual
Hide thumbs
Also See for TITANIUM Series:
- Installation manual (35 pages) ,
- Manual (20 pages) ,
- Installation manual (25 pages)

Subscribe to Our Youtube Channel
Related Manuals for Fass TITANIUM Series


Summary of Contents for Fass TITANIUM Series
- Page 1 INSTALLATION MANUAL APPLICATION: T D02 095G (95GPH @ 8-10psi) T D02 150G (150GPH @ 8-10psi) Cummins 5.9L 12 Valve *with VE Pump* 1989-1993...
- Page 2 Building extremely “High-Quality” fuel products is our business. We concentrate all of our efforts in this arena. No one else is as specialized as FASS in what we do! This is one of the ingre- dients to insure you are running with the “Highest-Quality” fuel system in the world! We have im- plemented very rigorous testing procedures to provide the “Highest Quality”...
- Page 3 T D02 150G Note: Because of the higher fuel flow these systems have to offer , you may encounter pr ob- lems with the stock fuel module. FASS can solve this issue with a Suction Tube Kit. Secure vehicle from ROLLING! ...
- Page 4 ViP FASS dealer for the installation. They are prepared to install the FASS fuel pumps with the most effi- ciency. If a situation/problem arises during the installation, they are the most pre- pared for that situation/problem.
-
Page 5: Installation
Titanium Series 95 or 150 GPH 8 PSI (Approximately) A fuel pressure gauge is highly recommended to identify fuel filter life and to prevent engine damage! “H” Coolant Heater “E” To Engine ‘T’ Fuel Inlet ‘R’ Fuel Return to Tank... - Page 6 Contents MP-9019 WH-1002 PBR-2001 FL-1002 x17’ PFB-2001C...
- Page 7 Mounting Package Contents Mounting Package Contents *WE-1001* RM-1003 PL-1005 PL-2003 Ring Terminal DIPF-1003 10-300 10-301 QD-1001 HC-1004 HC-1001 1/2” Washers 1 Hex Bolt 1/2” -20 x 1 1/2” 4 Locking Nut 3/8” 4 3/8” Washers 3 WA-1001D 4 Hex Bolt 3/8” -16x 1 1/2” 3 Hex Bolt 1/4”-20x1 3/4”...
- Page 8 Step 1: Install Electrical Harness The installation of the electrical harness is done first, allowing power to be applied to the pump for lubrication purposes later in the installation. Using wire stripping tool remove excess insulation off the add-a-fuse and the WH-1005. Connect WE-1001 to the WH-1002.
- Page 9 Step 1: Install Electrical Harness E. If fuse panel is located in the cab it will be necessary to guide the single red wire from the relay through the fire wall grommet to access the fuse pan- Locate fuse box under hood and select ignition hot fuse. Remove fuse and put Add-A-Fuse in place. Install fuse previously removed.
- Page 10 Prepare suction & Return lines Some of the photo’s are of a different application, procedures are the same. Prepare FASS return line by cutting rubber junction connecting the two halves of the filler neck. Loosen the factory clamps at the tank.
- Page 11 NOTE ATTENTION: While installing fittings into Titanium pump DO NOT Apply side pressure to dr aw tube of pump Proper Improper...
- Page 12 Step 3: Mount Fuel System NOTE: Before installing fittings make sure to inspect for burs or flare imperfections. When cutting fuel line make sure to blow out line to keep debris from moving forward. Using thread tape, install the 10-300 into “E” and the 10-301 into the “T” port (on opposite end). Note: Do Not Put Thread Tape on Flare of Fitting ***The use of Torque to 40 lb./ft.²...
- Page 13 Connect factory plug into the FASS harness. Plug FASS harness into the fuel module in tank. Make sure to lock red slide tab. Connect female plug of the FASS harness into pump. Turn key to “on”. With pump operating (you may have to bump the starter), turn pump over, liberally spray WD-40 (or equiva-...
- Page 14 Position the PBR-2001 to the PFB-2002 pump assembly at the mounting location and check for fit. Once location is established mark location for mounting in next step. Assemble the FASS pump bracket PBR-2002 using the RS-2002 spacer between PFB-2002 and PBR- 2001 bracket with 4-3/8 bolts, nuts, and washers. Note: Torque bolts not flange nut.
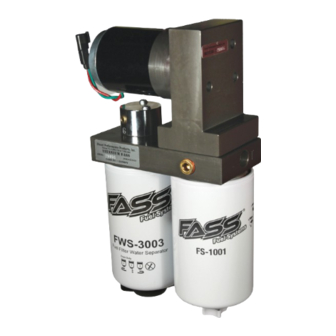
- Page 15 Step 3: Mount Fuel System Apply motor oil to gasket located on filters. Attach to system and hand tighten. Fuel Filter –Install FWS-3003 on side of pump with draw tube in the middle of the filter nipple. Water Separator Filter –Install FS-1001 on water separator nipple without the draw tube.
- Page 16 Step 4: Install Fuel Line Caution: Do not use sealant on AN fittings. Only use sealant on threads going into the FASS pump. NOTE: After cutting fuel line make sure to blow out lines to keep any debris out of lines Route suction line to ‘T’...
- Page 17 Electrical harness and fuel lines secured and properly tightened? Reconnect the battery. Has the system been primed? Turn key to the ignition position, turning on the FASS pump for 15 sec.. Crank engine and allow to run for at least 1 minute. Check for leaks. ...
- Page 18 Step 5: Review Installation To assist with priming your FASS pump crack the FWS-3003. Put power to the FASS pump to activate the pump. When the tone of the pump changes you can tighten up the fuel filter. If you need a video of the priming process go to www.FASSride.com.
- Page 19 LIMITATION OF Lifetime WARRANTY Disclaimer: To help insure you receive the proper system and customer support at the local level, FASS has a VIP and Authorized Dealer network representing FASS products. This is one reason you must purchase through a dealer to comply with our warranty policies.
- Page 20 NOTES...
Need help?
Do you have a question about the TITANIUM Series and is the answer not in the manual?
Questions and answers