Table of Contents
Advertisement
Advertisement
Table of Contents

Related Manuals for APART Champ-2


Summary of Contents for APART Champ-2
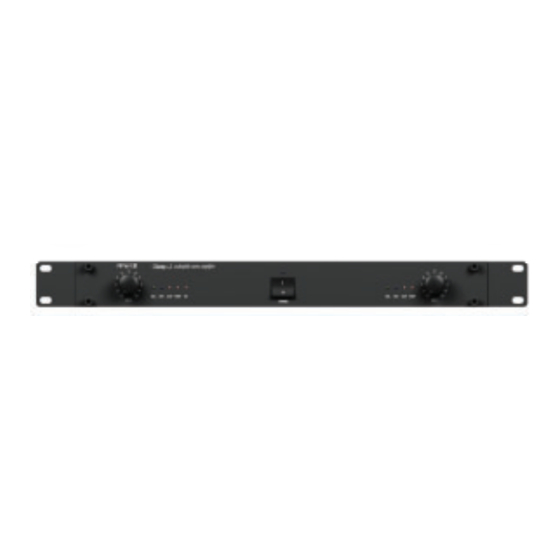
- Page 1 MANUAL MANUAL Champ - 2 Audiophile Stereo Power Amplifier INFO@APART-AUDIO.COM...
-
Page 2: Safety First
Do not drive the inputs with a signal level higher than that required to drive equipment to full output. • D o not run the output of any amplifier back into another input. • Do not ground the red output terminal, never connect a red output terminal to another red output terminal. • I n case of mal-function this device should be serviced by qualified service personnel only. WWW.APART-AUDIO.COM... -
Page 3: Manual Contents
While our competitors are struggling with often poorly designed so called energy efficient class D digital amplifiers…well, we have taken a close look and listened carefully to some of these designs, and we were not impressed. We got inspired to make something APart from all the rest, and started from scratch. Take a look at our new champion with his striking design and powerful set of features that will exceed the demands of passionate music lovers as well as system integrators. Designed with... - Page 4 Audiophile grade components mounted on solid aluminum and steel construction chassis for the highest possible signal integrity and reliability, even under difficult circumstances. • H igh current, high voltage discrete output stage in class G configuration, capable of driving even the most demanding speaker systems and combinations. Either at low or high power, you Champ-2 will hear the difference. • C ustom designed side mount heatsinks, in combination with class G amplifier topology have made it possible to create a discrete high power amplifier without the need of a noisy dust col- lecting cooling fan inside the enclosure. This means less maintenance, no annual fan or dust...
- Page 5 ! Example in bridge mode: speaker load = 8 ohms, set channel 1 impedance selector to 8 : 2 = 4 ohms setting (4 – 8 ohms). • V ersatile input and output connector configuration with balanced and unbalanced inputs and additional line level signal outputs for linking the signal to other devices for increased flexibility. The speaker output terminals accept speaker cables as well as 4 mm banana plugs. • G round lift switch to enable you to find the cause of system ground loops in case of hum or excessive noise. INFO@APART-AUDIO.COM...
- Page 6 Conclusion: don’t punish your speakers with weak amplifiers. Set the APC control to a power level equal to your speaker’s RMS input power and avoid hitting the clip limiter ! WWW.APART-AUDIO.COM...
-
Page 7: Inputs And Outputs
The amplifier will not turn on automatically after the transformer has cooled down, the user MUST turn off the power, remove the cause of the fault condition, wait for cooling down and then power on again! 6) Bridge led: this led lights up to indicate that the amplifier is in bridge mode. 7) P ower switch and power led: flip the switch to power on the amplifier. The blue led will light up to indicate that mains power is present. INFO@APART-AUDIO.COM... - Page 8 MUST turn off power, wait for cooling down and then power on again ! More details can be found in the table below. 12) V olume potmeter channel 2: use this potmeter to preset the volume. In bridge mode, this potmeter has no function. WWW.APART-AUDIO.COM...
-
Page 9: Led Status Messages
The intelligent APC circuitry will reduce input gain and level to a safe margin within certain limits. This circuitry can not correct an input signal that is already clipped and distorted. INFO@APART-AUDIO.COM... - Page 10 Remove the protective cover from the middle of the red/black binding post in case you want to use banana plugs. For bridge mode applications, you MUST use the red binding posts only: channel 2 red plug is bridge mode negative speaker connector. 7) M ains cable connector: plug the mains cable connector here, this socket also contains a mains fuse holder. Replace this fuse only with a 3 AT 250V type. 8) C hannel 1 speaker binding post: this connector accepts speaker cable as well as 4 mm banana plugs. Remove the protective cover from the middle of the red/black binding post in case you want to use banana plugs. For bridge mode applications, you MUST use the red binding posts only: channel 1 red plug is bridge mode positive speaker connector. WWW.APART-AUDIO.COM...
- Page 11 8 ohms, because every amplifier only ‘feels’ half of this impedance. Set the speaker impedance selector of channel 1 to the 4-8 ohms position for 8 ohms(or higher) loads in bridge mode. INFO@APART-AUDIO.COM...
- Page 12 4. Rack mounting and wiring Champ-2 can be mounted in a 19” rack, taking up only 1 rack space. Always allow a good airflow around the amplifier’s front, rear, side, top and bottom. When installing in a rack with multiple audio devices, it is compulsory to leave one rack space between units. Fill the empty rack spaces with meshed blind panels for improved ventilation. Never mount the amplifier in a sealed cabinet, unless adequate forced ventilation is provided. The amplifier may not be able to meet the specifications when installed in a poorly ventilated environment. Support the unit at the rear when installing in a rack ! Always remember: excessive heat is one of your amplifier’s biggest enemies !
-
Page 13: Standalone Use
5. Standalone use It is possible to integrate Champ-2 in a high quality audio chain. In order to adapt the front panel dimensions to the dimensions of other equipment, it is possible to remove the 19” brackets and handles for an even more sleek and refined look. Remove the two screws marked in red circles and slide off the handles. INFO@APART-AUDIO.COM... -
Page 14: Technical Specifications
This amplifier is designed for an audiophile music experience, not for lab testing! Bridge-mono operation 8 ohm 350 W 2 channel mode 8 ohm 120 W / ch 2 channel mode 4 ohm 180 W / ch 2 channel mode 2.7 ohm 200 W / ch WWW.APART-AUDIO.COM... -
Page 15: General Technical Specifications
APart-Audio general warranty conditions: APart-Audio warrants this product to be free of defects in material and workmanship for a period of one* year for parts and for a period of one* year for labor from the date of original end-user purchase. This warranty is valid only for the original end-user and cannot be transferred. - Page 16 Send your ideas or suggestions to suggestions@apart-audio.com Company names, product names, and names of formats etc. are the trademarks or registered trademarks of their respective owners. © 2008 APart-Audio specifications subject to change without notice. CHAMP-2 is developed by Audioprof nv Lanteernhofstraat 90...
Need help?
Do you have a question about the Champ-2 and is the answer not in the manual?
Questions and answers