Table of Contents
Advertisement
Advertisement
Table of Contents

Related Manuals for APART MA30


Summary of Contents for APART MA30
- Page 1 MA30 - MA60 Instruction manual...
- Page 3 MA30 - MA60 Instruction manual MA30 - MA60 manual...
- Page 4 Mixing amplifiers...
- Page 5 MA30 - MA60 Instruction manual • Do not connect the inputs / outputs of amplifiers or consoles to any other voltage source, such as a battery, mains source, or power supply, regardless of whether the amplifier or console is turned on or off.
- Page 6 Introduction “Setting a new industry standard” When we, at Apart, look at mixing amplifiers today it seems like the complete pro audio industry slumbered. Stuck into old habits, the overall look and feel remains a hassle for both users and installers worldwide.
- Page 7 High power class-D power amplifier module with 100 volt output transformer • Output power: - MA30: 1 x 30 W @ 70 V / 100 V / 4 ohm. - MA60: 1 x 60 W @ 70 V / 100 V / 4 ohm. • High thermal efficiency.
- Page 8 Mixing amplifiers Connections 1. Emergency input: connect your balanced 0 dBV line level emergency input on the euroblock connector. If available, connect the emergency contact at the “mute all” connection. The contact must be “potential free”, i.e. a relay or switch contact that does not carry any foreign voltage.
-
Page 9: Mic Input
MA30 - MA60 Instruction manual will be muted, and the chime will sound. Set the chime level as desired. The paging contact will also activate the priority output (6). To test the chime level, a chime test button is present. -
Page 10: Auto Standby
Mixing amplifiers test button) on the paging mic input. Typically, 24 volt priority is used to override volume controllers present on speaker lines. 7. Auto standby: set the switch to “enabled” to enable auto standby. 8. Input 2: line level input on RCA connectors. Adjust the gain potmeter so that the clip led does not light up when the signal is at its highest level. - Page 11 Minimum load impedance @ 100 volt must be 167 ohms or more (MA60) or 333 ohms or more (MA30). These values correspond to 60 and 30 watts @ 100 volt.
-
Page 12: Operation
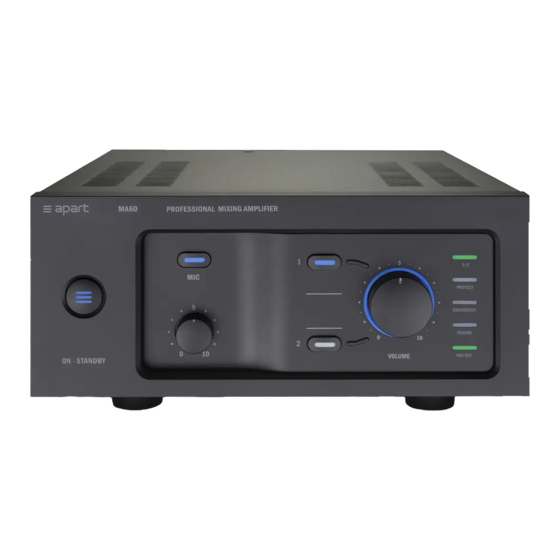
Mixing amplifiers Operation On / Standby switch: switch the unit on from standby by pushing this button. Switch to standby by pressing again. Please note that the main power switch at the rear of the unit (10) must be switched on. - Page 13 MA30 - MA60 Instruction manual that the vox circuit of MIC is active. The vox circuit will not be active when MIC is not lit (front button 2). MIC volume control: this knob determines the output volume of MIC. Name field: here you can attach the source name stickers supplied with the unit.
- Page 14 Mixing amplifiers The unit will go to auto standby after 10 minutes when all these requirements are fullfilled: • Auto standby is enabled • No audio signal is present on the SELECTED INPUT* (or when no input is selected) • No emergency signal is present, and the emergency contact is not closed •...
- Page 15 MA30 - MA60 Instruction manual Mounting the mixing amplifier With the optional mounting kit MA3060-19, you can: • Mount the amplifier in a 9.5 inch rack (aka half-rack or 10 inch rack) • Mount the amplifier under a shelf or under a counter...
- Page 16 Mixing amplifiers • Mount the amplifier in a 19 inch rack • Convert 2 mixing amps into one 19” unit Use only the screws supplied with the MA3060-19 kit: • Short screws: used for the bottom connection plates • Long screws: used to attach the rack ears •...
- Page 17 MA30 - MA60 Instruction manual Connect two units with the provided connection plates and srews. Turn devices upside down...
-
Page 18: Input Labels
Mixing amplifiers Input labels Use the sticker paper included in the box to attach labels to the front panel inputs. The blank labels can be personalised. -
Page 19: Practical Examples
COM connector. Connect the 100 volt line to the 100 volt connector. The minimum speaker line impedance is 333 ohms (MA30) and 167 ohms (MA60). Check the impedance with an impedance meter before connecting the speaker line to the amplifier. - Page 20 Mixing amplifiers b. Connecting and setting up a paging microphone 1. Connect the microphone wire as shown in the picture. The + - GND is used for the balanced signal of the microphone. The paging contact closure is indicated in the picture. mic signal paging contact...
- Page 21 MA30 - MA60 Instruction manual 3. While speaking in the microphone as loud as possible, turn the gain control slowly clockwise until the clip led lights up at the highest peaks. Now turn the control back a little. Open the volume control until the paging message sounds as loud as desired through the connected speakers.
- Page 22 Mixing amplifiers 5. Turn the chime potmeter about halfway, push the “test” button to hear the chime and adjust the chime volume as desired using the chime potmeter. You can also close the paging contact to activate the chime. Note: the paging mic and chime levels are independent from the position of the big volume control on the front of the unit.
- Page 23 MA30 - MA60 Instruction manual c. Connecting a line source (tuner, CD player, ...) to input 1 1. Connect the output of the line source to the cinch connectors of input 1. 2. While the line source is playing, turn the gain...
-
Page 24: Warranty Info
Apart Audio. The warranty only concerns the spare parts and not the involved labor, transportation or any other costs. The product must be returned in the original packaging with the proof of purchase by an Apart Audio authorized reseller. -
Page 25: Technical Specifications
MA30 - MA60 Instruction manual Technical specifications Product name MA30 MA60 Emergency input Nominal input sensitivity 0 dBV (1 Vrms) THD+N @ -6dB (pre-out) < 0.5% Frequency response (-3dB) 100 Hz – 20 kHz Input impedance 5 kohms Paging mic Nominal input sensitivity bal. - Page 26 Mixing amplifiers Product name MA30 MA60 Priority output Voltage 24 V Max current 0.5 A Amplifier output RMS output power (1%THD) 30 W 60 W Dynamic power 35 W 65 W SNR (1%THD) > 90 dB > 90 dB THD+N @ -6dB <...
- Page 28 Apart Audio nv Industriepark Brechtsebaan 8 bus 1 2900 Schoten - Belgium Company names, product names and trademarks are property of their respective owners. Apart-Audio specifications are subject to change without notice.
Need help?
Do you have a question about the MA30 and is the answer not in the manual?
Questions and answers