Samsung VR20T6001M Series User Manual
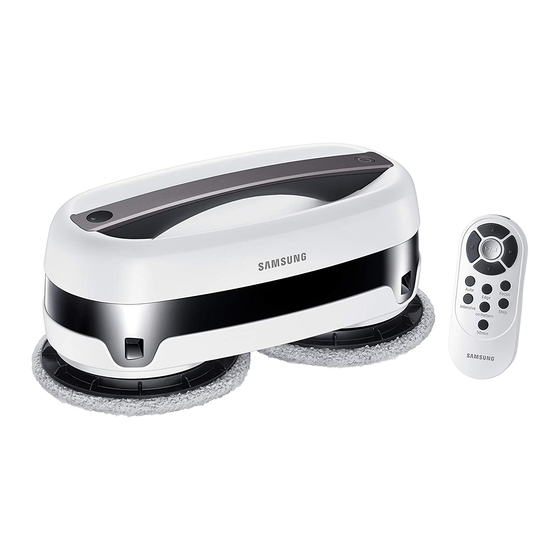
Mopping robot
Hide thumbs
Also See for VR20T6001M Series:
- Quick manual (16 pages) ,
- Quick manual (24 pages) ,
- Quick manual (104 pages)
Advertisement
Table of Contents
- 1 Table of Contents
- 2 Safety Information
- 3 Parts Name & Product Component
- 4 Charging Status & Indication
- 5 Installing the Water Supply Mop Kit
- 6 Water Supply Mop Kit & Mop Maintenance
- 7 Cleaning Operation & Remote Control
- 8 Cleaning Modes
- 9 Handy Cleaning Mode & Product Maintenance
- 10 LED Indications
- 11 Troubleshooting
- 12 Product Specifications
- Download this manual
Advertisement
Table of Contents

Related Manuals for Samsung VR20T6001M Series


Summary of Contents for Samsung VR20T6001M Series
- Page 1 Mopping Robot User manual VR20T6001M* Series • Before operating this unit, please read the instructions carefully. • For indoor use only...
-
Page 2: Table Of Contents
Mopping Robot is not designed for Industrial or Commercial use. Please fully charge the battery before first use. Samsung assumes no responsibility for technical or editorial errors or omissions contained herein, nor for any incidental or consequential damages and failures of appliance caused by not following the precautions and instructions. -
Page 3: Safety Information
Warning • Do not use power cord if it is damaged. Please contact a Samsung Authorized support facility to repair or replace the damaged power cord. • When plugging in or removing the power plug, always plug it in or remove it by holding the plug, not via the cable. - Page 4 • Remove and allow mop pads to dry after use. Do not leave wet mops on floors for an extended period of time, as you risk damaging your floors. • Make sure that children or pets do not step or sit on the robot cleaner while operating. •...
-
Page 5: Parts Name & Product Component
Parts name & Product component Components Main unit Floor plate Water supply mop kit Mother yarn mop Microfiber mop (Gray color) (Green color) Remote control (with Power adapter Silicone brush battery) Mother yarn mop (Gray color) Microfiber mop (Green color) Mother yarn is 100x thicker than It is a mop with richer and longer yarns microfiber, ideal for cleaning dust in... - Page 6 Main unit / Front Illumination sensor/Remote control receiver Handle Operation button/ LED lamp Obstacle detection sensor Cliff detection sensor Main unit / Bottom Main unit / Rear Power jack Mop guide kit Water supply mop kit / Top Water supply mop kit / Bottom Mop velcro Rubber cap Water inlet...
-
Page 7: Charging Status & Indication
Charging status & Indication • Only use authorized adapter. Or, it may cause serious damage to the product. • Do not charge the non-rechargeable batteries. Caution How to charge Connect the power adapter to the charging port on the back of main unit. Remove the protective film from the product before use. -
Page 8: Installing The Water Supply Mop Kit
Installing the water supply mop kit • Please disconnect and power off the Mopping Robot when you install or detach the water supply mop kits. • Please wring the water out of the mops prior to use, otherwise the cleaning process may slow down. -
Page 9: Water Supply Mop Kit & Mop Maintenance
Water supply mop kit & Mop maintenance Washing the mops You can use included silicon brush for easier mop washing. 1 Wet mops thoroughly. 2 Use a natural detergent for 3 Squeeze out water and dry washing mops. them under the sun light. Maintaining the water supply mop kits 1 Separate the water supply mop kit from the 2 Open the rubber cap and pour out any... -
Page 10: Cleaning Operation & Remote Control
Cleaning operation & Remote control Do not use the main unit without the water supply mop kit, as it may damage the device. Caution Start cleaning 1 Press and hold the Operation button 2 To start cleaning, either press the Operation button for 2 seconds until it beeps and the on the main unit, or press the Start/Stop button on light stays on. -
Page 11: Cleaning Modes
Cleaning modes Select a cleaning mode you want by using the remote control. Note Auto Edge Focus Basic cleaning mode that Focuses on cleaning corners and Intensively cleans the effectively cleans the whole area. edges of floor. surrounding area relative to the main unit location. -
Page 12: Handy Cleaning Mode & Product Maintenance
Handy Cleaning mode & Product maintenance • User can clean manually by holding the handle of the main unit. • This mode is good to clean desks, tables, glass floors, and glass windows. Note How to use Handy Cleaning mode Lift the main unit by the handle, and press the Press the Operation button if you want to stop Operation button twice quickly. -
Page 13: Led Indications
• Turn off the main unit, and then turn it on again. Blue Then, restart cleaning. Blinking • If the same symptom is repeated, turn off the power. Then, contact a local Samsung service center. LED Off Fully charged LED Off •... -
Page 14: Troubleshooting
• Check if the LED lamp blinks red while charging. • The LED lamp blinking red may be a sign indicating that battery is abnormal, so turn off and unplug the main unit. Then, contact a local Samsung service center. 14 English... -
Page 15: Product Specifications
Product Specifications Main Unit 6.5 in 5.35 in 12.87 in Product Name Electric Floor Sweeper (Floor Mopping Robot Cleaner) Model Name Mopping Robot Power Consumption 27 W Size W12.87 x D6.5 x H5.35 in Weight 3.5 lb Power 100-240 V~, 50-60 Hz Battery Li-ion DC 11.1 V, 2150 mAh 63 dB (Auto Cleaning... - Page 16 If you have any questions or comments relating to Samsung products, please contact a local Samsung service center. Country Customer Care Center Web Site 1-800-SAMSUNG (726-7864) www.samsung.com/ca/support (English) CANADA 1-844-SAM-PAYS (726-7297) www.samsung.com/ca_fr/support (French) 1-800-SAMSUNG (726-7864) U.S.A www.samsung.com/us/support 1-844-SAM-PAYS (726-7297) Rev 0.2...
Need help?
Do you have a question about the VR20T6001M Series and is the answer not in the manual?
Questions and answers