Table of Contents
Advertisement
Quick Links
Advertisement
Table of Contents

Related Manuals for Atag XL75F


Summary of Contents for Atag XL75F
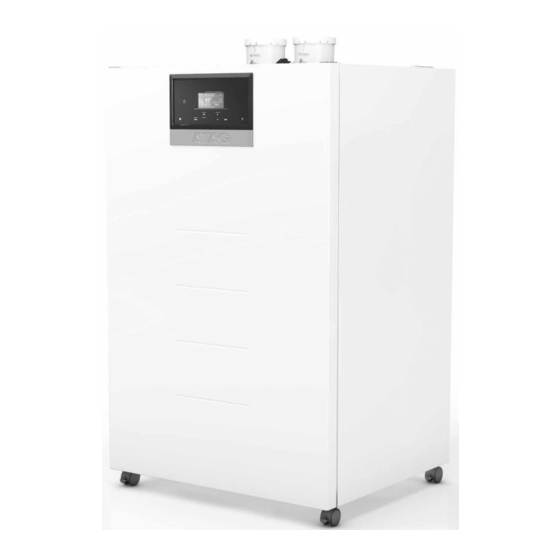
- Page 1 Installation & Servicing Instructions XL75F XL105F XL125F XL150F XL180F XL210F...
-
Page 2: Table Of Contents
Safety regulations General regulations ............ Intended use .............. Standards and regulations ......... Product description Functional description - ATAG XL F ......Hydraulic circuit diagram ..........Technical data / ERP data .......... Dimensions ..............Delivery scope Standard version / Accessories ........ -
Page 3: Safety Regulations General Regulations
EN 55014-1 (2011) EMC – Requirements for household Incorrect operation can cause sioning and the operation of the ATAG appliances, electrical tools and damage to the boiler and system similar equipment – Part 1:... -
Page 4: Product Description Functional Description - Atag Xl F
Product description ATAG XL F Double Engine... - Page 5 Product description ATAG XL F Legend: Product description The ATAG XL F is a condensing performance via the gas armature. ignition electrode A changed default value of the detection electrode fan unit A large modulation range that heating control unit...
-
Page 6: Hydraulic Circuit Diagram
Product description ATAG XL F hydraulic circuit diagram Burner B Burner A Legend: 8 venturi 9 automatic air vent 3 ignition 10 circulation pump T2 return sensor 11 control unit HMI P1 water pressure sensor gas pipe 5 gas valve... -
Page 7: Technical Data Erp Data
Product description Technical data ErP data Tipe ATAG XL F Permit Category Heat exchanger type iConXL1 iConXL2 iConXL1 iConXL1 iConXL1 iConXL2 iConXL1 iConXL1 iConXL2 iConXL2 Output Full load 65,4 90,2 110,8 130,5 155,5 180,3 72,0 99,0 122,2 142,4 170,9 197,4... -
Page 8: Dimensions
Product description Dimensions of ATAG XL F single engine C1 / C2 A A1 Type ATAG XL F Boiler connections Boiler height 1100 1100 Type ATAG XL F 1185 1185 Flue gas nozzle concentric 100* 100* Boiler width Air supply connector concentric... - Page 9 Product description Dimensions of ATAG XL F double engine C1 / C2 A A1 Type ATAG XL F 125-150 176-210 Boiler connections Boiler height 1100 1100 Type ATAG XL F 125-150 175-210 1185 1185 Flue gas nozzle concentric 100* Boiler width...
-
Page 10: Delivery Scope Standard Version / Accessories
Min gas pressure switch header, gas line and low loss header are adjusted to the selected overall demand. When installing a single ATAG XL F constructed or selected especially for boiler the use of a low loss header is strongly recommended. -
Page 11: Cascade
Product description ATAG XL F Cascade 2140 1440 Legend: Cascade possibilities 1. Air supply The ATAG XL F cascade 2. Flue/Air supply 3. Cascade manager Floor-standing in line Accessories: 4. Gas isolation valve another. 5. Flow and return isolation valves 6. -
Page 12: Cascade Exampless
Product description 1139 1440 2140 3540 7488... - Page 13 Product description 1440 1437 1880 2140 4686...
- Page 14 Product description ATAG XL F Cascade accessories FG codes Description Single Boiler Cascade Cascade Power size in line 3905101 MIN. GAS PRESSURE SWITCH - BOILER 3905102 MIN. GAS PRESSURE SWITCH - CASCADE 0-1600 3905103 ROOM FAN + EXT. GAS VALVE...
-
Page 15: Cascade Accessories
Product description ATAG XL F Cascade accessories FG codes Description Single Boiler Cascade Cascade Power size in line 3905197 0-1600 3905265 0-1600 3905198 CASCADE FLUE KIT DN150 LINE 3905199 FLUE SIPHON SET DN150 3905200 CASCADE FLUE KIT DN200 LINE 3905201... - Page 16 Product description ATAG XL F Cascade accessories FG codes Description Single Boiler Cascade Cascade Power size in line 3905259 FLUE WALL TERMINAL PP CONC 100/150MM 3905260 FLUE ADAPTER PAR - CONC 100/100-100/150 3905261 ADAPTOR Ø100-110 FLUE/AIR 3905262 FLUE EXPANDER 130-150MM...
- Page 17 Installation Boiler transport The ATAG XL F is a fully equipped Handling and carrying precautions: compact heating system, which has Wear protective clothing and gloves instructions are printed on the to protect from any sharp edges. appliances are: proposed steps.
-
Page 18: Installation Boiler Transport
(refer to above) for commissioning system (refer to chapter 7). part yourself, then ATAG recommends using “Connection set ATAG XL F as The ATAG XL F cascade Floor standing in line... -
Page 19: Hydraulics Circulation Pumps
Boiler type Pump type Circulating water volume heat cell Residual head /h - l/min) O - mbar - kPa) XL75F 1 x WILO PARA 8 2,8 - 46,7 2,2 - 37,4 1,5 - 150 -15 4,0 - 400 - 40... - Page 20 Installation Collector assembly 6-7-8 the upper space. 7. Place the return water collectors in the middle recess. Connect the water lines using the supplied washers and nuts. 8. Place the gas collectors in the lower recess. Connect the gas lines using Boiler positioning Floor standing rack assembly ground in the required location.
- Page 21 Installation Attention: once in the correct and Collector assembly the upper space. 7. Place the return water collectors in the middle recess.Connect the water lines using the supplied washers and nuts. 8. Place the gas collectors in the lower 6-7-8 recess.
- Page 22 Installation Connecting the boiler 1-2. Keep the cap on the connections return headers: coupling. Return: 45mm pipe pieces with coupling. 5. Connect the pipes to the valves For connections, use the supplied Flow: 45mm pipe pieces with Return: 45mm pipe pieces with 2" return headers: coupling.
-
Page 23: Cascade Accessories
The low loss header and the complete installation 1.2.3. Low loss header - Low loss header for 1 ATAG XL F to for temperature sensor T10. Boiler connections are 2x 2", installation connections are 2x 2". - Page 24 1. Boiler connection set for single boiler G 3/8" 1779 G 1/2" 2"outer thread (48) 2"outer thread G 1/2" Accessories Single boiler back-pack Connection description B - return C - gas D - condense sulution with ATAG X 1007 R 2" R 2" R 1 1/4"...
- Page 25 Installation Cascade accessories Dimensions pipe headers DN100 G1/2” G3/8” DN100 G1” DN65: 133 DN100: 197 DN100 DN100 DN100 DN65 DN100 349±6 350 x 8 DN150 DN100 DN100 DN100 DN100 DN150...
-
Page 26: Water And Hydraulic System
DIN 4726-4729. If the system contamination. ATAG recommends If the regulations with regard to does not meet the ATAG requirements consideration. The central heating installation must warranty claims become null and void (see the warranty conditions). -
Page 27: System Water Additives
Installation System water additives The system water additives, which are In case of a wrong use, and if the maximum concentration quantities are exceeded, then the guarantee for all the indicated dosage quantities. components that come in contact with heating water are null and void. Additive type Application Sentinel X100 Corrosion protection... -
Page 28: Dhw Quality
When applying a DHW cylinder It is not necessary to install an (ATAG cylinder connection with use single, central installed expansion the diverter valve and the DHW single expansion vessel the handles of whilst open. -
Page 29: Gas Line
Installation Gas line The gas line leading to the installation is necessary that the gas dynamic inlet capacity to determine the diameter of the supply pipe. ensure that the gas line does not contain any residual pollution. ATTENTION: Pressure loss for a newly installed see separate conversion instructions. -
Page 30: Condensate Connection
Installation Condensate connection For condensate drainage, only HAZARD: Danger of death due to poisoning! If the siphon is space. The drainage pipe should have connections are open, then escaping waste gas can pose a hazard of the condensate. death for people. Filling of the siphon Condensate connection For every m... -
Page 31: Hot Water Supply
Installation Hot water supply to the ATAG XL F. For connection and settings refer to the Boiler Control chapter. When connecting a DHW cylinder header an ATAG diverter valve is recommended. Boiler connection set with diverter valve Legend 1. Three way valve... - Page 32 (and must not exceed the maximum Walls that are sensitive to heat Flue gas connection should be insulated. We recommend the use of ATAG components. way that no recirculation may take place. For further information, please see the...
- Page 33 (follow the Room sealed system Boiler type instruction on page 42. diameter Lift the parallel connection. in from the outside through a duct. XL75F 100 - 100 Disconnect the main switch 230V XL105F 100 - 100 connection and remove it. XL125F...
- Page 34 Installation Connections Ambient combustion air Flue gas duct into the chimney, aspiration of air from the surroundings. Flue gas duct into the chimney, aspiration of air from the surroundings. Combustion air taken from the surroundings square area. same square area. Suction air and waste gas duct via the chimney system, which is Section the air and waste gas exhaust to the outside, in areas with Vertical end section of the waste gas duct.
- Page 35 Installation Connections installation is indoors. For such situations, we recommend collective negative pressure. regard to their outlet area In the case of collective venting outlet always has to end up in the open area (outlet area 1). You may opt for: (`open device` Boiler category B).
- Page 36 Installation Connections Diameter and venting lengths of the Open system, with under-pressure (calculated with thermal draft) under atmospheric circumstances. NOTE! and B Output (80/60) d = minimum diameter Ø in mm [kW] h = 2 - 5 h = 5 - 9 h = 9 - 13 h = 13 - 17 Diameter and venting lengths of the...
- Page 37 = 16 - 20 1200 Diameter and venting lengths of the Room sealed system with over- pressure. Please contact ATAG. Output (80/60) d = minimum diameter Ø in mm [kW] h = 2 - 5 h = 6 - 10...
-
Page 38: Electrical Connection
Installation Electrical connection A deviation on the grid of 230V (+10% or -15%) and 50Hz technician, and in conformity with led to the electronics panel at the front valid national and local standards and The following additional regulations regulations. An insulated mains switch also apply: at least 3 mm contact openings. - Page 39 Installation Electrical connection The boiler has 4 socket blocks for all electrical connections: Caution: High voltage supply (230V) After removing the panels 230V Volt free switches (230V relays) 3-4. Low voltage sensors and I/O Electrical connections are only to PWM 0-10V GND Signal Signal PWM 0-10V...
- Page 40 Installation Electrical connection Line (AC) Line (AC) MO1 (AC) Input Output Output Contact Line Type Name Function Description Electrical Description Line The Main Power supply to Neutral Main input Earth Line Output of the main power Neutral Main Output input, Live when the switch of Same as Input Earth Line...
- Page 41 Installation Electrical connection 3 & 5 PWM 0-10V GND Signal Signal NTC 7 NTC 3 (DHW/ MO1 (0-10V output) MTS1 (T10) MTS2 MTS3 eBus eBus (outd. sensor) Tank sensor) Output Input Input Input Input Input Input Output Contact Line Type Name Function Description Electrical Description...
-
Page 42: Multi Function
Installation Electrical connection Multi function MO1 OUTPUT (AC) ECU I/O Menu display parameter Multi Out HV Function Function value None System Pump HC1 Pump Circulating Pump DHW intermediate circuit pump BUF Filling pump Heat request VFR 1 ECU I/O Menu display parameter VFR1 Volt free Contact 1 Function... - Page 43 Installation Electrical connection Multi function Function Function value None Heat request Alarm output Lpg/Room Supply Fan MO1 OUTPUT (0-10V) ECU I/O Menu display parameter MO1_LV Multi Out PWM 1 Function Function value None System pump modulator DHW Pump modulator Circulating pump modulator BUF Filling pump modulator MTS 1-2-3 ECU I/O...
- Page 44 Installation Electrical connection Multi function MO2 OUTPUT (0-10V) ECU I/O Menu display parameter MO2_LV Multi Out PWM 2 Function Function value None System pump modulator DHW Pump modulator Circulating pump modulator BUF Filling pump modulator PADIN 1-2-3-4 ECU I/O Menu display parameter PADIN1 Multi In AD 1 PADIN2...
-
Page 45: Temperature Sensors
Installation Electrical connection Temperature sensors addressed on MTS1. DHW Tank Setting There are several schemes for hot water preparations see pages 42-45. Flue gas Sensor sensor. With a setting for max temp MTS1 (T10) MTS2 MTS3 temp where system has to reduce the Input Input Input... -
Page 46: External Controls
Installation Electrical connection BMS Feedback this output gives a 0-10 Volt signal as indication of Load. Pump modulation for several pump types. For types, see scheme on pages 42-44. PWM 0-10V GND PWM 0-10V MO2 (0-10V output) MO1 (0-10V output) Output Output Signal... -
Page 47: Ebus2 Controls
Installation Electrical connection eBus2 controls Cascade connection a cascade is done via the eBus2 in and output. Accessories the eBus2 connection. Signal Signal eBus eBus Input Output... -
Page 48: Wiring Diagram
Installation Electrical connection Wiring diagram SWITCH POWER eBUS PFDIN1 PFDIN WV/DHW SUPPLY 1-2-3 1-2-3 1-2-3-4 PUMP M01-M02 MTS1-2-3 CN20 CN22 CN17 CN14 communication to slave PCB VFR1 CN21 CN11 VFR2 CN13 PC Service Tool VFR3 PUMP PFDIN1 CN11 CN17 PFDIN3 IGNITOR CN16 PFDIN2... - Page 49 Installation Electrical connection Wiring diagram Legend: Main switch 230V Electrical connections Human machine interface HMI Detection electrode Ignition electrode Flow sensor T1 Return sensor T2 Fan unit Gas valve Circulation pump Water pressure sensor P1 Air pressure switch APS Detection electrode Ignition electrode Flow sensor T1 Return sensor T2...
- Page 50 Installation Filling the system Filling the system 25/03/19 09:00 –10 ° The central heating installation needs automatic air purge program will run 32 ° to the requirements in chapter ‘Water This will last for approximately 7 1.5 bar minutes. During this program the electrically commissioned, then the pressure in the central heating needs CH Pump Overrun...
-
Page 51: Boiler Setting Boiler Setting
Boiler setting First time startup a boiler It’s needed to configure the device, press OK to question as in the picture on the left. proceed After pressing OK the next menu is shown. Single boiler setting Available configurations When there is no cascade, select Unconfigured (actual) “Single boiler”. -
Page 52: Operation Description Of Display
Operation Description of display numerous settings to adjust the control exactly to the installation and user requirements. 25/03/19 09:00 –10 ° Display 32 ° accept an action. The light is activated 1.5 bar Cascade symbols are not visible in case of a single boiler or when no bus communication cable is CH Pump Overrun connected. - Page 53 Operation Description of display and keyboard Boiler status Status description Boiler mode and power button color: C.Heating active Burner active for heating The Power Button has four colors: CH pump overrun Overrun time pump over CH DHW Pump overrun Overrun time pump over DHW Pump frost prot Pump active for frost protection Burn frost prot...
-
Page 54: Structure Of The User Menu
Operation Structure of the User Menu The device functions are divided into Home screen Basic settings menu three levels, depending on their This menu is used to display the In this menu, the main functions can importance and the frequency of their operating status of the system and to use. -
Page 55: Change The Settings (Expert Level)
Operation through a code. 25/03/19 09:00 –10 ° 32 ° 1.5 bar CH Pump Overrun 1 From the controller Home screen, press the ESC and OK time for 7 seconds. 2 Use “+” to go down and “–” to go up to highlight 007 as the Technical Code. -
Page 56: Parameter Listing
Operation Parameter listing Name Description Range NETWORK BUS Network Indication of devices connected via BUS Boiler Remote Modem OpenTherm Gateway User interface 1 - 3 1 min - 24 hours Time Program service type Select the time program service type 0 = Time programs 1 = Extended time programs... - Page 57 Operation Parameter listing Name Description Range 0.6LT Slope LT: From 0.2 - 1.0 1.3HT HT: From 1.0 - 3.5 Increase setting: °C temperature, especially at low outside temperatures. Reduce setting: especially at low outside temperatures. -25 °C outdoor temperature LT=2 HT=4 is connected Max T...
- Page 58 Operation Parameter listing Name Description Range 20. 0. temperature temperature 20. 0. 0 = Fixed 0 - 1 20. 0. 24 Commercial Boiler 24. 0 General 24. 0. Maximum Water temp 24. 0. 0 - 100 % 24. 0. Fan inc percentage 4 - 400 % 24.
- Page 59 Operation Parameter listing Name Description Range 24. 5. Anti-legionella Function 0 = OFF, 1 = ON 0 = OFF 1 = ON 24. 5. Boiler DHW charge mode 0 - 2 0 = Charge 1 = Full charge 2 = Full charge Legio 24.
- Page 60 Operation Parameter listing Name Description Range 24. 6. Multi In AD 1 0 = None 0 - 8 1 = Room thermostat HC1 2 = Room thermostat HC2 3 = Room thermostat HC3 4 = 0-10V input request 5 = External operating mode changeover HCs+DHW 7 = Timer CH 8 = Gas Pressure Switch 24.
- Page 61 Operation Parameter listing Name Description Range 24. 7. Free Contact 1 0 = None 0 - 11 1 = System pump 2 = HC1 Pump 3 = Circulating pump 4 = DHW intermediate circuit pump 8 = Heat request 9 = Alarm output 10 = Flue Gas Dumper 11 = Lpg/Room Supply Fan 24.
- Page 62 Operation Parameter listing Name Description Range 24. 8. Fan control 0 = OFF 0 - 1 1 = ON 24. 8. Boiler pump control 2nd Engine 0 = OFF 0 - 1 1 = ON 24. 8. Fan control 2nd Engine 0 = OFF 0 - 1 1 = ON...
- Page 63 Operation Parameter listing Name Description Range 24. 11 Engine 2 diagnostics 24. 11. 0 Fan Speed 24. 11. 1 Pump Modulation % 24. 11. 2 Ionization current 24. 11. 3 SAFETY Flame presence 24. 11. 4 CH Flow T 24. 11. 5 CH Flow2 T 24.
- Page 64 Operation Parameter listing Name Description Range 24. 15 Engine 2 Statistics 24. 15. 0 24. 15. 1 Hours Burner On (h x10) 24. 15. 2 24. 15. 3 Time of circulator on (h x 10) 24. 15. 4 24. 15. 5 Time of fan ON (h x 10) 24.
- Page 65 Operation Parameter listing Name Description Range 25. 0. Max Turnover Level 0 - 100% 25. 0. Maximum Water temp 25. 0. 25. 0. CH/DHW shifting priority time 0 - 65535min. 25. 1 System Settings 25. 1. Thermoregulation 0 = OFF 0 - 1 1 = ON 25.
- Page 66 Operation Parameter listing Name Description Range 25. 3 System Diagnostics 25. 3. CH Flow Set T 25. 3. System Flow T 25. 3. Outdoor T 25. 3. Storage Temperature - High 25. 3. Storage Temperature - Low 25. 3. System Pump Status 25.
- Page 67 Operation Parameter listing Name Description Range 26..32. System Setting 26..32. Thermoregulation 0 = OFF 1 = ON 0 - 1 26..32. External temperature correction T7 26..32. Boost time 0 - 60 min 26..32. Plant frost protection 0 = OFF 1 = ON 0 - 1 26..32.
- Page 68 Operation Parameter listing Name Description Range 26..32. Commercial Boiler - Slave 1.. 26..32. 0 General 26..32. 0. 26..32. 0. Maximum Water temp 26..32. 0. 26..32. 0. Fan inc percentage 26..32. 0. Altitude 26..32. 0. 26..32. 0. Emergency setpoint 26..32. 3 Water Circulation 26..32.
- Page 69 Operation Parameter listing Name Description Range 26..32. 10 Engine 1 diagnostics 26..32. 10. 0 Fan Speed 26..32. 10. 1 Pump Modulation % 26..32. 10. 2 Ionization current 26..32. 10. 3 SAFETY Flame presence 26..32. 10. 4 CH Flow T 26..32. 10. 5 CH Flow T 2A 26..32.
- Page 70 Operation Parameter listing Name Description Range 26..32. 13. 4 Storage Temperature - Low 26..32. 13. 5 System Pump Status 26..32. 13. 6 DHW Pump Status 26..32. 14 Engine 1 Statistics 26..32. 14. 0 26..32. 14. 1 Hours Burner On (h x10) h x10 26..32.
- Page 71 Operation Parameter listing Name Description Range 26..32. 20 Other 26..32. 20. 0 DHW modulation setpoint Building Management System General BMS Control Mode Voltage Power Voltage Temp Current Power Current Temp External Controller Power External Controller Temp BMS Max Temp BMS Min Temp Analog Level Settings BMS Analog Control Voltage to Stop Heat Demand BMS Analog Control Voltage for Maximum Heat Demand...
-
Page 72: Detail Parameter Description
Operation Detail parameter description Date and time DHW preheating Date and time Time program Comfort function activated when DHW preheating is set The control unit is equipped with a to “TIME”. The programs control the DHW set point for the various switching times. -
Page 73: Function Thermoregulation
Operation Function Thermoregulation Room temperature day / night Function Thermoregulation see Complete Menu activation of automatic heating temperature control (AUTO function). This function allows external environmental conditions and to the type of system in which it is installed. This allows to easily achieve high comfort without unnecessary waste of components. -
Page 74: Time Programs Heating
Operation Time programs Heating Heating curve Slope Heating curve Parallel shift Time programs Heating 0-24h Mo-So 00:00 – 24:00 Mo-Do 06:00 – 22:00 Family program systems according to his wishes. If a Fr-Sa 06:00 – 23:00 07:00 – 22:00 operates in the desired periods in order Mo-Do 06:00 –... -
Page 75: Automatic Summer / Winter Changeover
Operation Automatic summer / winter changeover Automatic summer / winter Summer/winter change-over changeover temperature Criterion external temperature in order automatically changes from “winter” mode ( ) to “summer” mode summer operation to change, factory conditions. Hint: automatically activate or deactivate The automatic summer / winter the heating mode. -
Page 76: Commissioning Change The Language On The Screen
Commissioning Change the language on the screen 25/03/19 09:00 –10 ° 32 ° 1.5 bar CH Pump Overrun 1 From the controller Home screen, press OK. 2 The “+” and “–” to select the parameter set and parameter settings. The OK stores any adjustments made. -
Page 77: Change The Time And Date
Commissioning Change the time and date Attention: in case of the boiler is connected to 25/03/19 09:00 –10 ° 32 ° automatically. 1.5 bar CH Pump Overrun 1 From the controller Home screen, press OK. 2 Use “+” to go down and “–” to go up to highlight Complete Menu. -
Page 78: Parameter Adaption To The Heating System
Commissioning Parameter adaption to the heating system through a code. 25/03/19 09:00 –10 ° 32 ° 1.5 bar CH Pump Overrun 1 From the controller Home screen, press the ESC and OK time for 7 seconds. 2 Use “+” to go down and “–” to go up to highlight 007 as the Technical Code. - Page 79 Commissioning Parameter adaption to the heating system Factory Name Description settings Zone1 Parameters Summer / Winter Changeover 4.1.0 S/W function activation 0 = OFF, 1 = ON 4.1.1 S/W temperature treshold Zone 1 Settings 4.2.0 Zone temperature range 4.2.1 Thermoregulation 0 = Fix Flow T 1 = Basic thermoregulation 2 = Room T Only...
-
Page 80: Weather Compensation
Commissioning Weather compensation Select thermoregulation type 1 Use “+” to go down and “–” to go Menu up to highlight the Parameters Zone Network you want to set. In this case Zone1 Parameters Zone 1 Parameters. Zone2 Parameters Press OK. Zone3 Parameters Commercial boiler 2 Use “+”... -
Page 81: Inspection
(non-aggressive) cleaning agent. (2x) (2x) inspection is only to be carried When carrying out maintenance, only original ATAG replacement parts may Removal of front panel Checks prior to commissioning pressure and setting the amount of air is not necessary. Only in the case of failures or... -
Page 82: Flue Gas Analysis
Commissioning Flue gas analysis Full load (Step 1/3) 25/03/19 09:00 –10 ° 32 ° 1.5 bar CH Pump Overrun 5 sec. Legend The O / CO Step 1: Check on full load The modulation rate can now be Set the load of complete boiler Step 2: Check on low load adjusted between minimum 0% Step 3: Adjustment (if necessary). -
Page 83: Low Load (Step 2/3)
O value at full load. result is achieved. Please contact ATAG, if the values should lie outside End of measuring: to exit chimney sweep mode. This completes the procedure. The maximum duration of the commissioning function, without interruption, is 20 minutes. -
Page 84: Adjustment On The Gas Valve (Step 3/3)
Commissioning Flue gas analysis Adjustment on the gas valve (Step 3/3) Step 3: Adjustment on the gas valve Adjust the gas valve only in case the measured values lies out of range of the values mentioned in the table on previous page. -
Page 85: Inspection And Maintenance Interval
/ CO control measurement must calibrated equipment. When replacing spare parts only original ATAG Service parts are to zero-point setting. The zero-point any remaining heating water cannot a malfunction, or after an exchange freeze, in case of a frost hazard. -
Page 86: Maintenance Details
Maintenance Maintenance details Maintenance interval Both the gas connection and the An inspection of the burner must pressure on the connection must be checked. within 2 years. (To verify with local Check at each maintenance service depending by installing condition). gas leaks are detected. - Page 87 Maintenance Maintenance details CAUTION: remove the fast clip on the venturi (1) and the gas valve (2) and before carrying out maintenance or repair works on the boiler. Ventilator unit and burner cassette Direction (B). (see illustration) Disconnect the electrical Now lift the complete fan unit (7) with the upper tray and remove it in...
- Page 88 Maintenance Maintenance details Turn the unit up side down and pollution. Clean it, if necessary, with Avoid any pollution falling down. wear and tear, pollution and any vacuum cleaner. In the case NOTE: TOP-FLUSHING THE EXCHANGER WITH WATER IS NOT ALLOWED.
- Page 89 Maintenance Maintenance details renewed, if damages or any wear and tear is detected. The value of ignition renewed, if damages or any wear and through measurements. years. Furthermore, the value of the The maximum electrode resistance at room temperature should not exceed through measurements.
-
Page 90: Maintenance Warning
Maintenance Maintenance details Dirt collector Place a basin under the red dirt the drainage cup to remove eventual collector to collect the dirty and aggressive condensate water. Take the device back into operation gloves and safety glasses. (refer to chapter Check O pollution. -
Page 91: Inspection Overview
Maintenance Inspection overview Pos. Nr.: Inspection check list - ATAG XL-F Remarks Switch off power supply to the boiler and close the gas valve! Air box/Boiler cover 1.0.1 Remove boiler cover 1.0.2 Check boiler cover/air box sealing on wear 1.0.3... -
Page 92: Maintenance Overview
Maintenance Maintenance overview Pos. Nr.: Maintenance check list - ATAG XL-F Remarks Switch off power supply to the boiler and close the gas valve! Air box/Boiler cover 1.0.1 Check cover on impurence and damage 1.0.2 Necessary cleaning 1.0.3 Check the sealing and replace if necessary... - Page 93 Errors Cascade The cascade master display shows all clip-in, solar manager, etc. Cascade slave boiler Shows only an error that is active on Error on cascade master from a 01/01/15 00:00 Fault 110 1 Boiler Slave 1 Send probe damaged ALERT 01/01/15 00:00 Error on the master itself.
- Page 94 Errors Fault Code Fault Code Message on display (no indication of BHE0 and BHE1 engine 2 engine 1 (if applicable) (Reserved) (Reserved) (Reserved) (Reserved) Flow Sensor Open Short Circuit 110 1 Flow Sensor Open Short Circuit 110 2 Return Sensor Open Short Circuit 112 1 Return Sensor Open Short Circuit 112 2...
- Page 95 Errors Fault Code Fault Code Message on display (no indication of BHE0 and BHE1 engine 2 engine 1 (if applicable) No Flame 2 5P2 1 No Flame 2 5P2 2 Flame lift 1 5P3 1 Flame lift 1 5P3 2 145 1 145 2 Fan Error...
-
Page 96: Reset A Fault Code
Errors Reset a Fault code through a code. 1 When an error occurs, the fault code and description appear on the screen. 2 To reset the fault code, press the RESET 3 The message on the screen left appears. Press OK to reset the error, otherwise the previous screen is shown. -
Page 97: View Error Code History
Errors View Error code History 25/03/19 09:00 –10 ° 32 ° 1.5 bar CH Pump Overrun 1 From the controller Home screen, press the ESC and OK time for 7 seconds. 2 Use “+” to go down and “–” to go up to highlight 007 as the Technical Code. -
Page 98: Disposal And Recycling
Disposal and recycling Device decommissioning please note the following points for dismantling and disposal: The decommissioning should specialist personnel, since certain activities are required on electrical components and fuel carrying lines. to the device/ the device part and is de-energised. Disposal of packaging material professional and appropriate disposal specialist tradesman or dealer. -
Page 99: Appendix Sensor Resistance
Sensor resistance Sensor resistance Outdoor temperature sensor Heating return sensor DHW sensor optional sensors that are contained in Flue gas sensor 55.047 4.574 32.555 4.358 When measuring resistance values, he 19.873 4.152 18.069 3.958 Carry out measurements near to the sensor, so as to avoid deviations from 16.447 3.774... -
Page 100: Standard Schemes
Standard schemes Scheme Boiler group Distribution group One direct zone Name and Description ECU I/O Note NTC1 Boiler return sensor NTC2 Outdoor sensor NTC4 Boiler pump (230 V) Boiler pump (PWM) PWM_P1 MTS1 HC1 pump MO1_HV Pumps managed in parallel System pump* MO1_HV Heat request zone 1... - Page 101 Standard schemes Scheme Boiler group Distribution group Multiple direct zones Name and Description ECU I/O Note Outdoor sensor NTC4 Boiler pump (230 V) Boiler pump (PWM) PWM_P1 NTC1 Boiler return sensor NTC2 MTS1 HC1 pump P_Z1 Controlled with HC2 pump P_Z2 CLIP 3 ZONE MIX.
- Page 102 Standard schemes Scheme Boiler group Distribution group One or multiple mixing zones Name and Description ECU I/O Note Outdoor sensor NTC4 Boiler pump (230 V) Boiler pump (PWM) PWM_P1 NTC1 Boiler return sensor NTC2 MTS1 HC1 pump P_Z1 HC1 mix valve MV_Z1 NTC_Z1 HC2 pump...
- Page 103 Standard schemes Scheme Boiler group Distribution group hydraulic separator • From 1 to 3 mixing zone Name and Description ECU I/O Note Outdoor sensor NTC4 Boiler pump (230 V) Boiler pump (PWM) PWM_P1 NTC1 Boiler return sensor NTC2 NTC3 DHW pump MTS1 HC1 pump VFR1...
- Page 104 CE DECLARATION OF CONFORMITY XL75F XL105F XL125F XL150F XL180F XL210F are in conformity with the following standards: EU Gas Appliance Regulation 2016/426/EU EN 15502-1: 2012 EN 15502-2-1: 2012 EN 60335-1: 2011 EN 60335-2-102: 2016 EN 298: 2013 Low Voltage Directive...
- Page 105 Notes...
- Page 106 Notes...
- Page 107 Notes...
Need help?
Do you have a question about the XL75F and is the answer not in the manual?
Questions and answers