Table of Contents
Advertisement
Available languages
Available languages
PLEASE SAVE THIS OWNERS MANUAL AND READ BEFORE EACH USE.
This manual will explain how to use the battery charger safely and effectively.
Please read and follow these instructions and precautions carefully.
POR FAVOR CONSERVE ESTE MANUAL DEL USUARIO Y LEALO ANTES
DE CADA USO. En este manual le explica cómo utilizar el cargador de batería
de manera segura y confiable. Por favor, lea y siga las siguientes instrucciones
y precauciones.
GARDER LE MANUEL D'INSTRUCTION ET LISEZ LE AVANT CHAQUE
UTILISATION. Ce manuel explique comment utiliser le chargeur de batterie
d'une façon securitaire et efficace. S'il vous plaît lisez et suivez ces instructions
et precautions.
MODEL / MODELO / MODÈLE :
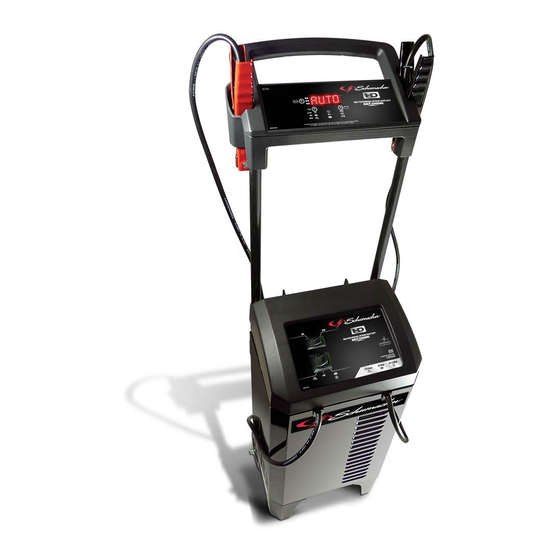
SC1326
Automatic
Battery Charger
Cargador de baterías
automático
Chargeur de batterie
automatique
OWNERS MANUAL
MANUAL DEL USUARIO
MANUEL D'UTILISATION
0099001958-00
Advertisement
Table of Contents

Related Manuals for Schumacher SC1326


Summary of Contents for Schumacher SC1326
- Page 1 MODEL / MODELO / MODÈLE : SC1326 Automatic Battery Charger Cargador de baterías automático Chargeur de batterie automatique OWNERS MANUAL MANUAL DEL USUARIO MANUEL D’UTILISATION PLEASE SAVE THIS OWNERS MANUAL AND READ BEFORE EACH USE. This manual will explain how to use the battery charger safely and effectively.
-
Page 2: Important Safety Instructions
1. IMPORTANT SAFETY INSTRUCTIONS SAVE THESE INSTRUCTIONS. 1.1 SAVE THESE INSTRUCTIONS – 1.8 Do not operate charger if it has received This manual contains important safety a sharp blow, been dropped, or otherwise and operating instructions. damaged in any way; take it to a qualified serviceman. -
Page 3: Preparing To Charge
3. PREPARING TO CHARGE 3.1 If necessary to remove battery from battery without removable cell caps, such vehicle to charge, always remove as valve regulated lead acid batteries, grounded terminal from battery first. Make carefully follow manufacturer’s recharging sure all accessories in the vehicle are off, instructions. -
Page 4: Follow These Steps When Battery Is Outside Vehicle
7. FOLLOW THESE STEPS WHEN BATTERY IS OUTSIDE VEHICLE WARNING: A SPARK NEAR THE connect NEGATIVE (BLACK) charger clip BATTERY MAY CAUSE A BATTERY to free end of cable. EXPLOSION. TO REDUCE THE RISK OF 7.5 Do not face battery when making final A SPARK NEAR THE BATTERY: connection. -
Page 5: Control Panel
10. CONTROL PANEL DIGITAL DISPLAY LED INDICATORS The digital display indicates the status of REVERSED CLAMPS (red) LED the battery and charger. See the Display flashing: The connections are reversed. Messages section for a complete list of (yellow/orange) LED lit: messages. - Page 6 ENGINE START – Use this position BOOST or CHARGE/MAINTAIN – for the Engine Start mode. When the When the switch is in this position, switch is in this position, the Engine Start Rate Selection button can be set LED will illuminate. to either the 6A<>2A Charge/Maintain 40A Boost.
- Page 7 MAINTAINING A BATTERY set the ON/OFF switch to the The SC1326 maintains 6 and 12 volt Engine Start position, and then press batteries, keeping them at full charge. Rate Selection button until the It is not recommended for industrial Engine Start LED is lit.
- Page 8 ENGINE STARTING NOTES TESTER AND CHARGER During the starting sequence, the charger When first turned on, the unit operates only is set to one of three states: as a tester, not as a charger. Selecting a charge rate activates the battery charger •...
-
Page 9: Display Messages
NOTE: Refer to your vehicle owner’s near the charger clear of obstructions, to manual for appropriate voltage numbers allow the fan to operate efficiently. for your alternator. RESTART FAN OPERATION If the Charge Mode is changed after It is normal for the fan to start and stop when charging has started (by pressing the maintaining a fully charged battery. -
Page 10: Troubleshooting
14. TROUBLESHOOTING PROBLEM POSSIBLE CAUSE SOLUTION The charger will not turn on AC outlet is dead. Check for open fuse or circuit when properly connected. breaker supplying AC outlet. Poor electrical connection. Check power cord and extension cord for loose fitting plug. Battery is defective. -
Page 11: Before Returning For Repairs
1-800-621-5485 Monday-Friday 7:00 to 5:00 For REPAIR OR RETURN, contact Customer Service at 1-800-621-5485. DO NOT SHIP UNIT until you receive a RETURN MERCHANDISE AUTHORIZATION (RMA) number from Customer Service at Schumacher Electric Corporation. • 11 •... -
Page 12: Specifications
Manufacturer does not provide any warranty for any accessories used with this product that are not manufactured by Schumacher Electric Corporation and approved for use with this product. This Limited Warranty is void if the product is misused, subjected to careless handling, repaired, or modified by anyone other than Manufacturer or if this unit is resold through an unauthorized retailer. -
Page 13: Instrucciones Importantes De Seguridad
1. INSTRUCCIONES IMPORTANTES DE SEGURIDAD GUARDE ESTAS INSTRUCCIONES. 1.1 GUARDE ESTAS INSTRUCCIONES – 1.8 No utilice el cargador si el mismo recibió Este manual contiene instrucciones un golpe fuerte, si se cayó o si sufrió operativas y de seguridad de importancia. daños de cualquier otra forma;... -
Page 14: Preparación Para La Carga
ácido puede producir una corriente de aplicación de un motor de arranque. No cortocircuito lo suficientemente elevada utilice este cargador de batería para cargar como para soldar un anillo o provocar baterías de pila seca que por lo general efectos similares sobre el metal, se utilizan con artefactos domésticos. - Page 15 6. SIGA ESTOS PASOS CUANDO LA BATERÍA ESTÉ COLOCADA EN EL VEHÍCULO ADVERTENCIA: UNA CHISPA POSITIVO (ROJO) del cargador de PROVOCADA CERCA DE LA BATERÍA batería al borne POSITIVO (POS, P, +) sin PUEDE CAUSAR LA EXPLOSIÓN DE LA descarga a tierra de la batería. Conecte BATERÍA.
-
Page 16: Conexiones A Tierra Y Energía De Ca
8. CONEXIONES A TIERRA Y ENERGÍA DE CA 8.1 Este cargador de batería está destinado a adaptador no es permitido en el Canada. un uso en un circuito con tensión nominal El uso de un enchufe como adaptador de 120 V y posee un enchufe con descarga no se recomienda y no debe ser utilizado a tierra. - Page 17 A (Porcentaje de alternador) – BOTÓN DE TIPO DE BATERÍA La pantalla digital muestra un porcentaje Utilice este botón para establecer el tipo de salida estimado del sistema de carga de batería. del vehículo conectado a las pinzas STD (Estándar) – Se utiliza en de batería pertenecientes al cargador, automóviles, camiones y motocicletas, en comparación con un sistema de...
-
Page 18: Instrucciones De Operación
ARRANQUE DEL MOTOR – Utilice IMPULSAR o CARGA/ esta posición para el modo de arranque MANTENIMIENTO – Cuando el del motor. Cuando el interruptor se interruptor se encuentra en esta posición, encuentra en esta posición, el LED el botón de selección de velocidad se Arranque del motor se iluminará. - Page 19 MANTENIENDO UNA BATERÍA Carga de la Batería en el Vehículo. El SC1326 carga y mantiene las Con el cargador enchufado y baterías de 6 y 12 voltios, mantenerlos a conectado a la batería y chasis, carga completa.
- Page 20 4. Si el motor no arranca, utilice el ajuste UTILIZAR EL PROBADOR DE TENSIÓN Impulsar 40A por 5 minutos antes DE BATERÍA de darle arranque nuevamente. 1. Con el cargador desenchufado del 5. Después de que el motor se puso en tomacorriente de CA, conecte el marcha, pulse el interruptor ON / OFF cargador a la batería siguiendo las...
-
Page 21: Muestra De Mensajes
unidad permanecerá como probador (no 4. Arranque el vehículo, accelere el motor cargador) indefinidamente, a menos que a 2000 rpm durante 30 segundos y se seleccione un índice de carga. encienda las luces delanteras u otros accesorios. PROBAR DESPUÉS DE CARGAR 5. -
Page 22: Mantenimiento Y Cuidado
13. MANTENIMIENTO Y CUIDADO Con cuidados mínimos puede mantener • Enrolle los cables de entrada y salida el cargador de baterías funcionando cuidadosamente cuando almacene el correctamente durante años. cargador. Esto ayudará a evitar daños accidentales a los cables y el cargador. •... - Page 23 PROBLEMA CAUSA POSIBLE SOLUCIÓN La pantalla muestra La batería está sulfatada. No continúe intentando cargar CHARGE ABORTED esta batería. Revise la batería y BAD BATTERY. reemplácela si es necesario. La batería es demasiado grande Usted necesita un cargador con una para el cargador.
-
Page 24: Antes De Devolver A Reparaciones
5:00 Para REPARACIÓN O DEVOLUCIÓN, comuníquese con Servicios al Cliente al 1-800-621-5485. NO ENVÍE LA UNIDAD hasta que usted reciba AUTORIZACIÓN DE DEVOLUCIÓN DE MERCANCÍA (RMA) de Servicios al Cliente de Schumacher Electric Corporation. 16. ESPECIFICACIONES Entrada ..............120V AC @ 60Hz, 12.7A cont., 49A int. -
Page 25: Garantía Limitada
El Fabricante no presta garantía por lo accesorios utilizados con este producto que no sean los fabricados por Schumacher Electric Corporation y que no estén aprobados para su uso con este producto. La presente Garantía Limitada será nula si el producto se utiliza en forma errónea, se trata de manera inadecuada, es reparado o modificado... -
Page 26: Consignes De Sécurité Importantes
1. CONSIGNES DE SÉCURITÉ IMPORTANTES CONSERVER CES INSTRUCTIONS. 1.1 CONSERVER CES INSTRUCTIONS – 1.7 Ne pas faire fonctionner le chargeur avec Ce manuel contient des instructions un cordon ou une prise endommagé – importantes concernant la sécurité et le remplacer immédiatement. fonctionnement. -
Page 27: Préparation Pour Le Chargement
capacité recommandé de 22 Ah (6V) 2.9 NE JAMAIS charger une batterie gelée. et 22-75 Ah (12V). Il n’est pas conçu 2.10 AVERTISSEMENT : Ce produit contient pour alimenter un système électrique un ou plusieurs produits chimiques à basse tension autre que dans une reconnus par l’État de Californie pour application d’un démarreur. -
Page 28: Étapes À Suivre Quand La Batterie Est Installée Hors Du Véhicule
6.4 Déterminer quelle borne est mise à la raccorder la pince NÉGATIVE (NOIRE) masse (raccordée au châssis). Si la du chargeur à la borne NÉGATIVE (NÉG, borne négative est raccordée au châssis N, –) non mise à la masse de la batterie. (comme dans la plupart des cas), voir Raccorder la pince POSITIVE (ROUGE) l’étape 6.5. -
Page 29: Directives D'assemblage
9. DIRECTIVES D’ASSEMBLAGE 9.1 Il est important d’assembler MISE EN GARDE : veillez à ne pas pincer ni à complètement votre chargeur avant de endommager le câble pendant l’installation de l’utiliser. Retirez toutes les range-cordons la poignée. Le chargeur ne fonctionnera pas et déroulez les câbles avant d’utiliser correctement si ce câble est endommagé. -
Page 30: Consignes D'utilisation
INDICATEURS LED moteur de démarrage, les sports de puissance, cycle profond, batteries solaires. PINCES INVERSÉES (rouge) LED clignotant : Les connexions sont GEL – L’électrolyte dans un élément inversées. gélifié a un additif de silice qui lui permet de s’ancrer ou de se raidir. La tension (jaune / orange LED allumée : du chargement de ce type d’élément Le chargeur a détecté... - Page 31 CHARGE AUTOMATIQUE MAINTENIR UNE BATTERIE Quand une charge automatique est Le SC1326 maintient batteries de 6 volts effectuée, le chargeur passe en mode et 12 volts, de les maintenir à pleine de maintien automatiquement lorsque la charge.
- Page 32 NOTE : La technologie de mode maintien 3. Une fois le chargeur branché et vous permet de recharger en toute connecté à la batterie et au châssis, sécurité et de maintenir une batterie en placez l’interrupteur MARCHE/ARRÊT bon état pendant des périodes de temps sur la position Démarrage du prolongées.
- Page 33 secondes ou jusqu’à l’arrêt du démarrage DÉLAI DE MARCHE à moteur. L’écran numérique affiche le Si aucune touche n’est touchée dans les compte à rebours du temps nécessaire qui 10 minutes après le chargeur de batterie reste pour faire tourner le moteur. est mis sous tension, le chargeur passe automatiquement du testeur au chargeur •...
-
Page 34: Messages D'affichage
FONCTIONNEMENT DU VENTILATEUR REDÉMARRAGE Il est normal pour le ventilateur de Après le début du chargement, si le mode démarrer et de s’arrêter lorsque la batterie est changé (en appuyant sur le bouton est maintenue complètement chargée. Sélection de Taux ou Type de Le ventilateur ne fonctionne pas en mode Batterie... - Page 35 14. TABLEAU DE DÉPANNAGE PROBLÈME CAUSE POSSIBLE SOLUTION Le chargeur ne s’allume La prise de courant CA Vérifiez si un fusible est coupé pas quand il est est morte. ou le disjoncteur pour cette prise correctement branché. de courant. Mauvaise connexion Vérifiez le cordon d’alimentation électrique.
- Page 36 PROBLÈME CAUSE POSSIBLE SOLUTION Cycle de démarrage court Pas de courant à la prise. Vérifiez si un fusible est coupé ou non existant quand on ou le disjoncteur pour cette prise lance le moteur. de courant. Mauvais branchement du Vérifiez le cordon d’alimentation cordon CA ou de la rallonge.
-
Page 37: Avant De Retourner Pour Les Réparations
ACHETEUR DE CE PRODUIT. CETTE GARANTIE LIMITÉE N’EST PAS TRANSFÉRABLES NI CESSIBLES. Schumacher Electric Corporation (le « Fabricant ») garantit ce unité pour deux (2) ans à compter de la date d’achat au détail contre les défauts de matériaux ou de fabrication qui peuvent se produire dans des conditions normales d’utilisation et de soins. - Page 38 CETTE GARANTIE LIMITÉE EST LA SEULE GARANTIE EXPRESSE LIMITÉE ET LE FABRICANT N’ASSUME OU N’AUTORISE QUICONQUE À ASSUMER ET NE FAIT AUCUNE AUTRE OBLIGATION VERS LE PRODUIT AUTRE QUE CETTE GARANTIE. Schumacher et le logo Schumacher sont des marques déposées ® de Schumacher Electric Corporation. • 38 •...
-
Page 39: Warranty Card / Tarjeta De Garantía
ORIGINAL receipt because it will be required for any warranty claims. This warranty is not transferable. Send warranty card only. DO NOT SEND UNIT TO THIS ADDRESS FOR REPAIR. Mail this card to: Schumacher Electric Corporation 801 Business Center Drive Mount Prospect, IL 60056-2179 Name ______________________________________________________________... -
Page 40: Carte De Garantie
éventuelle réclamation au titre de la garantie. Cette garantie n’est pas transférable. Envoyer la carte de garantie seulement. NE PAS ENVOYER L’UNITÉ À CETTE ADRESSE POUR RÉPARATION. Envoyer cette carte à : Schumacher Electric Corporation 801 Business Center Drive Mount Prospect, IL 60056-2179 (É.-U ) Nom _______________________________________________________________...
Need help?
Do you have a question about the SC1326 and is the answer not in the manual?
Questions and answers
Club car battery charger 36 volt 18amp/48volt. LifePo4. charger shows OFF but batteries are dead.
The Schumacher SC1326 charger is not designed for charging 36V or 48V LiFePO4 batteries. It is likely a 6V/12V charger intended for lead-acid batteries. If the charger shows OFF, it may not be detecting a compatible battery voltage or chemistry, preventing it from charging. Additionally, if the batteries are completely dead, the charger may not recognize them and fail to initiate charging.
This answer is automatically generated