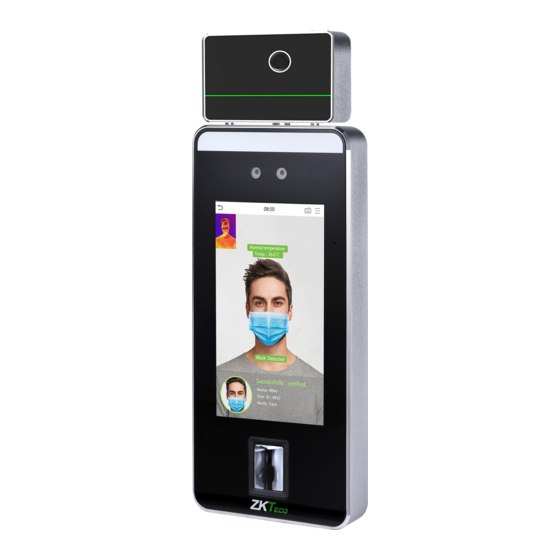
ZKTeco SpeedFace-V5L User Manual
5/7-inch linux visible light product
Hide thumbs
Also See for SpeedFace-V5L:
- User manual (126 pages) ,
- Quick start manual (33 pages) ,
- Quick start manual (18 pages)
Table of Contents
Advertisement
Quick Links
Advertisement
Table of Contents

Related Manuals for ZKTeco SpeedFace-V5L


Summary of Contents for ZKTeco SpeedFace-V5L
- Page 1 USER MANUAL 5/7-inch Linux Visible Light Product Version: 1.0 Date: June 2019...
- Page 2 Important Statement Thank you for choosing our product. Before using this product, please read this user manual carefully to avoid risks of danger to the users of this product or those nearby and damaging the device. Follow these instructions to ensure that your product functions properly and completes verifications in a timely manner.
-
Page 3: Table Of Contents
Contents 1 Notice for Use ............................................... 1 1.1 Method of Pressing Fingerprint ..................................1 1.2 Standing Position, Facial Expression and Standing Posture ......................1 1.3 Face Registration ......................................... 2 1.4 Verification Mode ........................................3 1.4.1 Password Verification ....................................3 1.4.2 Fingerprint Verification .................................... 4 1.4.3 Facial Verification ...................................... - Page 4 8.2 Backup Data ..........................................35 8.3 Restore Data ..........................................36 9. Access Control ............................................37 9.1 Access Control Options ......................................37 10. USB Manager ............................................39 10.1 USB Download .......................................... 39 10.2 USB Upload ..........................................40 10.3 Download Options ........................................ 40 11.
-
Page 5: Notice For Use
1 Notice for Use 1.1 Method of Pressing Fingerprint Recommended fingers: index, middle, or ring fingers; avoid using the thumb or pinky, as they are difficult to accurately press onto the fingerprint reader. Diagram of how to correctly press your fingers onto the fingerprint reader. Press your finger onto the fingerprint reader. -
Page 6: Face Registration
Facial expression and standing posture Note: During enrolment and verification, please remain natural facial expression and standing posture. 1.3 Face Registration Try to keep the face in the center of the screen during registration. Please face the camera and stay still during face registration. -
Page 7: Verification Mode
1.4 Verification Mode 1.4.1 Password Verification Compare the entered password with the registered User ID and password. Enter the User ID on the main screen to enter the 1:1 password verification mode. Enter the user ID and press M/OK. If the user registers face and fingerprint in addition to password, the following screen will appear. Select the Password icon to enter password verification mode. -
Page 8: Fingerprint Verification
Verification is successful. Verification is failed. 1.4.2 Fingerprint Verification 1:N fingerprint verification Compare the fingerprint that is being pressed onto the fingerprint reader with all of the fingerprint data that is stored in the device. To enter fingerprint verification mode, simply press your finger on the fingerprint reader. Make sure that you correctly press your fingerprint onto the fingerprint reader. - Page 9 Successful verification: Verification is failed: 1:1 fingerprint verification Compares the fingerprint that is being pressed onto the fingerprint reader with the fingerprints that are linked to Employee ID input via the virtual keyboard. This method can be used when the system has trouble recognizing an employee's fingerprints.
- Page 10 Press the finger on the fingerprint reader to proceed with verification. Successfully verified. 6 2.8-inch Linux Visible Light Product User Manual...
-
Page 11: Facial Verification
Verification is failed. 1.4.3 Facial Verification 1:N face verification Compare the acquired facial images with all face data registered in the device. The following is the pop-up prompt box of comparison result. 1:1 face verification Compare the face captured by the camera with the facial template related to the entered user ID. Enter the User ID on the main interface and enter the 1:1 facial verification mode. -
Page 12: Card Verification
After successful verification, the prompt box "Successfully verified" will appear. 1.4.4 Card Verification Only the product with the card module offers the card verification function. Please place the registered card on the card reader. 1.4.5 Combined Verification To increase security, this device offers the option of using multiple forms of verification methods. A total of 5 different verification combinations can be used, as shown below: 8 2.8-inch Linux Visible Light Product User Manual... - Page 13 Notes: 1) "/" means “or”, and "+" means “and”. 2) You must register the required verification information before using the combination verification mode, otherwise the verification may fail. For example, if a user uses Face Registration but the verification mode is Face + Password, this user will never pass verification.
-
Page 14: Main Menu
2 Main Menu Click M/OK on the initial interface to enter the main menu, as shown below: Items Descriptions To add, edit, view, and delete basic information about a user. User Mgt. To set the permission scope of the custom role and enroller, that is, the rights to User Role operate the system. -
Page 15: User Management
3 User Management 3.1 Adding Users Select User Mgt. on the main menu. Select New User. Register a User ID and Name Enter the user ID and name. Notes: 1) A user name may contain 17 characters. 2) The user ID may contain 1-9 digits by default. 3)... - Page 16 Setting the User Role There are two types of user accounts: the normal users and the super admin. If there is already a registered administrator, the normal users have no rights to manage the system and may only access authentication verifications.
- Page 17 Register fingerprint Select Fingerprint to enter the enroll fingerprint page. User can choose one or more fingerprint(s) to enroll. Press the finger horizontally onto the fingerprint sensor. The registration interface is as follows: Register face Select Face to enter the face registration page. Please face the camera and stay still during face registration. The registration interface is as follows: 2.8-inch Linux Visible Light Product User Manual 13...
- Page 18 Register password Select Password to enter the password registration page. Enter a password and re-enter it. Select M/OK. If the two entered passwords are same, the system will return to the New User interface. Note: The password may contain one to eight digits by default. Register user photo ...
-
Page 19: Search For Users
3.2 Search for Users Enter the retrieval keyword on the user list (The keyword may be an ID, surname or full name.). The system will search for the users related to the information. 3.3 Edit Users Choose a user from the list and select Edit to enter the edit user interface: Note: The operation of editing a user is the same as that of adding a user, except that the user ID cannot be modified when editing a user. -
Page 20: Deleting Users
3.4 Deleting Users Choose a user from the list and select Delete to enter the delete user interface. Select the user information to be deleted and click M/OK. Note: If you select Delete User, all information of the user will be deleted. 16 2.8-inch Linux Visible Light Product User Manual... -
Page 21: User Role
4 User Role If you need to assign some specific permissions to certain users, you may edit the “User Defined Role” under the User Role menu. You may set the permission scope of the custom role (up to 3 roles) and enroller, that is, the permission scope of the operation menu. - Page 22 Note: You need to select the features in sub-menus. If the device has a role enabled, you may assign the roles you set to users by selecting User Mgt. > New User > User Role. If no super administrator is registered, the device will prompt "Please register super administrator user first!” after Selecting the enable bar.
-
Page 23: Communication Settings
5 Communication Settings Set parameters of the network, PC connection, WIFI and cloud server. Select COMM. on the main menu. 5.1 Network Settings When the device needs to communicate with a PC over the Ethernet, you need to configure network settings and ensure that the device and the PC are connecting to the same network segment. -
Page 24: Pc Connection
Item Descriptions The factory default value is 192.168.1.201. Please adjust them according to the IP Address actual network situation. The factory default value is 255.255.255.0. Please adjust them according to the Subnet Mask actual network situation. The factory default address is 0.0.0.0. Please adjust them according to the actual network situation. -
Page 25: Wifi Setting
5.3 WIFI Setting Select Wireless Network on the Comm. Settings interface. When WIFI is enabled, select the searched network. Enter the password, and select Connect to WIFI (OK). The connection succeeds, with icon displayed on the status bar. Adding WIFI Network ... -
Page 26: Cloud Server Setting
Item Description DHCP Short for Dynamic Host Configuration Protocol, which involves allocating dynamic IP addresses to network clients. IP Address IP address of the Wi-Fi network. Subnet Mask Subnet mask of the Wi-Fi network. Gateway Gateway address of the Wi-Fi network. 5.4 Cloud Server Setting This represents settings used for connecting with the ADMS server. - Page 27 Item Description When this function is enabled, the domain name mode “http://... ” will be used, Enable Domain Name such as http://www.XYZ.com, while “XYZ” denotes the domain name when this mode is turned ON. Server Address IP address of the ADMS server. Server Port Port used by the ADMS server.
-
Page 28: System Settings
6 System Settings Set related system parameters to optimize the performance of the device. Select System on the main menu interface. 6.1 Date and Time Select Date Time on the System interface. 1. You can manually set date and time and click M/OK to save. 2. -
Page 29: Access Logs Setting
device date and time cannot be restored. Note: For example, the user sets the time of the device (18:35 on March 15, 2019) to 18:30 on January 1, 2020. After restoring the factory settings, the time of the equipment will remain 18:30 on January 1, 2020. 6.2 Access Logs Setting Select Access Logs Setting on the System interface. -
Page 30: Face Parameters
The number of attendance logs allowed to be deleted in one time when the Cyclic Delete ATT Data maximum storage is attained. It can be disabled or set to a value ranged from 1 to 999. When attendance photos have reached full capacity, the device will automatically Cyclic Delete ATT Photo delete a set value of old attendance photos. -
Page 31: Fingerprint Parameters
similarity between the acquired facial image and the facial templates enrolled in the device is greater than the set value. The valid value ranges from 55 to 120. The higher the thresholds set, the lower the misjudgment rate, the higher the rejection rate, and vice versa. -
Page 32: Factory Reset
Item Description Under 1:1 Verification Method, only when the similarity between the verifying 1:1 Match Threshold fingerprint and the user’s registered fingerprint is greater than this value can the verification succeed. Under 1:N Verification Method, only when the similarity between the verifying 1:N Match Threshold fingerprint and all registered fingerprints is greater than this value can the verification succeed. -
Page 33: Usb Upgrade
6.6 USB Upgrade Insert the U disk with upgrade file into the device’s USB port, and in the initial interface, press [M/OK] > System > USB Upgrade to complete firmware upgrade operation. Select USB Upgrade on the System interface. Note: If upgrade file is needed, please contact out technical support. -
Page 34: Personalize Settings
7. Personalize Settings You may customize interface settings. Select Personalize on the main menu interface. 7.1 Interface Settings You can customize the display style of the main interface. Select User Interface on the Personalize interface. Item Description Wallpaper To select the main screen wallpaper according to your personal preference. Language To select the language of the device. -
Page 35: Voice Settings
When there is no operation, and the time exceeds the set value, the device will Menu Screen Timeout (s) automatically go back to the initial interface. You can disable the function or set the value between 60 and 99999 seconds. When there is no operation, and the time exceeds the set value, a slide show will Idle Time To Slide Show (s) be played. -
Page 36: Punch States Settings
7.3 Punch States Settings Select Punch State Options on the Personalize interface. Item Description To choose the Punch State Mode, which includes the following modes: Off: To disable the punch state key function. The punch state key set under Shortcut Key Mappings menu will become invalid. -
Page 37: Shortcut Keys Settings
7.4 Shortcut Keys Settings Shortcut keys can be defined as punch state keys or menu function key. When the device is on the main interface, pressing the set shortcut key will display the attendance state or enter the menu operation interface. Select Shortcut Key Mappings on the Personalize interface. -
Page 38: Data Management
8. Data Management To delete the relevant data in the device. Select Data Mgt. on the main menu interface. 8.1 Delete Data Select Delete Data on the Data Mgt. interface. Item Description Delete Attendance Data To delete all attendance data in the device. Delete Attendance Photo To delete attendance photos of designated personnel. -
Page 39: Backup Data
Delete Blacklist Photo To delete the photos taken during verifications which are failed. Delete All Data To delete information and access records of all registered users. Delete Admin Role To remove administrator privileges. Delete Access Control To delete all access data. Delete User Photo To delete all user photos in the device. -
Page 40: Restore Data
Insert the USB disk. In the initial interface, press [M/OK] > Data Mgt. > Backup Data > Backup to USB Disk > Backup Content > choose content to be backed up (Business Data / System Data) > Backup Start to start backup. -
Page 41: Access Control
9. Access Control Select Access Control on the main menu interface. 9.1 Access Control Options To set the parameters of the control lock of the terminal and related equipment. Select Access Control Options on the Access Control interface. Item Description The length of time that the device controls the electric lock to be unlock. - Page 42 If the door is not closed and locked after opening for a certain duration (Door Sensor Delay), Door Sensor Delay (s) an alarm will be triggered. The valid value of Door Sensor Delay ranges from 1 to 255 seconds. There are three types: None, Normal Open, and Normal Closed. None means door sensor is Door Sensor Type not in use;...
-
Page 43: Usb Manager
10. USB Manager Upload or download data between device and the corresponding software by USB disk. Before uploading/downloading data from/to the USB disk, insert the USB disk into the USB slot first. Select USB Manager on the main menu interface. 10.1 USB Download Select Download on the USB Manager interface. -
Page 44: Usb Upload
10.2 USB Upload Select Upload on the USB Manager interface. Item Description To upload all screen savers from USB disk into the device. You can choose [Upload selected Screen Saver picture] or [Upload all pictures]. The images will be displayed on the device’s main interface after upload. -
Page 45: Attendance Search
11. Attendance Search When the identity of a user is verified, the record will be saved in the device. This function enables users to check their access records. 1. Attendance Record Select Attendance Search on the main menu interface. The process of searching for attendance and blacklist photos is similar to that of searching for access records. The following is an example of searching for access records. - Page 46 3) The record search succeeds. Select the record in 4) The below figure shows the details of the selected green to view its details. record. 2. Attendance Photo and Blacklist ATT Photo The operations are similar to those performed to Attendance Record. 42 2.8-inch Linux Visible Light Product User Manual...
-
Page 47: Autotest
12. Autotest The auto test enables the system to automatically test whether functions of various modules are normal, including the LCD, voice, sensor, keyboard and clock tests. Select Autotest on the main menu interface. Item Description Test All To automatically test whether the LCD, audio, camera and RTC are normal. To automatically test the display effect of LCD screen by displaying full-color, pure white, Test LCD and pure black to check whether the screen displays colors normally. -
Page 48: System Information
13. System Information With the system information option, you can view the storage status, the version information of the device, and so Select System Info on the main menu interface. Item Description Displays the current device's user storage, password and face storage, administrators, access Device Capacity records, attendance and blacklist photos, and user photos. -
Page 49: Statement On The Right To Privacy
Thank you for choosing this hybrid biometric recognition product, which was designed and manufactured by ZKTeco. As a world-renowned provider of core biometric recognition technologies, we are constantly developing and researching new products, and strive to follow the privacy laws of each country in which our products are sold. -
Page 50: Eco-Friendly Use
Eco-friendly Use This product's "eco-friendly use period" refers to the period during which this product will not leak toxic or hazardous substances, when used in accordance with the conditions in this manual. The eco-friendly use period indicated for this product does not include batteries or other components that are easily worn down and must be periodically replaced. - Page 51 ZK Technology LLC DBA ZK Teco 200 Centennial Avenue, Suite 211, Piscataway, NJ 08854,US https://www.zktechnology.com/ ZK Building, Wuhe Road, Gangtou, Bantian, Buji Town, Longgang District, Shenzhen China 518129 Tel: +86 755-89602345 Fax: +86 755-89602394 www.zkteco.com Copyright©2019 ZKTECO CO., LTD. All rights reserved.
Need help?
Do you have a question about the SpeedFace-V5L and is the answer not in the manual?
Questions and answers