Table of Contents
Advertisement
Quick Links
Advertisement
Table of Contents

Subscribe to Our Youtube Channel
Related Manuals for Perlesmith PSTVS11


Summary of Contents for Perlesmith PSTVS11
- Page 1 V3.0 PSTVS11...
- Page 2 •Not all parts and hardware included will be used. lf you require replacement parts, contact customer service at supportus@perlesmith.com •Carefully read all instructions before attempting installation. •If you do not understand the instructions or have any concerns or questions, please contact customer service at supportus@perlesmith.com...
- Page 3 Step 1 Connecting the Support Pillar to Tempered Glass (01) (02) Tempered Support Glass Pillar (03) (B) Plastic M6×25 Bolt Cover Plastic Steel Washer Washer (F) Wrench Foot Pads Place foot pad on the bottom of the tempered glass base at the corners.
- Page 4 Connecting the TV Plate to Support Pillar Step 2 (A) (04) M6 Nut TV Plate (D) (E) Steel M6x50 Bolt Washer (J) Wrench Connecting TV plate to support pillar by using M6*50 bolts and supporting with steel washer and M6 nut (H)Wire Clip Attaching wire clips...
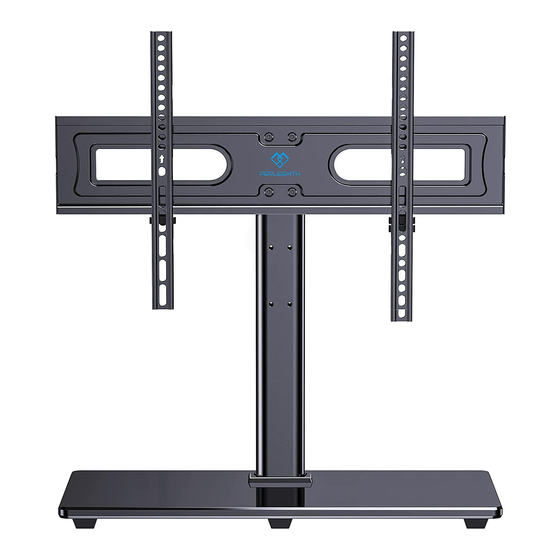
- Page 5 Step 3 Mounting the TV Bracket to a TV (05) TV Bracket (TV2) (TV1) M8x25 Bolt M6x16 Bolt M6x35 Bolt (TV3) (TV4) M8x50 Bolt M8x65 Bolt (TV6) (TV5) 2.5mm Spacer (TV7) (TV8) 5mm Spacer 10mm Spacer Measure VESA and Check TV screws Measure the distance between the holes located at the 600mm back of your TV (these measures may form the shape of a...
- Page 6 TV6/TV7/TV8 Option C (For Round Back TV) If the length of the screws is too long, the spacers can be used in multi-layer. If the installation fails after trying various methods, please contact customer service at supportus@perlesmith.com. TV1(M6x35) TV2/TV3/TV4 TV6/TV7/TV8...
- Page 7 Option D (For TV with A “Bump”) Spacers may be necessary for 2 holes ONLY. TV1(M6x35) TV2/TV3/TV4 TV1(M6x16) TV6/TV7/TV8 Option E Spacers maybe necessary when brackets interfere with cables or USB.
- Page 8 Step 4 Attaching TV to the TV Plate and Managing the Wires TV brackets are three-height-adjustable. You can choose the proper height. The third The second The first choice choice choice (G) Safety Lock “Be gentle” Insert the safety lock in the bottom of the bracket and then tighten the screws.
Need help?
Do you have a question about the PSTVS11 and is the answer not in the manual?
Questions and answers