
Related Manuals for Drive Mountway Neptune Toilet lift


Summary of Contents for Drive Mountway Neptune Toilet lift
- Page 1 Operating instructions pg 2 Operating instructions pg 19 Consignes d’utilisation p 35 Betriebsanleitung S 51 Instrucciones de uso pag 67 Istruzioni operative pag 83 Bedieningsinstructies pag 99...
-
Page 2: Table Of Contents
Operating instructions Please ensure both yourself and any helpers read the following instructions carefully before using your toilet lift. These operating instructions should be retained for future reference. This toilet lift is designed and manufactured to assist individuals in getting on and off the toilet. It should not be used for any other purpose. -
Page 3: Unpacking The Toilet Lift
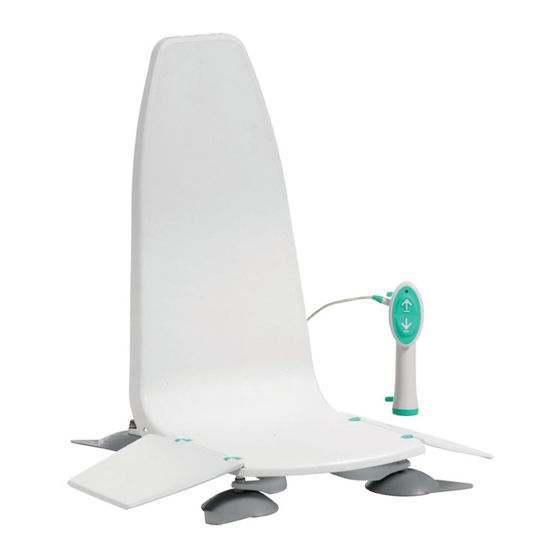
Diagrams for operation and explanation of use are on the fold- out diagram sheet attached to the rear of this booklet 1. Unpacking the toilet lift For ease of handling, unpack your toilet lift (see fig 1) in a large area. Open the packaging and ensure the toilet lift is not damaged and that all parts are included. -
Page 4: Charging The Battery Pack
2. Charging the battery pack Before first operation of your toilet lift or after long periods of non-use (typically 7-10 days), fully charge the battery packs as follows. A flat battery will take approximately 5 hours to charge. i) Place the charging dock (see fig 2) on a firm, flat surface near a mains socket outside the bathroom. -
Page 5: Fitting The Arms (Where Applicable)
3. Fitting the arms (where applicable) To fit the arms to the toilet lift, it is recommended that the toilet lift’s seat be fully raised first, as this provides better access to the fixtures underneath the seat. To raise the seat, follow steps i) and ii) below: i) Plug the cable on the arm with operating switch into the socket located on the lower left side of the toilet lift (see fig 4). -
Page 6: Fitting Foot Cups And Anti-Slip Pads
4. Fitting foot cups and anti-slip pads Your toilet lift is supplied with 4 foot cups and 4 adhesive anti-slip pads. When fitted, the anti-slip pads provide extra stability especially on smooth flooring e.g. tiled or laminated. i) Remove the backing paper on the pads and secure centrally to the flat underside of each foot cup. ii) Align each foot cup under the toilet lift’s feet and twist clockwise (see fig 11) to lock the foot cups to the feet. -
Page 7: Installing Over The Toilet
5. Installing over the toilet Ensure the battery pack is not connected to the toilet lift during installation. i) Remove the existing toilet seat and ensure that all floor areas are clean and dry to eliminate any slipping hazard. Ensure the floor surface is sound and solid, e.g. no broken boards or tiles. NOTE: Before moving the toilet lift, ensure the hand control is not trailing on the floor, as it may become a tripping hazard or become accidentally damaged. -
Page 8: Permanently Attaching Foot Cups To The Floor
6. Permanently attaching foot cups to the floor (where applicable) For maximum security, especially if arms are fitted to the toilet lift, it is recommended that the foot cups are permanently attached to the floor by screws or a silicone-based adhesive. Before drilling, ensure that the area around the toilet is clear of underground pipes/ heating and electrical cables. -
Page 9: Cleaning
NOTE: • The battery packs are for use solely with the Mountway toilet lift and cannot be used to operate any other product. • If the RED light appears on the battery pack during use, continue to use the toilet lift but charge IMMEDIATELY afterwards. -
Page 10: Warranty
10. Warranty This product is sold with the benefit that, in the event of any defect of manufacture or material appearing within 2 years of the date of the receipt of the product, the defect will be rectified free of charge, provided that: i) Reasonable evidence is provided (e.g. -
Page 11: Technical Data
12. Technical data The toilet lift seat is made of ABS. All structural components, i.e. chassis and lifting struts are made from polypropylene. The side covers, battery covers and hand control are made of ABS. The feet are made of nylon. The toilet lift is in the official category of ‘internally powered equipment’... - Page 12 Toilet lift Overall width without arms 612mm (24.09in) Bowl clearance width 390mm (15.35in) Seat height (down) 430mm min (16.9in) 490mm max (19.3in) Depth front to back 540mm (21.26in) Height Adjustments Bowl clearance height 370mm – 430mm (14.56in – 16.9in) Feet adjustment 60mm (2.36in) Pedestal height range 360mm –...
-
Page 13: Dimensions
13. Dimensions (in millimetres) 660 MIN 720 MAX 430 MIN 490 MAX 560 MIN 620 MAX The vertical dimensions vary by 60mm due to adjustable feet. -
Page 14: Troubleshooting
14. Troubleshooting Symptom Possible Cause Solution Section Toilet lift does not • Battery is flat. • Charge battery pack. Section 2 move. No sound • Battery pack is not • Insert battery pack correctly into battery Section 3, from the motor. connected/not compartment at the front of the toilet Section 5... - Page 15 Symptom Possible Cause Solution Section • Interruption to • Check for charger indicator light at mains power alternative power socket. supply/faulty mains • Check if other electrical appliances are socket. working. • Charger fault. • Contact supplier or authorised service/ repair centre.
- Page 16 Symptom Possible Cause Solution Section Toilet lift seat is • Toilet seat has not • Contact supplier or authorised service/ Section 7 tilting sideways. been lowered to repair centre. lowest position after each use, causing motor to become unsynchronised. Arms are •...
-
Page 17: Accessories
15. Accessories The toilet lift can be supplied with a wide range of optional accessories: Accessory Part No. Extended feet TL 634/S Supplied as a set of four, extended feet allow extra bowl clearance for higher than average toilet bowls by as much as 64mm/2.52”. -
Page 18: Parts List
16. Parts List ITEM No. Description Part no. ITEM No. Description Part no. Chassis cover moulding TL551 Seal TL556 Clamp TL576 Bridge moulding TL571 Foot cup TL554 Allen key TL642 Screw – supplied Hand control TL575 TL539 quantity 4 Seat TL557 Upper arm moulding TL588... - Page 19 Diagram sheet Page de schéma Diagrammblatt Hoja de diagramas Foglio di diagrammi Diagramblad...
- Page 20 Figures/Abbildungen/Figuras/Figure/Afbeeldingen Left hand arm with operating switch (also available without switch) Left hand arm with operating switch (also available without switch) Accoudoir de gauche avec interrupteur de fonctionnement (également disponible sans interrupteur) Linke Armlehne mit Betriebsschalter (auch ohne Schalter verfügbar) Brazo izquierdo con interruptor de funcionamiento (también disponible sin él) Bracciolo sinistro con interruttore di funzionamento (disponibile anche senza interruttore) Linkerarm met bedieningsschakelaar (ook beschikbaar zonder schakelaar)
- Page 21 Battery pack Charging dock Light indicator Battery pack Charging dock Light indicator Bloc-pile Socle de chargement Voyant lumineux Batteriepack Ladedock Leuchtanzeige Batería Base Indicador de luz Pacco batterie Base di ricarica Spia luminosa Batterijpakket Oplaadstation Lampje Battery socket Charger plug Battery socket Charger plug Support de pile...
- Page 22 Battery pack Battery compartment Battery pack Battery compartment Bloc-pile Compartiment pour pile Batteriepack Batteriefach Batería Compartimento de la batería Pacco batterie Vano batterie Batterijpakket Batterijcompartiment Arm with operating switch Arm with operating switch Accoudoir avec interrupteur de fonctionnement Armlehne mit Betriebsschalter Brazo con interruptor de funcionamiento Bracciolo con interruttore di funzionamento Arm met bedieningsschakelaar...
- Page 23 Seat Seat hole Seat Seat hole Siège Trou du siège Sitz Sitzloch Asiento Agujero del asiento Sedile Foro sedile Zitting Opening van de zitting Accoudoir Armlehne Brazo Bracciolo Arm bar Arm bar Barre de l’accoudoir Armlehnenstange Barra del brazo Astina bracciolo Armbalk Arm bar NOT correctly aligned Arm bar NOT correctly aligned...
- Page 24 Arm clamp Arm clamp Pièce de serrage pour les accoudoirs Armlehnenklemme Sistema de fijación del brazo Morsetto bracciolo Armklem Screws Screws Schrauben Sistema de fijación del brazo Viti Schroeven Allen key Hexagonal key wrench Clé hexagonale Inbusschlüssel Llave allen Chiave a brugola Inbussleutel Foot Foot...
- Page 25 Seat skirting Feet Seat skirting Feet Socle du siège Pieds Sitzeinfassung Sitzeinfassung Borde del asiento Pies Bordo interno Piedini Rand van de zitting Voeten Rear cross bar Rear cross bar Barre transversale arrière Hintere Querstange Barra transversal trasera Barra trasversale posteriore Achterste dwarsbalk Foot cup Foot...
- Page 26 ML1040 © Mountway Limited 2012 03: 09/12 Tafarnaubach Ind. Est. Tredegar NP22 3AA UK tel +44 (0)1495 723300 fax +44 (0)1495 723360 freephone 0800 014 1852 e-mail mail@mountway.co.uk www.mountway.com...
Need help?
Do you have a question about the Mountway Neptune Toilet lift and is the answer not in the manual?
Questions and answers