Table of Contents
Advertisement
Quick Links
Advertisement
Table of Contents

Subscribe to Our Youtube Channel
Related Manuals for Yealink T3 Series


Summary of Contents for Yealink T3 Series
-
Page 2: Table Of Contents
Table of Contents Table of Contents Table of Contents Before You Begin Related Documentation Getting Started Hardware Overview T33P/T33G Hardware T31P/T31G/T31/T30P/T30 Hardware Power LED Indicator Line Key LED Screen and Icons Idle Screen Calls Screen Icons in the Status Bar T33P/T33G Icons in the Status Bar T31P/T31G/T31/T30P/T30 Icons in the Status Bar Line Key Icons... - Page 3 Yealink T3 Series IP Phones User Guide Silencing or Rejecting Incoming Calls Silencing a Call Rejecting a Call Manually Rejecting Anonymous Calls Rejecting Calls with Do Not Disturb (DND) Rejecting Calls with DND on All Lines Rejecting Calls with DND on a Specific Line...
- Page 4 Table of Contents Sending Multicast Paging Setting a Multicast Paging Key Sending a Paging by a Multicast Paging Key Setting a Paging List Key Setting a Paging Group Sending Pages by a Paging List Key Deleting a Paging Group Receiving Multicast Paging Managing a Paging Call Advanced Call Features Using Call Completion...
- Page 5 Yealink T3 Series IP Phones User Guide Visual Alert for BLF Pickup Ring Type for BLF Parked Call Monitor Setting an Alert Tone for the BLF Parked Call Monitor Visual Alert for BLF Parked Call Monitor Picking up a Remote Call by BLF List Key...
- Page 6 Table of Contents Editing Contact Groups Deleting Contact Groups Managing the Local Directory Contacts Adding Contacts Viewing Contacts Editing Contacts Deleting a Contact Deleting All Contacts Moving a Local Directory Contact to Blacklist Searching for Contacts Favorites Adding Favorites Adding an Existing Contact to Your Favorites Adding a New Contact to Your Favorites Viewing Favorites Reordering Favorites...
- Page 7 Yealink T3 Series IP Phones User Guide Customizing Your Phone Changing the Administrator Password Wallpaper Changing Wallpaper on Idle Screen Screen Saver Changing the Waiting Time for Screen Saver Disabling Time & Date and Status Icons Display Setting the Screen Saver Type...
- Page 8 Table of Contents For the T31P/T31G/T31/T30P/T30 Phone...
-
Page 9: Before You Begin
T30 IP phones Related Documentation You can view more types of documents to make the phone to perform more functions. You can obtain additional information on the following phones from Yealink Support: Classic IP Phone T33P Classic IP Phone T33G... -
Page 10: Getting Started
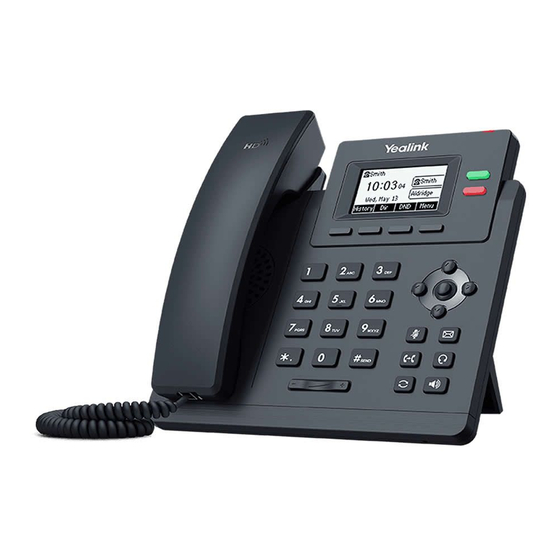
Getting Started Getting Started Before you use your phone, take some time to get familiar with its features and user interface. The terms "the phone" and "your phone" refer to any of the IP phones. Topics Hardware Overview Screen and Icons Entering Characters Hardware Overview Understanding the phone hardware helps you easily use the phone's features. - Page 11 Yealink T3 Series IP Phones User Guide Item Description change depending on what you are doing at the time. • Scroll through information or options displayed on the screen. Navigation Keys • Access History and Directory respectively. OK Key Confirms actions or answers incoming calls.
-
Page 12: T31P/T31G/T31/T30P/T30 Hardware
Getting Started T31P/T31G/T31/T30P/T30 Hardware Item Description Power LED Indic- Indicates call status, message status and phone’s system status. ator Shows information about your phone, such as calls, messages, soft keys, time and Phone Screen date. Access your phone lines and features. Line Keys The T30P/T30 phone does not have Line keys. -
Page 13: Power Led Indicator
Yealink T3 Series IP Phones User Guide Item Description Volume Key Adjust the volume of handset, headset, speaker. Allow you to enter numbers, letters, and special characters. If a menu item has an Keypad keys index number, you can use the keypad key to select the item. -
Page 14: Screen And Icons
Getting Started LED Status Description page. The monitored user whose line key is not on the current page receives an Fast-flashing red incoming call. The line keys are idle. Screen and Icons The user screens and icon indicators can help you navigate and understand the important information on the phone's status. -
Page 15: Calls Screen
Yealink T3 Series IP Phones User Guide T30P/T30 Status Bar: Display the default account, feature status icons, and the time. The status icons are displayed when features are activated. Line Keys: Display the information associated with the line keys and feature keys on the phone. -
Page 16: Icons In The Status Bar
Getting Started Icons in the Status Bar The icons in the status bar help you easily get the current phone status, such as call and message status. Icons in the status bar vary by phone models. Topics T33P/T33G Icons in the Status Bar T31P/T31G/T31/T30P/T30 Icons in the Status Bar T33P/T33G Icons in the Status Bar Icons... -
Page 17: Line Key Icons
Yealink T3 Series IP Phones User Guide Icons Description Icons Description Wired network is unreachable Phone Warning Speakerphone (hands-free) Keep Mute mode Handset mode Ringer volume is 0 Headset mode Phone Lock Voice Mail Missed Calls Text Message Call Forward... -
Page 18: T31P/T31G/T31/T30P/T30 Line Key Icons
Getting Started Icons Description Icons Description The private line registers suc- The shared/bridged line registers suc- cessfully. cessfully. Registering. Register failed. DND is enabled on this line. Call forward is enabled on this line. T31P/T31G/T31/T30P/T30 Line Key Icons Icon indicators (associated with line) Icons Description Icons... -
Page 19: Call Features
Call Features Call Features You can use the phone to place and answer calls, ignore incoming calls, transfer a call to someone else, conduct a conference call and perform other basic call features. Topics Changing the Default Account Placing Calls Answering Calls Switching Among the Handset, Speakerphone and Headset Modes Disabling Call Waiting... -
Page 20: Placing Multiple Calls
Yealink T3 Series IP Phones User Guide Procedure 1. Do one of the following: Start typing a phone number. Select the desired line key (not supported on the T30P/T30 phones). Pick up the handset, press the Speakerphone key or the HEADSET key. -
Page 21: Placing A Call Back To The Last Incoming Number
Call Features : By default, you can long press the desired line key to set it. When the phone is idle, you can press the Speed Dial key to call a contact quickly. The phone calls a contact using the configured line by default. If you want to call a contact using another line, you can first press the line key, and then press the Speed Dial key. -
Page 22: Placing A Call From The Call History
Yealink T3 Series IP Phones User Guide 2. Enter the phone number with the country code. 3. Select Send. Placing a Call from the Call History You can place calls to contacts from the History list, which contains the calls that were recently placed, answered, missed, or forwarded. -
Page 23: Placing An Emergency Call From A Locked Phone
Call Features Procedure 1. Go to Menu > Directory > Google Contact. 2. Highlight the desired contact and select Send. Placing an Emergency Call from a Locked Phone Once all keys are locked on the phone, you can only dial emergency numbers or authorized numbers that are set up by your administrator, such as 911. -
Page 24: Answering A Call When In A Call
Yealink T3 Series IP Phones User Guide Answering a Call When in a Call You can answer a call when there is already an active call on your phone. When you are in an active call and an incoming call arrives on the phone, a call waiting tone beeps, and the incom- ing call information is displayed. -
Page 25: Silencing Or Rejecting Incoming Calls
Call Features Procedure 1. Go to Menu > Features > Call Waiting. 2. Select Disabled from the Call Waiting field. 3. (Optional.) Enter the call waiting off code in the Off Code field. 4. Select Save. Silencing or Rejecting Incoming Calls When you receive an incoming call, you can choose to silence or reject the call instead of answering. -
Page 26: Rejecting Calls With Do Not Disturb (Dnd)
Yealink T3 Series IP Phones User Guide Rejecting Calls with Do Not Disturb (DND) You can enable DND to reject all incoming calls automatically when you do not want to be interrupted. If you want to receive incoming calls from the specific numbers when DND is enabled, you can ask your system administrator to set DND Authorized Numbers. -
Page 27: Deactivating Dnd
Call Features Deactivating DND You can deactivate DND when you are ready to resume receiving calls again. Procedure 1. Go to Menu > Features > DND. 2. (Optional.) If the DND is activated on a specific line, select the desired line. 3. -
Page 28: Muting/Unmuting Audio
Yealink T3 Series IP Phones User Guide The phone screen displays the redial times and interval. The phone will retry as many times as configured until the callee answers the call. Muting/Unmuting Audio When you are in a call, you can mute the audio, so that you can hear the other person, but they cannot hear you. -
Page 29: Resuming A Held Call
Call Features The phone ignores engaged audio device (handset or headset) and plays beep in the Speakerphone (hands-free) mode by default. Note : When you have multiple calls on the phone and the current call is held, you can press the corresponding line key to swap to the active call. -
Page 30: Forwarding All Incoming Calls On A Specific Line
Yealink T3 Series IP Phones User Guide 4. If you select the No Answer Forward option, select the desired ring time to wait before forwarding from the After Ring Time field. 5. (Optional.) Enter the always/busy/no answer forward on code or off code respectively in the On Code or Off Code field. -
Page 31: Forwarding Incoming Calls With A Forward Key
Call Features The phone prompts a call forward message. Forwarding Incoming Calls with a Forward Key When the phone receives an incoming call, you can easily press the Forward key to forward the incoming call to a specific contact. Before You Begin If you are using the T30P/T30 phones, check with your system administrator if the Forward key has set for your phone. -
Page 32: Performing A Blind Transfer
Yealink T3 Series IP Phones User Guide Performing a Blind Transfer You can transfer a call to another contact immediately without consulting with her/him first. Procedure 1. Press the TRAN key or Transfer (Trans) during a call. 2. Do one of the following: Enter the number or select a contact from the placed call list you want to transfer to. -
Page 33: Performing A Blind Transfer Using A Transfer Key
Call Features 4. Select Transfer (Trans) from the Key Type field. 5. Do one of the following: (Optional.) Enter the string that will appear on the phone screen in the Label field. Enter the contact number you want to transfer the call to in the Value field. On the T33P/T33G phones, highlight the Label or Value field. -
Page 34: Conference Calls
Yealink T3 Series IP Phones User Guide 1. Press the Transfer key during a call, the phone screen is shown below: 2. Select the desired transfer mode. Related Topic Setting a Transfer Key Conference Calls The phone supports creating local conference and network conference. -
Page 35: Merging Two Calls Into A Conference
Call Features You can also select the desired contact from the search list, or select a contact from the placed call list or Dir- ectory before you enter the number. 4. When the second party answers the call, select Conference (Conf) to add the second party to the conference. Merging Two Calls into a Conference You can invite a held call into a conference call with the active call. -
Page 36: Ending A Conference Call
The phone supports the following 31 channels: 0: Broadcasts are sent to channel 0. Note that the Yealink IP phones running firmware version 80 or earlier can be regarded as listening to channel 0. It is the default channel. -
Page 37: Sending Multicast Paging
Call Features Topics Sending Multicast Paging Receiving Multicast Paging Managing a Paging Call Sending Multicast Paging Your phone supports up to 31 groups for paging. You can assign a label to each group to identify the phones in the group, such as All, Sales, or HR. You can set a line key as Multicast Paging key or Paging List key on the phone, which allows you to send announcements to the phones with pre-configured multicast address(es) on specific channel(s). -
Page 38: Setting A Paging List Key
Yealink T3 Series IP Phones User Guide 1. Press the Multicast Paging key when the phone is idle. Both your phone and receiver’s phone play a warning tone and the multicast RTP session will be automatically answered on the receiver’s phone in the speakerphone (hands-free) mode. -
Page 39: Sending Pages By A Paging List Key
Call Features Sending Pages by a Paging List Key You can send a paging by using the Paging List key when the phone is idle. Before You Begin You need to set a Paging List key in advance. Procedure 1. Press the Paging List key when the phone is idle. 2. -
Page 40: Advanced Call Features
Advanced Call Features Advanced Call Features You can perform some server-dependent tasks on the phone. Contact your system administrator to find out if your phone supports these advanced call features. Topics Using Call Completion Call Pickup Call Park and Call Retrieve Busy Lamp Field (BLF) BLF List Shared Line... -
Page 41: Call Pickup
Yealink T3 Series IP Phones User Guide Call Pickup You can use call pickup to answer someone else’s incoming call on your phone. The phone supports the following two call pickup features: Directed Call Pickup: allows you to pick up incoming calls to another phone. -
Page 42: Picking Up A Call With A Pick Up Key
Advanced Call Features Before You Begin Your system administrator has enabled the group call pickup and set the group call pickup code. Procedure 1. Pick up the handset, press the line key or the Speakerphone key. The GPickup appears on the phone screen. 2. -
Page 43: Call Park And Call Retrieve
Yealink T3 Series IP Phones User Guide 3. Select Key Event from the Type field. 4. Select Group Pick Up from the Key Type field. 5. Select the desired line from the Account ID field. 6. Do one of the following: (Optional.) Enter the string that will appear on the phone screen in the Label field. -
Page 44: Retrieving A Parked Call In The Fac Mode
Advanced Call Features Related Topics Parking or Retrieving a Call with a Park or Retrieve Key Parking or Retrieving a Call by BLF Key Retrieving a Parked Call in the FAC Mode You can retrieve a parked call in the FAC mode from any phone within your network. Before You Begin Your system administrator has set call park in the FAC mode. -
Page 45: Parking Or Retrieving A Call With A Park Or Retrieve Key
Yealink T3 Series IP Phones User Guide Before You Begin Your system administrator has set call park in the Transfer mode. There is a call parked on the shared parking lot. Procedure 1. Select Retrieve (You may need to select the More( ) >... -
Page 46: Retrieving A Parked Call Using A Retrieve Key
Advanced Call Features : By default, you can long press the desired line key to set it. During a call, you can press the Call Park key, and the call is parked to the desired extension or the shared parking lot directly. -
Page 47: Audio Alert For Blf Pickup
Yealink T3 Series IP Phones User Guide Icons LED Status Description T33P/T33G The monitored line is ringing. Fast-flashing The monitored line is dialing. Solid red The monitored line is busy or in a call. The monitored line places a call on hold. -
Page 48: Picking Up A Remote Call By Blf Key
Advanced Call Features Procedure 1. Go to Menu > Features > Dsskey. 2. Select the desired line key. 3. Select BLF from the Type field. 4. Select the desired line from the Account ID field. 5. Do one of the following: (Optional.) Enter the string that will appear on the phone screen in the Label field. -
Page 49: Performing A Blind Transfer
Yealink T3 Series IP Phones User Guide Performing a Blind Transfer During a call, you can transfer the call to the monitored contact in a blind-transfer way. Before You Begin Check with your system administrator if the Transfer Mode via Dsskey is set to Blind Transfer. -
Page 50: Blf List
Advanced Call Features BLF List BLF List feature enables you to monitor a list of users defined by your system administrator, and the respective key LEDs or icons will either flash or glow depending on the status of monitored lines. It is not available on the T30P/T30 phones. -
Page 51: Visual Alert For Blf Pickup
Yealink T3 Series IP Phones User Guide 2. Select the desired ring tone. 3. Select Save. Visual Alert for BLF Pickup Your system administrator can configure your phone to display the call information when the specified monitored line receives an incoming call. -
Page 52: Picking Up A Remote Call By Blf List Key
Advanced Call Features Picking up a Remote Call by BLF List Key When the monitor user is not at his/her desk and someone rings his/her line, you can pick up the call simply by pressing the flashing BLF List key. You can also check the caller ID first, and then pick up the incoming call. Before You Begin Check with your system administrator to find out if this feature is available on your phone. -
Page 53: Parking A Call By A Blf List Key
Yealink T3 Series IP Phones User Guide Before You Begin Check with your system administrator if the Transfer Mode via Dsskey is set to Attended Transfer. Procedure 1. During a call, press the BLF List key of the monitored line which you want to transfer this call to. -
Page 54: Shared Line
1. Select Retrieve. Shared Line Yealink phone supports using Shared Call Appearance (SCA) or Bridged Line Appearance (BLA) to share a line. So that this line can be registered on more than one phone at the same time. Your system administrator can set your phone to use the shared line. -
Page 55: Placing Calls On A Shared Line
Yealink T3 Series IP Phones User Guide Placing Calls on a Shared Line You can place one or multiple calls on a shared line. The phone places a call on the first shared line key automatically. You can select the desired shared line key first and place a call using this key. -
Page 56: Retrieving A Held Call On A Shared Line
Advanced Call Features Retrieving a Held Call on a Shared Line If you place a call on hold on a shared line, you can resume this call at any time. When the shared line key shows a call that is in a held state, you can resume the held call remotely from other user's phone. Before You Begin There is at least one call placed on public hold on the shared line. -
Page 57: State Indicator Of The Intercom Key
Yealink T3 Series IP Phones User Guide Topics State Indicator of the Intercom key Placing an Intercom Call Picking up an Incoming Call of the Target Extension Answering an Intercom Call State Indicator of the Intercom key On T33P/T33G phones, you can get the intercom status by viewing the icon indicator of the Intercom key. -
Page 58: Answering An Intercom Call
Advanced Call Features Before picking up an incoming call, make sure that the directed call pickup code has been configured either for an Intercom key or for Call Pickup feature in advance. Check with your system administrator to find out if this feature is available on your phone. Note : If the directed call pickup code is not set, the phone will place a call to the target extension instead of picking up an incoming call of the target extension when you press the Intercom key. -
Page 59: Short Message Service (Sms)
Yealink T3 Series IP Phones User Guide Related Topics Switching Among the Handset, Speakerphone and Headset Modes Muting/Unmuting Audio Answering a Call When in a Call Short Message Service (SMS) Text messages can be stored in your phone’s Inbox, Sentbox, Outbox or Draftbox, and each box stores up to 100 text messages. -
Page 60: Deleting A Text Message
Advanced Call Features Deleting a Text Message You can delete messages from your phone after reading. Procedure 1. Go to Menu > Message > Text Message > Inbox (Sentbox, Outbox or Draftbox). 2. Highlight the desired message. 3. Select Option > Delete. The phone prompts you to delete the message or not. -
Page 61: Using The Hot Desking
Yealink T3 Series IP Phones User Guide 2. Highlight an account, and then select Connect. 3. Follow the voice prompt to listen to your voice mails. Connect : When the phone prompts that the phone receives a new voice mail, you can press the MESSAGE key or soft key to dial out the voice mail access code directly. -
Page 62: Logging Into The Acd System
Advanced Call Features Icons Line key LED Status Description T31P/T31G/T31 T33P/T33G Solid green Available/Log in Solid red Wrap up Fast-flashing green × Unavailable Logging into the ACD System After logging into your ACD account, you are ready to receive calls from the ACD system. Before You Begin Your system administrator has set an ACD key for you to log into the ACD system. -
Page 63: Directory
Directory Directory The phone provides several types of phone directories, which can be customized by your system administrator. Topics Local Directory Favorites Blacklist Google Contacts Remote Phone Book Local Directory You can store up to 1000 contacts and 48 groups in your local directory, you can search, add, edit and delete a con- tact. -
Page 64: Deleting Contact Groups
Yealink T3 Series IP Phones User Guide Deleting Contact Groups When you delete a contact group, the contacts in the group will not be deleted. You can view the contacts in All Contacts list. Procedure 1. Select Directory (Dir) or go to Menu > Directory > Local Directory. -
Page 65: Deleting A Contact
Directory Deleting a Contact You can delete any contact from the Local Directory. Procedure 1. Select Directory (Dir) or go to Menu > Directory > Local Directory. 2. Select the desired contact group or All Contacts. 3. Highlight the desired contact, and select Option > Delete. The phone prompts you to delete the contact or not. -
Page 66: Adding Favorites
Yealink T3 Series IP Phones User Guide Adding Favorites Viewing Favorites Reordering Favorites Deleting Favorites Adding Favorites After adding a contact as a favorite, your phone will automatically assign a Speed Dial key for it. You can quickly dial a contact using the Speed Dial key on the idle screen. -
Page 67: Deleting Favorites
Directory 2. Highlight the desired contact, and select Option > Detail. 3. Enter a new index number in the Favorites Index field. 4. Select Save. Deleting Favorites You can delete favorites to make room for new favorites. Procedure 1. Go to Menu > Directory > Favorites. 2. -
Page 68: Deleting Blacklist Contacts
Yealink T3 Series IP Phones User Guide Deleting Blacklist Contacts You can delete one or all blacklist contacts. If a contact is removed from the blacklist, you can answer the call from the contact normally. Topics Deleting a Blacklist Contact... -
Page 69: Updating Google Contacts
Directory 1. Go to Menu > Directory > Google Contact. Updating Google Contacts The Google contacts may be updated on the Google Contact Server, you can update Google contacts on your phone to get the newest Google contacts. Procedure 1. Go to Menu > Directory > Google Contact. 2. -
Page 70: Saving A Remote Phone Book Contact To The Blacklist
Yealink T3 Series IP Phones User Guide 1. Go to Menu > Directory > Remote Phone Book. 2. Select the desired remote phone book. 3. Highlight the desired contact, and then select Option > Add to Contacts. 4. Edit the corresponding fields. -
Page 71: Call History
Call History Call History The call history list includes Missed Calls, Placed Calls, Received Calls and Forwarded Calls, and each list holds 100 entries. Topics Call History Icons Viewing History Records Saving a History Record to Local Directory Saving a History Record to Blacklist Deleting History Records Disabling History Record Call History Icons... -
Page 72: Saving A History Record To Blacklist
Yealink T3 Series IP Phones User Guide Saving a History Record to Blacklist You can prevent someone from calling you again by saving a history record to Blacklist. Procedure 1. Select History or go to Menu > History. 2. Select the desired list. -
Page 73: Customizing Your Phone
Customizing Your Phone Customizing Your Phone You can make your phone more personalized by customizing various settings. Topics Changing the Administrator Password Wallpaper Screen Saver Changing the Backlight and Time Adjusting the Screen Contrast Changing the Language Time & Date Setting a Key as Send Customizing the Soft Keys Phone Lock... -
Page 74: Screen Saver
Yealink T3 Series IP Phones User Guide 3. Select Save. Screen Saver The screen saver starts automatically when your phone has been idle for the preset waiting time. You can stop the screen saver by pressing any key. Topics Changing the Waiting Time for Screen Saver Disabling Time &... -
Page 75: Changing The Backlight And Time
Customizing Your Phone The phones can only display custom information that is preset by your system administrator as the screen saver. Before You Begin If you want to set a custom picture as the screen saver, make sure that the custom picture has been uploaded by your system administrator. -
Page 76: Changing The Language
Yealink T3 Series IP Phones User Guide The intensity of screen contrast ranges from 1 to 10 and the highest intensity is 10. It is not available on the T33P/T33G phones. Procedure 1. Go to Menu > Settings > Basic Settings > Display > Contrast. -
Page 77: Setting A Key As Send
Customizing Your Phone 2. Select the desired time format or date format. 3. Select Save. Setting a Key as Send The pound key (#) is used as the send key by default. To type a phone number followed by the pound key (#), you can set the send key to the star key (*). -
Page 78: Locking Your Phone Manually
Yealink T3 Series IP Phones User Guide Function key: it only allows users to use the keypad for placing a call, answering or rejecting an incoming call and ending a call, and it prevents unauthorized users from other operations. All keys: it only allows users to use the keypad for dialing an emergency number or authorized numbers that set up by your system administrator, answering or rejecting an incoming call and ending a call, and it prevents unau- thorized users from other operations. -
Page 79: Extending The Line Key Labels
Customizing Your Phone On the T33P/T33G phones, go to Menu > Basic > Change PIN. 2. Enter your old and new unlock PIN respectively. The unlock PIN length must be within 15 digits. 3. Select Save. Extending the Line Key Labels On the T33P/T33G phones, you can extendwhen the phone is placing a call or during the call. - Page 80 Yealink T3 Series IP Phones User Guide Procedure 1. Go to Menu > Features > Dsskey. 2. Select the desired line key. 3. Select Line from the Type field. 4. Select the desired line from the Account ID field. 5. (Optional.) Enter the string that will appear on the phone screen in the Label field.
-
Page 81: Audio Settings
Audio Settings Audio Settings You can change the basic audio settings on your phone. Topics Adjusting the Volume Setting the Ring Tone Disabling the Key Tone Adjusting the Volume You can adjust the volume of the ringer, media, and audio during a call. Procedure 1. -
Page 82: Setting A Ring Tone For A Group
Yealink T3 Series IP Phones User Guide Setting a Ring Tone for a Group You can select a unique ring tone for various groups in your Local Directory. Note : You can only set a ring tone for a group that is added manually. -
Page 83: Maintaining Your Phone
Maintaining Your Phone Maintaining Your Phone When your phone is unable to operate properly, you need to investigate or troubleshoot issues along with other tasks your system administrator may ask you to perform. Topics Warnings Diagnosing the Network Rebooting Your Phone Resetting to Factory Settings Updating the Phone Configuration Clearing User's Personalized Configuration Settings... -
Page 84: Clearing Warnings
Yealink T3 Series IP Phones User Guide 4. Select OK. Clearing Warnings You can temporarily remove the warning icon from the status bar. However, the warning icon appears again after the phone reboots or the phone has a new warning if the issue is not solved. -
Page 85: Updating The Phone Configuration
Maintaining Your Phone The phone begins resetting. : You can also long press the OK key when the phone is idle. After reset, the screen prompts “Welcome Initializing…Please wait”. The phone will be reset successfully after startup. Note : Reset of your phone may take a few minutes. Do not power off until the phone has started up successfully. Updating the Phone Configuration Your system administrator may ask you to update the configuration for your phone to apply any changes to system settings, which you can do without restarting it. -
Page 86: Appendix - Menu Structure
Appendix - Menu Structure Appendix - Menu Structure For the T33P/T33G Phone... - Page 87 Yealink T3 Series IP Phones User Guide For the T31P/T31G/T31/T30P/T30 Phone...
Need help?
Do you have a question about the T3 Series and is the answer not in the manual?
Questions and answers