
Related Manuals for FitNord Cyclo 500E


Summary of Contents for FitNord Cyclo 500E
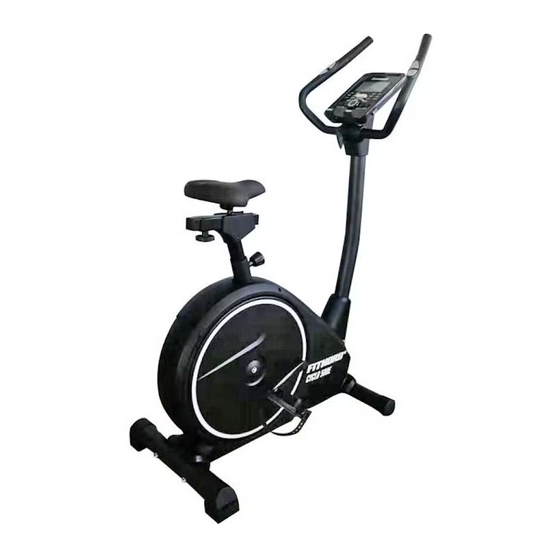
- Page 1 FitNord Cyclo 500E OWNER’S MANUAL IMPORTANT! Read all instructions carefully before using this product. Retain this manual for future reference. The specifications of this product may vary slightly from the illustrations and are subject to change without notice.
- Page 2 Before You Start Thank you for purchasing this Product! For your safety and benefit, read this manual carefully before using the machine. Prior to assembly, remove components from the box and verify that all the listed parts were supplied. Assembly instructions are described in the following steps and illustrations. IMPORTANT SAFETY NOTICE PRECAUTIONS BE SURE TO READ THE ENTIRE MANUAL BEFORE YOU ASSEMBLE OR OPERATE YOUR MACHINE.
-
Page 3: Table Of Contents
EXPLODED DIAGRAM ......................4 PARTS LIST ......................... 5 ASSEMBLY INSTRUCTIONS ....................6 DISPLAY MANUAL ......................11 DISPLAY FUNCTIONS ...................... 11 KEY FUNCTIONS ......................11 OPERATIONS........................12 APP............................ 16... -
Page 4: Exploded Diagram
EXPLODED DIAGRAM... -
Page 5: Parts List
PARTS LIST Part Part Description Description Main frame Sensor wire Front bottom tube Extension sensor wire Rear bottom tube Handlebar post cover Cross tapping screw Handlebar post ST4.2×18 Handlebar 25a/b Computer cover Protective guard for saddle Allen bolt M8×18 26L/R post Arc washerΦ8×1.5×Φ25 Round end cap... -
Page 6: Assembly Instructions
ASSEMBLY INSTRUCTIONS Step 1. 1. Attach the Front bottom tube (2) to the Main frame (1) with Hex bolts (8) and Arc washers (7). 2. Attach the Rear bottom tube (3) to the Main frame (1) with Hex bolts (9) and Arc washers (7). - Page 7 Step 3 1. Insert the Handlebar post cover (23) onto the Handlebar post (4). 2. Connect the Extension Sensor wire (22) with Sensor wire (21). 3. Attach the Handlebar post (4) to the Main frame (1) with Allen bolts (6) and Arc washers (7).
- Page 8 Step4. 1. Insert the Pulse wires (19) through the hole on the Handlebar post (4) and pull them out from the top of the computer bracket. 2. Attach the Handlebar (5) to the Handlebar post (4) with the Knob (38), bushing (12), Computer cover (25a) and flat washer (39).
- Page 9 Step 5. 1. Connect the Extension sensor wire (22) and Pulse wire (19) with the Computer (35) wires, 2. Attach the Computer (35) to the computer bracket of the Handlebar post (4) with Cross screws (37). 3. Tighten the Handle and Computer cover (25a/b) on the Handlebar post (4) with Cross tapping screws (24).
- Page 10 Step 6. 1. Attach the Saddle bracket (11) to the Saddle (34) with Flat washers (14) and Nylon nuts (13). 2. Attach the saddle (34) to the Saddle slider (33) with the wrench tightly. 3. Attach the Saddle Slider (33) to the Saddle post (28) with the Knob (29), Flat washer (30) and U-shaped slider (31).
-
Page 11: Display Manual
DISPLAY MANUAL DISPLAY FUNCTIONS ITEM DESCRIPTION+ TIME Count up - No preset target, Time will count up from 00:00 to maximum 99:59 with 1-minute increments. Count down - If training with preset Time, Time will count down from preset to 00:00. Each preset increment or decrement is 1 minutes between 00:00 to 99:00. -
Page 12: Operations
OPERATIONS 1. POWER ON Plug in power supply, computer will power on and display all segments on LCD for 2 seconds (Picture 1). Picture 1 2. WORKOUT SELECTION Use WHEEL+/- to select workout Manual (Picture 2) Beginner (Picture 3) Advance (Picture 4) Sporty (Picture 5) ... - Page 13 Picture 10 Picture 11 Picture 12 Beginner Mode Use WHEEL+/- to select workout program, choose Beginner and press MODE / ENTER. Use WHEEL+/- to browse Beginner programs 1-4 (Picture 13) and select with MODE / ENTER. Use WHEEL+/- to set TIME. Press START/STOP to start exercising.
- Page 14 Cardio Mode Use WHEEL+/- to select workout program, choose H.R.C. and press MODE / ENTER. Use WHEEL+/- to set Age (Picture 16). Use WHEEL+/- to select 55% (Picture 17), 75%, 90% or TAG (TARGET H.R.) (default: 100). Use WHEEL+/- to set workout TIME. 5.
- Page 15 BODY FAT When STOPPED, press BODY FAT to start body fat measurement. Console will remind to input user GENDER (Picture 21), AGE, HEIGHT and WEIGHT, then begin to measure. Hold both hands on the hand grips during the measurement. The LCD will display “= ” “= = ” (Picture 22) for 8 seconds, until computer finishes measuring.
-
Page 16: App
User can scan the QR code label to download i-Console+ training APP to a tablet or mobile device. Turn on Bluetooth on your tablet, search for the console device and connect.
Need help?
Do you have a question about the Cyclo 500E and is the answer not in the manual?
Questions and answers