Table of Contents
Advertisement
Advertisement
Table of Contents

Related Manuals for Baby Lock Euphoria BLC4


Summary of Contents for Baby Lock Euphoria BLC4
- Page 2 "IMPORTANT SAFETY INSTRUCTIONS" When using overlock machine, basic safety precautions should always be followed, including the following. "Read all instructions before using this overlock machine." DANGER- To reduce the risk of electric shock. 1. The overlock machine should never be left unattended when plugged in. Always unplug this overlock machine from the electrical outlet immediately after using and before cleaning.
- Page 3 3. Ne jamais utiliser la machine si le cordon ou la prise électrique sont endommagés , en cas de dysfonctionnement, de bris ou de dégâts d’eaux, vous devez la retourner chez votre revendeur BABY LOCK ou au centre de service le plus proche pour vérification, réparation, ajustement mécanique ou électrique.
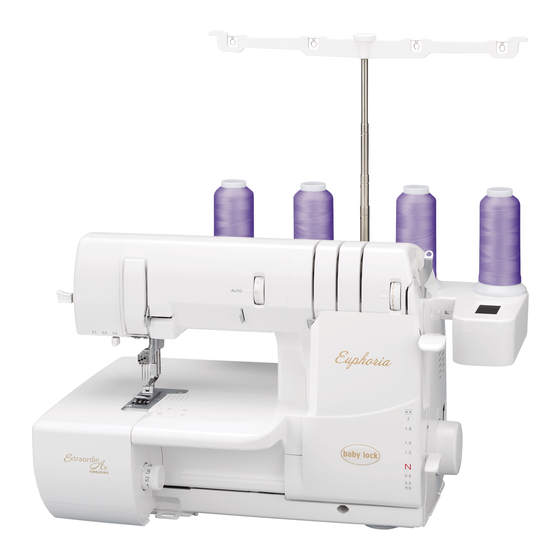
- Page 4 Welcome to the Baby Lock Euphoria Your Baby Lock Euphoria delivers a variety of chain and cover stitches, allowing you to create professional looking hems and decorative effects just like the ready-to-wear fashions in stores. Euphoria offers a variety of stitch widths and lengths and many exclusive features that allow you to efficiently accomplish a perfect stitch with a wide variety of threads and fabrics.
- Page 5 Notes:...
-
Page 6: Table Of Contents
Table of Contents OVERVIEW ........................5 How Your Machine Operates .................. 5 Overview of the Euphoria ..................6 Accessories ......................7 Needles ........................8 Thread ........................8 Optional Accessories ....................8 Setting Up Your Euphoria..................9/10 Side Cover ......................10 Snap-On Presser Foot..................11 Knee Lifter...................... - Page 7 Table of Contents (Cont.) CHAIN/COVER STITCH ....................21 Chain Stitching....................21/22 Cover Stitch - Right Narrow - 3mm..............23/24 Cover Stitch - Left Narrow - 3mm ..............25/26 Cover Stitch - Wide - 6mm................27/28 Triple Cover Stitch - 6mm ................29/30 TECHNIQUES.........................31 Turning Corners - Chain Stitch ................
-
Page 8: Overview
How Your Machine Operates Awareness of the Euphoria's simple operation will enable you to become more proficient in its use. Please read all instructions before using your new machine. Use one, two or three chain/cover stitch needles and one looper for a chain or cover stitch. When forming a chain stitch, the chain needle thread catches the chain looper thread to form a straight stitch on the top of your fabric and thread chain loops on the underside. -
Page 9: Overview Of The Euphoria
Overview of the Euphoria 1. Needle threading lever 16. Front cover 2. Presser foot pressure adjusting dial 17. Telescopic antennae and thread guides 3. Carrying handle 18. Needle threads fine-tuning dial 4. Thread cutter 19. Pretension thread guides 5. Quilting guide fixing screw (see page 8) 20. -
Page 10: Accessories
Accessories Your Baby Lock Euphoria has a built-in accessory compartment. To open, swing the base of the thread spool stand to the right to reveal the tray holding some of the accessories listed below. Others may be found in the machine packing materials. -
Page 11: Needles
Needles Your Baby Lock Euphoria is set up with Organ ELx705CF needles size 90/14. These are suitable for most medium and heavyweight fabrics. For lightweight fabrics, use size 80/12, ELx705CF needles. The ELx705CF needle has a semi-ballpoint design and is suitable for knits and wovens. -
Page 12: Setting Up Your Euphoria
Setting Up Your Euphoria 1. Remove machine from box After removing the packing materials from the box, gently lift your Baby Lock by grasping the handle provided on the top of the machine. Place the machine on a sewing table or any level surface that provides ample work area to the left. -
Page 13: Side Cover
Setting Up Your Euphoria (Cont.) 6. Open front cover The front cover may be opened simply by placing your fingers behind the cover at the upper right side and gently pulling toward you (fig. D). 7. Open front table To open the front table, place your thumb against the tab, and slide the cover to the right. -
Page 14: Snap-On Presser Foot
Snap-On Presser Foot The Baby Lock Euphoria has the convenience of a snap-on presser foot. To Release: 1. Raise the presser foot lever to highest position. This will also lower the feed dogs out of the way. 2. Raise the needles to the highest position. -
Page 15: Drop Feed System
Drop Feed System When you raise the presser foot, using the lever or knee lifter, the feed dogs lower automatically, which helps thick fabrics fit under the presser foot. Needle plate surface Feed dog Thread Cutter There is a thread cutter located on the left side of your machine. At the end of a seam, sew off the fabric edge and continue sewing to create a 5 to 6-inch (12-15cm) thread chain. -
Page 16: Differential Feed
(fig. E). Thread Delivery System (Needle Thread Tension) The Baby Lock Euphoria revolutionizes the way needle thread tension works with its exclusive Thread Delivery System. You no longer have to manually adjust the tension settings for the type of chain or cover stitch you are sewing. -
Page 17: Chain Looper Tension Dial
・Set the tension dial between 0 and 1 for looser looper tension. Needle Thread Fine-Tuning Dial No adjustments are needed when sewing with most fabrics and threads on your Baby Lock Euphoria, but certain threads or fabrics may require minor fine-tuning of the Thread Delivery system to perfect your stitches. -
Page 18: Ethreading
Threading Preparation When using threads on cones or king spools, place the cone or spool securely over the cone holders furnished on your machine. To avoid bending the thread stand, you may need to place one hand under the stand while positioning the cone. The cone holders prevent the cone or spool from spinning, enabling the thread to feed evenly (fig. -
Page 19: Threading Your Euphoria
Your Baby Lock Euphoria is equipped with an exclusive "Electronic ExtraordinAir Threading System" for fast, easy threading of the chain looper. One touch of the "Push-to-Thread" button will automatically thread the looper. It is no longer necessary to use tweezers for threading the thread guides. If the looper thread breaks or runs out, just re-thread it. -
Page 20: Chain Looper
Chain Looper 1. With the presser foot in the raised position, open the front cover and move the threading lever into the threading position, and rotate the handwheel counterclockwise until the looper tube locks into position (see page 16, fig. A). 2. -
Page 21: Chain/Cover Needles
Chain / Cover Needles Note: The Euphoria must be in the locked threading position when using the needle threader. "Left Needle" C-1 1. Raise presser foot and place the thread on the far left spool pin. Slip the thread into the telescopic antenna thread guide directly above the thread spool. -
Page 22: Needle Threader
Needle Threader 1. Open the front cover and front table. 2. Raise the presser foot to release all threads. 3. Set the threading lever from serging position to threading position. 4. Rotate the machine handwheel slowly toward you until the tube moves to connecting position (see page 16). -
Page 23: Re-Threading Looper
Re-threading Looper If the looper thread breaks, raise the presser foot and pull the broken thread from under the foot. Open the front cover, move the machine threading lever to the threading position, and rotate the handwheel counterclockwise to lock the looper tube. Re-thread the machine above the threading port, leaving a 22-inch (55cm) thread tail. -
Page 24: Chain/Cover Stitch
Chain/Cover Stitch Chain Stitching The chain stitch is formed using two threads: one thread in the needle and one thread in the chain looper. Chain Stitching looks like a straight stitch on the top of the fabric, while the chain looper thread forms a chain on the underside of the fabric. -
Page 25: Chain Stitching
Chain Stitching (Cont.) Chain Stitch Looper Tension Adjustments Balanced tension - Balanced tension Chain stitch has correct tension when the needle thread sews a straight seam on the top side and the chain looper thread forms under side loops on the under side of the fabric. Chain looper thread is too tight - Chain looper thread is too tight Decrease the chain looper tension dial to a lower number. -
Page 26: Cover Stitch - Right Narrow - 3Mm
Cover Stitch - Right Narrow - 3mm The narrow cover stitch consists of two rows of straight stitching on the top side of the fabric with an overlock stitch on the underside of the fabric. This stitch is very common in the garment industry to hem knit garments. - Page 27 Cover Stitch - Right Narrow (Cont.) Cover Stitch - Right Narrow Looper Tension Adjustments Balanced tension - Balanced tension Cover stitch has correct tension when the needle threads sew two rows of straight stitching on the top side and the chain looper under side forms a zigzag on the underside of the fabric.
-
Page 28: Cover Stitch - Left Narrow - 3Mm
Cover Stitch - Left Narrow - 3mm The narrow cover stitch consists of two rows of straight stitching on the top side of the fabric with an overlock stitch on the underside of the fabric. This stitch is very common in the garment industry to hem knit garments. - Page 29 Cover Stitch - Left Narrow (Cont.) Cover Stitch - Left Narrow Looper Tension Adjustments Balanced tension - Balanced tension Cover stitch has correct tension when the needle threads sew two under side rows of straight stitching on the top side and the chain looper forms a zigzag on the under side of the fabric.
-
Page 30: Cover Stitch - Wide - 6Mm
Cover Stitch - Wide - 6mm The wide cover stitch consists of two rows of straight stitching on top side of the fabric with an overlock stitch on the underside of the fabric. This stitch is very common in the garment industry to hem heavier knit fabrics such as double knits, sweatshirt fleece, and polar fleece. - Page 31 Cover Stitch - Wide - 6mm (Cont.) Cover Stitch - Wide Looper Tension Adjustments Balanced tension - Balanced tension Cover stitch has correct tension when the needle threads sew two under side rows of straight stitching on the top side and the chain looper forms a zigzag on the underside of the fabric.
-
Page 32: Triple Cover Stitch - 6Mm
Triple Cover Stitch - 6mm The Triple Cover Stitch can be used for topstitching, hemming, and elastic application. The stitch can also be used as a decorative stitch upside down with the overlock side on the right side of the fabric. The garment industry uses the Triple Cover Stitch frequently in activewear. - Page 33 Triple Cover Stitch (Cont.) Triple Cover Stitch Looper Tension Adjustments Balanced tension - Balanced tension Triple Cover stitch has correct tension when the needle threads sew three rows of straight stitching on the topside and the chain under side looper forms a zigzag on the underside of the fabric. Chain looper thread is too tight - Chain looper thread is too tight Decrease the chain looper tension dial to a lower number.
-
Page 34: Techniques
Turning Corners - Chain Stitch Sew to the point in fabric where you want to turn a corner. Stop the machine. Turn the handwheel toward you (counterclockwise) by hand, making sure the needle is going down in the fabric. Slowly start to raise the needle OUT OF FABRIC. -
Page 35: Flat Hemming - Cover Stitch
5. Sew hem. 6. Sew seam on garment. Note: Optional guide or attachments will help with hemming (fig. B). Ask your Baby Lock retailer. Hemming in the Round - Cover Stitch 1. Sew all seams on the garment. 2. Measure, turn up and press the hem on garment. -
Page 36: Securing Chain And Cover Stitching
Securing Chain and Cover Stitching The Chain Stitch and Cover Stitch can easily be removed. Trim the chain tail to edge of fabric and the "end" of the seam and pull on the chain looper thread on underside of the fabric. This will give you the opportunity to "unsew"... -
Page 37: Specialty Threads
Lightweight threads such as rayon machine-embroidery thread and lingerie thread, can easily be threaded on the Baby Lock Euphoria. Very fine monofilament threads may need threading assistance from a "Threading Cradle" (see page 35) or "Looper Threading Tool" (see page 36). -
Page 38: Thread Cradle For Looper
Thread Cradle for Looper 1. Open the front cover and raise the presser foot. 2. At the threading port, cut the chain looper thread (fig. A). Remove thread from under the presser foot and the upper thread guides. Replace cone of thread with specialty thread. 3. -
Page 39: Bypassing The Threading Port
Bypassing the Threading Port Heavyweight threads can be used through the chain looper thread path. Specific techniques may require that the thread bypass the thread port for the thread pull to be loosened. Start with the machine threaded with regular chain looper thread. 1. -
Page 40: Chain Looper For Ribbon Thread
Chain Looper for Ribbon Thread Heavyweight threads and ribbon threads can be used through the chain looper thread path. Specific techniques may require that the thread bypass the thread port for the thread pull to be loosened. Start with the machine threaded with regular chain looper thread. 1. -
Page 41: Specialty Thread Guide Chart
Specialty Thread Guide Chart CHAIN/COVER Wooly Nylon Metallic Threads Topstitching STITCHES (Medium Weight) (Lightweight) Buttowhole Twist (Medium Weight) 2-Thread Chain Stitch In chain looper only In chain looper only In needles only C-1, C-2, or C-3 Needle Position 3-Thread Cover Stitch In needles only In chain looper only In chain looper only... -
Page 42: Maintenance
Troubleshooting Before taking your machine in for service, check the following: Machine fails to start: 1. Are electrical plugs properly connected? 2. Is the power switch on? 3. Check household circuit breaker or fuse. 4. Is the threading lever in the serging position? 5. - Page 43 Troubleshooting (Cont.) Stitch Unbalanced: 1. Is the machine threaded correctly? 2. Is the proper presser foot on the machine? 3. Is the correct needle inserted and threaded? 4. Is the thread in the tensions? 5. Are the needle threads set in the threading paths correctly? 6.
-
Page 44: Replacing Needles
The needle will be on the drawer (fig. D). Replacing LED Lighting Your Baby Lock Euphoria is equipped with a long-life LED lighting system. It is not necessary to change bulbs. If LED unit requires replacement, please contact your authorized Baby Lock retailer. -
Page 45: Cleaning
Your Baby Lock Euphoria will operate at best performance if it is kept clean at all times. Your Baby Lock's major moving parts are well protected and do not need to be oiled. However, we recommend using the cleaning brush often during garment construction in order to keep lint off the needle bar, the feed dog mechanism and looper. -
Page 46: Technical Data
Technical Data "Electronic ExtraordinAir Threading System" Looper Threading System: Dial for Chain/Cover Stitch Looper Thread Tension Dial: 1.0-4.0mm Stitch Length Dial: Differential Feed: Gathering effect: N ~ 2.0 Stretching effect: N ~ 0.6 Presser Foot: Snap On Foot Presser Foot Height: 6mm from Needle Plate Looper: Chain Looper... - Page 47 Notes:...
- Page 48 BLC4 El-52-TA Printed in Japan...
Need help?
Do you have a question about the Euphoria BLC4 and is the answer not in the manual?
Questions and answers