
Related Manuals for Detecto Solace ID-3636S-855RMP


Summary of Contents for Detecto Solace ID-3636S-855RMP
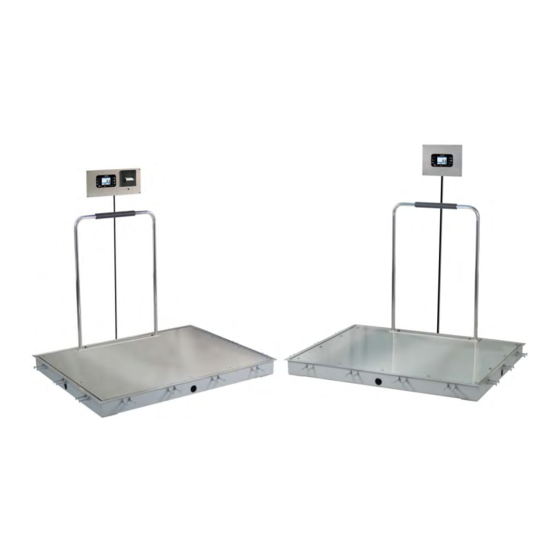
- Page 1 Solace In-Floor Dialysis Scale Digital Weight Indicator Models 855RM / 855RMP Setup and Calibration 3300-0298-0M Rev B 05/18...
-
Page 2: Fcc Compliance Statement
INTRODUCTION Thank you for purchasing our Detecto Solace In-Floor Dialysis Scale. The Solace series scales are flush-mounted platform scales that feature stainless steel decks, and include a pit frame, trim ring, and interface cable to the included multi-color, touchscreen LCD indicator, and printer. -
Page 3: Specifications
SPECIFICATIONS Specification Description Capacity: 1,000 lb x 0.2 lb / 450 kg x 0.1 kg Platform Construction: Anti-corrosion stainless steel Recessed-mount, touchscreen model 855 indicator / thermal ticket Indicator/Printer: printer combo with stainless steel cover plate Display Type: 3.2 in (diagonal) full color TFT display 320x240 resolution Mechanical switch type with 7 buttons: Power, Zero, Lock/Release, Keypad: ID, Cycle Display Mode, Menu, Print... -
Page 4: Ac Power Connection
AC POWER CONNECTION 1. Trim jacket back 2-inches from end of power supply cable, and strip insulation back from the three individual wires approximately 3/8 inch. 2. Remove conduit knockout from enclosure, and replace with conduit connector per local Electrical Code. 3. -
Page 5: Units Selection
LB/IN or KG/CM. 1. Press key to turn the indicator on. 2. The indicator display will show the software version for a few seconds, the Detecto logo briefly and then change to the Select Units screen. Select Units... -
Page 6: Keypad Functions
KEYPAD FUNCTIONS WEIGHT: POUNDS/GROSS AUTO LOCKED 155.7 TARE PATIENT/CHAIR WEIGHT 855RM Keypad (without Printer) WEIGHT: POUNDS/GROSS AUTO LOCKED 155.7 TARE PATIENT/CHAIR WEIGHT 855RMP Keypad (with Printer) DO NOT operate the keys or touchscreen with pointed objects (pencils, pens, etc..). Damage to keys or touchscreen resulting from this practice is NOT covered under warranty. - Page 7 This is the Zero key. Press and release this key to reset the display to zero, up to 100% of the indicator capacity. This is the Lock/Release key. Press and release this key, or touch the weight readout on the display to cause the weight, height, and BMI to lock on the current values until the key is pressed again or the weight readout on the display is touched again.
- Page 8 ANNUNCIATORS The annunciators are displayed on the Weight screen to show that the indicator is in the mode corresponding to the annunciator label or that the status indicated by the label is active. Weight Mode Power WEIGHT: POUNDS/GROSS Status Status CENTER ZERO Messages Weight...
-
Page 9: Menu Functions
1. Press key to turn the indicator on. 2. The indicator will show the Detecto logo briefly and then change to the Weight screen. 3. With the Weight screen displayed, press the Menu key. 4. The display will change to show the Setup Review screen. - Page 10 6. The display will change to show the ENTER PASSWORD screen. ENTER PASSCODE Enter passcode to access settings. Press CANCEL to exit. SAVE CANCEL 7. Using the 10-key on the touchscreen, enter 64870 and then press the Save key. 8. The indicator is now ready for setup and calibration 3300-0298-0M Rev B 05/18...
- Page 11 Setup Menu Page 1 MENU PAGE 1 Cal=9, Cfg=5 Units: lb, in Auto Locking: 4 sec. Sonar Ht: 222.2 cm <<< Exit >>> Cal=XX, Cfg=YY – Audit Trail Counters These are the Audit Trail Counters for the number of times that the metrological and non- metrological settings have been changed.
- Page 12 Setup Menu Page 2 MENU PAGE 2 Capacity1: 600.0 Capacity2: 1000.0 Interval1: 2 Interval2: 5 <<< Exit >>> Capacity1: Touching this key will open the capacity screen. This will allow you to set the capacity of the first range. Using the numeric keys, enter a new value and then press the Save key to save it.
- Page 13 Setup Menu Page 3 MENU PAGE 3 Decimal1: 1 Decimal2: 1 Motion Range: 3 Filter Mode: 0 <<< Exit >>> Decimal1: Touching this key will open the decimal entry screen. This will allow you to set the decimal point precision for the first weight range. Using the numeric keys, enter a new value and then press the Save key to save it.
-
Page 14: Zero Tracking
Setup Menu Page 4 MENU PAGE 4 Zero Tracking: 5 Power up Zero: No Gravity: 1.000000 OIML: No <<< Exit >>> Zero Tracking: Touching this key will open the zero tracking screen. This will allow you to set the number of half (1/2) divisions that the indicator will attempt to maintain zero on the scale. - Page 15 Setup Menu Page 5 MENU PAGE 5 Model: Dialysis Calibrate Scale Load Cell Trim <<< Exit >>> Model: This will change the default settings and operation of the indicator. For instance, select “Icon” as the model in order to use the stand-up type indicator with the sonar height measurement.
- Page 16 Setup Menu Page 6 MENU PAGE 6 Date: 03/22/2017 Time: 16:29:26 <<< Exit Date: Touching this key will allow you to enter the date starting with the year. After pressing Date:, the screen will show “Key in the Year and press SAVE”. Year Enter the 4-digits (YYYY) for the year and then press the Save key.
-
Page 17: Calibrate Scale
CALIBRATE SCALE Calibration Modes The Solace Weight Indicator has four modes that can be used to perform calibration. The modes are as follows: 1 = SmartCal SmartCal is the most precise method of calibration. It requires that a calibrated load be placed over each load cell of the scale platform only once. - Page 18 1. Press key to turn the indicator on. 2. The indicator will show the Detecto logo briefly and then change to the Weight screen. 3. With the Weight screen displayed, press the Menu key. 4. The display will change to show the Setup Review screen.
- Page 19 10. The display will change to show the “Number of Points” screen. CALIBRATE SCALE Number of points at which the scale will be calibrated. 1 = SmartCal SAVE CANCEL 11. With the “Number of Points” screen displayed, select 1 if a SmartCal calibration is desired, otherwise select the number of points to use (2, 3, or 4) on the touchscreen, and then press the Save key.
- Page 20 1 = SmartCal 1. With the “Number of Points” screen displayed, press the 1 key on the touchscreen and then press the Save key. CALIBRATE SCALE Number of points at which the scale will be calibrated. 1 = SmartCal SAVE CANCEL 2.
- Page 21 4. The display will change to show “Working” for a few seconds and then change to show “Set test weight over Cell 1”. CALIBRATE SCALE Working To calibrate zero, remove any weight from the scale before proceeding SAVE CANCEL 5. Place the calibrated test weight on the scale over Cell 1 and then press the Save key. CALIBRATE SCALE Set test weight over Cell 1 and...
- Page 22 8. The display will change to show “Working” for a few seconds and then change to show “Set test weight over Cell 3”. CALIBRATE SCALE Set test weight over Cell 3 and press Save. SAVE CANCEL 9. Place the calibrated test weight on the scale over Cell 3 and then press the Save key. 10.
- Page 23 2 = Two Calibration Points 1. With the “Number of Points” screen displayed, press the 2 key on the touchscreen and then press the Save key. CALIBRATE SCALE Number of points at which the scale will be calibrated. 1 = SmartCal SAVE CANCEL 2.
- Page 24 5. Place the calibrated test weight (full test load) on the scale, enter the value for the test weight, and then press the Save key. CALIBRATE SCALE 1000.0 NOTE: A minimum of This is the known 50% of the scale's test weight capacity is required, that is currently...
- Page 25 3 = Three Calibration Points 1. With the “Number of Points” screen displayed, press the 3 key on the touchscreen and then press the Save key. CALIBRATE SCALE Number of points at which the scale will be calibrated. 1 = SmartCal SAVE CANCEL 2.
- Page 26 4. With the “Known test weight” screen displayed, place the first calibrated test weight (half the test load) on the scale, enter the value for the test weight and then press the Save key. CALIBRATE SCALE 500.0 This is the known test weight that is currently on the scale.
- Page 27 4 = Four Calibration Points 1. With the “Number of Points” screen displayed, press the 4 key on the touchscreen and then press the Save key. CALIBRATE SCALE Number of points at which the scale will be calibrated. 1 = SmartCal SAVE CANCEL 2.
- Page 28 4. With the “Known test weight” screen displayed, place the first calibrated test weight (one fourth the test load) on the scale, enter the value for the test weight, and then press the Save key. CALIBRATE SCALE 250.0 This is the known test weight that is currently on the scale.
- Page 29 8. With the “Known test weight” screen displayed, place the third calibrated test weight (full test load) on the scale, enter the value for the test weight and then press the Save key. CALIBRATE SCALE 1000.0 NOTE: A minimum of 50% of the scale's capacity is This is the known required for the full test...
- Page 30 1. Press key to turn the indicator on. 2. The indicator will show the Detecto logo briefly and then change to the Weight screen. 3. With the Weight screen displayed, press the Menu key. 4. The display will change to show the Setup Review screen.
- Page 31 LOAD CELL TRIM 1: 2.941 mV 2: 3.334 mV 3: 3.148 mV 4: 1.747 mV 0.00 Exit 5.97 9. Place a test weight of at least 10% of the scale capacity on each corner of the scale, one at a time, and note the reading for each corner. 10.
-
Page 32: Before You Call For Service
ERROR AND OPERATION MESSAGES The Solace is equipped with diagnostic software that tests various portions of the indicator's circuitry and verifies proper operation. Should a problem be detected, an error or status message will be displayed. The following lists these messages and their meaning. AUTO LOCKED This message appears if the weight/height has been automatically locked. -
Page 33: Care And Cleaning
CARE AND CLEANING NOTE: The indicator contains no user-serviceable parts and maintenance should be limited to an occasional cleaning. Always remove power before cleaning. Do not pour or spray water directly on the indicator to clean. The indicator is not waterproof and covering it with water will damage it and void the warranty. -
Page 34: Statement Of Limited Warranty
Detecto. period of two (2) years from date of shipment. Detecto shall be B.) Has had serial number altered, defaced, or removed. the sole judge of what constitutes a defect. - Page 35 Printed in USA 3300-0298-0M Rev B 05/18 3300-0298-0M Rev B 05/18...
Need help?
Do you have a question about the Solace ID-3636S-855RMP and is the answer not in the manual?
Questions and answers