Table of Contents
Advertisement
Quick Links
Advertisement
Table of Contents

Related Manuals for Easypix Panox Champion


Summary of Contents for Easypix Panox Champion
- Page 1 USER M ANUAL USER M ANUAL...
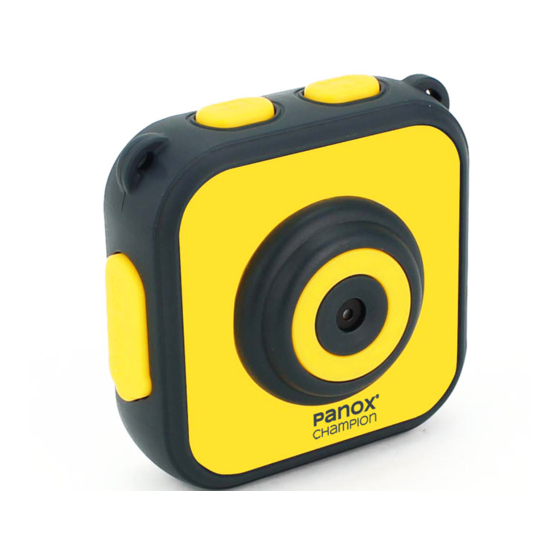
- Page 2 APPEARANCE APPEARANCE 1. USB port 2. Master power switch 3. Lens 4. Video button 5. Photo button ...
- Page 3 6. Page up 7. Power button 8. Shutter/OK button 9. Page down 10. LCD display 11. Busy indicator – blue light, Charging indicator – red light 12. Speaker 13. Microphone 14. Micro SD card slot ...
-
Page 4: Charge The Built-In Lithium Battery
START TO USE START TO USE 1. CHARGE THE BUILT-IN LITHIUM BATTERY The camera is equipped with 3.7V rechargeable lithium battery. To charge the camera, connect it to a computer. The camera must be powered off in order to charge completely. The charging indicator will illuminate while charging, and will turn off when the battery is fully charged. It takes approximately 3 hours to achieve a full charge. - Page 5 HOW TO USE THE MEMORY CARD 2.1. Insert the micro SD card into the card holder taking care to ensure it is being inserted correctly. 2.2. To remove the card, press the end of memory card gently, the card will be ejected. Note: As the camera is not equipped with built-in memory please insert a memory card before use. Please format the memory card using the ‘Format’ option in the ‘Settings’ menu before using the card for the first time.
-
Page 6: Power On/Off
3. POWER ON/OFF Please switch the master power switch (2) to “I” (ON) before you turn on the camera. 3.1. Power on: Short-press the power button (7) 3.2. Power off: Hold on power button (7) for 3 seconds. 3.3. Auto screen off: In order to save battery life the screen will auto-shutdown after a pre-determined time. Press the photo or video button to reactivate the screen. 3.4. Auto power off: When the camera requires a charge due to a low battery level, an icon will be displayed on the LCD screen. When the icon flickers the camera will be turned off automatically. When finished using the camera, please switch the master power switch (2) to “O” (OFF). -
Page 7: Recording Mode
4. RECORDING MODE After powering on, the camera enters video recording standby mode by default. Short-press the video button to start video recording; Short press the video button again to stop video recording. Short-press the page up button or page down button to choose a color effect for images. There are seven kinds of color effects, such as: normal, black and white, retro, negative, red, green and blue. 5. PHOTO MODE Short-press the photo button to enter photo standby mode. Short-press the photo button again to capture your photo. Short-press the page up button or page down buttons to select various frames. -
Page 8: Playback Mode
6. PLAYBACK MODE While in recording or photo mode, you can short-press the power button to switch between standby and playback modes using the LCD display. Short-press page up button and page down button to change modes. Short-press the shutter/OK button to confirm your choice. Short-press the power button to exit. You can view the captured videos and photos in one of the following ways: 1. Enter playback mode, press the page up button or page down button to scroll through the photos and videos. To play back a video press the shutter/OK button to start, press the shutter/OK button again to pause playback and press the power button to stop playback. 2. Connect your camera to a computer using the supplied USB cable to view your videos and photo files. -
Page 9: System Settings
7. SYSTEM SETTINGS You can enter the camera system settings as follows: Short-press the the page up button or page down button to choose the settings screen and short-press the shutter/OK button to confirm your choice. To exit the menu, short-press the power button . The following system settings are available: • Photo resolution: VGA (640x480), 1M (1280x960), 3M* (2048x1536), 5M* (2592x1944) *by interpolation • Video resolution: HD (1280x720), 640 (640x480) • Power frequency: 50HZ, 60HZ • Power save: Select OFF/1 min/3 min/5 min/Exit. To save battery power the camera will turn off automatically if no buttons are pressed within the selected time frame chosen from the ‘Power Save’ options above. - Page 10 • Date & Time: Set the date and time of the camera. • Language: Set the default language. • Invert mode: Select to ‘flip’ the LCD screen image when mounting the camera upside down. • Format: Prepares memory card for use. NOTE: This action erases all data on the SD Card. • Reset all: Reset all current camera settings to original factory default. 8. CONNECT TO PC VIA PLUG-AND-PLAY When connected to a computer using the USB cable, the operating mode will automatically switch to ‘removable hard disk’ mode. A removable disk icon will appear in the "My Computer window. The pictures and video files will be accessible under the following folder: H: \ DCIM\100MEDIA folder (‘H’ is the ID for the removable disk); Note: To avoid the loss of data during the file download process, please ensure the USB cable remains connected at all times and the micro SD card is not removed.
- Page 11 TECHNICAL SPECIFICATIONS SPECIFICATIONS TECHNICAL Sensor 1.3MP CMOS Function modes Video, photo, playback Display 1.77''/4.5cm display Photo VGA (640x480), 1M (1280x960), 3M* (2048x1536), 5M* (2592x1944) *by interpolation resolution Video resolution HD (1280x720), 640 (640x480) Storage medium Micro SD card (max. supporting 32GB) - not included USB port USB 2.0 Power supply Built in 3.7V rechargeable lithium battery Power save 1 min. / 3 min. / 5 min. / OFF Operating system Windows XP / Vista / Win7 / Win8 / Mac OS 10.8 requirements...
- Page 12 NOTE: The original specification may vary from time to time due to product upgrading and updating. Please use Micro SD cards up to 32GB (not included). Recording times are depending on resolution. Before using your camera in the water please verify that all lids and locks are tightly closed and sealed on the camera and the underwater case. After use, clean the housing of salt and chlorine water and then let it dry. The camera should not be exposed to large temperature and humidity differences to avoid condensation inside the housing or behind the lens. After underwater use, the case must be kept open to avoid condensation or rust.
-
Page 13: Declaration Of Conformity
After reaching a max. video recording time of max. 20 minutes the camera will automatically stop. It can only be restarted manually. DECLARATION OF CONFORMITY Easypix hereby declares that the product Panox Champion conforms to all essential requirements of Directive 1999/5/EC. The declaration of conformity can be downloaded here: http://www.easypix.info/download/pdf/doc_panox_champion.pdf For technical help please visit our support area on www.easypix.eu. Only EU ...
Need help?
Do you have a question about the Panox Champion and is the answer not in the manual?
Questions and answers