Table of Contents
Advertisement
Quick Links
Original Operating Instructions
BATI0XXX-ES-1-XXX-1
Table of Contents
Original Operating Instructions
Battery Charger
BATx0100-ES-1-400-1
WSTECH is a Wind&Sun Technologies and Siemens Joint Venture.
Before starting any work, please read "Original Operating Instructions" and
"Interface Description Modbus TCP and EtherCAT"!
O_BATx0100-ES-1-400-1_V3.1_GB
Advertisement
Table of Contents

Related Manuals for WSTECH BAT 0100-ES-1-400-1 Series


Summary of Contents for WSTECH BAT 0100-ES-1-400-1 Series
- Page 1 Original Operating Instructions BATI0XXX-ES-1-XXX-1 Table of Contents Original Operating Instructions Battery Charger BATx0100-ES-1-400-1 WSTECH is a Wind&Sun Technologies and Siemens Joint Venture. Before starting any work, please read "Original Operating Instructions" and "Interface Description Modbus TCP and EtherCAT"! O_BATx0100-ES-1-400-1_V3.1_GB...
-
Page 2: Table Of Contents
Original Operating Instructions BATx0100-ES-1-400-1 Table of Contents Table of Contents User Information ..................7 Identification of the Product ................ 8 Scope ......................9 Target Audience ..................9 General Information ..................9 1.4.1 Related Documents ................10 1.4.2 Symbols ....................10 1.4.3 Terms und Abbreviations ............... - Page 3 Original Operating Instructions BATx0100-ES-1-400-1 Table of Contents Performing Measurements before Operation ..........48 4.2.1 Voltage Measurement DC Voltage and AC Voltage ....... 50 4.2.2 Voltage Measurement Harmonic Filter ........... 50 Operation ....................51 Interfaces ....................51 Operating Modes ..................51 Enable Switch ...................
- Page 4 Original Operating Instructions BATx0100-ES-1-400-1 Table of Contents 7.2.2 Visual Inspection of Interior Area ............63 7.2.3 Torque Check of Electrical Connections ..........64 7.2.4 Condition Check of Cables and Lines ............ 64 7.2.5 Condition Check of Fuses ..............64 7.2.6 Functional Test of DC Circuit Breaker ............
- Page 5 Original Operating Instructions BATx0100-ES-1-400-1 List of Figures List of Figures Figure 1: Example of a type plate .................. 8 Figure 2: Example of an option plate ................8 Figure 3: Schematic structure ..................18 Figure 4: Exterior view front ..................19 Figure 5: Interior view front ..................
- Page 6 Original Operating Instructions BATx0100-ES-1-400-1 List of Tables List of Tables Table 1: Naming convention ..................11 Table 2: Scope of delivery................... 21 Table 3: Feedback of insulation monitoring device ............43 Table 4: Extract of BAT Error Codes ................57 Table 5: Extract of BAT Error Codes (continued) ............
-
Page 7: User Information
User Information 1 User Information We congratulate you on purchasing a BATx0280-ES-1-400-1. By purchasing this battery charger, you have chosen a high-quality WSTECH product. If you have questions about the application, please contact info@wstech.com. Legal Information All rights reserved. Reproduction, also in extract form, only admissible with approval from the manufacturer. -
Page 8: Identification Of The Product
Original Operating Instructions BATx0100-ES-1-400-1 User Information Identification of the Product The type plates and option plates of the BATx0100-ES-1-400-1 (hereinafter referred to as BAT or product) are located on the outside and inside of the front cabinet door. Figure 1: Example of a type plate Pos. -
Page 9: Scope
Original Operating Instructions BATx0100-ES-1-400-1 User Information Scope These original operating instructions (hereinafter referred to as operating instructions) are valid for the following products: • BATD0100-ES-1-400-1 (hardware version: 04X, wiring diagram version: 4.XX) • BATY0100-ES-1-400-1 (hardware version: 04X, wiring diagram version: 4.XX) The illustrations used in these operating instructions are reduced to the essentials and may differ from the delivered product. -
Page 10: Related Documents
Original Operating Instructions BATx0100-ES-1-400-1 User Information 1.4.1 Related Documents This and the related documents are provided on an USB Stick in the product. • Interface Description Modbus TCP and EtherCAT (hereinafter referred to as Interface Description) • Wiring diagram 1.4.2 Symbols Symbol Description DANGER! -
Page 11: Terms Und Abbreviations
Original Operating Instructions BATx0100-ES-1-400-1 User Information 1.4.3 Terms und Abbreviations Table 1: Naming convention Complete designation Designation in the document Alternating current Battery inverter Constant current-constant voltage CC-CV Direct current Electromagnetic compatibility Electrostatic discharge Energy Storage Ethernet for Controller and Automation EtherCAT Technology Hardware version... -
Page 12: Intended Use
Original Operating Instructions BATx0100-ES-1-400-1 User Information Intended Use This product is intended for use exclusively with batteries. The product is constructed for indoor use and fulfils the IP20 degree of protection. The product is not suitable for operation in areas with the risk of explosion and must be kept away from flammable or combustible materials. -
Page 13: Safety Instructions
Original Operating Instructions BATx0100-ES-1-400-1 User Information Safety Instructions DANGER! Danger to life due to disregarding the instructions for action! Disregarding the safety instructions or performing unauthorized actions may lead to serious injury or death. • Read and observe all safety instructions and symbols on the product and within these operating instructions. - Page 14 Original Operating Instructions BATx0100-ES-1-400-1 User Information NOTICE Damage to components due to electrostatic discharge! Electrostatic discharge can damage the components. • Wear suitable personal protective equipment for all work on the product. • Perform all work on the product in accordance to IEC 61340-5-1.
-
Page 15: Fire Protection Measures
Original Operating Instructions BATx0100-ES-1-400-1 User Information Fire Protection Measures DANGER! Danger to life due to fire or explosion! Unsuitable installation sites can cause fire or explosion. This may cause damage to the product and result in serious injury or death to persons within the products vicinity. -
Page 16: Safety Sign On The Packaging
Original Operating Instructions BATx0100-ES-1-400-1 User Information Safety Sign on the Packaging O_BATx0100-ES-1-400-1_V3.1_GB Page 16 of 73... -
Page 17: Description
Original Operating Instructions BATx0100-ES-1-400-1 Description 2 Description Functional Description The product can feed the energy stored in batteries power controlled into the grid. For this purpose it converts the DC voltage of the batteries into grid-compliant AC voltage. If required, reactive power can be provided. To charge the batteries from the grid the inverter operates as a controlled rectifier. -
Page 18: Figure 3: Schematic Structure
Original Operating Instructions BATx0100-ES-1-400-1 Description Figure 3: Schematic structure O_BATx0100-ES-1-400-1_V3.1_GB Page 18 of 73... -
Page 19: Options
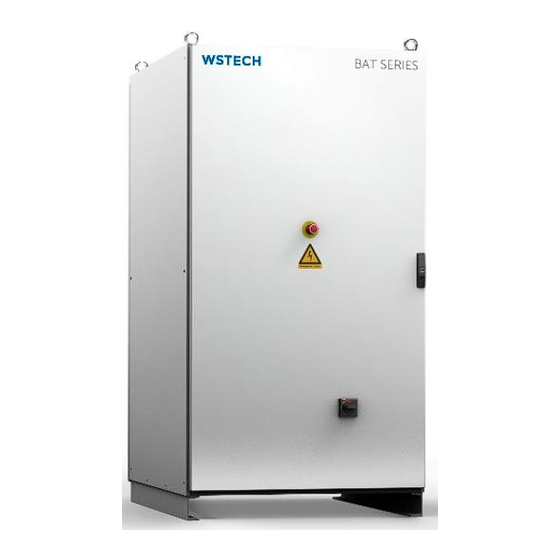
Original Operating Instructions BATx0100-ES-1-400-1 Description Options Following options are available for each product: • Island grid function • Interface for SBB16-10 • Cabinet heating • EtherCAT interface • Graphical display (HMI) Views 2.4.1 Exterior View Figure 4: Exterior view front Pos. -
Page 20: Interior Views
Original Operating Instructions BATx0100-ES-1-400-1 Description 2.4.2 Interior Views Pos. Description Control card (-A1), (-A2) Power stack DC link measurement points Fuses (-F10) (-F11), Precharge circuit Fuse (-F8), Insulation monitoring device Fuse (-F3), Surge arrester AC connection DC circuit breaker (-Q1) Circuit breaker (-Q101) (option) interface for SBB16-10 Fuses (-F13), (-F14) (option) -
Page 21: Installation
Original Operating Instructions BATx0100-ES-1-400-1 Installation 3 Installation NOTICE Damage to the product due to lightning! The product has NO lightning protection system. Absence of a lightning protection system can cause damage. • The risk of lightning damage can be reduced by installing a lightning protection system. -
Page 22: Transport
Original Operating Instructions BATx0100-ES-1-400-1 Installation Transport DANGER! Danger to life due to falling loads! The product can fall or tip over when transported incorrectly, which may cause damage to the product and result in serious injury or death. • Wear suitable personal protective equipment for all work on the product. -
Page 23: Transport With Crane
Original Operating Instructions BATx0100-ES-1-400-1 Installation 3.2.1 Transport with Crane Transport requirements: • Ensure that the transport lugs (separate package) are fixed. • Comply with the wire rope angle of α>50° (Figure 6). Figure 6: Transport with crane O_BATx0100-ES-1-400-1_V3.1_GB Page 23 of 73... -
Page 24: Storage
Original Operating Instructions BATx0100-ES-1-400-1 Installation Storage NOTICE Damage to the product due to incorrect storage! Storage of the product with or without packaging, unassembled and in disconnected condition can leads to ingress of moisture and dirt. • Packaging is only suitable for dry conditions. •... -
Page 25: Installation Site
Original Operating Instructions BATx0100-ES-1-400-1 Installation Installation Site WARNING! Danger to life due to the product tipping over! When installed on an uneven foundation, the product can tip over. This may cause damage to the product and result in serious injury or death to persons within the products vicinity. -
Page 26: Figure 7: Cable Entry Area (Bottom View)
Original Operating Instructions BATx0100-ES-1-400-1 Installation Requirements for the installation site: • Foundation and formwork must be built according to applicable local regulations and standards. • Ensure that there is sufficient room for installation, mounting, operation and repair. • Required ambient conditions must be fulfilled (Table 11). •... -
Page 27: Distances
Original Operating Instructions BATx0100-ES-1-400-1 Installation Figure 8 shows the mounting points of the product. All dimensions are given in millimetres. Figure 8: Mounting points (bottom view) 3.4.1 Distances Following distances must be observed: • Front: Minimum 600 mm with opened door •... -
Page 28: Cooling
Original Operating Instructions BATx0100-ES-1-400-1 Installation 3.4.2 Cooling The air is sucked in from the bottom (Figure 9), flows to the components to be cooled and is blown out on the top (Figure 10) by means of two radial fans mounted under the top cover. -
Page 29: Figure 10: Top View
Original Operating Instructions BATx0100-ES-1-400-1 Installation Figure 10: Top view O_BATx0100-ES-1-400-1_V3.1_GB Page 29 of 73... -
Page 30: Connection
Original Operating Instructions BATx0100-ES-1-400-1 Installation Connection DANGER! Danger to life due to electric shock! An incorrect selection and cable routing can cause damage to property or serious injury or death to persons. • Wear suitable personal protective equipment for all work on the product. -
Page 31: Required Connections
Original Operating Instructions BATx0100-ES-1-400-1 Installation 3.5.1 Required Connections The following cables and lines must be prepared and in flawless condition, safe and de-energized: • Grounding (Section 3.5.1.1) • AC Connection (Section 3.5.1.2) • DC Connection (Section 3.5.1.3) • Supply Voltage (Section 3.5.1.4) •... - Page 32 Original Operating Instructions BATx0100-ES-1-400-1 Installation 3.5.1.1 Grounding Required material: • 1 x M8x20 mm hexagon screw • 1 x 8.4 mm conical spring washer Procedure: 1. Connect the PE conductor to the press-in nut (Figure 12). 2. Tighten the screw with a torque of 22 Nm. NOTICE: The cable lug must be suitable for a M8 screw.
-
Page 33: Figure 12: Ac Connection
Original Operating Instructions BATx0100-ES-1-400-1 Installation 3.5.1.2 AC Connection Prerequisites: • All grid parameters must be fulfilled (Section 11.2.1). Figure 12: AC connection Pos. Description AC circuit breaker AC connection PE conductor connection Neutral conductor connection Procedure: 1. Observe the sequence (Figure 12). 2. -
Page 34: Figure 13: Dc Connection
Original Operating Instructions BATx0100-ES-1-400-1 Installation 3.5.1.3 DC Connection Prerequisites: If the battery has no circuit breaker or fuse, a circuit breaker or fuse must be installed between the battery and the product. This must be able to securely switch off the short-circuit current of the battery under fault conditions. Figure 13: DC connection Pos. -
Page 35: Figure 14: Connection Supply Voltage (-X1)
Original Operating Instructions BATx0100-ES-1-400-1 Installation 3.5.1.4 Supply Voltage The supply voltage (optional: UPS with buffered output voltage) feeds the fans, control and heating. Requirements: • Product operates with a supply voltage of 230 V /50Hz/TN-grid. • Supply lines must be connected and secured by means of a 16 A miniature circuit breaker with tripping characteristic B or a 16 A fuse with tripping characteristic gG. - Page 36 Original Operating Instructions BATx0100-ES-1-400-1 Installation Depending on the demand the connection can be done in two ways: Variant 1: Buffered supply voltage via an UPS Procedure: 1. Locate terminal strip (-X1) (Figure 14). 2. Connect PE, N and L conductor of the UPS terminal strip (-X1): o Protective conductor PE to (-X1.7) o Phase L to (-X1.1) or (-X1.2) o Neutral conductor N to (-X1.3) or (-X1.4)
-
Page 37: Figure 15: Connection Data Communication
Original Operating Instructions BATx0100-ES-1-400-1 Installation 3.5.1.5 Data Communication NOTICE Damage to the product due to overvoltage! Overvoltage can be generated by lightning, by capacitive or inductive interferences of other electric systems. • Ensure that a surge arrester is available, if an Ethernet cable is led outwards. -
Page 38: Figure 16: Wiring Diagram Extract Terminal Strip (-X17)
Original Operating Instructions BATx0100-ES-1-400-1 Installation 3.5.1.6 Option Island Grid Function If the product has the island grid function, an external voltage (+24 V ) must be applied on the terminals (-X17.1-2) so that the product can also operate parallel to the grid. -
Page 39: Figure 17: Connection Option Interface For Sbb16-10
Original Operating Instructions BATx0100-ES-1-400-1 Installation 3.5.1.7 Option Interface for SBB16-10 With the option interface for SBB16-10, a connected SBB16-10 can be switched on and off remotely. The connection is done at the screw-type terminals in the lower left area of the cabinet. The screw-type terminals are designed for conductor cross- sections of 16 mm²... -
Page 40: Figure 18: Connection Supply Voltage And Plc
Original Operating Instructions BATx0100-ES-1-400-1 Installation Figure 18: Connection supply voltage and PLC Output Connections Description Values signal Feedback On (-X11.1) DC links are connected 24 V , max. 10 mA Feedback Off (-X11.2) DC links are disconnected 24 V , max. 10 mA Feedback (-X11.3) Circuit breaker tripped... -
Page 41: Optional Connections
Original Operating Instructions BATx0100-ES-1-400-1 Installation 3.5.2 Optional Connections The following cables and lines must be in flawless condition, safe and de-energized: • Feedback Operating Status (Section 3.5.2.1) • Feedback Enable Switch (Section 3.5.2.2) • Feedback Insulation Monitoring Device (Section 3.5.2.3) •... -
Page 42: Figure 19: Feedback Enable Switch
Original Operating Instructions BATx0100-ES-1-400-1 Installation 3.5.2.1 Feedback Operating Status The operating status of the control card feedback contacts can be queried via terminals (-X2.1-3). Operating status Terminal Switching status (-X2.1) to (-X2.2) open Ready for operation (-X2.1) to (-X2.3) close (-X2.1) to (-X2.2) close Not Ready for operation... -
Page 43: Table 3: Feedback Of Insulation Monitoring Device
Original Operating Instructions BATx0100-ES-1-400-1 Installation 3.5.2.3 Feedback Insulation Monitoring Device The feedback contact of the insulation monitoring device can be queried via terminals (-X2.9-11). The connection is provided as potential-free feedback contact. Mode of operation of the insulation monitoring device: If the measured value of the insulation resistance drops below the set threshold value, the output relays switch into the fault state. - Page 44 Original Operating Instructions BATx0100-ES-1-400-1 Installation 3.5.2.5 External Voltage Measurement Device Required material: • Voltage measuring device (not included in scope of delivery) Procedure: 1. Locate the terminal strip (-X3) (Figure 5). 2. Connect the cables to the terminal strip (-X3): o Phase L1 to (-X3.11) o Phase L2 to (-X3.12) o Phase L3 to (-X3.13)
-
Page 45: After Installation
Original Operating Instructions BATx0100-ES-1-400-1 Installation 3.5.2.7 External Temperature Sensor Required material: • Temperature sensor (e.g. PT100) (not included in scope of delivery) Figure 20: Cable routing to terminal strip (-X17) Procedure: 1. Locate the terminal strip (-X17) (Figure 20). 2. Connect the lines to the terminals (-X17.3) and (-X17.4). After Installation After installation the following items must be checked: •... -
Page 46: Commissioning
Original Operating Instructions BATx0100-ES-1-400-1 Commissioning 4 Commissioning NOTICE Damage to the product due to incorrect commissioning! Incorrect commissioning can damage the product. • Commissioning of the product via the user interfaces is described in the Interface Description. O_BATx0100-ES-1-400-1_V3.1_GB Page 46 of 73... -
Page 47: Preparing Commissioning
Original Operating Instructions BATx0100-ES-1-400-1 Commissioning Preparing Commissioning Prerequisite: • Conditions for operation must be fulfilled (Section 11.2). Procedure: 1. Ensure that the Enable switch is pressed. 2. Ensure that the product is de-energized. 3. Ensure that all fuses are inserted (Figure 5). 4. -
Page 48: Performing Measurements Before Operation
Original Operating Instructions BATx0100-ES-1-400-1 Commissioning Performing Measurements before Operation WARNING! Risk of injury due to high voltage when measuring! Improper measurements at high voltage can cause injury. • Perform measurements only with appropriate measurement devices. • During measurement, all circuit breakers must be switched in position OFF and all fuses must be removed. -
Page 49: Figure 21: Measurement Points
Original Operating Instructions BATx0100-ES-1-400-1 Commissioning Figure 21: Measurement points Pos. Description DC (+) DC (-) Phase L1 Phase L2 Phase L3 Protective conductor connection Neutral conductor connection Harmonic filter O_BATx0100-ES-1-400-1_V3.1_GB Page 49 of 73... -
Page 50: Voltage Measurement Dc Voltage And Ac Voltage
Original Operating Instructions BATx0100-ES-1-400-1 Commissioning 4.2.1 Voltage Measurement DC Voltage and AC Voltage Procedure: 1. Measure the DC voltage from plus to minus connection at the DC circuit breaker inside the product (Figure 21). NOTICE: The voltage must be positive, and the measured values must be within the specified limits (Table 10). -
Page 51: Operation
Original Operating Instructions BATx0100-ES-1-400-1 Operation 5 Operation WARNING! Danger to life due to incorrect installation! If the product is not installed correctly it may cause damage to the product and result in serious injury or death to persons within the products vicinity. -
Page 52: Enable Switch
Original Operating Instructions BATx0100-ES-1-400-1 Operation Enable Switch Pressing the Enable switch opens the AC and DC circuit breakers. When all possible errors are eliminated, the Enable switch may be pulled out. The product restarts operation after the Enable switch has been pulled out and the product has been reset by means of the higher-level control. -
Page 53: Starting The Product
Original Operating Instructions BATx0100-ES-1-400-1 Operation Starting the Product Procedure: 1. Switch the AC circuit breaker in position ON. The DC circuit breaker is operated automatically. NOTICE: Operation is started after the appropriate checks via the user interface. Carry Out Measurements DANGER! Danger to life due to electric shock if the product is not locked! After stopping the product dangerous voltages is present. -
Page 54: Ac Current
Original Operating Instructions BATx0100-ES-1-400-1 Operation 5.5.2 AC Current Procedure: 1. Ensure that a measuring device is connected (Section 3.5.2.6). 2. Start the product (Section 5.4). NOTICE: The internal current sensors have a translation ratio of 200/1A. 3. Check if the values of the AC current are within the specified limits (Table 10). 5.5.3 Ambient Temperature The product offers the possibility to show the ambient temperature on the user interface. -
Page 55: Troubleshooting
Original Operating Instructions BATx0100-ES-1-400-1 Troubleshooting 6 Troubleshooting DANGER! Danger to life due to high voltage! In case of fault, high voltage may still be present on the product. Touching energized parts lead to dead or servere injury. • Observe all safety instructions when working on the product. WARNING! Risk of injury due to improper condition of the product! Incorrect troubleshooting can lead to serious bodily injury or death and... - Page 56 Original Operating Instructions BATx0100-ES-1-400-1 Troubleshooting The description of the error codes and troubleshooting is part of the Interface Description. Error messages and the associated error codes can be displayed via the user interface. Depending on the occurred error, the product changes the operating mode. If the product switches off due to an error, the error must be reset before the product can be switched on again.
-
Page 57: Bat Error Codes
Original Operating Instructions BATx0100-ES-1-400-1 Troubleshooting BAT Error Codes Table 4: Extract of BAT Error Codes Code Error Description Corrective Action temperature_high_L1_HW Check cooling temperature_high_L1_SW Check cooling temperature_high_L2_HW Check cooling temperature_high_L2_SW Check cooling temperature_high_L3_HW Check cooling temperature_high_L3_SW Check cooling temperature_high_PT100_X108A12 Check cooling temperature_high_PT100_X108A34 Check cooling temperature_high_PT100_X108B12... -
Page 58: Bat Error Codes 11-21
Original Operating Instructions BATx0100-ES-1-400-1 Troubleshooting Table 5: Extract of BAT Error Codes (continued) Code Error Description Corrective Action OV-Protection_/_Filter_Fuses Check OV-Protection Insulation Error Check Insulation Voltage_Measurement_Failed Check voltage measurement Inverter_HW_Error_L1 Check Powerstack Inverter_HW_Error_L2 Check Powerstack Inverter_HW_Error_L3 Check Powerstack Port_Idc_error Check Idc-Sensor connection Precharge_DC-Link Check Precharge Grid_rotation... -
Page 59: Bat Error Code 156
Original Operating Instructions BATx0100-ES-1-400-1 Troubleshooting 6.1.6 BAT Error Code 156 Corrective action: 1. Check if the Enable switch is pressed (Figure 4). If the Enable switch is pressed, then pull out the Enable switch. 2. Check if the door is closed (Figure 4). ... -
Page 60: Bat Error Codes 172, 174
Original Operating Instructions BATx0100-ES-1-400-1 Troubleshooting 6.1.14 BAT Error Codes 172, 174 Corrective action: 1. Ensure that the motor protecting switch (-F31) is in position I (Figure 5). 2. Measure the AC voltage and the grid frequency. 3. Check if the values are within the specified limits. ... -
Page 61: Bat Warning Codes
Original Operating Instructions BATx0100-ES-1-400-1 Troubleshooting BAT Warning Codes Table 6: Extract of BAT Warning Codes Code Warning Description Corrective Action temperature_high_L1 Reduce power / check cooling temperature_high_L2 Reduce power / check cooling temperature_high_L3 Reduce power / check cooling temperature_high_PT100_X108A12 Reduce power / check cooling temperature_high_PT100_X108A34 Reduce power / check cooling temperature_high_PT100_X108B12... -
Page 62: Maintenance
Original Operating Instructions BATx0100-ES-1-400-1 Maintenance 7 Maintenance DANGER! Danger to life due to high voltage! After stopping the product dangerous voltage is present in the product. Touching live parts can result in death or serious injury due to electric shock. •... -
Page 63: Maintenance Every 12 Month
Original Operating Instructions BATx0100-ES-1-400-1 Maintenance Maintenance every 12 Month NOTICE: During each maintenance interval, the following tasks must be checked. Table 7: Maintenance in De-energized Condition (all 12 months) MAINTENANCE TASKS Visual Inspection of Housing Section 7.2.1 Visual Inspection of Interior Area Section 7.2.2 Torque Check of Electrical Connections Section 7.2.3... -
Page 64: Torque Check Of Electrical Connections
Original Operating Instructions BATx0100-ES-1-400-1 Maintenance 7.2.3 Torque Check of Electrical Connections Maintenance tasks: 1. Check connections and connectors of all parts for tight fit. If connections are loose, contact customer service for specific torque. Tighten connections with specific torque. 2. -
Page 65: Functional Test Of Ac Circuit Breaker
Original Operating Instructions BATx0100-ES-1-400-1 Maintenance 7.2.7 Functional Test of AC Circuit Breaker Maintenance tasks: 1. Check the continuity of the AC circuit breaker (-Q2) when it is in position ON. If the AC circuit breaker has no continuity, replace it. 2. -
Page 66: Decommissioning
Original Operating Instructions BATx0100-ES-1-400-1 Decommissioning 8 Decommissioning Procedure: 1. Stop the product (Section 5.6). 2. Switch off the AC/DC voltage externally and secure it from being switched on again. 3. Ensure that the product is de-energized. 4. Disconnect the AC/DC cables. 5. -
Page 67: Disposal
Original Operating Instructions BATx0100-ES-1-400-1 Disposal 9 Disposal The product contains electrical components and metals. Final and professional disposal of the product must be executed by the customer under the applicable statutory regulations of the country in which the product is used. Please observe the special regulations for electric and electronic equipment in particular. -
Page 68: Customer Service
• Failure description: Inverter status, Failure date, Error code, Detailed failure description How often does the error occur? Address WSTECH GmbH Eckernförder Landstraße 78 D-24941 Flensburg, Germany Telephone +49-(0) 461-430122-69 Fax: +49-(0) 461-430122-11 E-mail service@wstech.com Internet www.wstech.com... -
Page 69: Appendix
Original Operating Instructions BATx0100-ES-1-400-1 Appendix 11 Appendix 11.1 Spare Parts Table 9: Spare parts list Item designation Article description Type Part No. -E1; -E2 (Option) Heating 230 V / 400 W 550014 -F1; -F2 Fuse 10 x 38 mm 500081 -F1, -F2 Fuse 14 x 51 mm... -
Page 70: Technical Data
Original Operating Instructions BATx0100-ES-1-400-1 Appendix 11.2 Technical Data 11.2.1 Electrical Data Table 10: Electrical data BATx0100-ES-1-400-1 Remarks AC SIDE Max. AC apparent power 120 kVA (2h) At nominal grid voltage At (cos (φ)) = 1.0 Nominal AC power 100 kW Nominal grid voltage (U 400 V Other values on... -
Page 71: General Data
Original Operating Instructions BATx0100-ES-1-400-1 Appendix 11.2.2 General Data Table 11: General data BATx0100-ES-1-400-1 Remarks 0 °C…50 °C Ambient working Other values on temperature request Max. working humidity < 95 % Non-condensing Ambient storage -25 °C…60 °C temperature Storage relative humidity <... -
Page 72: Eu Declaration Of Conformity
Original Operating Instructions BATx0100-ES-1-400-1 Appendix 11.3 EU Declaration of Conformity O_BATx0100-ES-1-400-1_V3.1_GB Page 72 of 73...
Need help?
Do you have a question about the BAT 0100-ES-1-400-1 Series and is the answer not in the manual?
Questions and answers