Table of Contents
Advertisement
Advertisement
Table of Contents

Related Manuals for NSK PODIAVAC


Summary of Contents for NSK PODIAVAC
- Page 1 PODIAVAC /PDV30 Operating Instructions...
-
Page 2: Table Of Contents
Table of contents Introduction ........................3 Important notes ......................3 Operating elements and components ................4 Installation ........................5 Connection the hand-piece: ..................5 Inserting the tool: ....................5 Connection the foot switch (optional): ..............5 Mains supply: ......................5 Warranty ........................ -
Page 3: Introduction
Please read the following safety instructions carefully. Adequate ventilation of the device is necessary to prevent inside the unit too much heat. Imagine, the PODIAVAC should not be placed in the vicinity of heat sources, such as e.g. radiators or air vents. -
Page 4: Operating Elements And Components
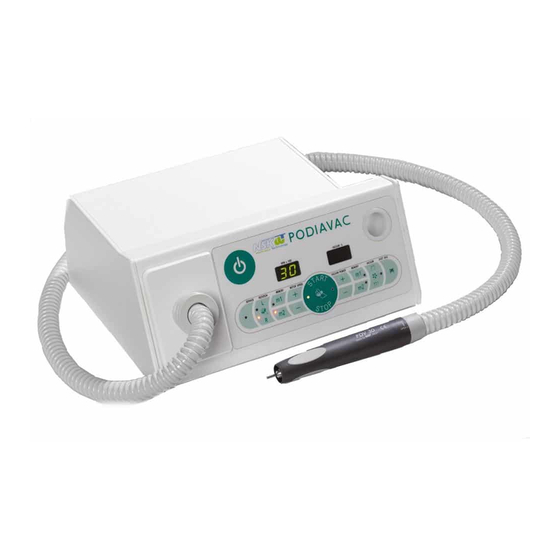
Operating elements and components Ill. 1: Suction chamber Dust-bag Front panel Hand-piece I/O switch (stand-by) additional to mains switch on the right side Display for speed START/STOP pushbutton for the speed of the tool (ROTATION) Counter-clockwise/ clockwise rotation of the tool (L/R) Service LED for maintenance (10) Memory for stored speed values (2x) (11) Speed control (rotation) -
Page 5: Installation
The device is now ready for operation. Warranty The term of the warranty for Podiavac amounts to 1 year or a limit of 500 hours of operation, except wearing parts such as bearings, carbon brushes, dust bag and seals. The warranty extended for a period of another 500 operating hours up to a maximum of 1 year, if the recommended maintenance of the device was done in time. -
Page 6: Operation
Operation Switching on the device: Switch on the main switch on the right side of the device. In addition the displays (6+12) on the front panel show you the software version (initialisation); after that, the display (6) shows the basic setting regarding the speed and the rotating direction of the grinder is illuminated. -
Page 7: Tool Change
Working with the foot switch Before switching on the device, connect the foot switch on the right side of the device. Afterwards, switch on the device: Following this, you can switch the motor on and off by operating the foot switch. Press the foot switch in order to switch off the activated tool and the suction system. -
Page 8: General Care, Maintenance And Repair
General care, maintenance and repair Have your PODIAVAC checked if the corresponding Service LED (9) lights up. Cleaning the device Attention! Always pull the mains plug before cleaning the device. Risk of electric shock! Clean the housing (incl. the hand-piece and the hose) with a damp (but not wet) cloth. -
Page 9: Disinfection, Cleaning And Storing The Tools
Dry the tools immediately after cleaning them and store them in a sterile manner. Maintenance It is recommended that the PODIAVAC is serviced in accordance with the intervals specified (see below). Maintenance and repair may only be carried out by authorised skilled staff of the manufacturer. -
Page 10: Malfunctions And Trouble-Shooting
Malfunctions and trouble-shooting Malfunction Possible cause Measures Device does not work /no No voltage Please check connection of display: the mains cable / check fuses of the device / if required, check socket ERROR “E1” flashes and Dust bag is full or Let device cool down and/ or acoustic signal is sounded. -
Page 11: Service Messages
Service messages Service message Measure LED Dust bag (14) and ERROR “E4” Replace the dust bag after 10 operating hours and clean light the hand piece. Dust bag is full After replacing the dust bag press the Start/Stop pushbutton in order to be able to continue working. -
Page 12: Declaration Of Conformity
Declaration of Conformity in accordance with the EU-Directives for Electromagnetic Compatibility Directive 89/336/EEC + Modification Low Voltage Directive 73/23/EEC + Modification Manufacturer: NSK Wellness Technology GmbH Address: Portitzer Strasse 69 d D-04425 Taucha Germany We certifies that the product Purpose of equipment:...
Need help?
Do you have a question about the PODIAVAC and is the answer not in the manual?
Questions and answers