Advertisement
Quick Links
Advertisement

Subscribe to Our Youtube Channel
Related Manuals for York Fitness LC RW Rower


Summary of Contents for York Fitness LC RW Rower
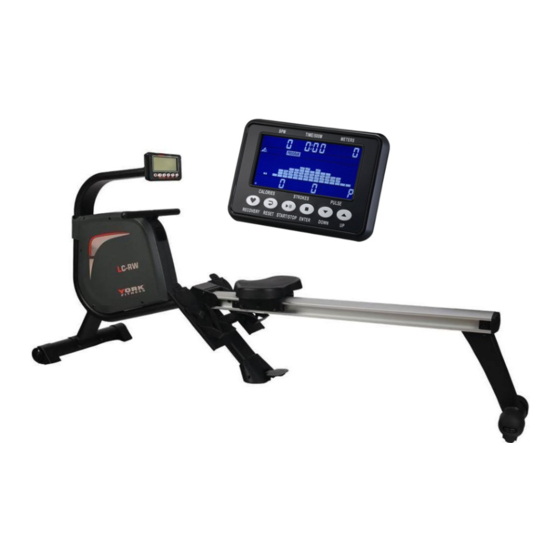
- Page 1 Owner’s Manual LC RW Rower Item #YRK56035A www.yorkfitness.com.au...
-
Page 2: Table Of Contents
Table of Contents Congratulations on CONTENTS purchasing your exercise equipment from Safety information Customer support Assembly Instructions You have chosen a high quality, safe and innovative piece Operational Instructions of equipment as your training partner and we are certain it will keep you motivated on the way to achieving your personal fitness goal . -
Page 3: Customer Support
Always use the correct adjustment pin / • Due to our continuous policy of product development, fixing. York Fitness reserves the right to change specifications • Always check that any pins / fixings are tight and secure without notice. -
Page 4: Assembly Instructions
Assembly Instructions PREPARE YOUR WORK AREA - It is important you assemble the product in a clean and uncluttered space. WORK WITH A FRIEND - We recommend you have someone assist you with the assembly as some of the components are quite heavy. - Page 5 Assembly Instructions step-1 D22x1.5T 4pcs M8x15L 2pcs M8x95L 2pcs N-12 M5*10L 4pcs step-2 M8x100L 1pcs D15.4x2T 2pcs M8x20L 7pcs 34*34*22T 2pcs N-11 M8 1pcs D25x2T 4pcs D16x1.2T 3pcs D15.4x2T 7pcs step-3 D15.4x2T 2pcs M8x20L 2pcs D16x1.2T 2pcs step-4 D15.4x2T 2pcs D16x1.2T 2pcs N-10 M8x50L 2pcs...
- Page 6 N-4 x2 N-1 x2 N-5 x4 N-6 x2 N-12 x4 N 12 N-6 N-1 step-1 N-2 x3 N-9 x1 N-1 x7 N-9 x1 N-3 x7 N-11 x1 N-7 x4 N-8 x1 N-3 N-1 N-7 N-11 N-9 N-8 step-2 www.yorkfitness.com.au...
- Page 7 N-2 x2 N-1 x2 N-3 x2 step-3 D-10 D-13 N 10 N-2 x2 N-1 x2 N-10 x2 step-4 www.yorkfitness.com.au...
- Page 8 N 14 N-13 x2 N-14 x2 N 13 step-5 www.yorkfitness.com.au...
- Page 9 Assembly Instructions Final Check Your equipment is now assembled. Please make the following final checks • Make sure all screws / bolts are tightened. • Make sure the equipment is on a flat, level surface. Folding Instructions Care & Maintenance •...
-
Page 10: Operational Instructions
Operational Instructions CONSOLE: DISPLAY FUNCTIONS ITEM DESCRIPTION ‧ Display range 0~999 WATTS ‧ Burned calories during rowing. CALORIES ‧ Display range 0~9999;Setting range 0~9990 Cal ‧ Displaying user rowing distance DISTANCE ‧ Display range0~99999; Each increment/decrement is ±100. ‧ Pulse BPM during rowing. PULSE ‧... - Page 11 KEY FUNCTION ITEM DESCRIPTION ‧ Increase function value or setting selection. ‧ Decrease function value or setting selection. Down ‧ Confirm setting or selection. ENTER ‧ Hold on pressing for 2 seconds, computer will reboot. ‧ Clear setting value. Reset ‧...
- Page 12 TIME will recover previous set value. 4.6 Press RESET to reverse to main menu. 5. Program Mode 5.1 Press UP or DOWN to select Program mode and press ENTER to confirm. 5.2 Press UP or DOWN to select profile (P1~P12, Picture 4) and press ENTER to confirm. 5.3 Press UP or DOWN to preset TIME ( Picture 5) and press ENTER to confirm.
- Page 13 6.7 Press RESET to reverse to main menu. 7. Race Mode 7.1 Press UP or DOWN to select Race mode (Picture 10) and press ENTER to confirm. 7.2 Press UP or DOWN to set SPM (preset=10) and DISTANCE (preset=500) (Picture 11). Press ENTER to confirm.
- Page 14 8.USER Mode 8.1 Press UP or DOWN to select USER mode and press ENTER to confirm. 8.2 Press UP or DOWN to set resistance level of each column (Picture 15). Press ENTER to next one. Hold on pressing MODE for 2s to finish or quit setting. 8.3 Press UP or DOWN to preset TIME (Picture 16), and press ENTER to confirm.
- Page 15 Program profile: P01~P12 www.yorkfitness.com.au...
-
Page 16: Troubleshooting
Troubleshooting If you have a problem with your exercise equipment, before you do anything else please check that all the cables have been connected correctly. Loose cables are very common and many problems can be solved by making sure the cables are properly connected. The following table details the most common problems and how to fix them. -
Page 17: Fitness Guide
Fitness Guide Starting and Finishing Your Workout Begin and end each workout with a Warm Up / Down session - a few minutes of stretching to help prevent strains, pulls and cramps. Correct Cycling Form Sit on the cycle, with your feet on the pedals and inside the pedal straps. Ensure that the seat height is adjusted correctly - you should be stable and balanced whilst on the saddle. - Page 18 How Long Should I Exercise For? That really depends on your current level of fitness. If you’re just starting out on a new exercise program, you should start gradually and build up - do not try to do too much too quickly. 30 minutes, 3 times a week should be enough. Don’t push yourself too hard - you should never feel exhausted during or following exercise.
-
Page 19: Exploded Drawing
Exploded Drawing 9 N-1 N 9 N www.yorkfitness.com.au... - Page 20 D 5 D 4 D 3 D 2 D D 13 D 12 D 14 D 11 D 10 D 17 D 18 D 22 D 19 D 23 D 20 D 24 D 21 D 16 D 25 D 26 D 15 M 5 M E 4 E...
-
Page 21: Part List
Part List Part No Description Specification Hex nut M8*P1.25*6T Cover Part No Description Specification Fixing board Computer set Chain cover set Computer SM-5866-64 Left chain cover Cross bolt M5x0.8x15L Right chain cover Pulling strap set Cover for pulling strap Foam roller Cross screw M5*0.8*10L Foam... - Page 22 Part No Description Specification K-13 Hex nut D9.5x5T(3/8-26UNF Footboard set Footboard Flat washer D16*D8.5*1.2T Allen bolt M8*1.25*55L Nylon nut M8*1.25*8T Fixing axle for magnetic bracket Bushing Magnetic system set Magnetic system Anti-loose nut 3/8"-26UNFx6.5T Spacer D10*D14*3T Air blade set Cross bolt M5x0.8x10L Adjustable Wahser U-Washer...
- Page 23 www.yorkfitness.com.au...
Need help?
Do you have a question about the LC RW Rower and is the answer not in the manual?
Questions and answers