Advertisement
Quick Links
Advertisement

Related Manuals for Motic K Series


Summary of Contents for Motic K Series
- Page 1 Instruction Manual K Series Copyright © 02/02 Motic Microscopes, European Division.
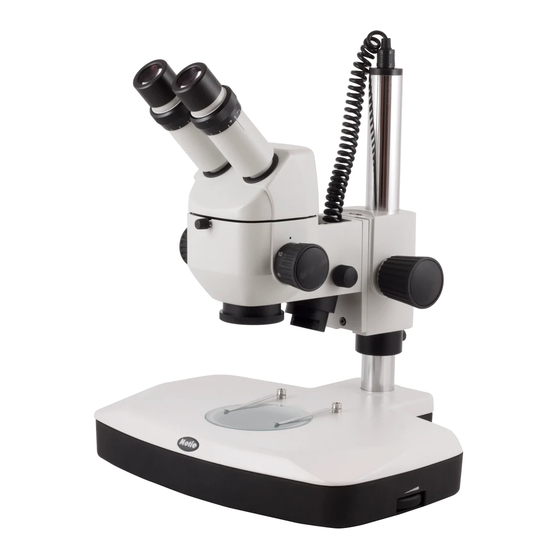
- Page 2 1. Eyepiece 12. Head 2. Diopter 13. Incident light adjuster connection 3. Eyepiece tubes 4. Head support screw 14. Head holder 5. Magnification 15. Focus changing knob knob 16. Support 6. Objective collar 7. Incident illumination 17. Support collar screw 8.
- Page 3 Introduction Thank you for your purchase of a Motic stereomicroscope. Motic stereomicroscopes are precision instruments subjected to meticulous examination to reach you in perfect condition. Their design combines easy management and optimum functioning with minimum maintenance. The information contained in this manual is likely to go beyond what the average user needs to know to use the stereomicroscope, however, it is provided to answer any queries that may arise.
- Page 4 Assembly All the steps described for the assembly of the stereomicroscope must be undertaken with extreme care, and without forcing the placement of the distinct parts and elements of the stereomicroscope. A. Place the stereomicroscope base (13) upright, on a flat, clean and stable surface. B.
- Page 5 1. Changing the stage. a. Remove stage (10) by pressing towards the tiny springs in the rim of the base (Fig. 2) and then upwards so the stage is released. Metallic stage b. If using glass stage, firstly place the metallic filter holder (Fig.
- Page 6 4. The head holder (14) is mounted on a column (18), on which it can be moved up or down, depending on the size of the object to be focussed on. a. Support head holder with one hand (14) without touching any lens, and with the other, loosen the screw (17) on the support collar (16).
- Page 7 1. Turn the magnification changing knob to the highest magnification. 2. Although the stereomicroscope has been parfocalised by the manufacturer, the focus may need adjusting due to the greater profundity of the field seen through higher magnification objectives. Field profundity is the ability to view distinct points on distinct levels. 3.
- Page 8 • Changing incident illumination bulb. a. Firstly holding the illuminator with care, completely unscrew, and remove both adjustment knobs for incident light angle (8), b. Unscrew the illuminator lens tube (7), turning it anti-clockwise. Remove the bulb from the socket. d.
-
Page 9: Troubleshooting
Troubleshooting: ELECTRICAL PROBLEMS PROBLEM CAUSE SOLUTION The bulb does not work. Outlet inoperative. Have it repaired by a qualified specialised technician. Cable not connected. Connect the cable to the power source. Bulb burned out. Replace bulb. Fuse blown. Replace fuse. Wrong Bulb. - Page 10 Bulbs and fuses are not under warrantee. The warrantee service is provided by MOTIC, or its authorised distributors. Defective products will be repaired without charge when returned to MOTIC, or one of its distributors. Transport costs will be covered by the purchaser.
Need help?
Do you have a question about the K Series and is the answer not in the manual?
Questions and answers