Advertisement
Advertisement
Table of Contents

Subscribe to Our Youtube Channel
Related Manuals for Motic SMZ168 Series


Summary of Contents for Motic SMZ168 Series
-
Page 2: Table Of Contents
Table of Contents Components ………………………………………………………………………………… Introduction ………………………………………………………………………………… Unpacking …………………………………………………………………………………… Assembly …………………………………………………………………………………… Operation …………………………………………………………………………………… Maintenance ………………………………………………………………………………… Troubleshooting …………………………………………………………………………… Moving the microscope …………………………………………………………………… Repair ……………………………………………………………………………………… Warrantee ……………………………………………………………………………………... -
Page 3: Components
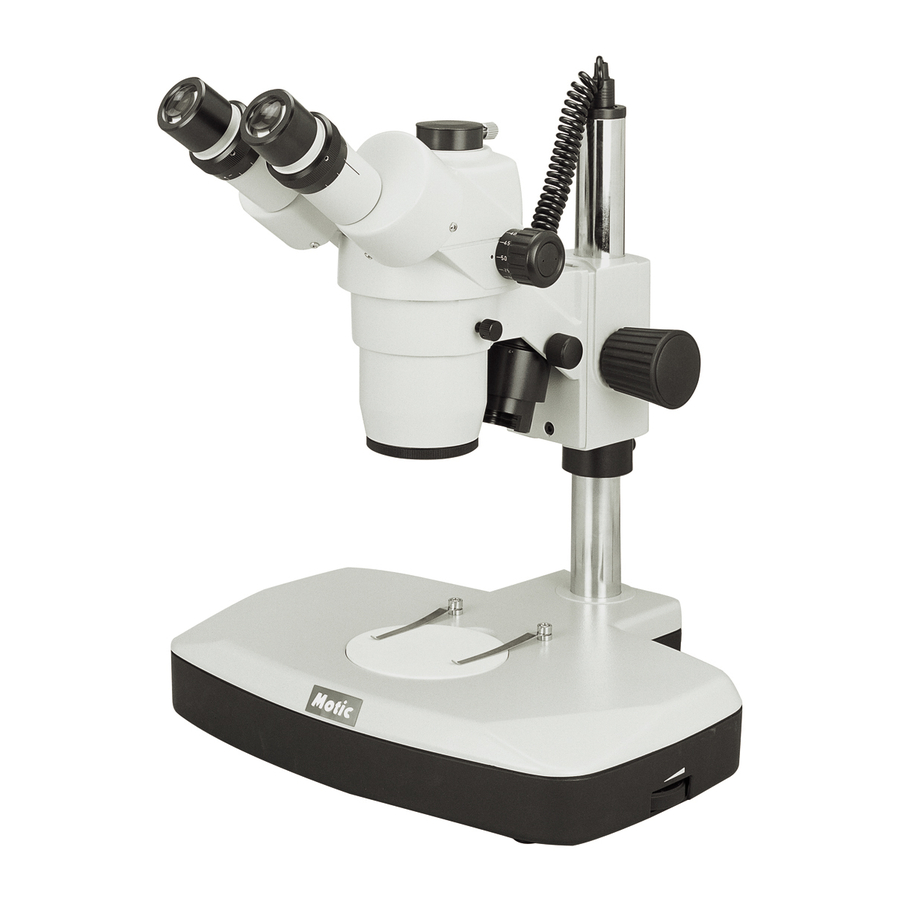
Components 1. Eyepieces 9. Slide stage clips 17. Support collar 2. Diopter adjuster 10. Stage 18. Column 3. Eyepiece tubes 11. Base 19. On/Off switch 12. Power cord for incident 20. Incident illumination 4. Prism housing illumination switch (I) 21. Transmitted illumination 13. -
Page 4: Introduction
Introduction Thank you for your purchase of a Motic stereomicroscope. Motic stereomicroscopes are precision instruments, subjected to meticulous examination to reach you in perfect condition. Their design combines easy management and optimum functionality with minimum maintenance. The information contained in this manual is likely to go beyond what the average user needs to know to use the stereomicroscope, however, it is provided to answer any queries that may arise. -
Page 5: Unpacking
Unpacking All components of the stereomicroscope have been carefully packed to make sure they reach you in perfect condition. We recommend that you do not discard any of the packing containers in case you need to return the microscope or store it for long periods of time; or should it become necessary to transport it to a technical service provider for any repair, or maintenance. -
Page 6: Assembly
Assembly All the steps described for the assembly of the stereomicroscope must be undertaken with extreme care and without forcing the placement of the distinct parts and elements of the stereomicroscope. A. Place the base of the microscope (11) upright on a flat, stable and clean surface. B. -
Page 7: Operation
Operation A. Starting Up The stereomicroscope has two stages. One is a frosted glass stage and is used for the observation of microscope slides or samples that are thin or transparent, such as leaves, insect wings, etc. The black and white stage is used for non-transparent objects or for dissection. For the best contrast, choose the side of the stage best suited for your specimen. - Page 8 4. Turn on the incident illumination (20) or transmitted illumination (21) or both at the same time (“I” and “II”) according to the sample being observed. 5. Light intensity should be adjusted according to the objective used or the type of sample being observed.
- Page 9 Fig.1 c. While looking through the eyepieces, move the head holder up or down until the object appears in focus. d. Tighten the head holder locking screw. Do not let go of the head yet. e. Slide the security collar up to the head holder and tighten the support collar screw. The head can then be released.
- Page 10 D. Diopter adjustment Diopter adjustment collars are located on the eyepiece tubes. They are in normal position when the lower part of the collar is aligned with the sign marked on the eyepiece tube. To compensate for differences in eyesight: 1.
- Page 11 A. To attach a photographic camera, an adapter tube is needed. This tube includes a 2X lens which maintains parfocality between the binocular and vertical ports. This balance can be achieved providing that the parfocality has been adjusted correctly, as described in point “E. Changing magnification”...
- Page 12 If the image on the monitor appears out of focus when the objective is changed, it is possible that the CS mount is responsible. Replace, or readjust it to obtain parfocality. Attaching the Motic K2401 Fluorescent Ring Illuminator The SMZ-168 comes equipped with a screw type objective system at the bottom of the optical tube for the installation of auxiliary objectives, or the K2401 Fluorescent Ring Illuminator with corresponding adapter.
- Page 13 A. To attach an auxiliary objective, the auxiliary objective must be a screw mount type to ensure a secure mount. 1. To mount the auxiliary objective to the microscope, first remove the protective glass from the optical tube by unscrewing it in a counter-clockwise direction. 2.
- Page 14 B. To attach the K2401 Fluorescent Ring Illuminator, an SMZ-168 ring adapter is needed. This ring adapter will replace the previously installed fastening mechanism. NB: The SMZ-168 ring illuminator adapter is not included in the K2401 Fluorescent Ring Illuminator kit as it is a specific model adapter. 1.
-
Page 15: Maintenance
Maintenance Warning: For your own safety switch off and disconnect the microscope from any electrical sources before attempting any maintenance to avoid risk of electrocution. Consult your distributor if any repair or maintenance is required for your microscope that does not appear in this instruction manual. A. - Page 16 B. Electrical maintenance 1. Changing the bulb Changing the transmitted illumination bulb ● a. Rest the stereomicroscope on its side being extremely careful, especially with the eyepiece (1) and the stage (10). b. Unscrew the 6 screws and open the cap on the base. c.
- Page 17 b. With a cloth, carefully pull the bulb out to disconnect it from the socket. c. If the bulb is accidentally touched with bare hands, it must be cleaned as this could affect the transmission of light and life span of the bulb. d.
- Page 18 C. Mechanical maintenance 1. Adjusting the focus tension Tension comes pre-adjusted by the factory. The best point of tension is that which permits the focus knobs to move as loosely as possible without the head sliding down from its own weight.
-
Page 19: Troubleshooting
Troubleshooting Electrical Problems Problem Cause Solution Have it repaired by a qualified The bulb does not work Outlet inoperative ● ● specialised technician Cable not connected ● Connect the cable to the ● Bulb burnt out ● power source Fuse blown ●... -
Page 20: Moving The Microscope
Warrantee All Motic microscopes are warranted against any manufacturing defect for a 5 year period. Damage occurring as the result of any unauthorised repair work, or occurring through misuse or modification of the microscope will not be included under the conditions of the warrantee. Bulbs... - Page 21 The warrantee service is provided by Motic or its authorised distributors. Defective products will be repaired free of charge when returned to Motic or one of its distributors. Transport costs will be covered by the purchaser. Owing to possible modifications and improvements in their manufacture, changes may occur to stereomicroscopes without prior notice.
Need help?
Do you have a question about the SMZ168 Series and is the answer not in the manual?
Questions and answers
How much is the cost?