Table of Contents
Advertisement
Quick Links
Advertisement
Table of Contents

Related Manuals for PSA Panacom PAN920SKHD


Summary of Contents for PSA Panacom PAN920SKHD
- Page 1 PAN920SKHD...
- Page 4 Ringtone volume adjustable se ngs for morning / a ernoon / evening Support 32G MicroSD for pictures or video recording Picture memory when MicroSD card fi ed (MicroSD card Mo on picture recording when MicroSD card installed not supplied) (MicroSD card not supplied) IP 65 surface mount Door Sta on Digital Photo Frame (Displays photos from MicroSD card) One indoor monitor...
- Page 5 3.DOOR STATION SPECIFICATION 17.5mm 48mm Power source Front of surface mount camera PAN921SCHD...
- Page 6 4.INSTALLATION OF DOOR STATION to Door Station specification for regulator location) Default setting of door volume is already set as HIGH. Do not overturn the volume regulator as it can be damaged easily.
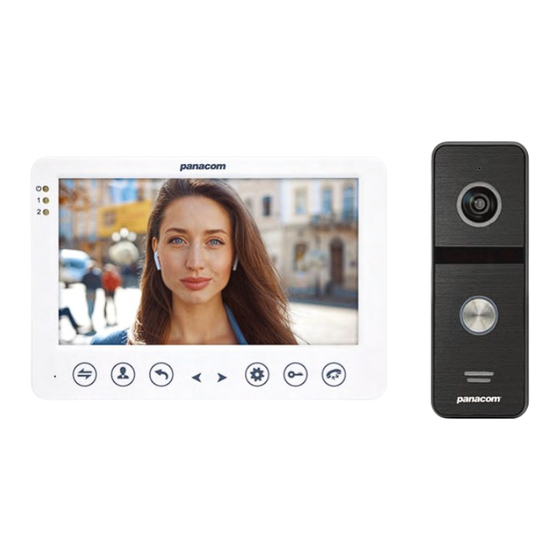
- Page 7 Transmit the voice to Door Station Start conversation with Door Station Setting Confirm/Enter to main menu Exit or Return to previous menu Navigation MicroSD card slot For the models with MicroSD card, Insert the MicroSD card for recording Power Indicator LED indicate the status of Door Station LED indicate the status of Door Station...
- Page 8 7" (1024x600 pixels) Maximum 250mA Maximum 600mA Working current Mounting MicroSD card Yes (Displays photo from MicroSD Card). “Displays photos ...” Custom Ringtone Yes (Uses ringtones) Motion picture recording when MicroSD card installed (MicroSD card not supplied)
- Page 9 Keep a distance of 30cm or more from AC power to avoid electrical interference. Avoid installation of the device near strong radiation source, eg. TV, DVR, Pcs etc. Do not drop, shake or knock the device to avoid damage to its components.
- Page 10 Keep intercom wires more than 30cm away from AC mains power to avoid interference The electric lock is not included in the package, Use 12VDC electric strike only. Do not exceed 500mA. Cable Requirements 1. CAT5e or CAT6 network cable connection mode: Panacom BRN/WHT, BLU/WHT BRN, BLU...
- Page 14 CAM1 and CAM2 each have an alarm input. If an ALM and GND cables are shorted together, its NO-alarm will activate. The Indoor monitor will continue to ring for 120 seconds until button is pressed. The monitor will then return to Standby mode. For models with installed MicroSD card, an alarm will also trigger a snapshot or recording (depending on which setting is selected).
- Page 15 The visitor presses The visitor presses the Call button on the call button on Door Station 1 Door Station 2 Note: If the call buttons of both Door Stations are pressed about the same time, preference would be given to the Door Station whose call button was pressed first.
- Page 16 By default, Door1, Door2, CAM1 and CAM2 can be monitored. To disable monitoring of Door2, set "Door2 Status" to OFF in the Mode menu. To disable monitoring of CAM1 and/or CAM2, set their corresponding "CAM1" and "CAM2" switch to OFF in the Alarm menu. Close display Each monitoring time is 60s Press the Unlock button...
- Page 17 Internal communication function requires at least two Indoor Monitors and one Door Station to be connected. Door Station calls indoor Note: monitor and conversation is underway After transferring a call to another extension, the first monitor will return to Standby mode. Whereas the target monitor will ring, and display video.
- Page 18 Photo Frame mode. MicroSD card. If no MicroSD card had been inserted, this function will not operate. MicroSD card Using your computer, create the “USER” folder manually on the MicroSD card. Then create a "Photo" subfolder, and store your picture files for display by the Digital Photo Frame.
- Page 19 While in Standby mode, press button to open the Main menu. While in the Main menu (see below) press & to navigate through the menu. Press button again to choose an item. Press button to go back to the previous menu or Standby screen.
- Page 20 The Time settings adjusts the system date and time and what will be displayed in Standby mode. The clock switch controls whether the clock is displayed in Standby mode. When turned off, the screen will be all black, without displaying neither clock nor digital photo frame display.
- Page 21 Format MicroSD will remove any stored data on the inserted MicroSD card. If selected, a prompt will be displayed. To continue with formatting, select “Yes”. Otherwise, select “No” to cancel. NOTE: Formatting the MicroSD card will permanently remove any stored data on the MicroSD card. Please ensure there is nothing you want to keep before formatting.
- Page 22 This will change ring tone of Door 2. Use & buttons to adjust the two settings. The first line adjusts the default ring tone. The second line adjusts the user defined ring tone. User defined ring-tones must be located in a folder named “ring” within the USER directory of the MicroSD card.
- Page 23 This setting allows the monitor to cycle through images and videos inserted on the MicroSD card. Note: Motion detection will be disabled if the Digital photo setting is active. Adjust the time between each image. Range: 01 - 10. All photos to be displayed by the Digital Photo frame must be stored in a subfolder named “photo”...
- Page 24 Options for recording Video or taking Snapshots. For "Video", when the call button of a Door Station is pressed, the Indoor Monitor with the MicroSD card will start recording video until the end of the call, or until stopped by the user. For "Snapshot", the monitor with the MicroSD card will automatically snapshot a photo.
- Page 25 “Normally Open”, When an ALM and GND terminals is shorted, an alarm on the monitor will sound. “Normally Closed”, When an ALM and GND terminals are disconnected, an alarm on the monitor will sound. Set the I/O to “Disable”, if external sensor alarms are not in use. The alarm ringing time for Camera 1, after its sensor had detected an alarm.
- Page 26 (for the models with MicroSD card) The system will automatically play from the top of the list and make its way down the list. Use the arrow keys to cycle through the audio files on the MicroSD card. Press and hold the arrow keys to fast forward and rewind the current playing track.
- Page 27 Store all videos in the “\USER\Movie” directory on the MicroSD card, otherwise the monitor would not recognise the files. Note: The player will only play compatible AVI, MOV and MP4 video files. 14.7.3 Photo (for the models with MicroSD card) In the “Media”...
- Page 28 (for the models with MicroSD card) The File menu (under Media menu) allows you to access all files on the MicroSD card. Press & to access the File menu, then press button again to access the “SD” directory. You can then examine all folders on the MicroSD card. The “DCIM” folder is automatically created by the system and stores all the snapshots and video recordings.
- Page 29 (for the models with MicroSD card) & to navigate the stored video list, press to select the video you would like to playback. Press button to exit current menu. Note: Use & to navigate the stored video, press button to select the video you would like to playback.
- Page 30 9 Deleting Files Files can be deleted using the "File" submenu within the Media menu. Navigate with the arrow keys to the file you would like to delete. Then press and hold button. The system will prompt you: Select "Yes" to confirm delete, or select "No" to cancel. In monitoring, calling, intercom, alarm and other modes, press button to activate the color adjustment, including volume, brightness, contrast, saturation,...
Need help?
Do you have a question about the Panacom PAN920SKHD and is the answer not in the manual?
Questions and answers
My panacom intercom/doorbell stopped working. Both outside and inside are turned off and not showing any light or activity.
1. Check Power Source – Ensure the power adapter is properly connected to the indoor monitor and power outlet.
2. Verify Power Indicator – Look for the LED power indicator on the Door Station or indoor monitor to confirm if it is receiving power.
3. Inspect Connections – Ensure all cables, including power and video connections, are securely plugged in.
4. MicroSD Card Issue – If a MicroSD card is installed, try removing it and restarting the device.
5. Reset the Device – If possible, reset the intercom system to its default settings.
6. Check Video Format – If the monitor is on but not displaying video, tap “R” (Refresh) repeatedly to adjust the video signal format.
7. Test with Another Power Source – If available, try using a different power adapter to rule out power supply issues.
This answer is automatically generated