Table of Contents
Advertisement
Advertisement
Table of Contents

Subscribe to Our Youtube Channel
Related Manuals for PSA panacom PAN930SKHD


Summary of Contents for PSA panacom PAN930SKHD
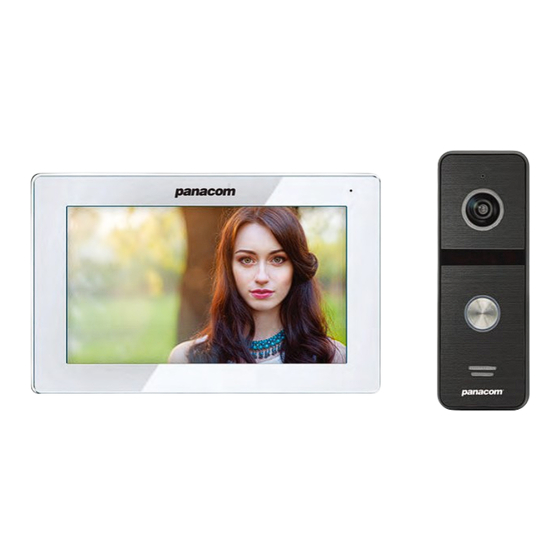
- Page 1 PAN930SKHD...
- Page 3 Motion Detection...
- Page 4 Support 128GB TF (MicroSD) card for pictures or video recording Picture memory when MicroSD card fi ed (MicroSD card Mo on picture recording when MicroSD card installed not supplied) (MicroSD card not supplied) IP 65 surface Door Sta on Digital Photo Frame (Displays photos from MicroSD Card) One indoor monitor One angle bracket One Door Sta on...
- Page 5 3.DOOR STATION SPECIFICATION 17.5mm 48mm Power source Front of surface mount camera PAN931SCHD...
-
Page 6: Installation Of Door Station
4.INSTALLATION OF DOOR STATION to Door Station specification for regulator location) - Page 7 Displays visitor’s image & monitor settings TFT display Microphone Transmits voice to outdoor camera Insert an MicroSD card for recording, for use with Digital Photo MicroSD card slot Frame & media playback...
-
Page 8: Specifications
Specifications 7"TFT LCD Monitor Resolution 1024*600 pixels System PAL/NTSC system Intercom Mode Analog call: half duplex Power Consumption Max.1200mA External 12VDC (100-240VAC plugpack) Power 0~+50℃ Operating Temperature Installation Surface mount 2GB~128GB class 10TF card (Micro SD) Note: read/write MicroSD Card Capacity speed ≥Class10 Video Input Signal CVBS CVI TVI AHD 1080P... - Page 9 Keep a distance of 30cm or more from AC power to avoid electrical interference. Avoid installation of the device near strong radiation source, eg. TV, DVR, Pcs etc. Do not drop, shake or knock the device to avoid damage to its components.
- Page 10 Keep intercom wires more than 30cm away from AC mains power to avoid interference The electric lock is not included in the package, Use 12VDC electric strike only. Do not exceed 500mA. Cable Requirements 1. CAT5e or CAT6 network cable connection mode: Panacom BRN/WHT, BLU/WHT BRN, BLU...
- Page 14 CAM1 and CAM2 each have an alarm input. If an ALM and GND cables are shorted together, its NO-alarm will activate. The Indoor monitor will continue to ring for 120 seconds until button is pressed. The monitor will then return to Standby mode. For models with installed MicroSD card, an alarm will also trigger a snapshot or recording (depending on which setting is selected).
- Page 15 The visitor presses The visitor presses the Call button on the Call button on Door Station 1 Door Station 2 Door Station and Indoor Note: monitor can hear the ring tone, default ring tone time 30s. If the call buttons of two or more door stations are pressed at the same time, only the 1st Door station will ring;...
- Page 16 Use this feature to select and display video from an external device. Tap the screen to enter the Main menu. Tap the Monitor icon to show selections for monitoring (Door1, Door, Camera1 and Camera2). Tap a Door or Camera icon to start monitoring that device. 1.The duration of monitoring is 1 minute for an Door Station and 5 minutes for a Camera.
- Page 17 Internal communication function requires at least two indoor and one Door Station to be connected. Door Station calls indoor monitor and conversation is underway Press Transfer Call button to see choice of extensions to transfer the call to. Note: The selected extension must be online and connected correctly for a successful transfer.
-
Page 18: Motion Detection
14.MOTION DETECTION 1. In Standby mode, tap the Master monitor(DeviceID:1) > Setting > Door (or Camera ) > Select Device > Select motion detection switch to turn on motion detection. 2. In Standby mode, tap the Master Monitor > Setting > System Setting > select MD preview switch to start motion detection preview. -
Page 19: Menu Operations
15.MENU OPERATIONS 15.1 STANDBY MODE Standby mode: clock mode, digital photo frame mode. 15.1.1 Clock Mode The Clock mode interface has two sections: year/month/date/hour/minute; Talk record/ message record/ motion detection record/alarm record shortcut keys. 1). The monitor will exit Menu mode and return to Standby Mode after 1 minute, if there is no user activity. - Page 20 15.2 MAIN MENU In Standby Mode, tap the monitor to enter the Main Menu. The Main Menu includes icons for Setting, Monitoring, Event, Home, Lock & Standby. To return to Standby mode, tap the Back Arrow button or Standby icon. Intercom Setting Monitor...
-
Page 21: System Setting
15.3 Settings System Door Camera System info Scene Admin 15.3.1 System Setting Device ID Time Date 2020 Date format YY/MM/DD Language English Clock Keytone System Motion detection preview Ringback Off Indoor unlock time Device ID : Means the local device’s extension ID, range from 1 to 6. 1means the monitor is Master, 2 to 6 means the indoor monitors are Slave. -
Page 22: Door Station Setting
Indoor unlock time : Indicates the unlocking time of the indoor unit. The range is 1s-10s, and the default is 2s. 15.3.2 Door Station Setting Status Unlock time Record mode Video Motion detection Off Motion detection sensibility Medium Door 1 Motion detection duration Message Off... - Page 23 Signal mode : It is divided into three modes: Auto, PAL and NTSC. When set to Auto, the indoor monitor will automatically detect the video signal type of the Door Station. Signal type : There are seven signal types: AHD1080, AHD720, CVBS, CVI1080, CVI720, TVI1080, and TVI720.
-
Page 24: Camera Setting
15.3.3 Camera Setting Status Off Sensor type Ring time Record mode Video Camera1 Motion detection Off Motion detection sensibility Medium Motion detection duration Camera 2 Signal mode Auto Signal type Auto Status : Indicates the status of this channel. If set to On, the camera can be used normally. If set to off, the camera is disabled. -
Page 25: System Info
15.3.4 System Info Hardware version 1_03 Software version 1_01 Firmware version 0_2_07 System info Release date 2020-03-28 SD size No sd Hardware version : Indicates the version number of the current hardware. Software version : Indicates the current software version number. Firmware version : Indicates the current MCU version number. -
Page 26: Admin Setting
15.3.6 Admin Setting Copy to SD card Restart system Format SD Admin Factory reset Automatic Storage Function : If no MicroSD card had been inserted, the pictures captured automatically for every call, alarm or motion detection is stored in onboard Flash Memory. If manual capture is triggered, the image is also stored as an event record in the onboard Flash Memory. - Page 27 15.4.1 Music In the Media interface, click on the Music icon to see a list o f m u s i c fi l e s . In the music player interface, you can see the music list, function buttons, playback mode, play progress, and volume.
- Page 28 1. Place your MP3 Music files in the “\USER\Music” folder on the MicroSD Card. The monitor will automatically detect & display these files. 2. If a visitor presses the doorbell, or an alarm triggers during playback, the playback will stop and the monitor will switch to the activated Door Station or Camera. 15.4.2 Movie On the Media page, select a movie file to playback from the movie file list.
-
Page 29: File Manager
15.4.3 Photos In the Media interface, tap the photo icon to see a list of photo files. 1. Once picture playback is started, all pictures will be displayed automatically; unless the playback is paused. Each picture will be displayed for the same duration as the Digital Photo Frame mode. - Page 30 In the Media screen, tap “File” to show the MicroSD Card folder. Tap on “SD” to see its subfolders. The following folders are automatically generated by the Monitor (in the \USER directory): “MessageImport”, “BgMusic”, “Ring”, “Music”, “Movie” & “Photo”. Note: The “DOORBELL” folder is auto-generated in the main root directory, and is only visible when using a computer to access the MicroSD card.
- Page 31 The Event menu shows the Call History, messages, motion detection and alarm events. Record details include Time, Device type and Read-status. Call record: 1. Automatic snapshot or recorded video when any Door Station calls. 2. Manually captured snapshots or recorded video, while a Door Station is active or being monitored.
- Page 32 Intercom Volume : The value can be set from 0 to 10, the default is 07 Brightness : The value can be set from 0 to 50, default value is 25. Contrast : The value can be set from 0 to 50, the default is 25. Saturation : The value can be set from 0 to 50, the default is 25.
Need help?
Do you have a question about the panacom PAN930SKHD and is the answer not in the manual?
Questions and answers