Smart Optics mono Scan Operating Manual
Audiology scanners
Hide thumbs
Also See for mono Scan:
- Operating manual (93 pages) ,
- Operating manual (121 pages) ,
- Operating manual (68 pages)
Table of Contents
Advertisement
Advertisement
Table of Contents

Related Manuals for Smart Optics mono Scan


Summary of Contents for Smart Optics mono Scan
- Page 1 Operating Manual Audiology Scanners mono Scan duo Scan duo Scan Touch free Stage ds Production Products from smart optics Sensortechnik GmbH Copyright © 2019 smart optics Sensortechnik GmbH. All rights reserved. – Translation of the original Operating Manual –...
- Page 2 If you have read this manual and need further information or have specific questions concerning the device, please contact your vendor (reseller or smart optics). The technical support of smart optics is available to our resellers and our direct customers.
-
Page 3: Table Of Contents
Audiology Scanners Operating Manual Table of contents About this manual ......5 5.2.1 Removal of the needle protection from the object holders ......27 Introduction ........5 Graphic symbols and highlighting of Connecting the scanner ....28 important information ......6 Installation of aural Scan .... - Page 4 Axis calibration ......... 79 Declaration of CE conformity ..106 14.1.1 Procedure in case of a faulty axis calibration ......... 80 20.1 mono Scan ........106 20.2 duo Scan ......... 107 14.2 3D calibration ........81 20.3 duo Scan Touch ......108 14.2.1...
-
Page 5: About This Manual
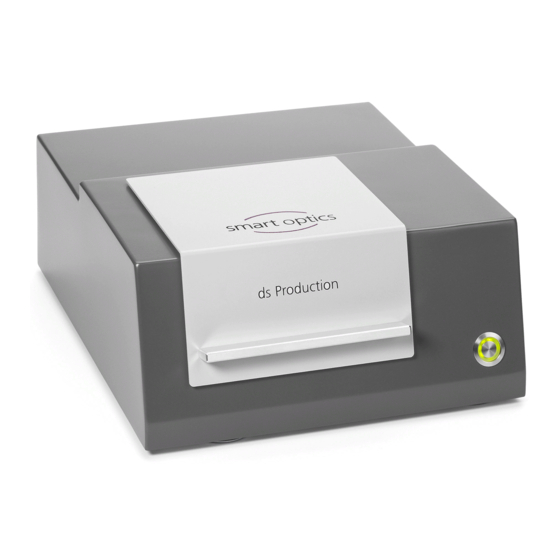
The high-end model ds Production is particularly suited for permanent use under production conditions. The mono Scan is the only scanner limited to single auditory canal impressions per scan. This low-priced model is therefore ideal for low production volumes. All audiology scanners work with the aural Scan software and use the open data formats STL, MSH or ASCII as output. -
Page 6: Graphic Symbols And Highlighting Of Important Information
Audiology Scanners Operating Manual Graphic symbols and highlighting of important information In this manual, graphic symbols and text highlights are used to present the information more clearly. In this way you may understand the instructions better. A triangle on the left indicates a step involving an action. ... -
Page 7: Warnings
Audiology Scanners Operating Manual Warnings Warnings are categorized into four levels depending on the severity of the possible consequences. NOTICE This combination of signal word and symbol warns you about possible material damage that might occur if the instructions are not followed correctly. -
Page 8: Software Controls
Audiology Scanners Operating Manual Software controls The software controls are highlighted as follows: Names of buttons in the software are shown with a coloured background. Name Names of fields in the software are highlighted in bold type. File | New Names of menu items are separated by a vertical line. -
Page 9: Units Of Measurement And Numbers
Audiology Scanners Operating Manual Units of measurement and numbers In this manual the numbers are given according to the decimal system with decimal places. Units of measurement comply with the legal units in Germany as well as the international system of units (SI). Further information as well as measurement converters can be found on the Internet. -
Page 10: For Your Safety
(e.g. dust or paint). smart optics strongly recommends not to use the scanner for any unintended use. smart optics assumes no liability for damages due to an improper use of the scanner and/or non-observance of the safety instructions indicated in these operating... -
Page 11: Constructive Protective Measures
Audiology Scanners Operating Manual Read and follow these operating instructions, in particular the instructions concerning setup, commissioning and cleaning of the scanner. If possible, take part in a training course (offered optionally by the vendor). Comply with local laws, regulations, occupational safety and accident prevention rules concerning your scanner’s workplace. -
Page 12: Protection Against Injuries
Audiology Scanners Operating Manual Protection against injuries Despite the protective measures included in the design, some residual risks that might lead to injuries cannot be excluded. In this section you will learn what measures you can take to protect yourself and other people. WARNING Risk of injury due to electric shock Fire hazard due to short circuit... - Page 13 Audiology Scanners Operating Manual WARNING Health hazard due to structured light (only applicable to scanners without a lid) The scanner works with structured light. Constant visual contact with structured light can trigger epileptic seizures, migraine or similar conditions. Individuals suffering from such conditions should cover the scanner during operation.
- Page 14 Audiology Scanners Operating Manual CAUTION Hand injuries due to sharp needles The object holders for mounting the auditory canal impressions are fitted with sharp needles. You can easily prick yourself with these needles. Hold the object holders only from the side. ...
-
Page 15: Protection Against Material Damages
Never use the 3D scan spray inside the scanner. If the optical or electronic components have to be cleaned, do not do it yourself. Please contact your reseller or smart optics. NOTICE Data loss due to a too long USB cable The transfer of data between the scanner and the PC is affected by the length of the USB cable. - Page 16 Audiology Scanners Operating Manual Measuring errors due to reflections on the measured object (only applies to scanners without lid) Strong ambient light leads to unwanted reflections on the measured object. This affects the accuracy of the measurements. Select a workplace away from a window or not affected by high levels of artificial lighting.
-
Page 17: Symbols On The Device
Audiology Scanners Operating Manual NOTICE Data loss due to magnetic fields The scanner and its accessories include magnetic components. Metal- containing technical devices and data carriers, e.g. credit cards, can be impaired in their function or even permanently damaged through contact with magnets. -
Page 18: Warnings
Audiology Scanners Operating Manual Warnings The meaning of the warning symbols placed on the device is explained on an adhesive label in several languages. Document Version: 3.2 10-2019 Page... -
Page 19: Scope Of Delivery
1 scanner Object holder (needle adapter) 1 piece, silver (mono Scan) 2 pieces, silver (duo Scan, duo Scan Touch, free Stage) 2 pieces blue and 2 pieces red (ds Production) 1 power cable (2.5 meters, AC 110/230 V) ... -
Page 20: Optional Accessories (Chargeable)
You can purchase spare parts and chargeable accessories from your vendor (reseller or smart optics). For safety reasons, please use only the replacement or additional items mentioned here (except for PCs). For parts that are not listed as optional accessories, e.g. cables, please replace them with commercially available products with the same technical specifications. -
Page 21: Device Components
Audiology Scanners Operating Manual Device components Front view A: Lid B: Viewing window C: Touchscreen D: Power switch* E: Status bar In the case of mono Scan, the power switch is located on the rear of the scanner. Document Version: 3.2 10-2019 Page... - Page 22 Audiology Scanners Operating Manual A: Lid D: Power switch D: Power switch* E: Front F: Touch sensor G: Swivel axis H: Rotary axis; magnetic base (here with object holders) The front position corresponds to the left side. 3D sensor, interior (calibrated optics) In the case of free Stage, the power...
-
Page 23: Internal View
Audiology Scanners Operating Manual Internal view Views for scanners with lid A: 3D sensor (calibrated optics) B: Swivel axis C: Rotary axis D: magnetic object holder E: magnetic base Document Version: 3.2 10-2019 Page... -
Page 24: Object Holders And Accessories
The top of the object holders is fitted with needles. Intended use: Mounting of the auditory canal impressions. Standard equipment mono Scan duo Scan Touch/duo Scan/free Stage ds Production The bottom of the object holders is magnetic. Intended use: Attachment to the base inside the scanner. -
Page 25: Connections And Type Plate (Rear View)
Type plate with technical information such as the voltage, serial number, place and date of manufacture as well as sensor number. Serial number of the 3D sensor Mains connection with fuse Power switch (flip switch) (mono Scan, free Stage) Document Version: 3.2 10-2019 Page... -
Page 26: Setup And Commissioning Of The Scanner
If damage is evident on the packaging, please inform the delivery company and your vendor (reseller or smart optics). Follow the instructions provided by the delivery company and the vendor (reseller or smart optics) before continuing to unpack the device. -
Page 27: Removal Of The Needle Protection From The Object Holders
If the scope of delivery is not complete or if one of the supplied parts shows visible damage, inform your vendor (reseller or smart optics) immediately. Follow their instructions before continuing with the setup. Removal of the needle protection from the object holders The object holders in the interior of the scanner are fitted with a needle protection during transport. -
Page 28: Connecting The Scanner
Audiology Scanners Operating Manual Pull the needle protection upwards, separating it from the object holders. Keep the needle protection in case you need to transport the scanner at a later time. Connecting the scanner To commission the scanner, you will need a mains connection for the power supply and a PC connection. -
Page 29: Installation Of Aural Scan
In this case please continue with “Positioning of the auditory canal impression”. Page 35, 88 If you already had aural Scan or an earlier version of smart optics Audiology installed, please follow the instructions to update the installation. The installation of aural Scan consists of two stages: the installation of the software and the loading of the calibration data when the software is run for the first time. - Page 30 Audiology Scanners Operating Manual Click OK. Please note that you cannot revert back to the choice of language during setup. Setup will ask you to choose a destination folder for the installation. Accept the suggested target folder or click on Browse to select a different folder.
- Page 31 The installation process will start and the progress is displayed on the screen. The final window for finishing the setup is displayed. You will be asked to decide whether the computer should be restarted immediately or later. smart optics recommends activating the option for immediate restart. Document Version: 3.2 10-2019...
-
Page 32: Loading Of Calibration Data
Audiology Scanners Operating Manual Click Finish. Setup is completed. Depending on your choice, the computer will restart. A new short cut will be available on the desktop: The Start menu or the app list now have a new software icon, e.g.: ... - Page 33 You must not use calibration data if the numbers do not match. In this case, cancel the process. Contact your vendor (reseller or smart optics) to obtain the appropriate calibration data for your scanner. Click OK. ...
- Page 34 Audiology Scanners Operating Manual The calibration data will be copied. Subsequently, a final message will be displayed. Click OK. Installation and copying of the calibration data are now complete. aural Scan will close automatically. Make sure that the scanner is switched on. The power switch is illuminated in this case or is in position I.
-
Page 35: Positioning Of The Auditory Canal Impression
The object holders are attached magnetically to the base. Other fastening materials are not required. All scanners have two bases, except for mono Scan, which has only one. CAUTION Risk of injury due to closing lid (if present) If the lid is open, it can fall down and, for example, injure your hand. -
Page 36: Removing And Inserting Object Holders
Audiology Scanners Operating Manual Removing and inserting object holders You can remove the object holders from the scanner, for example, to clean the Page 86 interior of the scanner. To position the auditory canal impressions it is usually not necessary to remove the object holders, unless you want to matte the auditory canal impressions with 3D scan spray. -
Page 37: Mounting Of The Auditory Canal Impression
Audiology Scanners Operating Manual Right: Wrong: Object holder in straight position: Object holder in slanted position: Mounting of the auditory canal impression Place the bottom of the auditory canal impression onto both needles of the object holder. Matte reflective or dark material using 3D scan spray, but always outside the scanner. - Page 38 Audiology Scanners Operating Manual object holders correspond to the display of the scans (left blue, right red, viewed from the front). In the case of the open free Stage scanner, the object holders are placed in a vertical position to the front side. The impression of the left auditory canal must be placed on the front place, the impression of the right canal on the back place.
-
Page 39: The Basics Of Scanning
Audiology Scanners Operating Manual The basics of scanning Working with STL files Your 3D scanner creates STL files (optionally also other formats). These files are open to all common CAD/CAM systems. The data are further processed during digital production, so that your scan turns into an earmold, step by step. STL Files CAD Data CAM Data... -
Page 40: The 3D Viewer
Audiology Scanners Operating Manual During a measurement, the 3D sensor projects a striped pattern onto the object being scanned. At the same time, the striped pattern is recorded by a camera. With the aid of several camera images taken from different angles, aural Scan calculates a 3-dimensional image of the object. -
Page 41: Mouse Functions
Audiology Scanners Operating Manual Mouse functions Page By default, the mouse buttons are assigned as follows in aural Scan: You can change the assignment of the mouse buttons in the settings. If you want to reduce the display of the 3D objects when moving them to pixels, for a better computer performance, you can also change this in settings. -
Page 42: Functions Of The Icons
Audiology Scanners Operating Manual Zooming in/out of the scan Click with the mouse on the left or right scan. The side is selected. To enlarge the view, move the scrolling wheel towards you. To reduce the view, move the scrolling wheel away from you. ... -
Page 43: Keyboard Functions
Audiology Scanners Operating Manual Representation (spheres) These icons allow you to determine how the STL is to be displayed. You can choose between points, triangles, areas and “Gouraud shaded”. Gouraud shaded is activated by default, as it is particularly vivid and realistic. Points: Triangles: Flat shaded:... - Page 44 Audiology Scanners Operating Manual Rotate the scan (Space bar) The space bar allows you to rotate the current view around the centre. The 360° rotation is ideal for a quick visual inspection. The current view determines the pivot point. The default view is from above. ...
-
Page 45: Scanning Auditory Canal Impressions
Page Define once, how your scans shall be named. With mono Scan, you can only insert one auditory canal impression. You will be asked to insert the left and right impressions one after the other. Naming scans Actually, there is no need of you to take care of names. aural Scan names all scans automatically and uniquely. -
Page 46: Naming Rules
Audiology Scanners Operating Manual Enter text, expand or replace the name. Select the entire content with a double-click. Open the context menu with a right click to cut, copy or paste characters. Click the other field and repeat the procedure. Using the keyboard ... - Page 47 Audiology Scanners Operating Manual Example 181012_094143 YY|MM|DD_HH|MM|SS Year|Month|Day_Hour|Minutes|Seconds File name ending By default, the file name has an addition that indicates the anatomical position: is used for left (sinister) for right (dexter). These endings are always added if the left and right scan have the same name, so that the file names are different.
-
Page 48: Starting A Scan
Audiology Scanners Operating Manual Starting a scan To start a new scan, the 3D viewer must be empty. Start the process using one of the following methods: Click on the top left icon in the title bar. Press RETURN or ENTER on the keyboard. ... -
Page 49: Checking And Saving The Scan
Audiology Scanners Operating Manual Page 63, 71 If you are working with settings other than the default settings, the result may look different than shown here. By default, all matching processes are performed at the end. The data is automatically trimmed, smoothed, and reduced to the information actually needed (“thinning”). -
Page 50: Repeating A Scan
Audiology Scanners Operating Manual The 3D view will be closed. You can continue scanning immediately. NOTICE Data loss due to missing settings Page 72 No files will be saved if no file format is specified in the settings. Open the settings and switch to the Matching tab. -
Page 51: Cancelling A Scan
You can benefit from a USB barcode scanner to start new scans or rename existing ones. mono Scan does not support the barcode function. For barcode scanning, you need a commercially available USB device. Please note that a USB barcode scanner is not included or available as an accessory. - Page 52 Audiology Scanners Operating Manual Connect the USB barcode scanner to your PC. USB barcode scanners are usually recognized automatically by Windows and can be used immediately to insert a decrypted barcode into any application. Settings adjustment Before starting, you should adjust the naming convention. ...
-
Page 53: Correcting The Result Of A Scan
The rescanning function measures not captured areas individually and thus achieves highly accurate results. The additional measurements must then be consolidated with the first measurement (“matched”). This function is not available for mono Scan. In the 3D viewer, click on the side to be rescanned. - Page 54 Audiology Scanners Operating Manual You can still switch the side by double-clicking on it. Green crosshairs are displayed on the selected scan. If you changed the side after activating, white crosshairs are displayed on the other scan. ...
-
Page 55: Matching A Rescan
Audiology Scanners Operating Manual Matching a rescan The “Matching” function combines the main measurement and all the individual measurements from the rescan into an overall measurement. Matching should always be performed after the end of a rescan, even if you have activated automatic matching in the settings. -
Page 56: Cutting The 3D Image
Audiology Scanners Operating Manual Cutting the 3D image Parts of the auditory canal impression which are not required for the earmold, e.g. Excessive length of the auditory canal, parts of the auricle, sutures or tamponage residues, will be captured by the 3D sensor and need to be removed from the 3D representation after scanning. -
Page 57: Data Transfer Via The "Ftp Upload" Module
Page 74 The “FTP Upload” module is a chargeable module. It will only become available in aural Scan after using an activation code. You can receive the activation code from your vendor (reseller or smart optics) after purchasing it. 10.1 “FTP Upload”... - Page 58 Audiology Scanners Operating Manual Press <ENTER>. Enter password dialogue box will open. The password by default is “smartoptics”. If you wish to change the password, click on Change ftp password. In the dialogue to change the password, enter the old password once and the new password twice.
-
Page 59: Changing The Ftp Connection Information
Audiology Scanners Operating Manual The connection information will be checked and saved. In case of invalid data, you will be prompted to correct your entries. If necessary, repeat the steps to add further FTP connections. 10.2 Changing the FTP connection information You can change the settings if there are issues when uploading data or if the connection information of an FTP server has changed. -
Page 60: Uploading Data To An Ftp Server
Audiology Scanners Operating Manual Enter the connection information (except the ID). To delete the connection, click on Delete. Click OK. The connection information has been changed. 10.3 Uploading data to an FTP server If you have saved the FTP connection information in the settings, you can upload the data to an FTP server after every measurement. - Page 61 Audiology Scanners Operating Manual The ZIP file containing all files to be transmitted will be displayed in the field File. This ZIP file is named according to the files it contains and the current date. If the connection ID is not to be transmitted, deactivate the checkbox connection ID to Zip file.
- Page 62 Audiology Scanners Operating Manual Open the menu. Open scan file. Select The dialogue box Loading data... will open. Click on the button … and select the desired left and right file from the file path for export, by default C:\Scans. ...
-
Page 63: Changing Software Settings
Audiology Scanners Operating Manual Changing software settings aural Scan works with a certain number of factory settings. These have been selected to deliver a satisfactory scanning result in most cases. However, you can change these settings if required. Open the menu. ... - Page 64 If you are not sure which file path is the correct one, ask your system administrator or your vendor’s technical support (reseller or smart optics). Only the correct setting will allow all Noah clients to access your scan results. Default value: \Scans Document Version: 3.2 10-2019...
- Page 65 If you use a barcode scanner to name the scans, smart optics recommends to activate this setting. Default value: deactivated. Names for the right and the left scan may be different. Determines whether the anatomical position designation...
-
Page 66: 3D Viewer" Settings
Only activate the checkbox in consultation with your vendor (reseller or smart optics) if measurement errors have occurred. This setting is not saved. When you end the session, the checkbox is automatically reset. - Page 67 Audiology Scanners Operating Manual Control Description Colours are used in the 3D viewer to distinguish the Top colour background, scans, rescanned areas and separators. Bottom Colour Colour left The usual colours in audiology for the left and the right side of the body (sinister/dexter), are blue and red. The Object colour object colour rescan highlights rescanned, unmatched Rescan...
- Page 68 Audiology Scanners Operating Manual Control Description Determines the intensity of the light reflection on the Reflectance scan in the 3D viewer. The slider allows you to set a value between 0 and 100. This setting has no influence on the 3D-measurement. Default value: 80 Example Default brightness...
- Page 69 Audiology Scanners Operating Manual Control Description Determines whether scans are displayed in very high Show high- quality in the 3D viewer. quality measurements Please note that this setting demands a significantly higher performance of the graphics card. Actions such as calculations, moving scans and adding new images take longer to perform.
-
Page 70: Scanning" Settings
Audiology Scanners Operating Manual 11.3 “Scanning” settings Scanning is based on a strategy that primarily defines the number of images that is generated per object. Control Description The colour of the auditory canal impression affects the Light light intensity of the sensor during a measurement. Medium Adjust the setting to match the colour of the material to Dark... -
Page 71: Matching" Settings
Audiology Scanners Operating Manual 11.4 “Matching” settings The settings for matching influence the quality and size of the STL data set. If necessary, you can change the file format here. Control Description Cutting filters cause the top and bottom areas of the STL Activate the data set to be cut. - Page 72 Audiology Scanners Operating Manual Control Description Determines in which formats the scan files are saved. The following are possible: STL, MSH and ASCII. You can enable one or more export formats, but at least one ASCII format must be selected. NOTICE Data loss due to missing export settings If you do not select a format, nothing will be saved...
- Page 73 Audiology Scanners Operating Manual Control Description Causes the smoothing of the surface in the 3D data set. Smoothing Smoothing is important for scanning impressions with bubbles and edges. If 3D data with smooth meshes is used for production or 3D printing, the product requires less polishing afterwards.
-
Page 74: Module Activation
Audiology Scanners Operating Manual Module activation In order to unlock additional software functions, the following steps must be carried out once after purchasing the corresponding module. Open the menu. Add activation code. Select A dialogue window for entering the code will open. ... -
Page 75: Icons, Menu Items And Shortcuts
Audiology Scanners Operating Manual Icons, menu items and shortcuts 13.1 Icons Page The icons in the 3D viewer have been explained above. Icon Meaning Icon Meaning Start scanning Activate the rescan mode Repeat a scan Start the rescan Save STL files and close scans Cut inside a selection Transfer files via FTP Cut outside a selection... -
Page 76: Menu
Audiology Scanners Operating Manual 13.2 Menu “Hamburger You can find rarely used aural Scan in the menu. Click on the top left icon to open the menu button” menu. Please note that this is not possible while a scan is running or a dialogue/message is open. -
Page 77: Shortcuts
Audiology Scanners Operating Manual Menu item Meaning To the standby — Activates the standby mode for the software instead of closing it. An mode active scan is discarded (after confirmation). aural Scan minimizes into the “Hidden symbols” group of the task bar. The power supply within the scanner is switched off. - Page 78 Audiology Scanners Operating Manual Shortcut Context Meaning 3D viewer Rotate the scan by 360 degrees Dialogues and messages, e.g. settings Turn a checkbox on or off Open the context menu of a selected Dialogues and messages, e.g. settings input field ...
-
Page 79: Device Maintenance
Only scan for test purposes. Do not create real data. Contact your vendor (reseller or smart optics) to find the cause of the problem. Open the menu. ... -
Page 80: Procedure In Case Of A Faulty Axis Calibration
If you have loaded incorrect calibration data replace the folder. You will find the calibration data for the scanner on the installation data carrier. If necessary, request your reseller or smart optics to send you the matching calibration data again. ... -
Page 81: Calibration
You can only perform the 3D calibration with a 3D calibration object (optional accessory). The 3D calibration object can be purchased from your reseller or from smart optics. For the 3D calibration, aural Scan compares the current measured values with the documented values of the 3D calibration object. - Page 82 Align the 3D calibration object with the label facing forward; in the case of free Stage facing sideways. In the case of mono Scan, you will be repeatedly asked to position the 3D calibration object or the auditory canal impression during the 3D calibration process.
- Page 83 Audiology Scanners Operating Manual The dialogue will show the steps Sensor calibration, Axis calibration and Mesh calibration sequentially and display the remaining time at the bottom. The dialogue will report the successful completion of all steps. If you do not need a log, click OK. ...
- Page 84 Audiology Scanners Operating Manual The dialogue will finally report the determined deviation after the 3D calibration. Ideally, the deviation should be 0 μm. Click OK. The 3D calibration has been completed. The log is saved in HTML format in the folder C:\Scans\Calibration. The files are named according to the creation time [YYYY]-[MM]-[DD]-[HH]- [MM]-[SS]-Calibrationresults.html.
-
Page 85: Possible Causes For The Failure Of The 3D Calibration
If there are deviations above or below the scanner accuracy of > 14 μm, the values in the log are red. In this case, contact your vendor (reseller or smart optics) for technical support. Possible causes for the failure of the 3D calibration The failure of the 3D calibration can have different causes. -
Page 86: Cleaning The Scanner
Never use the 3D scan spray inside the scanner. If the optical or electronic components have to be cleaned, do not do it yourself. Please contact your reseller or smart optics. Document Version: 3.2 10-2019 Page... - Page 87 Audiology Scanners Operating Manual NOTICE Damage to surfaces due to unsuitable cleaning agents Paper towels, coarse cotton cloth, detergents, polishing paste, etc. leave scratches on the sensitive surfaces. Only use the recommended materials for cleaning. Before cleaning Switch off the scanner for safety reasons. ...
-
Page 88: Installing Software Updates
To prepare an individual quote for you, your vendor (reseller Page smart optics) will need the serial numbers of the scanner and of the 3D sensor. You will find these numbers on the on the rear of the scanner. 15.1 Uninstalling the previous version In principle it is possible to have a previous software version (older than 3.0 or... - Page 89 Audiology Scanners Operating Manual NOTICE Loss of data or software functionality due to file deletion To fully uninstall aural Scan, it is necessary to delete data from protected folders. If other files are deleted by accident, it might happen that some other software installed on your computer no longer works.
-
Page 90: Installing An Update
Alternatively, make a note of your personal settings. For example, save screenshots of all tabs in the dialogue Settings. Proceed as follows upon receipt of an update from your vendor (reseller or smart optics): Download the installation file or save it locally on the computer on which aural Scan is installed. -
Page 91: Activation Code Renewal
Start aural Scan. You will receive the following message: Enter the activation code provided by your vendor (reseller or smart optics) into Activation Code field. The dongle characteristics already exist and needs not be entered again for an update. -
Page 92: The Noah Interface
C:\Scans or a network path to a Noah server. If you are not sure which saving location is the correct one, ask your vendor’s (reseller or smart optics) technical support service. If your saving folder is a path to a Noah server (network path or local shared path), other Noah users will also be able to see your STL files. - Page 93 Noah will have recognized aural Scan automatically. Restart Noah and select the configured Noah server. In addition to the buttons to call up the Noah modules, a smart optics button is now available. Document Version: 3.2 10-2019 Page...
-
Page 94: Scanning With Noah
In the patient browser (in the mixed view on the left), click on a patient. You cannot scan without performing the assignment. Click on the smart optics button. aural Scan starts. You can now work with the software as usual. -
Page 95: Viewing Scans From Inside Noah
Audiology Scanners Operating Manual 16.3 Viewing scans from inside Noah aural Scan can also act as a simple viewer for already existing scans. No scanner needs to be connected or switched on for this feature. In the Noah patient browser (in the mixed view on the left), click on a patient for whom STL data already exist on your Noah server. - Page 96 Audiology Scanners Operating Manual Page 40, 55 You can use the functions of the 3D viewer, the cutting tools and the function “Fill holes”. The menu and the rescan function are not available in this mode. To exit the view, close the software. If you hover with the mouse pointer for a prolonged period of time over an entry in the Sessions...
-
Page 97: Faults And Repairs
Repairs must only be carried out by your reseller or smart optics. Please note that smart optics assumes warranty responsibility for equipment damages, but not for damages caused as a result equipment damage, e.g. financial losses due to business interruptions. -
Page 98: Solving Connection Problems
Audiology Scanners Operating Manual Checking connections Page 28 Are all connections made and fixed? If applicable, replace the USB slots. Page 98 Check if the USB port is overloaded. USB hubs may cause transfer faults. Plug the scanner directly into a USB port on the rear of the PC. -
Page 99: Solving Calibration Problems (Holes/Overlappings)
After installation, turn off the scanner and remove the USB cable. Restart the PC and reconnect the USB cables. If connection problems persist, please contact the smart optics support. Solving calibration problems (holes/overlappings) Problems with the calibration can be solved by manually deleting and loading the calibration data. -
Page 100: Further Known Problems
The calibration data must be current and match the sensor number (SO number) of the scanner. Page 79, 81 Perform the axis calibration and, if possible, the 3D calibration. If calibration problems persist, please contact the smart optics support. Further known problems Error Possible source Possible cause ... -
Page 101: Important File Paths
If none of the above solutions correct the problem, please contact your vendor's support (reseller or smart optics). Important file paths Some Windows folders are protected, so that they are only displayed by entering the path name into the Explorer. The placeholder % can replace parts of the path, e.g. - Page 102 Audiology Scanners Operating Manual Default paths aural Scan 3.0 or higher Calibration Data C:\Program Files (x86)\3D- Scanner\aural Scan\data\SO-20… Software folder C:\Program Files (x86)\3D- Scanner\aural Scan 3D Calibration logs C:\Scans\Calibration Session logs C:\Scans\log * Paths to XML files: XML files are important for software functionality. Do not manually change file names or contents of XML files.
-
Page 103: Serial Numbers
Page will find a list under “Scope of delivery”. If you need other spare parts please send in the device to get it repaired. Please contact your vendor (reseller or smart optics). Environmentally-friendly disposal The information in this chapter refers to EU directives and German law. -
Page 104: Disposal Of The Device
The devices marked with this symbol are subject to European Directive 2002/96/EC for WEEE (Waste Electrical and Electronic Equipment). WEEE registration number of smart optics: DE47893210 Electrical equipment must not be disposed of with domestic waste. Please note that the scanner is a device that only serves for commercial or industrial use. -
Page 105: Technical Specifications
Windows 7 (32-Bit) requirements operating system Recommended Windows 10 (64-Bit) operating system 2.0 or 3.0 Barcode interface USB barcode scanner Noah interface* Compatible with winIPRO® * smart optics is a registered member company of HIMSA. www.himsa.com Document Version: 3.2 10-2019 Page... -
Page 106: Declaration Of Ce Conformity
Audiology Scanners Operating Manual Declaration of CE conformity 20.1 mono Scan Document Version: 3.2 10-2019 Page... -
Page 107: Duo Scan
Audiology Scanners Operating Manual 20.2 duo Scan Document Version: 3.2 10-2019 Page... -
Page 108: Duo Scan Touch
Audiology Scanners Operating Manual 20.3 duo Scan Touch Document Version: 3.2 10-2019 Page... -
Page 109: Free Stage
Audiology Scanners Operating Manual 20.4 free Stage Document Version: 3.2 10-2019 Page... -
Page 110: Ds Production
Audiology Scanners Operating Manual 20.5 ds Production Document Version: 3.2 10-2019 Page... -
Page 111: Quick Guide
Setup and commissioning of the scanner Installation of aural Scan Axis calibration Workstation: Table load-bearing capacity (kg) - scanner’s space requirements (W×L×H mm): mono Scan duo Scan duo Scan Touch ds Production free Stage 15 kg 16 kg 16 kg... - Page 112 Audiology Scanners Operating Manual Page 35, 45, 57, All work steps and explanations to the following quick guides: 63, 75 Positioning of the auditory canal impression Scanning auditory canal impression Data transfer via the “FTP Upload” module ...
- Page 113 Start the scan with: The method is supported by: mono Scan, duo Scan, duo Scan Touch, ds Production, free Stage mono Scan, duo Scan, duo Scan Touch, ds Production, free Stage duo Scan, duo Scan Touch, ds Production, free Stage...
- Page 114 Audiology Scanners Operating Manual Index Calibration ............33, 79 µ Calibration (optional module) ......... 81 Calibration Data ..........19, 32 µ (Unit of measurement) .......... 9 Cancelling ............. 51 Carton ..............26 Caution (convention) ..........6 3D calibration (module) .......... 81 CD (installation) .............
- Page 115 Audiology Scanners Operating Manual Connections ............25 Hood (Lid) .............. 21 Front ..............21 Hz (technical data) ..........105 Inside ..............23 Object holder ............ 23 Outside ............. 25 Icons..............42, 75 Dimensions (technical data) ........105 Initial scan(strategy) ..........70 Display ..............
- Page 116 Audiology Scanners Operating Manual Info ..............76 Move to service position ........76 Packaging .............. 26 New ..............76 Password (FTP) ............58 Open scan file ........... 76 PC (technical data) ..........105 Settings ............. 76 PCM (data format) ........... 9 mm (Unit of measurement) ........
- Page 117 Audiology Scanners Operating Manual Principle ............39 Touchscreen ............ 21, 48 Repetition............50 Transport protection ..........27 Select side ............43 Trial Version ............88 Starting ............. 48 Triangle (symbol) ............. 6 with the Noah Interface ........94 Triangles (3D) ............43 Scissors ..............
- Page 118 Manufacturer smart optics Sensortechnik GmbH Lise-Meitner-Allee 10 D-44801 Bochum, Germany +49 (0) 234 / 29 828-0 +49 (0) 234 / 29 828-20 info@smartoptics.de sales@smartoptics.de support@smartoptics.de www.smartoptics.de smart optics is an official member of HIMSA.
Need help?
Do you have a question about the mono Scan and is the answer not in the manual?
Questions and answers