Smart Optics mono Scan Operating Manual
Audiology scanners, software version 3.3
Hide thumbs
Also See for mono Scan:
- Operating manual (93 pages) ,
- Operating manual (118 pages) ,
- Operating manual (68 pages)
Table of Contents
Advertisement
Advertisement
Table of Contents

Subscribe to Our Youtube Channel
Related Manuals for Smart Optics mono Scan


Summary of Contents for Smart Optics mono Scan
- Page 1 Operating Manual Audiology Scanners mono Scan duo Scan duo Scan Touch free Stage ds Production Products from smart optics Sensortechnik GmbH Copyright © 2020 smart optics Sensortechnik GmbH. All rights reserved. – Translation of the original operating manual –...
- Page 2 Delivery within the EU: smartoptics.shop/de/en/ Delivery outside the EU: onlineshop@smartoptics.de Changes smart optics reserves the right to make changes in the products and this documentation. For the current version of this documentation visit: www.smartoptics.de. Brands and trademarks FlyCapture Point Grey Research, Inc.
-
Page 3: Table Of Contents
..........33 Mounting of ear impressions ..34 2.6.1 Warnings ..........15 Introduction to scanning ..... 36 About smart optics audiology scanners ......... 16 Working with scan data ....36 Operating principle of the scanner 36 Scope of delivery ........ 16 “3D viewer”... - Page 4 Operating Manual Audiology Scanners 9.5.1 Annotate a scan ......... 45 11.2.3 Advanced ..........75 9.5.2 Commenting a scan project ..... 47 11.3 “Scanning” settings ......76 Correcting a scan ....... 47 11.3.1 Object tone ......... 76 9.6.1 Rescanning ......... 48 11.3.2 Strategy..........
- Page 5 Calibration problems ....... 101 15.4 Failed axis calibration ...... 101 Declaration of CE conformity ..112 15.5 Failed 3D calibration ......102 19.1 mono Scan ........112 15.6 Failed FTP upload ......102 19.2 duo Scan ........... 113 15.7 Error messages ........ 103 19.3...
-
Page 6: About This Manual
Operating Manual Audiology Scanners About this manual Please save this operating manual, pass it on with the product and replace it with a new version after performing an upgrade. Symbols and highlighting of important information Action step Result Cross reference to pages (with hyperlink). - Page 7 Operating Manual Audiology Scanners Units of measurement and numbers Units of measurement Units legally in force in Germany International System of Units (SI) Numbers Decimal system with decimal places Measurement Unit Abbreviation Mass/weight Kilogram Gram Length Meter Centimeter Millimeter Micrometer µm Angle Degree...
- Page 8 Operating Manual Audiology Scanners Warnings Warnings provide information on: Possible personal injuries Possible damages to objects Risk avoidance. Warning levels NOTICE Material damages CAUTION Minor injuries WARNING Severe injuries DANGER Death or severe injuries Document version: 3.3 04-2020...
-
Page 9: For Your Safety
Operating Manual Audiology Scanners For your safety Intended use smart optics scanners are to be used exclusively for the purpose of their intended use, i.e.: The optical three-dimensional measurement of human ear impressions The digital production and archiving of earmolds. -
Page 10: General Safety Instructions
Operating Manual Audiology Scanners General safety instructions Qualification for use In order to set up, configure and operate a smart optics scanner safely, you need specific knowledge to be acquired through: The operating manual Instruction or training. Please comply with your local occupational safety and accident prevention regulations. -
Page 11: Protection Against Injuries
CAUTION Health hazard due to structured light (concerns open scanners) smart optics scanners work with structured light. Structured light can trigger epileptic seizures and migraine, among other conditions. People suffering from such conditions should cover the scanner with light-tight foil when operating it. - Page 12 Health hazard due to LED light with high blue content (concerns open scanners) smart optics scanners emit white light or blue light while measuring. Light with a high blue content can lead to retinal damage or other conditions in the long term.
-
Page 13: Protection Against Material Damages
Keeping them clean and dry (close or cover the scanner) Using the 3D scan spray only outside the scanner. Optical and electronic components should only be cleaned by your reseller or smart optics. NOTICE Data loss due to a too long USB cable The length of the USB cable affects the data transfer between the scanner and the PC. - Page 14 No direct sunlight. If necessary, use air conditioning and sunlight protection. NOTICE Material damages due to moisture smart optics are made of materials that are damaged by moisture. Dry moist components with a soft, microfiber cloth. Document version: 3.3 04-2020...
-
Page 15: Symbols On The Device
Operating Manual Audiology Scanners NOTICE Data loss due to magnetic fields smart optics scanners and accessories include magnetic components. These can impair the functioning or delete the data of other technical devices or data carriers, e.g. credit cards. Keep the distance between magnets and technical devices/data carriers. -
Page 16: About Smart Optics Audiology Scanners
Operating Manual Audiology Scanners About smart optics audiology scanners smart optics audiology scanners are 3D desktop scanners for the purpose of digitizing ear impressions. mono Scan duo Scan duo Scan Touch free Stage ds Production Features Basic By default By default... -
Page 17: Optional Accessories (Chargeable)
Required for 3D calibration 90347 Software upgrade Upgrade for a single license 90066 Warranty extension 12-month extension, optional as of the 3 year after delivery. Order replacements/accessories from: reseller (regional) or smart optics: www.smartoptics.de/en/contact/ (worldwide) www.smartoptics.shop (EU) Document version: 3.3 04-2020... -
Page 18: Device Components
Operating Manual Audiology Scanners Device components Front views A: Lid B: Viewing window C: Touch screen D: Power switch E: Status display Document version: 3.3 04-2020... - Page 19 H: Rotary axis, base (displayed here with object holders) front: back: 3D sensor/ Optical components Indicator lights mono Scan duo Scan duo Scan Touch ds Production free Stage Scanner is off, Scanner is off, Scanner is off, no power no power...
-
Page 20: Internal Views
Operating Manual Audiology Scanners mono Scan duo Scan duo Scan Touch ds Production free Stage Sleep mode Ready for operation Scanning Scanning Internal views Closed scanners A: 3D sensor/ Optical components B: Swivel axis C: Rotary axis D: Object holders E: Base Document version: 3.3 04-2020... -
Page 21: Accessory Views
Operating Manual Audiology Scanners A: 3D sensor/ Optical components B: Swivel axis C: Rotary axis D: Object holders Accessory views Intended use Needles (top) Object Mounting of ear Neutral Left Right holder* impressions Magnet (bottom) 3D calibration Required for 3D object* calibration Power... -
Page 22: Rear View
Operating Manual Audiology Scanners Rear view Connections and type plate USB port Type plate with technical data and serial number Sensor number D Mains connection with fuse Power switch (toggle switch) (mono Scan, free Stage) Document version: 3.3 04-2020... -
Page 23: Commissioning
The outer carton is damaged. The delivery is complete. There are damaged parts. Complain immediately: To the carrier and seller in case of transport damage To the seller (reseller/smart optics) in case of wrong/incomplete delivery. Document version: 3.3 04-2020... -
Page 24: Unpacking
Operating Manual Audiology Scanners Unpacking Grasp the scanner with both hands at the bottom from the sides. Also for open scanners: Do not touch inside. Touching can damage the optical components. Pull the scanner upwards out of the carton. ... -
Page 25: Connect The Scanner
Operating Manual Audiology Scanners Connect the scanner Audiology scanners require connections for: Power supply Data transfer (USB). Power connection Connect: The device plug mains connection socket (at the back) The E+F type mains plug with a socket (optionally with a socket adapter). -
Page 26: Usb Connection
Operating Manual Audiology Scanners USB connection Connect: The type B plug to the USB port of the scanner The type A plug with a USB-port at the back of the PC (do not use a USB hub). position ǀ). -
Page 27: Installation And Upgrade
Operating Manual Audiology Scanners Installation and upgrade Installation The system requirements for aural Scan are: PC system Quadcore CPU, i5, 8 GB RAM, USB 2.0/3.0 Port, graphics card min. 1GB RAM, free hard disk space approx. 80 GB Minimum requirements Windows 7 (32-Bit) operating system Recommended operating... -
Page 28: Load The Calibration Data
( See the back of the scanner: SO number) If the calibration data folder is named differently, please contact your seller (reseller or smart optics). Do not rename the SO folder. Once the calibration data have been loaded, you can start aural Scan. -
Page 29: Upgrade
Download To request of a 30-day trial version: www.smartoptics.de/en/contact/ Request a 30 day trial To purchase an upgrade extension or request a quote: From smart optics: smartoptics.shop/en/ onlineshop@smartoptics.de From a reseller: www.smartoptics.de/en/contact/ Request a quote / Contact a reseller... -
Page 30: Installation Of An Upgrade
Operating Manual Audiology Scanners Double-click the file unins000.exe. Follow the instructions. The software will be uninstalled. The calibration data folder and a LOG file will be kept. Now you will be able to reinstall aural Scan. Cleaning up an incomplete installation This step allows you to completely remove aural Scan. -
Page 31: Activation Of Access To The Software
The activation code must be purchased from your seller (reseller or smart optics). The activation code is generated when requested by smart optics and is usually sent on the next business day. Message when the software is started: Document version: 3.3 04-2020... - Page 32 Operating Manual Audiology Scanners Repeat the start of aural Scan to verify the message. Enter the activation code (a combination of letters, numbers and special characters). There is no need to renew the dongle characteristic. Upgrades can be used without a new activation code during the next 12 months.
-
Page 33: Positioning Of Ear Impressions
Operating Manual Audiology Scanners Positioning of ear impressions Ear impressions are attached to the object holders (careful with the sharp needles!) and magnetically fixed on the bases inside the scanner. Removing and inserting object holders You can remove the object holders from the scanner to: ... -
Page 34: Mounting Of Ear Impressions
Operating Manual Audiology Scanners Slanted Inserted straight Mounting of ear impressions Prepare the ear impressions to be scanned: Cleaning (of tamponade, cerumen, withdrawal string) Drying Smoothing (auricle, outside, the flat side to be mounted = bottom of the scan). - Page 35 (side reference considered from the patient’s viewpoint). ds Production Color-coded object holders and bases free Stage Left = front, right = back mono Scan Only one base (impressions must be scanned one after the other) Gapless fit Gap between impression and object holder ...
-
Page 36: Introduction To Scanning
Operating Manual Audiology Scanners Introduction to scanning Working with scan data smart optics scanners create open data for common CAD/CAM systems (STL, MSH, ASC file formats). In digital production, the earmold is manufactured using the scan files. Scan data CAD Data CAM Data •... -
Page 37: "3D Viewer" Workspace
Operating Manual Audiology Scanners A striped pattern is projected onto the object to be scanned by the 3D sensor and recorded by the camera. With the aid of several camera images taken from different perspectives, aural Scan calculates a 3-dimensional image of the object. “3D viewer”... -
Page 38: Icons In The 3D Viewer
Operating Manual Audiology Scanners Icons in the 3D viewer Rotation axis (X Y Z ∞) Selection of the rotation axis, the default option is “All axes” (∞). When rotating with the mouse, the scan is rotated about the selected axis. The Cartesian coordinate system applies in the 3D viewer (regardless of the Orientation setting). -
Page 39: Mouse In The 3D Viewer
Operating Manual Audiology Scanners Mouse in the 3D viewer Default mouse button assignment Left: click, hold + move Rotate the scan Right: click, hold + move Move the scan Rotate the scan Zoom in/out of the scan See: Setting Change mouse functions Rotate the scan... -
Page 40: Keyboard In The 3D Viewer
Operating Manual Audiology Scanners Zoom in/out of the scan You can zoom steplessly in and out up to a maximum or minimum size. Click on the scan. To enlarge: Turn the scroll wheel towards your hand. To reduce: Turn the scroll wheel away from your hand. ... -
Page 41: Scanning The Ear Impression
Position one or two object holders with ear impressions (not empty object holders). mono Scan will scan the left and right impressions one after the other. Starting a scan project Start a new scan project using one of the following methods: ... -
Page 42: Naming Scans
Operating Manual Audiology Scanners The display depends on the settings for the 3D viewer, scanning and matching. Naming scans aural Scan names scans automatically. To identify scans more easily, you can enter scan names manually, e.g. with patient names or case numbers. Naming rules Automatic naming Based on date and time (time stamp). -
Page 43: Editing Scan Names
Operating Manual Audiology Scanners Side identification Indicates the anatomical position. _L = Left sinister, _R = Right dexter, completes the file names, no display in the 3D viewer. Example Scan name: 200612_094143 File name: 200612_094143_L.STL Left – Right Different scan names are possible. -
Page 44: Cancelling A Scan
Operating Manual Audiology Scanners 1 × Select all 2 × Place the cursor 1 × With the keyboard Press TAB or SHIFT + TAB to place the cursor on the side you wish to edit. Invalid special characters cannot be entered. ... -
Page 45: Repeating A Scan
Operating Manual Audiology Scanners Repeating a scan You can repeat a scan to replace a bad scan result with a new scan (alternatively: Correcting a Scan). Correct possible causes for the poor scan result: 33, 63 Settings, e.g. the impression color ... - Page 46 Operating Manual Audiology Scanners Note icon Note field Marker Moving a marker Markers (pins) are movable so that they can be arranged in a clear way. Click and hold the marker with the left mouse button. Move the mouse to the desired target position. ...
-
Page 47: Commenting A Scan Project
Operating Manual Audiology Scanners Press DEL or click on the trash bin icon. Deleted notes cannot be recovered. Commenting a scan project You can enter general information about the scan project, e.g. to process the order. Click on “Add project note“. ... -
Page 48: Rescanning
Operating Manual Audiology Scanners Rescanning The rescanning correction function specifically measures holes (gaps), e.g. in narrow places. This function not available for mono Scan. In the 3D viewer, click on: The page to be rescanned “Start rescanning”. -
Page 49: Matching
Operating Manual Audiology Scanners The overall quality of the rescans is bad. Repeat the scan. The overall quality of the rescans is good. Proceed with the matching of the scan project. Positioning the crosshair icon Position the crosshair icon on the scan by: Rotating Moving Zooming... -
Page 50: Fill Holes
Operating Manual Audiology Scanners Must be carried out manually in order to end the rescanning process (the main scan and the rescan become a single scan). Click on “Matching”. You can cancel the matching process and continue rescanning. ... - Page 51 Operating Manual Audiology Scanners Outside of the selection Within the selection. Make the selection by clicking around the area with the left mouse button (many clicks = fine line, few clicks = rough line). Example: Cutting the base Fine Rough Zoom and rotate the view before making a selection.
-
Page 52: Scanning A Barcode
USB barcode scanners read and decipher barcodes, e.g. of laboratory labels. In aural Scan, scan names can be created and new projects can be started using a barcode scanner. This function is not available for mono Scan. USB barcode scanners are not available from smart optics. Preparation aural Scan can be left open. -
Page 53: Finishing And Exporting Work
Operating Manual Audiology Scanners Renaming scans Mark the scan name you wish to change. Scan the barcode. aural Scan will ask if you wish to discard the current scan. Click on No. The scan will be kept, and the scan name changed. Finishing and exporting work Checking the scan results Recommendation:... -
Page 54: Finishing And Exporting
Operating Manual Audiology Scanners Flaws in the impression Wrong settings viewer, scanning, matching). If you have changed any of the settings, repeat the scan. If not, annotate 45, 45, 47 the scan. Finishing and exporting Click on “Finish work” ... - Page 55 Operating Manual Audiology Scanners Files Files to export. aural Scan suggests the project files (by default scan files in the STL data format, order.pdf, project.log). File selection for export. Add file(s) No effect on the files in the files contained in Remove file(s) work folder.
-
Page 56: Documents (Order.pdf, Project.log)
Operating Manual Audiology Scanners Documents (order.pdf, project.log) Order document “order.pdf” Setting: aural Scan generates by default the order document “order.pdf” for a scan. PDF file Barcode Coded order data to be captured by a barcode scanner Company logo Configurable Title “Order Left Side/Right Side” Fixed text Front, back, top screenshots Fixed perspectives, with markers... -
Page 57: Ftp Export Method
Operating Manual Audiology Scanners The scanner’s sensor number Time stamp: Creation time + Name Name left, name right_side identification Settings: Use the same name for the left and the right ear casts Always add side description to scan names Apply patient name (Noah) - Page 58 Operating Manual Audiology Scanners Settings Export dialog Uploading files to a FTP server At the end of the job, aural Scan will ask you to select or enter an FTP connection (if one has not been saved yet). Selection of an FTP connection: Entering of a new FTP connection (password- protected): ...
-
Page 59: Zip Export Method
Operating Manual Audiology Scanners ZIP export method The ZIP method is used to save the project/export files as a zip archive. Starting the ZIP export Button in the Export dialog (default) Direct start (without file selection) by configuring the Export ZIP method: Exporting files as a ZIP archive When the work is finished, aural Scan asks you to select a folder to save the ZIP archive. -
Page 60: Editing And Exporting
Operating Manual Audiology Scanners Starting the sending of an email Button in the Export dialog (default) Direct start (without file selection), by setting the Send via Mail (Outlook/Thunderbird) method Settings Export dialog Sending files via email When the work is finished, aural Scan initiates a new email with attachment (ZIP archive). - Page 61 Operating Manual Audiology Scanners Edit the scan. The following functions are available: Rotate, zoom, display 37, 47, 50, 50 Commenting the scan project Hole Filling Cutting The following are not available: Renaming/naming with a barcode ...
- Page 62 Operating Manual Audiology Scanners Finish editing by: Placing aural Scan in the standby mode (you have to confirm the message “Discard the current scan?”) Quit aural Scan. Document version: 3.3 04-2020...
-
Page 63: Aural Scan With Noah
The following work steps are necessary at the workstation. Further setup steps may be necessary in the Noah administration. Request setup instructions for administration on data carrier or from smart optics: support@smartoptics.de. Install the current Noah version as described in the Noah Knowledge Base. -
Page 64: Scanning With Noah
Scanning with Noah Switch on the scanner. Choose a name (Noah patient browser, left). Start aural Scan with the smart optics button. aural Scan will start and opens a scan project for the patient. Possible tasks: ... -
Page 65: Viewing, Editing And Exporting Scans From Noah
Operating Manual Audiology Scanners Repeating Rescanning/hole filling Cutting Finish the work, optionally with an export (FTP, ZIP, email). aural Scan goes into the standby mode by default. If it doesn’t, select To the standby mode in the menu. ... - Page 66 Operating Manual Audiology Scanners Click on scan right or scan left. aural Scan loads the scan into the 3D viewer. Editing and exporting scans The following functions are available: Rotate, zoom, display 37, 47, 50, 50, Commenting a scan project ...
- Page 67 Operating Manual Audiology Scanners Close the scan by: Placing aural Scan in the standby mode (you have to confirm the message “Discard the current scan?”) Quit aural Scan. The project files will be saved. Noah actions ...
-
Page 68: Software Settings
Operating Manual Audiology Scanners Software settings aural Scan usually achieves good results with the standard settings. However, you can change these settings during operation, should it be necessary. Check and change the settings after installation: Work folder File formats ... -
Page 69: Work Folder
Operating Manual Audiology Scanners Work folder Folder in which aural Scan saves the scan projects (mandatory, cannot be deleted). Paths that have become invalid are displayed in red. Enter the path or select it from the folder structure with Browse (local folder, network path or network drive). -
Page 70: File Formats
Operating Manual Audiology Scanners File formats STL MSH ASCII Determines in which file formats the scans are saved. Select at least one file format. If no format is specified, no files will be saved. Default value: Orientation X Y Z aural Scan saves the data in the Cartesian coordinate system XYZ, with the following values per axis: x, y, z, -x, -y, -z. - Page 71 Operating Manual Audiology Scanners Recommendation: Enable this option when naming with barcodes. Default value: disabled. Scan prefixes can be different for the left and right side Always add side description to scan names Side identification: anatomical location identification: left, sinister right, dexter Determines how file names are formed.
-
Page 72: 3D Viewer" Settings
Operating Manual Audiology Scanners 11.2 “3D viewer” settings Click on for information ⁉ ⁉ ⁉ ⁉ Visualization Colors Separator Left Right Rescan Bottom Scans, rescanned areas and the background are differentiated by colors. To change a color Click on the color box. Document version: 3.3 04-2020... - Page 73 Operating Manual Audiology Scanners Select a color from Windows' basic colors or define one with Define colors (RGB values/hue + saturation + brightness). A gradient is created from the background colors (top, bottom). Scan and rescan colors depend on smoothing, reflection brightness and reflectance.
-
Page 74: Object Rotation
Operating Manual Audiology Scanners Reflection shining Determines the intensity of the light reflection on the scan in the 3D viewer. Scale 0 – 100 Steps of 1 Steps of 10 Default value: Effect of the reflection in the 3D viewer (brightness + reflectance), it has no influence on the 3D measurement. -
Page 75: Advanced
Operating Manual Audiology Scanners Rotation speed Determines the speed of the object rotation. Applies to both manual and automatic rotation. Scale 0 – 10, 0 = Off Steps of 1 Default value: 2 (slow) Advanced Show measurements at high quality Determines the quality of the display in the 3D viewer during scanning. -
Page 76: Scanning" Settings
Operating Manual Audiology Scanners 11.3 “Scanning” settings Click on for information ⁉ ⁉ ⁉ Object tone Categorization of the impression material to be scanned as light, medium or dark according to the color scale. Select the setting that is most similar to the impression material to be scanned. -
Page 77: Matching" Settings
Operating Manual Audiology Scanners Mode Scanning Number of Images Time Fast Standard 100% Enhanced 150% If necessary, change the scanning strategy to regulate the measurement accuracy. The standard values are selected to allow audiology scanners to achieve measurement accuracy pursuant to ISO 12836. If you have any questions about quality management, please contact your support. -
Page 78: Quality
Operating Manual Audiology Scanners Quality Thinning Determines the STL accuracy, i.e. the distance between the pixels that are linked to form a data set. The maximum accuracy is limited by the maximum resolution of the sensor. The size of the data increases with a greater accuracy. -
Page 79: Base Cutting
Operating Manual Audiology Scanners Base cutting Cutting filters are used to: Cut the top and bottom area of the scan in the STL data set Make manual cutting unnecessary. The settings must match the size of the ear impressions. Enabled Determines whether the cutting filters are applied. -
Page 80: Export
Operating Manual Audiology Scanners 11.5 Export Click on for information ⁉ ⁉ ⁉ ⁉ ⁉ Export dialog Enabled Determines whether an export dialog is displayed when the work has been finished (for details see Method). When it is disabled, projects are only saved in the Work folder. -
Page 81: Pdf File
Operating Manual Audiology Scanners PDF file Enable PDF overview Determines whether a PDF document (order.pdf) is created for each impression for order communication purposes. To enter your address and contact details, click on Customize. Default value: enabled Customize Your company logo, address and contact details can be printed in the PDF document. -
Page 82: Ftp
Operating Manual Audiology Scanners By default Customized PDF (Impression) — Default value: FTP connections are required for the FTP upload export method. Upon work finishing, the export files are loaded onto the selected FTP server. The recipient must provide the connection information to the FTP server and the corresponding login information. - Page 83 Operating Manual Audiology Scanners To add an FTP connection: Enter the information under Parameter and Login. Connection Name of the FTP connection For identification purposes Freely selectable Cannot be changed Protocol for data transmission ...
-
Page 84: Advanced
Operating Manual Audiology Scanners Click on to check the new connection and save it in the connection list. A valid connection will be saved. Connections with an invalid URL or incorrect login information will not be saved. Remove FTP connections if: ... -
Page 85: Interfaces
Operating Manual Audiology Scanners 11.6 Interfaces Click on for information ⁉ ⁉ Noah These settings only concern the operation of aural Scan with Noah (software of the Hearing Instrument Manufacturers' Software Association (HIMSA)). Apply patient name Determines whether the patient names in Noah are included in the scan names. -
Page 86: Module Activation
Operating Manual Audiology Scanners Module activation To unlock additional software functions, the following steps must be carried out once after the purchase of the corresponding module. Starting with aural Scan 3.3, there is no module sold requiring activation. Up to version 3.2, the FTP upload module is optional and must be purchased separately and activated. -
Page 87: Icons, Menu Items And Shortcuts
Operating Manual Audiology Scanners Icons, menu items and shortcuts 13.1 Icons Icon Meaning Icon Meaning Start scanning Set the X axis as the rotation axis Repeating a scan Set the Y axis as the rotation axis Work finished Set the Z axis as the rotation axis Add a project note Set all axes as the rotation axis View the front... -
Page 88: Menu
Operating Manual Audiology Scanners 13.2 Menu Menu-Icon aural Scan functions. The menu can be opened if no scan is running and no dialog/message is open. New scan An active scan is discarded (after confirmation). A new scan can be started. Open scan file ... - Page 89 Operating Manual Audiology Scanners Settings Opens the aural Scan settings. About Information on the version, including licensing information on program libraries. Add activation code Opens the dialog to enter an activation code to enable the activation of a chargeable module. Stand by ...
-
Page 90: Shortcuts
Operating Manual Audiology Scanners 13.3 Shortcuts aural Scan supports Windows shortcuts, e.g. for selecting, copying and cutting field contents (CTRL + A, CTRL + C, CTRL + X, CTRL + V). The same shortcut can have different effects depending on the context or cursor position. Shortcut Context Meaning... -
Page 91: Device Care
Axis calibration 3D calibration (optional) Cleaning the scanner smart optics scanners do not require maintenance. 14.1 Axis calibration The calibration of the axes of the scanner ensures the correct alignment of the axes and thus accurate measurement results. Schedule Calibration is required after: ... -
Page 92: 3D Calibration
However, if there are high demands on the measurement accuracy of the scanner in production or quality control, a 3D calibration is also useful. Accessories required: 3D calibration object industrially manufactured (optionally available from your reseller or smart optics). Pillar Label sample: Hemispheres APK-0005 Measuring points for height 21.9974... -
Page 93: Performing The 3D Calibration
Operating Manual Audiology Scanners Performing the 3D calibration Schedule Calibration is required after: The first installation of aural Scan An aural Scan upgrade Transporting the scanner to a different place One month since the last 3D calibration. Calibrate daily with: ... - Page 94 Color-coded object holders and bases free Stage Left = front, right = back mono Scan Only one base (3D calibration object and ear impression must be scanned one after the other) Turn the 3D calibration object so that the label is facing forward.
- Page 95 Operating Manual Audiology Scanners The deviation determined after the 3D calibration will be displayed. The log will be saved: C:\Scans\Calibration Naming pursuant to the creation time: [YYYY]-[MM]-[DD]-[hh]-[mm]-[ss]-Calibrationresults.html Open the log with an HTML editor or web browser. ...
-
Page 96: Cleaning The Scanner
Operating Manual Audiology Scanners Deviation values after the 3D calibration Ideal value 0 µm Tolerance range ± 13.999 µm Fault range ± 14.000 µm 14.3 Cleaning the scanner The scanner must be cleaned regularly during operation. The optical and electronic components inside the scanner are sensitive to touch. -
Page 97: Troubleshooting
Operating Manual Audiology Scanners Troubleshooting 15.1 What to do in case of problems Troubleshooting offers solutions for known problems: Connection problems Calibration problems Failed axis calibration Failed 3D calibration Failed FTP upload Other problems Error messages indicate possible sources of error and give advice on 102, 103 solutions. -
Page 98: Connection Problems (Usb, Camera)
Operating Manual Audiology Scanners BIOS Hardware drivers Virus and threat protection. Allow aural Scan in the antivirus software. Change the PC to rule out computer errors. 15.2 Connection problems (USB, camera) The following are signs of connection problems: ... -
Page 99: Usb Root Hub
Operating Manual Audiology Scanners Enable High performance. Disable energy saving option for USB root hub Open the Device Manager. Select USB-Controller USB-Root-Hub, Properties in the context menu. Disable Allow the computer to turn off this device to save power under Power Management. -
Page 100: Reinstall The Camera Driver
Reinstall the camera driver www.smartoptics.de The release notes Changelog-auralScan.pdf inform about the last released version of the PointGrey FlyCap2Viewer camera driver. smart optics makes the installation file available on the download server. Current version: 2.11.3.121_x64 http://downloads.smartoptics.de/Support/Tools/PointGrey/ FlyCapture_2.11.3.121_x64.exe Download the installation file. -
Page 101: Calibration Problems
Operating Manual Audiology Scanners 15.3 Calibration problems Holes and overlaps in scans are signs of calibration problems. Delete and reload the calibration data The calibration data must be up-to-date and match the scanner's sensor number (SO-number). Enter into the Open the path Explorer: %appdata% C:\Users\[User]\AppData\Roaming\3D-Scanner\aural Scan ... -
Page 102: Failed 3D Calibration
Operating Manual Audiology Scanners 15.5 Failed 3D calibration The measuring accuracy of the scanner will not be corrected If the 3D calibration fails. Scanning is still possible however, but without correction values. After cancelling a scan, the axes remain in the last position. ... -
Page 103: Error Messages
Operating Manual Audiology Scanners Error: Encountered errors during FTP upload Error: The remote server returned an error. (530) Not logged in. Restart aural Scan, open the scan files or scan again. Click on “Upload”, then on FTP. Edit the saved FTP connection (server, login). ... - Page 104 Operating Manual Audiology Scanners If the problem persists, please contact your Support to request a technical examination. Error during image capture Possible sources of error Camera Position of the axes Prolonged inactivity Possible solution Repeat the scan. ...
- Page 105 Operating Manual Audiology Scanners No name defined Possible sources of error Scan name missing Possible solution The scan must be named. The export path can no longer be found. Please check your export path in the settings. Possible sources of error ...
-
Page 106: Other Problems
Operating Manual Audiology Scanners Create the path accordingly in Windows. Grant write access to the Windows user. Something went wrong while creating the order document (PDF) Possible sources of error PDF file settings (order.pdf) File format settings Possible solution ... - Page 107 Operating Manual Audiology Scanners A scan shows an empty object holder To scan one side, remove the empty object holder, start a new scan discard the first scan. To scan both sides, place the ear impression on the empty object holder. A scan has disappeared from the 3D viewer ...
-
Page 108: Data Paths
Operating Manual Audiology Scanners 15.9 Data paths To open protected Windows folder: Enter the path name into the Explorer using the placeholder %. %appdata% %programfiles% Data paths by default as of aural Scan 3.0 * Placeholder C:\Scans\Noah Work folder (with Noah) C:\Scans Work folder (Stand-alone) C:\Scans\[Scanname*]\order_[Scan*]_[Seite*].pdf... -
Page 109: Faults And Repairs
Repair or custom help required. Damages to the device due to improper repairs Repairs may only be carried out by your reseller or smart optics. Improper repairs can damage the scanner permanently. smart optics assumes no liability for consequential damages caused by improper repairs and the warranty will be void. -
Page 110: Disposal
Directive (Waste Electrical and Electronic Equipment, 2002/96/EC) WEEE registration number of smart optics: DE47893210 For disposal, send your smart optics scanners to: smart optics (manufacturer) Your reseller (if you are a resident of the area of application of the EU directive). -
Page 111: Technical Specifications
Windows 7 (32-Bit) operating system Recommended Windows 10 (64-Bit) operating system 2.0 or 3.0 Barcode interface USB barcode scanner Noah interface* Compatible with winIPRO® * smart optics is a registered member company of HIMSA: www.himsa.com Document version: 3.3 04-2020... -
Page 112: Declaration Of Ce Conformity
Operating Manual Audiology Scanners Declaration of CE conformity 19.1 mono Scan Document version: 3.3 04-2020... -
Page 113: Duo Scan
Operating Manual Audiology Scanners 19.2 duo Scan Document version: 3.3 04-2020... -
Page 114: Duo Scan Touch
Operating Manual Audiology Scanners 19.3 duo Scan Touch Document version: 3.3 04-2020... -
Page 115: Free Stage
Operating Manual Audiology Scanners 19.4 free Stage Document version: 3.3 04-2020... -
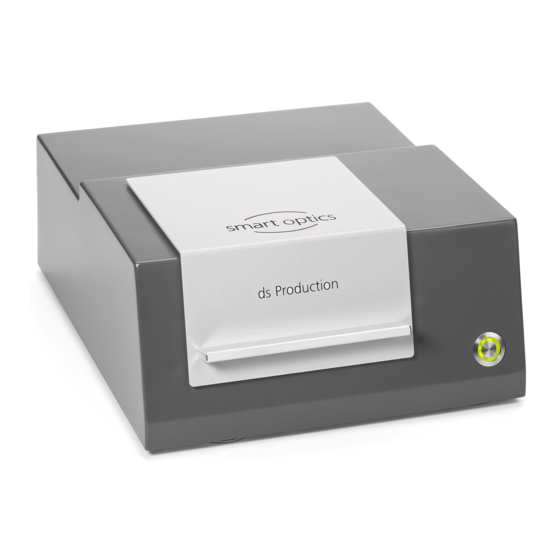
Page 116: Ds Production
Operating Manual Audiology Scanners 19.5 ds Production Document version: 3.3 04-2020... -
Page 117: Quick Guide
Operating Manual Audiology Scanners Quick guide Workstation: table load-bearing capacity (kg) - scanner’s space (W×L×H mm, open): requirements mono Scan duo Scan duo Scan Touch ds Production free Stage 15 kg 16 kg 16 kg 20 kg 13 kg 300×367×350* 300×350×350*... - Page 118 Scanning: Start with: The method is supported by: mono Scan, duo Scan, duo Scan Touch, ds Production, free Stage mono Scan, duo Scan, duo Scan Touch, ds Production, free Stage duo Scan, duo Scan Touch, ds Production, free Stage...
- Page 119 Operating Manual Audiology Scanners Check the settings Answer the following decisive questions: Everything is ok, no changes needed. Change the setting! Click on the keyword for more information!! General Should aural Scan: Save scan files in the work folder C:\Scans? Save scan files only in the STL file...
- Page 120 Operating Manual Audiology Scanners Scanning When scanning, should aural Scan: Expect these impression colous Use the fast scan strategy? Matching When matching, should aural Scan: Perform the thinning of the 3D data (reduce them to what is essential)? ...
- Page 121 Manufacturer smart optics Sensortechnik GmbH Lise-Meitner-Allee 10 D-44801 Bochum, Germany +49 (0) 234 / 29 828-0 +49 (0) 234 / 29 828-20 info@smartoptics.de sales@smartoptics.de support@smartoptics.de www.smartoptics.de audiology store: smartoptics.shop ...
Need help?
Do you have a question about the mono Scan and is the answer not in the manual?
Questions and answers