Table of Contents
Advertisement
Assembly, Installation, Care,
Maintenance, and Use Instructions
Read these materials prior to assembling and
using this Trampoline/Trampoline enclosure.
Please
CALL us
if you have
any issues.
Questions? Issues?
We are here to help!
Phone: (1) 718-535-1800
Email: support@pyleusa.com
Sound Around, Inc.
1600 63rd. Street Brooklyn, NY 11204 USA
Advertisement
Table of Contents

Related Manuals for SereneLife SLTRA10BL


Summary of Contents for SereneLife SLTRA10BL
- Page 1 Assembly, Installation, Care, Maintenance, and Use Instructions Read these materials prior to assembling and using this Trampoline/Trampoline enclosure. Please CALL us if you have any issues. Questions? Issues? We are here to help! Phone: (1) 718-535-1800 Email: support@pyleusa.com Sound Around, Inc. 1600 63rd.
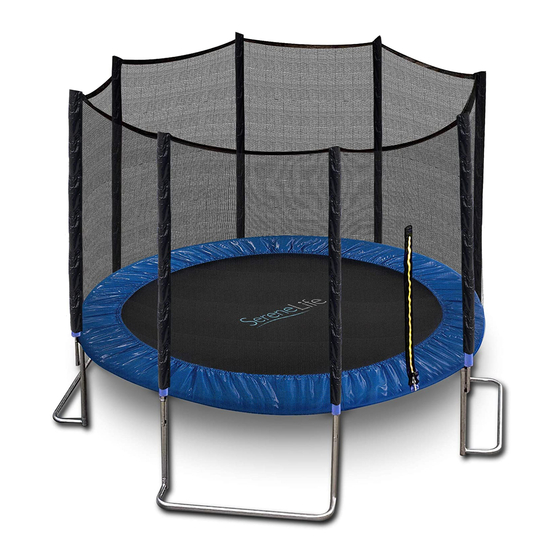
- Page 2 SLTRA10BL SLTRA10PNK SLTRA10BL - SLTRA10PNK Home Backyard Sports Trampoline Large Outdoor Jumping Fun Trampoline for Kids/Children, Safety Net Cage (10’ ft.)
- Page 3 WARNING YOU MUST CAREFULLY READ AND UNDERSTAND THESE OPERATING INSTRUCTIONS BEFORE PUTTING TOGETHER AND USING THIS TRAMPOLINE. KEEP THESE OPERATING INSTRUCTIONS SO THAT YOU CAN REFER BACK TO THEM LATER OR PASS THEM ON IF YOU SELL THIS TRAMPOLINE. THIS TRAMPOLINE MAY ONLY BE USED TOGETHER WITH THE NET THAT COMES WITH IT.
- Page 4 WARNING CONSULT YOUR DOCTOR PRIOR TO ANY KIND OF PHYSICAL TRAINING THE TRAMPOLINE SHOULD ONLY BE USED BY ONE PERSON AT A TIME! IF THERE ARE SEVERAL TRAMPOLINISTS, THERE IS A GREATER RISK OF BREAKING YOUR NECK, LEG OR BACK. FALLING ON YOUR HEAD OR NECK MAY RESULT IN PARALYSIS OR DEATH! DO NOT PERFORM ANY SUMMERSAULTS AS THIS INCREASES THE RISK OF FALLING ON YOUR HEAD OR NECK!
- Page 5 • Stop bounce by flexing knees as feet come in contact with the bed. Learn this skill before attempting others. • Learn fundamental bounce and body positions thoroughly before trying more advanced skills. A variety of trampoline activities can be carried out by performing the basic fundamentals in various serious and combinations, performing one fundamental after another, with or without feet bounces between them.
- Page 6 WARNING • Do not attempt or allow somersaults, landing on the head or neck can cause serious injury, paralysis, or death, even when landing in the middle of the bed. • Do not allow more than one person on the trampoline. Use by more one person at the same time can increase the chance of injury.
- Page 7 WIND In the event of strong wind, the trampoline can be blown away. If you are expecting strong wind, the trampoline must be placed in a sheltered position or dismantled. Another optionis to secure the round outer part (top frame) of the trampoline in the ground with the help of ropes and stakes.
- Page 8 • Don't practice any daredevil jumps on the trampoline as this increases the risk of injury. The key for safety and fun on the trampoline is the control and mastery of the various jumps. Never try to jump higher than another trampolinist! Never use the trampoline on your own without a spotter.
- Page 9 • Poor maintenance of the trampoline: A trampoline in poor condition increases your risk of injury. Please check the trampoline before every use for bent steel tubes, loose or broken springs and the general stability of the trampoline. • Weather: When using the trampoline, pay attention to the weather. When the trampoline mat is wet, the trampolinist can slip and get injured.
- Page 10 • Focus your eyes on the mat to ensure you maintain control. Otherwise, you risk losing balance or control. • The trampoline should only be used by one person at a time. • When the trampoline is used by children, there must always be a spotter. SPOTTERS: Familiarize yourself with the basic jumps and safety information.
- Page 11 C. Start with the hands and knees drop and then go face down on the mat and get back on your feet. D. Practice the hands and knees drop, perform a front drop, get back to your feet, seat drop, back to your feet. seat drop and back to your feet until you have learned the routine.
- Page 12 KNEE DROP 1. Start with the basic jump and perform a low jump. 2. Land on your knees with a straight back and upright body and keep your balance with your arms. 3. Jump back into the basic jumping position by swinging your arms upwards.
- Page 13 To ensure safe use of the trampoline, be aware of the following when choosing where to put it: • Make sure it is placed on a level surface. • The area is well lit • There are no obstacles on the trampoline If you do not follow these instructions, you increase the risk of somebody being injured.
- Page 14 ASSEMBLY INSTRUCTIONS STEP 1 - Frame Assembly To assemble the frame, a total of 15 or 20 tube parts are required. All parts with the same part number are interchangeable and can be used on both the left or right. To connect the parts, push the thinner end of a tube into the wider end of another tube.
- Page 15 STEP 3 - Assembly of the top bars Two people are required to assemble the trampoline in this step. Lift one of the support components from Step 2 into the vertical position. Insert the top bar with the leg base into one end of tne support component. Insert the opposite end of the top bar with leg base into a second support group, as shown in FIGURE3.
- Page 16 STEP 4 - Attaching the trampoline mat A. Lay the trampoline mat (#1) in the frame. The logo must face upwards as shown in FIGURE 5. ZERO Figure 5 B. In total Jumper 180 has -> 36 triangular eyelets sewn on the mat and 36 holes in the frame of the top bars.
- Page 17 D. For Jumper 180, count -> 18 holes (Jumper 251 -> 24; Jumper 305 -> 32; Jumper 366 -> 36; Jumper 430 -> 44) from Point ZERO on the top bars and the corresponding eyelets to move on to Point 18 for Jumper 180 (Jumper 251 -> 24 Jumper 305 ->...
- Page 18 G. For Jumper 180, 251 and 305, every eight holes attach a spring to the corresponding eyelets; for Jumper 366, every nine holes attach a spring; for Jumper 430, every 11 holes attach a spring. For even distribution of the tension and an easier assembly, each of the springs should be attached to the opposite sides of the mat of the frame, I.e.
- Page 19 Jumper3 66 Attach a spring to hole 5 of the corresponding eyelet and from there attach a spring every nine holes. For even distribution of the tension and an easier assembly, each of the springs should be attached to the opposite sides of the mat/the frame, i.e.
- Page 20 B. Tie one cord (#10) end to one of the eyelets of the jumping mat, then run the other end of the cord through the mesh of the padding and back to the next eyelet, one by one until the cord Is finished. Once you have reached the end of the cord, tie it to the last eyelet in reach.
- Page 21 Trampoline Enclosure for the Jumper 180/251/305/366 Assembly and Installation Instructions • Adequate overhead clearance is essential. A minimum clearance of 24 ft. from ground level is recommended. Provide clearance for wires, tree limbs, and other possible hazards. • Lateral clearance is essential. Place the trampoline enclosure away from walls, structures, fences, and other play areas.
- Page 22 User Instructions • DO NOT attempt or allow somersaults. Landing on the head and neck can cause serious injury, paralysis, or death, even when landing in the middle of the bed. • Do not allow more than one person inside the trampoline enclosure. Use by more than one person at the same time can result in serious injury.
- Page 23 LIST OF PARTS REMEMBER TO WEAR GLOVES DURING THE ASSEMBLY IN ORDER TO AVOID TRAPPING YOUR HANDS. ATLEAST TWO PEOPLE ARE REQUIRED TO ASSEMBLE THE TRAMPOLINE. ASSEMBLY INSTRUCTIONS STEP 1 Ensure end cap (C) is placed on the upper tube (A). Put the upper tube (A) and the bottom tube (B) together as shown in the illustration.
- Page 24 STEP 3 Ensure that the entrance is located between two trampoline support legs, then place the safety net (I) pole cover into the installed tubes. Starting from the entrance, go left in a clockwise direction from tube to the net. STEP 4 Pull the elastic with buckle at the ends of the safety net (I) over the edge of the trampoline and hook this over the end of a trampoline jumping mat eyelet as shown...
- Page 25 WARNING CARE AND MAINTENANCE Instructions This trampoline was designed and manufactured with quality materials and handcraftsmanship. If proper care and maintenance is performed, all trampolinists can bene t from this with years of practice, fun and enjoyment, as well as a lower risk of injury.
- Page 26 WIND In the event of strong wind ,the trampoline can be blown away. If you are expecting strong wind, the trampoline must be placed in a sheltered position or dismantled. Another option is to secure the round outer part (top frame) of the trampoline in the ground with the help of ropes and stakes.
- Page 27 SLTRA10BL - SLTRA10PNK Home Backyard Sports Trampoline Large Outdoor Jumping Fun Trampoline for Kids/Children, Safety Net Cage (10’ ft.) Features: • Outdoor Jumping Trampoline • Backyard Home Sports Trampoline Style • Large Wide-Diameter Jumping Surface • Perfect for Kids, Children, Teens & Young Adults •...
Need help?
Do you have a question about the SLTRA10BL and is the answer not in the manual?
Questions and answers