Advertisement
Advertisement

Related Manuals for ALKOVA Delice 52


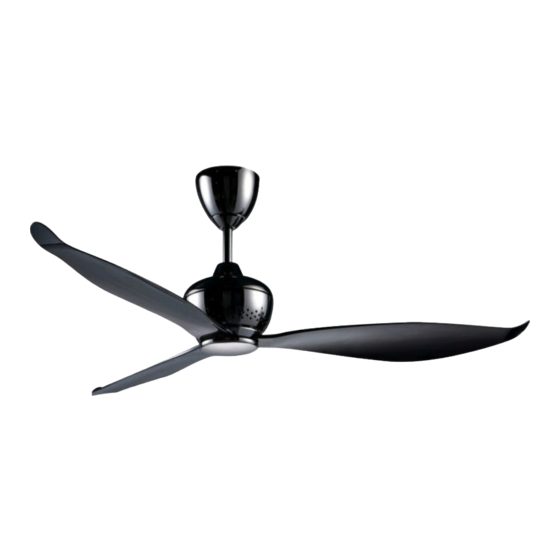
Summary of Contents for ALKOVA Delice 52
- Page 1 Delice Instruction Manual Version: 2017 V1...
-
Page 2: Table Of Contents
Content Item Page No. 1. Safety Precaution 2. Parts & Accessories 3. Installation Instruction 4. Transmitter Function & Assembly 5. Power Supply Connection & Circuit Diagram 6. Maintenance 7. Technical Specifications 8. Customer Service Centre... -
Page 3: Safety Precaution
Safety Precaution WARNING Installation and maintenance work shall only be performed by qualified persons, familiar with local code and regulation, and experienced with this type of appliance. All field wiring must be installed in accordance with the national wiring regulation. Ensure that the rated voltage of the unit corresponds to that of the name plate before commencing wiring work according to the wiring diagram. - Page 4 Safety Precaution WARNING This appliance is not intended for use by persons (including children) with reduced physical, sensory or mental capabilities, or lack of experience and knowledge, unless they have been given supervision or instruction concerning use of the appliance by a person responsible for their safety. Children should be supervised to ensure that they do not play with the appliance.
- Page 5 Safety Precaution CAUTION Please take note of the following important points when installing. Safety cord should not be longer than the earthing conductor. Should failure of the suspension system occur, the supporting of the fan must not rely on the earthing conductor.
- Page 6 Safety Precaution CAUTION Before turning off the power supply set the remote controller’s ON/OFF switch to the “OFF” position. If this is not done, the unit’s fans will start turning automatically when power resumes, posing a hazard to service personnel or the user. Do not operate any heating apparatus too close to the ceiling fan unit or use in room where mineral oil, oil vapour or oil steam exist, this may cause plastic part to melt or deform as a result of excessive heat or chemical reaction.
-
Page 7: Parts & Accessories
Parts & Accessories Rubber Pulley x 1 Canopy x 1 Decorative Cover x 1 Canopy Cover x 1 Motor Assembly Coupling with Downrod x 1 Cover x 1 Receiver x 1... - Page 8 Parts & Accessories Blade x 3 Wall Screw x 2 Battery x 2 Blade Screw & Washer x 10 Transmitter & Holder x 1...
-
Page 9: Installation Instruction
Installation Instruction Canopy Remove the Screw and Earth Wire on the Downrod and Canopy assemble the Canopy, Canopy Cover Coupling Cover and Coupling Cover Cover through the Downrod. - Page 10 Installation Instruction Bolt Washer, Nut & Clevis Pin Fix the Rubber assemble to the Downrod with Bolt, Washer, Nut and tighten them firmly then insert the Clevis Pin. IMPORTANT : Clevis pin MUST be insert to prevent nut from loosening.
- Page 11 Installation Rubber Pulley Instruction Clevis Pin Bolt Washer Safety Wire Remove the Bolt, Clevis, Nut, Washer and Rubber Pulley from the Downrod. Place the Rubber Pulley onto the ceiling hook and fix back the Bolt, Clevis, Nut and Washer. Safety Wire Tie the Safety Wire across the hook as shown and firmly screw the Safety Wire onto...
- Page 12 Installation Instruction House Supply Wires Connect the Connectors from Brown (L) Green/Yellow (E) Fan and Receiver. Blue (N) Connect the wires from the Green/Yellow(E) receiver to House’s Brown (L) Supply Wire. Blue (N) Tighten Earth Wire Grey Grey back to Downrod Yellow Yellow and connect to...
- Page 13 Installation Instruction IMPORTANT : ASSEMBLE THE BLADES ONLY AFTER THE CEILING FAN IS MOUNTED ON THE HOOK. Install the Blades on Motor with Screw & Washer. Install Decorative Cover onto fan by turning in. Decorative Cover...
- Page 14 Installation Instruction Below shows a complete installation diagram...
- Page 15 Transmitter Learning Process The receiver & transmitter is pre-programmed in factory. If you wish to control 2 or more fans using 1 transmitter, the below steps are required. DO NOT PRESS ANY OTHER BUTTON DURING THIS PROCESS Transmitter Turn on power to fan. Within 30 sec, press and hold “LEARN”...
-
Page 16: Transmitter Function & Assembly
Transmitter Function Power Turn off fan Fan Speed 1 - Lowest speed 8 - Highest speed Natural Wind Fan speed changes within Forward Reverse its range creating gentle Anti-clockwise or sea-breeze effect clockwise rotation Timer On 1h - Fan turns on after 1 hour 3h - Fan turns on after 3 hours 6h - Fan turns on after 6 hours 8h - Fan turns on after 8 hours... - Page 17 Function of Forward & Reverse Fan must be turned on and rotating. Press and hold button for 3 sec. Fan will slow down and then change direction (approx. 15 sec). When the fan is slowing down to change direction, the Fan Speed function is disabled until direction has been changed.
- Page 18 Transmitter Assembly Install the Transmitter Holder to wall with the 2 Screws provided. Transmitter Holder...
-
Page 19: Power Supply Connection & Circuit Diagram
Power Supply Connection IMPORTANT : DO NOT CONNECT THIS REMOTE CONTROL CEILING FAN TO REGULATOR OR DIMMER SWITCH. Regulator Dimmer Switch... - Page 20 Circuit Diagram Motor ANT1 MAIN PCB Blue Neutral (Blue) Brown Live (Brown) Power Supply 240V~ 50Hz Green/Yellow Earth (Green/Yellow) 240V~ 50Hz...
-
Page 21: Maintenance
Maintenance Due to the fan’s natural movement, connections may get loose after a period of usage. To ensure a proper and safety usage, it is highly recommended to inspect and tighten all connections every 6 months. Cleaning Cleaning your fan periodically will prolong its new appearance. Basic cleaning procedures are as follows : 1. -
Page 22: Technical Specifications
Technician Specifications MODEL DELICE / 52 No. of Blades Fan Width 52” Motor RPM 90 - 190 Voltage 240V~ 50Hz 6W - 32W Wattage Information may subject to 5% variation. - Page 23 Technician Specifications More than 1m 1321mm (4’ 4”)
-
Page 24: Customer Service Centre
Customer Service If you need any technical assistance or faulty report, please contact our customer service centre at : ALPHA HOME APPLIANCES SDN. BHD. (390258-H) Head Office Melaka 6, Jalan Sungai Kayu Ara 32/37, Berjaya Park, 19, 19-1 & 19-2, Jalan KSB 11, Section 32, 40460 Shah Alam, Selangor.
Need help?
Do you have a question about the Delice 52 and is the answer not in the manual?
Questions and answers