
Related Manuals for Parker Airtek TW 10


Summary of Contents for Parker Airtek TW 10
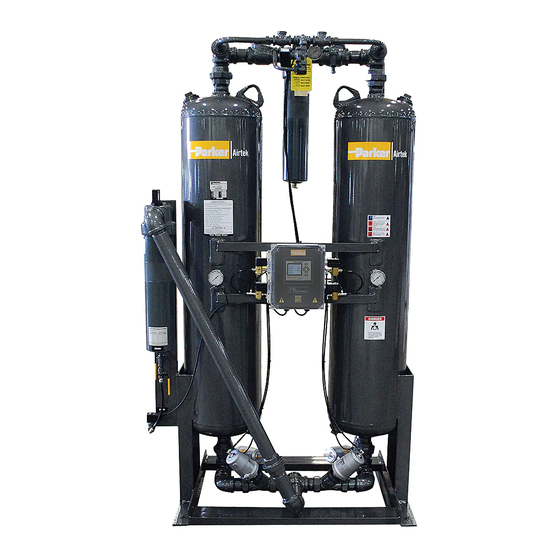
- Page 1 HEATLESS DESICCANT COMPRESSED AIR DRYER MODEL’S 75 - 6000 INSTALLATION, OPERATION & MAINTENANCE MANUAL Service Department 1-800-451-6023...
- Page 2 Dear Customer, Let us take this opportunity to introduce our company. AIRTEK is an innovative manufacturer of industrial equipment for compressed air systems. Our product line includes natural gas dryers, fluid coolers, water separators, air filters, refrigerated air dryers, and heatless and heat reactivated desiccant air dryers.
- Page 3 Section 1 Inspection & Installation Section 2 Safety & System Precautions Section 3 General Operation Section 4 Sequence of Operation Section 5 Start Up Section 6 Operational Notes Section 7 Shutdown Procedures Section 8 Demand Cycles Section 9 Maintenance Program Section 10 Parts Section 11...
-
Page 4: Section 1 Installation And Inspection
SECTION 1 Installation and Inspection PRIOR TO INSTALLATION OR START-UP OF DRYER, THIS ENTIRE MANUAL SHOULD BE READ AND UNDERSTOOD. INSPECTION All Dryers are tested and inspected at the factory prior to shipping. Inspect the dryer carefully upon arrival and note any damage on the freight bill. Uncrate and inspect for concealed damage. File claims with the carrier immediately and notify the AIRTEK service department. - Page 5 5. IMPORTANT! Bypass piping is necessary. A bubble tight valve should be used for bypass around filters and dryer for servicing. Make required electrical connections to control box. Refer to applicable drawings. NOTE: Customer to provide short circuit protection for dryer. Access ports should be provided upstream and down- stream of the dryer for dew point, pressure, and temperature checks.
-
Page 6: Section 2 Safety And System Precautions
SECTION 2 Safety and System Precautions - Use EXTREME CAUTION when working in the vicinity of the dryer. - Relieve pressure before servicing dryer or associated equipment. - Disconnect power before servicing dryer. - Use ear and eye protection when in the vicinity of the dryer or exhaust ports, especially if the dryer is being operated without mufflers. -
Page 7: Section 4 Sequence Of Operation
Important! The dryer is designed to remove only water vapor. You might see a small amount of condensate forming at the exhaust due to the Joule-Thomson cooling effect created by the depressurizing air. Prior to switching a freshly regenerated bed “on-line” to become the drying bed, it must be slowly pressurized from atmospheric pressure to line pressure. - Page 8 Step 3 is the reverse of step 1. Solenoid #1 is energized, providing control air to and opening the left exhaust valve. Solenoid #2 is energized, providing control air to and closing the left inlet valve. Solenoid #3 and #4 are de- energized.
- Page 9 Sequence of Operation Drawings...
-
Page 11: Section 5 Start Up
Section 5 Start Up Please read and understand the entire manual before operating the dryer. Check and read over wiring diagrams that pertain to your unit and make sure the correct power supply is connected, but do not energize circuit at this time. Provide proper short circuit protection. Follow all applicable codes. -
Page 12: Section 7 Shutdown Procedures
Exhaust valves and/or exhaust mufflers may have to be cleaned due to dusting in shipping and start- A desiccant dryer should never be suddenly pressurized or depressurized. This will cause fluidizing and dusting of the desiccant bed. After start-up, some dusting may occur. This will diminish with time. Some dusting may occur with normal operation. -
Page 13: Section 8 Demand Cycles
Depressurization Open bypass piping. Close outlet isolation valve. Close inlet isolation. Allow dryer to run. The normal cycle will allow both tanks to blow down and depressurize. Disconnect power. With the “Basic Filter Package” dryers, open manual ball valves on filters to allow full depressurization. - Page 14 Annunciator. The Variable Cycle Switch must be set to the 100% load setting and the Demand Control switch ON, for the Pro Purge to work! If the dryer is maintaining a good dew point AFTER the first five minutes of drying, the Pro Purge will override the fixed cycle and keep the current tower on-line until it is saturated to design loading (switch point value), usually -40°.
- Page 15 allowed to depressurize. Upon restart of the system, the dew point may appear to be poor, even though the dryer may be producing clean, dry air. Although the probe can be exposed to occasional, brief periods of liquid saturation, it can not be exposed to continuous wet conditions.
- Page 16 Read down the nearest operating pressure column until you arrive at a rating equal to or greater than your equipment; then read to the left for dryer model Heatless Model PRESSURE TW75 TW100 TW130 TW200 TW250 TW300 TW400 TW500 TW600 1079 TW800 1000...
-
Page 17: Section 9 Maintenance Program
Section 9 Maintenance Program Daily 1. Check dew point or humidity level if instrumentation is available. Any difficulty with the dryer will result in poor dew point performance. 2. Check for correct purge setting and air flow from purge exhaust. 3. - Page 18 Desiccant Replacement CAUTION: Activated Alumina Desiccant dust is considered a nuisance dust. Proper precautions should be taken. Refer to “Material Safety Data Sheet”. Remove pressure and power from dryer. Open drain ports on bottom of tanks. Catch desiccant in suitable container. Close drain ports and open top fill ports. Refill with recommended type, size and quantity of desiccant.
-
Page 19: Section 10 Parts (General Parts Description)
Remove the locknut and washer from the shaft. A screw driver slot is provided at the end of the shaft to prevent it from rotating while removing this nut. The diaphragm plates and diaphragm can now be removed. Make note of the curvature of the diaphragm plates. - Page 20 Section 10, cont. Spare Parts Lists 75 CFM Spare Parts List Recommended Maintenance QTY. PART # DESCRIPTION Spare Interval TP7610-P1 VALVE, 1" POPPET INLET VALVE TP7610-P1-RK 1 year REPAIR KIT, 1" POPPET INLET VALVE TP7510-P1 VALVE, 1" POPPET EXHAUST VALVE TP7510-P1-RK 1 year REPAIR KIT, 1"...
- Page 21 100 CFM Spare Parts List Recommended Maintenance QTY. PART # DESCRIPTION Spare Interval TP7610-P1 VALVE, 1" POPPET INLET VALVE TP7610-P1-RK 1 year REPAIR KIT, 1" POPPET INLET VALVE TP7510-P1 VALVE, 1" POPPET EXHAUST VALVE TP7510-P1-RK 1 year REPAIR KIT, 1" POPPET EXHAUST VALVE TP7105 VALVE, SAFETY RELIEF 1/2"...
- Page 22 130 CFM Spare Parts List Recommended Maintenance QTY. PART # DESCRIPTION Spare Interval TP7610-P1 VALVE, 1" POPPET INLET VALVE TP7610-P1-RK 1 year REPAIR KIT, 1" POPPET INLET VALVE TP7510-P1 VALVE, 1" POPPET EXHAUST VALVE TP7510-P1-RK 1 year REPAIR KIT, 1" POPPET EXHAUST VALVE TP7105 VALVE, SAFETY RELIEF 1/2"...
- Page 23 200 CFM Spare Parts List Recommended Maintenance QTY. PART # DESCRIPTION Spare Interval TP7615-P1 VALVE, 1 1/2" POPPET INLET VALVE TP7615-P1-RK 1 year REPAIR KIT, 1 1/2" POPPET INLET VALVE TP7510-P1 VALVE, 1" POPPET EXHAUST VALVE TP7510-P1-RK 1 year REPAIR KIT, 1" POPPET EXHAUST VALVE TP7105 VALVE, SAFETY RELIEF 1/2"...
- Page 24 250 CFM Spare Parts List Recommended Maintenance QTY. PART # DESCRIPTION Spare Interval TP7615-P1 VALVE, 1 1/2" POPPET INLET VALVE TP7615-P1-RK 1 year REPAIR KIT, 1 1/2" POPPET INLET VALVE TP7510-P1 VALVE, 1" POPPET EXHAUST VALVE TP7510-P1-RK 1 year REPAIR KIT, 1" POPPET EXHAUST VALVE TP7105 VALVE, SAFETY RELIEF 1/2"...
- Page 25 300 CFM Spare Parts List Recommended Maintenance QTY. PART # DESCRIPTION Spare Interval TP7615-P1 VALVE, 1 1/2" POPPET INLET VALVE TP7615-P1-RK 1 year REPAIR KIT, 1 1/2" POPPET INLET VALVE TP7510-P1 VALVE, 1" POPPET EXHAUST VALVE TP7510-P1-RK 1 year REPAIR KIT, 1" POPPET EXHAUST VALVE TP7105 VALVE, SAFETY RELIEF 1/2"...
- Page 26 400 CFM Spare Parts List Recommended Maintenance QTY. PART # DESCRIPTION Spare Interval TP7620-P1 VALVE, 2" POPPET INLET VALVE TP7620-P1-RK 1 year REPAIR KIT, 2" POPPET INLET VALVE TP7515-P1 VALVE, 1 1/2" POPPET EXHAUST VALVE TP7515-P1-RK 1 year REPAIR KIT, 1 1/2" POPPET EXHAUST VALVE TP7105 VALVE, SAFETY RELIEF 1/2"...
- Page 27 500 CFM Spare Parts List Recommended Maintenance QTY. PART # DESCRIPTION Spare Interval TP7620-P1 VALVE, 2" POPPET INLET VALVE TP7620-P1-RK 1 year REPAIR KIT, 2" POPPET INLET VALVE TP7515-P1 VALVE, 1 1/2" POPPET EXHAUST VALVE TP7515-P1-RK 1 year REPAIR KIT, 1 1/2" POPPET EXHAUST VALVE TP7105 VALVE, SAFETY RELIEF 1/2"...
- Page 28 600 CFM Spare Parts List Recommended Maintenance QTY. PART # DESCRIPTION Spare Interval TP7620-P1 VALVE, 2" POPPET INLET VALVE TP7620-P1-RK 1 year REPAIR KIT, 2" POPPET INLET VALVE TP7515-P1 VALVE, 1 1/2" POPPET EXHAUST VALVE TP7515-P1-RK 1 year REPAIR KIT, 1 1/2" POPPET EXHAUST VALVE TP7105 VALVE, SAFETY RELIEF 1/2"...
- Page 29 800 CFM Spare Parts List Recommended Maintenance QTY. PART # DESCRIPTION Spare Interval TP7620-P1 VALVE, 2" POPPET INLET VALVE TP7620-P1-RK 1 year REPAIR KIT, 2" POPPET INLET VALVE TP7515-P1 VALVE, 1 1/2" POPPET EXHAUST VALVE TP7515-P1-RK 1 year REPAIR KIT, 1 1/2" POPPET EXHAUST VALVE TP7105 VALVE, SAFETY RELIEF 1/2"...
- Page 30 1000 CFM Spare Parts List Recommended Maintenance QTY. PART # DESCRIPTION Spare Interval TP7631-BD VALVE, INLET VALVE ASSEMBLY 3" TP7631-BV VALVE, INLET VALVE ONLY TP7631-BA ACTUATOR, INLET VALVE ACTUATOR ONLY TP7515-P1 VALVE, 1 1/2" POPPET EXHAUST VALVE TP7515-P1-RK 1 year REPAIR KIT, 1 1/2"...
- Page 31 1200 CFM Spare Parts List Recommended Maintenance QTY. PART # DESCRIPTION Spare Interval TP7631-BD VALVE, INLET VALVE ASSEMBLY 3" TP7631-BV VALVE, INLET VALVE ONLY TP7631-BA ACTUATOR, INLET VALVE ACTUATOR ONLY TP7520-P1 VALVE, 2" POPPET EXHAUST VALVE TP7520-P1-RK 1 year REPAIR KIT, 2" POPPET EXHAUST VALVE TP7105 VALVE, SAFETY RELIEF 1/2"...
- Page 32 1500 CFM Spare Parts List Recommended Maintenance QTY. PART # DESCRIPTION Spare Interval TP7641-BD VALVE, INLET VALVE ASSEMBLY 4" TP7641-BV VALVE, INLET VALVE ONLY TP7641-BA ACTUATOR, INLET VALVE ACTUATOR ONLY TP7520-P1 VALVE, 2" POPPET EXHAUST VALVE TP7520-P1-RK 1 year REPAIR KIT, 2" POPPET EXHAUST VALVE TP7110 VALVE, SAFETY RELIEF 1"...
- Page 33 2000 CFM Spare Parts List Recommended Maintenance QTY. PART # DESCRIPTION Spare Interval TP7641-BD VALVE, INLET VALVE ASSEMBLY 4" TP7641-BV VALVE, INLET VALVE ONLY TP7641-BA ACTUATOR, INLET VALVE ACTUATOR ONLY TP7520-P1 VALVE, 2" POPPET EXHAUST VALVE TP7520-P1-RK 1 year REPAIR KIT, 2" POPPET EXHAUST VALVE TP7110-150 VALVE, SAFETY RELIEF 1"...
- Page 34 2600 CFM Spare Parts List Recommended Maintenance QTY. PART # DESCRIPTION Spare Interval TP7641-BD INLET VALVE ASSEMBLY 4" TP7641-BV INLET VALVE ONLY TP7641-BA INLET VALVE ACTUATOR TP7532-B EXHAUST VALVE ASSEMBLY 3" TP7532-BV EXHAUST VALVE ONLY TP7531-BA EXHAUST VALVE ACTUATOR TP7110-150 VALVE, SAFETY RELIEF 1"...
- Page 35 3000 CFM Spare Parts List Recommended Maintenance QTY. PART # DESCRIPTION Spare Interval TP7641-BD INLET VALVE ASSEMBLY 4" TP7641-BV INLET VALVE ONLY TP7641-BA INLET VALVE ACTUATOR TP7532-B EXHAUST VALVE ASSEMBLY 3" TP7532-BV EXHAUST VALVE ONLY TP7531-BA EXHAUST VALVE ACTUATOR TP7110-150 VALVE, SAFETY RELIEF 1"...
-
Page 36: Section 11 Trouble Shooting Guide
Section 11 Trouble Shooting Guide PROBLEM CAUSE SOLUTION Dryer Not Operating (No 1. Blown control fuse Replace Fuse Lights On) 2. No power Apply correct power 3. Solid state controller inoperative Replace controller 1. C ontrol air shutoff Open Valve Dryer Not Operating (Lights On, Dryer does not switch) 2. - Page 37 Exhaust Valve on Drying or 1. Valve dirty C lean valve Repressurizing Tower Leaking 2. Defective diaphragms or O-rings Repair or replace 3. Leaking control solenoid Repair or replace Excessive Pressure Drop 1. Pre-filter dirty Replace element 2. Afterfilter dirty Replace element 3.
-
Page 38: Section 12 Wiring Diagrams
Section 12 Wiring Diagrams... -
Page 40: Section 13 High Humidity
Section 13 High Humidity Principle of Operation AIRTEK’s High Humidity Alarm (HHA) are circuits designed to function in conjunction with a Hygrosensor to provide on/off control for compressed air dryers. The HHA can also provide an alarm when humidity conditions exceed or go below a fixed setpoint. Operation of the controller is based on relay actuation at a predetermined resistance value. -
Page 41: Section 14 Timing Charts
Section 14 Timing Charts 100% Load Cycle (10 min) ME (M INUTES) 4:15 9:15 Solenoid 1 L. REGEN. Left Exhaus Normally Closed) Left Tow er rying Light Solenoid 2 R. DRY (Right Inlet - ormally Open) Right Tow e rying Light Solenoid 3 L. - Page 42 75% LOAD CYCLE (15 MIN) Tim e (Minutes) 12 13 14 15 1 Cycle Solenoid L. R EGEN . (Left Exhaust - Normally Closed) Left Tow Drying Light Solenoid De-Energized R . D R Y I N G (Right Inl et - Normally Open) Valves in "Normal"...
-
Page 43: Section 15 Analyzing Chart
Section 15 Analyzing Chart Date Inlet Flow (SCFM) Model Inlet Temperature Serial No. Purge Setting Ambient Temperature Compressor HP Operating Temperature 100% Load 75% Load 50% Load Short Cycle Test PRESSURE (PSIG) STATUS LIGHTS (X - WHEN ON) Left Purge Right Drying Regenerating... -
Page 44: Section 16 Powerloc System
Section 16 PowerLoc System Quick-Start for Dryers Equipped withPowerloc The following steps are all that is normally required for start-up of dryers equipped with the Powerloc System. Refer to the remainder of this manual for more detailed information on Powerloc Operation. Please read entire Dryer Manual before proceeding. - Page 45 Mounting the Probe Probes are shipped loose. Do not misplace or damage the probe. The probe consists of more than 2/3 the value of the unit. When a Powerloc is ordered with a dryer, a sample line for the probe is built into the dryer outlet.
- Page 46 POWERLOC DEW POINT MONITOR DISPLAY: The display is factory set to indicate either degrees ºF or degrees ºC. There are four Set Points. To view depress the down ‘down’ arrow (right button). Each time the down arrow pushbutton is depressed, the display will cycle to the next set point value. The Set Point number is displayed followed by the set point value.
-
Page 47: Section 17 Jc, Jt & Jl Filters
OTHER SETTINGS: All other settings (4-20mA ‘IN’, and 4-20mA ‘OUT;) have been factory set. IMPORTANT: it is possible to inadvertently access these program menus, it is advisable to not change any range settings; as this would make the unit not respond correctly. For POWERLOC units with three (3) wire probes, the following information will apply to the 4-20mA outputs on J3, pin 16 =(+) and pin 17 =(-). - Page 48 JW / JC Filters Relieve internal pressure by opening the manual vent valve. Disconnect drain lines at manual and automatic drain valves (if applicable). Unscrew filter collar from head of filter and remove bowl. Unscrew retaining cap from rod. ...
- Page 49 PRESSURE DROP (PSID) OF THE ELEMENT Replacement Element Initial PSID Element at PSID Coalescer - Dry New Coalescer - Wet New 6 - 8 Adsorber 4 - 6 Particulate 4 - 6 CAPACITY CORRECTION FOR FILTERS OPERATING AT NON STANDARD PRESSURES Operating Correction Operating...
- Page 50 FILTER RATINGS FOR DIFFERENT GASES Molecular Gas Density Correction Weight @ 68ºF, 14.6 Factor 0.07 1.00 Ammonia 0.04 1.30 Butane 0.16 0.70 Carbon Dioxide 0.11 0.81 Carbon Monoxide 0.07 1.02 Ethane 0.08 0.98 Ethylene 0.07 1.01 Halocarbon-12 0.32 0.48 Halocarbon-13 0.27 0.53 Halocarbon-22...
-
Page 51: Troubleshooting Chart
Troubleshooting Chart PROBLEM CAUSE SOLUTION To high of an initial pressure Air flow excessive for housing size or Install larger filter or coarser element drop filter media grade too fine. Premature Clogging 1. Lubricant improperly selected for C hange oil, consult with lubricant supplier compressor. - Page 52 It is important when a call is placed to us for a potential warranty situation, that the following information be provided: Model and serial number. Start-up date. Company name. Dryer location. Phone number. Contact person. Specific nature of complaint (Diagnostic code, high dew point, etc.). Important: Airtek reserves the right to deny claim submitted without our knowledge and proper authorization.
-
Page 53: Warranty Registration
WARRANTY REGISTRATION IMPORTANT! Mail or Fax (716-685-1010) Today! Fold and Seal and your Service Warranty will be registered immediately. We are here to help. For more information on service or installation call the Service Department at 1-888-606-9303 Model # Serial # Company Address City...
Need help?
Do you have a question about the Airtek TW 10 and is the answer not in the manual?
Questions and answers