Advertisement
Quick Links
Advertisement

Related Manuals for Camtree G-PM


Summary of Contents for Camtree G-PM
- Page 1 Camtree Power Mount Gripper (G-PM) Instruction Manual...
- Page 2 At Camtree, our goal is to ensure 100% Customer Satisfaction in all that we do. We back our sales with a 1 year warranty from the date of purchase and work hard to resolve any problems in the unlikely event one should arise.
- Page 3 Camtree family. By purchasing your Camtree Power Mount Gripper, you have just joined a host of designers, engineers, machinists, assembly, customer service and office staff that take great pride in all that they do.
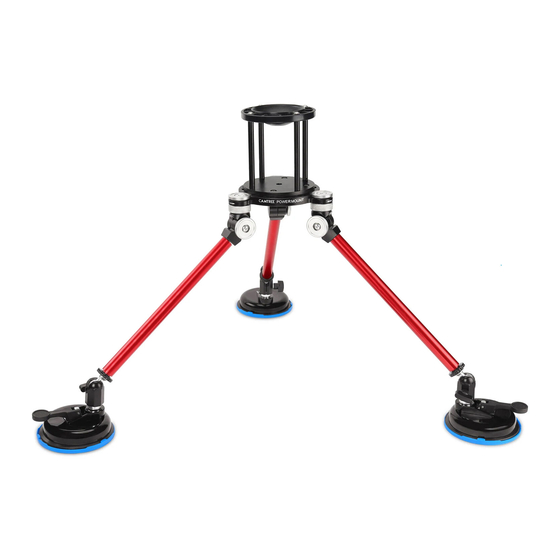
- Page 4 Introduction Capture your live actions on moving a vehicle with incredible freedom, style, and precision without worrying about the camera. Our Camtree Power Mount Gripper Car Suction Cup Mount is a perfect video equipment to execute those tricky moving shots with confidence!
- Page 5 Assembling Suction cup mounts can be affixed to just about any smooth surface on any vehicle. With a few pumps of the large pin on the side of each unit, suction mounts are good to go. Screw in the Ball Tilt Head on suction cups. Adjustable Ball Tilt Heads allow for an extensive range of lockable positions for the Aluminium Rods.
- Page 6 Note: Three rods are provided for each length – 3”, 6” & 12”. These rods can be linked together in any combination you need to create the perfect length Power Mount Gripper. Tighten the knob of Ball Tilt Head to lock it in a position.
- Page 7 Attach one end of Rope with metal Hooks to camera mounting platform and another end to Metal loop of Suction cup. Tighten the Rope properly. Now loosen the four Allen bolts on Camera platform, align 75mm bowl with it. ...
- Page 8 Now mount your Fluid Head (NOT Included) on Bowl Head. And then secure your camera set up on fluid head. To use the Rope Hooks, press the lever to loosen the rope. Remove the metal hook from Metal loop of suction cups. ...
- Page 9 You can also attach your camera set up directly to camera mounting platform with provided screw. The Camera mounting platform of the Power Mount Gripper has three leg attachment points that are each fitted with two positive locking ratchet joints, one for tilt and one for swivel. Each locking ratchet joint has a quick turn knurled lock ring foe easy adjustment.
- Page 10 Tilt Adjustments YOUR CAMTREE POWER MOUNT GRIPPER ALL DRESSED UP AND READY TO GO! (SHOWN WITH OPTIONAL ACCESSORIES) WARRANTY We offer a one year warranty for our products from the date of purchase. We will repair or replace your product, free of charge, in the event of a defect in materials or craftsmanship obtained during normal use or handling based on the user manual.
- Page 11 The warranty does not include, by the way of example, damage caused by products that we do not supply or from mishandling in transit, accident, misuse, neglect, lack of care of the product , or service by anyone other than our company. We are not liable for incidental or consequential damages resulting from the use of the unit or occurring due to any breach of this warranty.
Need help?
Do you have a question about the G-PM and is the answer not in the manual?
Questions and answers