Advertisement
Table of Contents
AUTOMOTIVE PRODUCTS,
ITEM
QUANTITY
1
1
ANTI-SEIZE LUBRICANT MUST BE USED ON ALL STAINLESS STEEL FASTENERS TO PREVENT THREAD DAMAGE AND GALLING
1. Remove contents from box, verify if all parts listed are present and free from damage.
Carefully read and understand all instructions before attempting installation.
Failure to identify damage before installation could lead to a rejection of any claim.
2. Lower the spare tire using the vehicle service tools located in the cab of the truck. Remove the center bracket by removing
(4) factory bolts with a 13mm socket. Raise spare tire back into position. See Fig. 1 &2.
3. Support the bumper with the two jack stands. Remove (8) factory bolts securing the factory cross member/hitch to the
frame rail with a 21mm socket. Set the (8) factory bolts aside for reuse during the hitch assembly installation. (Note: The
bumper shares the same mounting points and should be supported from underneath with the two jacks.) See Fig. 3.
INSTALLATION INSTRUCTIONS
CLASS III RECIEVER HITCH
APPLICATION:
2015-2016 Chevrolet Colorado
2015-2016 GMC Canyon
PART NUMBER:
65-1535
DESCRIPTION
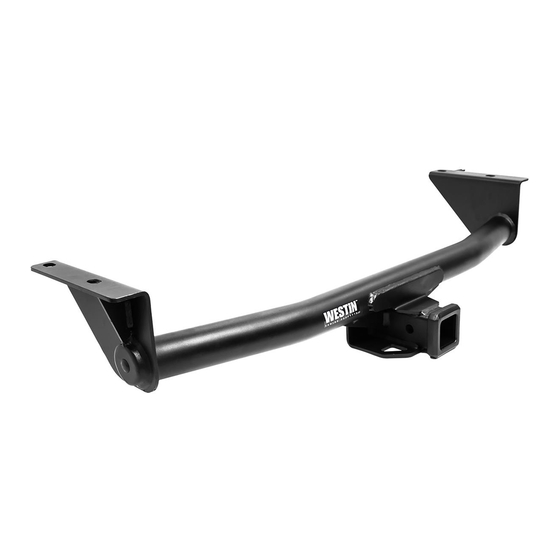
HITCH ASSEMBLY
PROCEDURE
1
TOOLS NEEDED
13MM SOCKET
21MM SOCKET
(2) JACK STANDS
9" SOCKET EXT.
RATCHET
TORQUE WRENCH
Main Hitch Assembly
Advertisement
Table of Contents

Subscribe to Our Youtube Channel
Related Manuals for Westin 65-1535


Summary of Contents for Westin 65-1535
- Page 1 INSTALLATION INSTRUCTIONS CLASS III RECIEVER HITCH APPLICATION: 2015-2016 Chevrolet Colorado AUTOMOTIVE PRODUCTS, 2015-2016 GMC Canyon PART NUMBER: 65-1535 ITEM QUANTITY DESCRIPTION TOOLS NEEDED HITCH ASSEMBLY 13MM SOCKET 21MM SOCKET (2) JACK STANDS 9” SOCKET EXT. RATCHET TORQUE WRENCH ANTI-SEIZE LUBRICANT MUST BE USED ON ALL STAINLESS STEEL FASTENERS TO PREVENT THREAD DAMAGE AND GALLING...
- Page 2 Lower spare tire Remove (4) bolts Fig. 1 Fig. 2 Remove center bracket Remove (4) factory bolts each side Refer to Fig. 4 Loosely secure the Hitch Assembly with the factory bolts Secure the bumper with the factory bolts Remove factory Cross member/ hitch Fig.
Need help?
Do you have a question about the 65-1535 and is the answer not in the manual?
Questions and answers