Advertisement
Quick Links
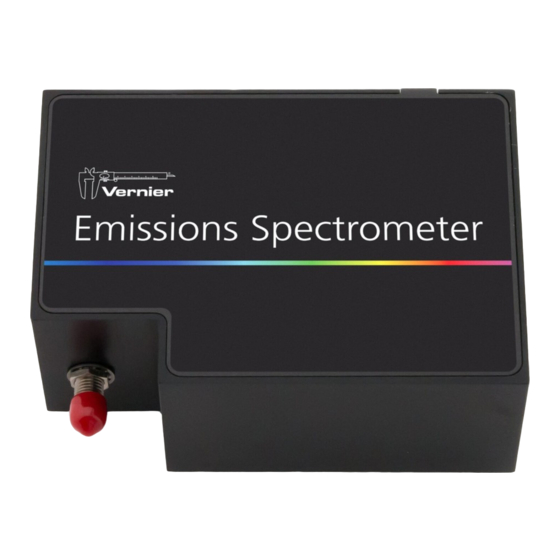
Vernier Emissions
Spectrometer
(Order Code: VSP-EM)
The Vernier Emissions Spectrometer is a
portable spectrometer designed to measure
emissions from a wide variety of light sources.
What is Included with the Vernier Emission Spectrometer?
Spectrometer
USB cable
Software Requirements
®
Logger Pro
3 (version 3.8.6.2 or newer) software is required if you are using a
computer. LabQuest App version 2.2.1, or newer, is required if you are using
LabQuest 2. LabQuest App 1.7.1, or newer, is required if you are using the original
LabQuest. Visit www.vernier.com/downloads to update your software.
NOTE: Vernier products are designed for educational use. Our products are not
designed nor are they recommended for any industrial, medical, or commercial
process such as life support, patient diagnosis, control of a manufacturing process, or
industrial testing of any kind.
Safety
No user-serviceable parts are in this device. Do not attempt to open or modify this
device. Contact Vernier for all repairs and service.
Handle the device with care. This instrument can be damaged if it is dropped.
Do not use this instrument for clinical or diagnostic procedures.
Using the Vernier Emissions Spectrometer with Your Computer
Getting Started
1. Ensure Logger Pro software (version 3.8.6.2 or newer) is installed on your
computer before using the Vernier Emissions Spectrometer.
2. Connect the Vernier Emissions Spectrometer to your computer with the supplied
USB cable.
3. Start Logger Pro software on your computer.
Measuring Emission Spectra
You may use your spectrometer to measure the emission spectrum of a light source
such as an LED or a gas discharge tube. To do so, you may wish to purchase an
optical fiber assembly (www.vernier.com/VSP-EM) though this is not required.
Measure Intensity of Light Emissions
Intensity is reported in relative units with a range of 0–1. Note: The spectrometer is
not calibrated for measuring absolute intensity.
Aim the sensor opening or the tip of the optical fiber cable at a light source.
Click
. Click
to end data collection.
If the spectrum saturates, displaying flat and wide peaks near 1.0, increase the
distance between the light source and the sensor or tip of the optical fiber cable. You
can also adjust data-collection parameters by choosing Set Up Sensors ►
Spectrometer from the Experiment menu. Reduce the Sample Time until peaks are
less than 1.0
Under some circumstances, you may want to intentionally saturate some peaks in
order to display weaker features. For example, in viewing a hydrogen spectrum, you
may safely saturate the red 656 nm line in order to see the blue lines near 400 nm.
Changing the Settings in Logger Pro 3
Spectrometer Dialog Box
The Spectrometer dialog box lists all the settings for the device. To display this box
choose Set Up Sensors ► Spectrometer from the Experiment menu.
For most experiments, the default settings work well.
There are four parameters listed in the dialog box.
Sample Time: this is similar to the shutter speed of a camera. Logger Pro has a
stored sample time. You may need to change the sample time manually.
Wavelength Smoothing: the number of adjacent readings on either side of a
given value that is used to calculate an average value. Large values will broaden
sharp peaks.
Samples to Average: the number of scans taken to calculate an average scan. Use
a value more than 1 to reduce noise.
Wavelength Range: the range is determined by the type of spectrometer in use.
By clicking on the picture of the spectrometer in this dialog box, you will gain
access to four options: calibrate, configure data collection, go to the support web
page, and units of measure. Click on an item to select it.
Overlaying Data on the Same Graph
You may wish to bring data from another Logger Pro 3 file into a current file. This
is easily done. Using the example of testing the fluorescent lighting in a classroom
for the presence of mercury, follow these steps in Logger Pro.
1. Measure the emission spectrum of a fluorescent lamp.
2. Open the File menu and choose Import From ► Logger Pro file.
3. From the Experiment folder, open Sample Data ► Physics ► Gas Discharge
Spectra ► Mercury.
4. Place your cursor anywhere on the Logger Pro graph screen and double-click. In
the Graph Options dialog box, click the Options tab.
5. In the Y-axis Columns box, open Run 1 and select the check box next to
Intensity. Click
.
2
Advertisement

Related Manuals for Vernier VSP-EM


Summary of Contents for Vernier VSP-EM
- Page 1 You may need to change the sample time manually. Wavelength Smoothing: the number of adjacent readings on either side of a NOTE: Vernier products are designed for educational use. Our products are not given value that is used to calculate an average value. Large values will broaden designed nor are they recommended for any industrial, medical, or commercial sharp peaks.
- Page 2 www.vernier.com Rev. 1/2/2014 Logger Pro, Logger Lite, Vernier LabQuest, Vernier LabQuest Mini, Vernier LabPro, Go! Link, Vernier EasyLink and other marks shown are our trademarks or registered trademarks in the United States. All other marks not owned by us that appear herein are the property of their respective owners, who may or may not be affiliated with, connected to, or sponsored by us.
Need help?
Do you have a question about the VSP-EM and is the answer not in the manual?
Questions and answers