Advertisement
Quick Links
Setup Guide
Before you start filming, there are a few simple steps
to follow to ensure your Magic Carpet PRO is
assembled correctly and you're sliding smoothly.
This guide will walk you through the correct Magic
Carpet Pro set up, as well as some helpful tips.
Additional resources can be found at
support.syrp.co.nz
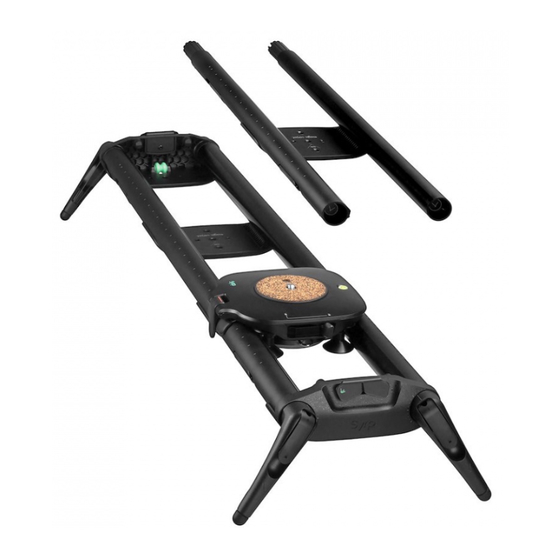
Install the End Caps
Unlock both the Track Locks and insert the
End Caps.
Close the Track Locks securing the End
Caps in place.
UNLOCK
Insert evenly with the
End Caps flush with the
Track Ends.
Remove Track Joiners
Lift open both Track Locks and pull out the
Track Joiners.
The Track Joiners are only required when
joining multiple tracks together.
Adjust the Legs
Lift open the Leg Locks to release the legs
and set the leg angle.
LOCK
LOCK
Orientate the carriage with
the Carriage Lock on the
same side as the Flywheel
Tread!
UNLOCK
UNLOCK
FIRMLY TO
Fine leg adjustment can be
achieved by twisting the
foot.
Install the Carriage
Slide the Carriage on to the Track Rails.
Flywheel
Tread
Carriage
Lock
Ensure you lock the carriage
once installed and when not
in use.
Remove the Quick Release Plate
Slide the Quick Release Lock to unlock and
push in while pulling the Plate up to remove.
PUSH IN
UNLOCK
LOCK
Advertisement

Related Manuals for Syrp MAGIC CARPET PRO


Summary of Contents for Syrp MAGIC CARPET PRO
- Page 1 Flywheel Flywheel Tread! Before you start filming, there are a few simple steps Tread to follow to ensure your Magic Carpet PRO is assembled correctly and you’re sliding smoothly. Carriage Lock This guide will walk you through the correct Magic Carpet Pro set up, as well as some helpful tips.
- Page 2 Fasten Quick Release Plate Mount Camera Engage Flywheel Screw the Quick Release Plate to your video Push the Quick Release Plate down into the Press the Flywheel button in to engage or head. carriage. You will hear a click when it’s flush release the Flywheel.
Need help?
Do you have a question about the MAGIC CARPET PRO and is the answer not in the manual?
Questions and answers