Table of Contents
Advertisement
Advertisement
Table of Contents

Related Manuals for BAS-IP AK-10


Summary of Contents for BAS-IP AK-10
- Page 1 AK-10 AK-10 Exported on 02/10/2020...
-
Page 2: Table Of Contents
Table of Contents Device description....................6 Appearance............................. 6 Technical parameters....................7 Main features ...........................7 Possibilities of connection......................7 Functional capabilities .........................7 Additional ............................8 Configuration through graphical interface ..........9 Main screen ............................. 9 Call menu ............................9 In call menu ..................................12 Contacts .................................. - Page 3 Silence mode ................................36 Call ringtone.................................. 37 Language ..................................37 Wallpaper..................................38 VOIP settings................................40 Intercom ..................................40 Room ....................................41 SIP ..................................... 43 DTMF ....................................44 Default panel view mode ............................44 Network ..................................45 Administrator password............................46 Security settings................................47 Scenes settings................................47 Zones ....................................
- Page 4 SOS/Concierge button ............................. 66 Network ............................67 Security............................67 IP cameras ..................................67 Security scenes settings............................68 Security sensors settings ............................68 Notification..................................70 Advanced............................72 Standby mode................................72 Service links .................................. 74 System ............................74 Language ..................................74 Settings................................... 75 Firmware upgrade ..............................
- Page 5 • Device description (see page 6) • Technical parameters (see page 7) • Configuration through graphical interface (see page 9) • Configuration through web interface (see page 61) • Installation and connection (see page 78) • Integrations (see page 81) – ...
-
Page 6: Device Description
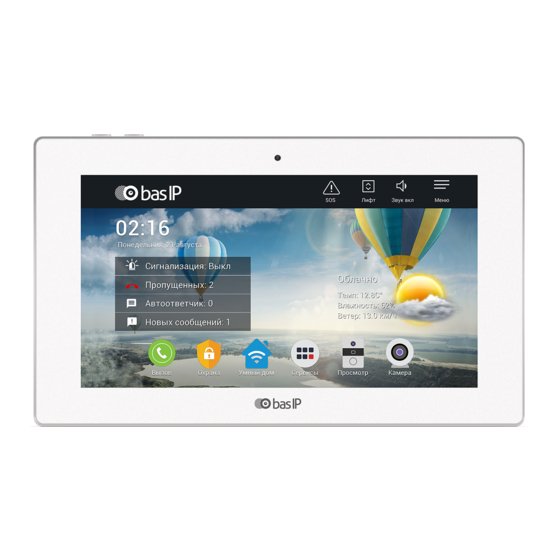
Device description IP intercom in stylish design with a 10 inch screen and built-in camera. Engineering solutions have taken a big step forward,and we are pleased to offer a new 10-inch screen. The intercom has become faster, more reliable and more functional. Intercom controlling is even easier and more convenient with the new operating system and capacitive screen. -
Page 7: Technical Parameters
Technical parameters Main features Display: 10 ”TFT LCD, capacitive touchscreen Screen resolution: 1024 × 600 Built-in camera: Yes Power: PoE and + 12 Volts Power consumption: 6 W, standby 2.5 W Dimensions: 270 × 168 × 25 mm Display dimensions: 266 × 164 mm Colors: White, black Body: Plastic Installation Type: Wall mount... -
Page 8: Additional
Scenarios: Yes Answering machine: Yes Support of receiving messages: Yes Multimedia features: View video, photo and audio files from an SD card Standby mode: Yes, customizable by time Select the type of screensaver in standby mode • Quadsplitter • Clock •... -
Page 9: Configuration Through Graphical Interface
Configuration through graphical interface • Main screen (see page 9) • Call menu (see page 9) • Security menu (see page 22) • Home automation menu (see page 23) • Services menu (see page 27) • Monitoring menu (see page 27) •... - Page 10 - Incoming calls - outgoing calls - missed calls Call line consists of: • subscriber's number • type of subscriber's number: • individual panel • multi apartment panel • user's device • call type, date, time and duration of conversation. To display additional options of the call on the list you just press it once.
- Page 11 Call: Call the selected number back. Photo/videos: Navigating to the Preview photo/video menu of this conversation. Save to SD card: Saving photo/video to SD card. - Delete a recording from the list. Configuration through graphical interface – 11...
-
Page 12: In Call Menu
In call menu During the call, following window appears: 192.168.1.63 - The address of the device with which the connection is established. - End call button. - Open the lock button. - Save photo button. - Save video button. - Button to open the keypad. - Turn on/off microphone button. -
Page 13: Contacts
Contacts Use the dialer to add a contact and press the Add button in the upper left corner. Configuration through graphical interface – 13... - Page 14 Enter name: Contact name input field. Format: Displayed value input format. Example: Entering values example. Configuration through graphical interface – 14...
- Page 15 A choice of several additional parameters is also available: Inner number and SIP number. In them, you can select several types of contacts for correct recording and subsequent display in various sections of the monitor. Inner number Regular number Single panel Multi apartment panel Configuration through graphical interface – ...
- Page 16 Add to favorites: Selected numbers are displayed at the top of the contact list. Use as default camera: Selected panels will appear first in the monitoring menu. SIP number Add to favorites: Selected numbers are displayed at the top of the contact list. After clicking on the "Add new contact"...
- Page 17 A single click on the contact will display more detailed information: In this menu, you can add a contact to your favorites so that it appears at the top of the contact list. Configuration through graphical interface – 17...
- Page 18 By pressing the button in the upper left corner, you can edit or delete a contact. By pressing the call button on the right, the call is made. Configuration through graphical interface – 18...
-
Page 19: Synchronized Devices
Synchronized devices This menu displays additional monitors that have the same logical address, but different sequence numbers. Configuration through graphical interface – 19... - Page 20 By clicking the button in the upper left corner near the contact will display the name editing menu. In the window that opens, you can enter the name of the additional monitor you want to display. After pressing the "OK" button, the window closes and the previous menu is displayed. Configuration through graphical interface – ...
- Page 21 After clicking on the "Delete" button, in the lower right corner, a window will appear in which you can restore the default values of devices. Configuration through graphical interface – 21...
-
Page 22: Security Menu
Security menu Enable/disable alarm in this menu and go to the IP camera Preview menu. Configuration through graphical interface – 22... -
Page 23: Home Automation Menu
Home automation menu The automation menu looks like this: This menu includes submenus: Scenes Configuration through graphical interface – 23... -
Page 24: Lights
You can choose one of the scripts, previosly defined and written in automation modules through software in advance. Lights Configuration through graphical interface – 24... -
Page 25: Air Conditioning
This menu allows different groups of lights to be controlled in separate rooms (using module SH-62). Air conditioning This menu allows controlling air conditioners in separate rooms. Curtains Configuration through graphical interface – 25... -
Page 26: Elevator
This menu allows controlling curtains in separate rooms. Elevator In this menu, you can call the elevator (when using the elevator control module EVRC IP). Configuration through graphical interface – 26... -
Page 27: Services Menu
Services menu In this menu, buttons are displayed to quickly navigate to the links specified in the monitor settings menu. Monitoring menu In this menu you can watch the outdoor panels camera. Configuration through graphical interface – 27... - Page 28 - Lock opening button. - Button to switch between individual and multi apartment panels. Switching between the panels is done by the arrows "left" and "right". - Start view button - Stop view button. - Mute/unmute button. By clicking on the button in the upper right corner, you can switch to the view mode for panels added to the "Contacts "...
-
Page 29: Ip Cameras View Menu
IP cameras view menu This menu allows to view IP cameras streams, switching between them in the list. Select a camera in the list by scrolling through the list and clicking on the camera name. Configuration through graphical interface – 29... -
Page 30: Messages Menu
- Play button. - Stop button. Messages menu This menu displays messages received from the concierge or the managing organization. If the message came to the monitor, the following interface will appear in this menu: Double tap on the message to read it. Configuration through graphical interface – ... -
Page 31: Monitor Settings Menu
After reading the message, the number of unread messages on the main screen will decrease by one and the menu will look like this: Monitor settings menu Monitor is set up through the corresponding menu on the main display. Configuration through graphical interface – 31... - Page 32 Tap the monitor settings menu to open. Configuration through graphical interface – 32...
-
Page 33: General Settings
The button is displayed on the main screen of the monitor and makes a call in a specified direction (through SIP or internal protocol), when pressed. Data format for calling through SIP: sip:5544@sip.bas-ip.com Where 5544 - number of called subscriber, sip.bas-ip.com - SIP server address. Data format for internal calls: Configuration through graphical interface – 33... -
Page 34: Widget
Widget Monitor supports several different widgets: weather widget and application widgets. Using weather widget: Enable/disable weather widget displayed on the main display. Auto-detect city by IP: Enable/disable automatic weather detection function by IP address (If there is Internet access). Current location: Choosing a location by entering the name and selecting a city from the list. Wind speed can be displayed both in km/h and miles/h. -
Page 35: Display
Display Brightness: Screen brightness adjusting. Do not disturb mode Turning on this function, you can specify a time interval in which all incoming calls to the monitor will be received without sound and the screen will not be activated. Configuration through graphical interface – 35... -
Page 36: Silence Mode
All calls to the monitor in this mode will be displayed in Missed Calls on the main screen. Enable mode from main screen of the monitor To turn on this mode from the monitor's main screen, it is enough to press "Sound modes"... -
Page 37: Call Ringtone
Call ringtone Choose ringtone from list: Choose melody from the list of standart melodies. Ringtone volume: Ringtone volume adjustment. Language Configuration through graphical interface – 37... -
Page 38: Wallpaper
Choose language: Choose system language. Wallpaper Choose wallpaper from the list: Choose wallpaper from the list of default wallpapers. Configuration through graphical interface – 38... - Page 39 Choose wallpaper from the file system: Choosing wallpaper from the file system (The resolution of the image should be no more than 1024 * 600 pixels for correct displaying). Configuration through graphical interface – 39...
-
Page 40: Voip Settings
VOIP settings Intercom Configuration through graphical interface – 40... -
Page 41: Room
Camera: Turn on/off the monitor camera. Auto hung up after opening: Automatically end a call 3 seconds after pressing the "Open" button during a call. Answerphone: The function of an automatic call receiving by the monitor after 30 seconds of not answering the call for recording a video message. - Page 42 Building: building number 0001-9999 Unit: Unit number 00-99 Floor: Floor number 00-99 Room: Room number 01-99 Device: The sequence number of the monitor in the system. If the monitor is one, it is necessary to set "0" in this line. If there are several monitors, then the numbering should begin with "0"...
-
Page 43: Sip
MS IP address: The address of the PC or server where the monitoring software for the intercom system is installed: Management Software or Link. Password: Access password. Enable/Disable: Enable/disable SIP registration. Proxy: A proxy SIP server that can be represented by both an IP address and a domain name. ... -
Page 44: Dtmf
Password: Password of SIP number. DTMF Lock Name #1: The name displayed near the first lock button. Default value: Enable/disable the function to send a standard value when the button to open the first lock is pressed (the internal protocol command to open the door). Lock code #1: DTMF code transmitted when the first lock button is pressed. -
Page 45: Network
In this menu, you can choose which panels will be displayed when you go to the monitoring menu. Network DHCP: enable/disable mode to get network settings automatically. IP: Internal monitor IP address. Default values By default, internal monitor can have a static IP address 192.168.1.90 or 192.168.1.91. Mask: Subnet Mask. -
Page 46: Administrator Password
Current MAC: Displays the MAC address of the monitor. Administrator password Old password: Current password input field. By default, admin password is 123456. New password: New password input field. Confirm: New password confirmation field. Configuration through graphical interface – 46... -
Page 47: Security Settings
Security settings Scenes settings Setup scenes: After pressing this button, following window will apear: Configuration through graphical interface – 47... -
Page 48: Zones
A total of 3 scenarios are available: Out, Home, and Sleep. Depending on each scenario, you can customize the logic of the triggering of certain loops. Activation time: The time after which a particular scenario is activated. You can set up delay from 0 to 300 seconds. Zones Setup zones: After pressing this button, following window will apear: Configuration through graphical interface – ... - Page 49 №: Number of the sensor. Тип: Type o the sensor. Normal mode - the sensor is activated only when the system is armed and if this sensor is selected in the paragraph above. Usually this type is used for door and window sensors.
-
Page 50: Ip Camera Settings
Sensor: Selects the display type of the sensor for additional informativity when triggered. Display during an alarm By setting the required value for the connected sensor, the sensor number and its name will be displayed on the monitor when the alarm is triggered. ... - Page 51 After selecting the required number of cameras, the following fields will be available in this window: IP Camera Name: Desired to display the camera name. RTSP URL: RTSP string to get the camera stream. The string is usually indicated in the installation instructions that comes with the camera.
-
Page 52: Smart Settings
Old password: Current password input field. By default, user password is 1234. New password: New password input field. Confirm: New password confirmation field. Smart settings Room setting When you go to this menu, the following interface will be displayed: Configuration through graphical interface – 52... -
Page 53: Light Setting
In this menu you can setup name of each room Function is available only on the main monitor. Light setting When you go to this menu, the following interface will be displayed: Configuration through graphical interface – 53... -
Page 54: Service Settings
In this menu you can setup names for each group of lightning for each button. Service settings Configuration through graphical interface – 54... -
Page 55: Standby Mode
Standby mode After: Choosing time interval after which monitor will go to standby mode. Anouncement URL: The line for entering a link to an advertisement. This can be either an RTSP string or a standard WEB page. Timeout: Timeout advertising. Screensaver: Turn on / off screen saver in standby mode. - Page 56 Type: The desired type of splash screen. Clock Turn off after: Clock screensaver timeout. Photoframe Show clock: Turn on / off the clock display in the photo frame mode. Turn off after: Photo frame display timeout. Configuration through graphical interface – 56...
- Page 57 IP cameras: In this mode IP cameras can be shown in three modes: Single camera Choose IP camera: Select the camera to be displayed in standby mode. Turn off after: IP camera view timeout. Quad splitter IP camera 1-4: Selection of cameras which will be displayed. Turn off after: IP camera view timeout.
-
Page 58: Service Links
When using quad splitter mode, it is necessary to specify the RTSP lines of the additional stream of cameras with a resolution of no more than 720х576 pixels for correct displaying. Tour Time interval: switching time between cameras. Turn off after: IP camera view timeout. Service links Configuration through graphical interface – ... -
Page 59: Settings Menu
This menu sets the main links to the buttons for the services menu. Settings menu This menu displays installed applications and has access to system settings. Configuration through graphical interface – 59... - Page 60 Configuration through graphical interface – 60...
-
Page 61: Configuration Through Web Interface
Configuration through web interface • Login (see page 61) • Dashboard (see page 62) • Intercom (see page 63) • Network (see page 67) • Security (see page 67) • Advanced (see page 72) • System (see page 74) Login To configure the internal monitor remotely through the Web interface, you need to connect to it via the Internet browser on your PC. -
Page 62: Dashboard
Dashboard Framework: Version of Framework. VoIP: Version of VOIP app. Security: Version of Security app. Smart: Version of Smart home app. Web Server: Version of Web server. Launcher: Version of Launcher app. Quad Splitter: Version of Quad splitter app. Services: Version of Services. Silent mode Enable/disable: Enable disable silent mode. -
Page 63: Intercom
Intercom Address settings Building: building number 0001-9999 Unit: Unit number 00-99 Floor: Floor number 00-99 Room: Room number 01-99 Device number: The sequence number of the monitor in the system. If the monitor is one, it is necessary to set "0" in this line. If there are several monitors, then the numbering should begin with "0"... -
Page 64: Sip
MS Password: Access password. Enable/Disable: Enable/disable SIP registration. Proxy: A proxy SIP server that can be represented by both an IP address and a domain name. Data format: Before the proxy address, you must specify "sip:". Server: SIP server address. Data format: Сan be represented by both an IP address and a domain name. -
Page 65: Advanced Intercom Settings
Lock Name #1: The name displayed near the first lock button. Default value: Enable/disable the function to send a standard value when the button to open the first lock is pressed (the internal protocol command to open the door). Lock code #1: DTMF code transmitted when the first lock button is pressed. ... -
Page 66: Calls Forward
Total count: The number of active redirects (up to four redirects). URL: Direction for parallel call forwarding when an incoming call is made to the internal monitor. Example sip:1155@sip.bas-ip.com Forwarding to the specified directions is activated when making calls to the monitor using an internal protocol. -
Page 67: Network
SIP number of any device. Data format for calling through SIP: sip:5544@sip.bas-ip.com Where 5544 - number of called subscriber, sip.bas-ip.com - SIP server address. Data format for internal calls: Network DHCP: enable/disable mode to get network settings automatically. ... -
Page 68: Security Scenes Settings
After selecting the necessary number of cameras, the following fields will be available in this window: Name: Display the desired name of the camera. URL: RTSP-line to get the camera stream. The string is usually listed in the installation instructions that come with the camera. ... - Page 69 No: Number of the sensor. Type: Type o the sensor. Sensor type Normal mode - the sensor is activated only when the system is armed and if this sensor is selected in the paragraph above. Usually this type is used for door and window sensors.
-
Page 70: Notification
Sensor: Selects the display type of the sensor for additional informativity when triggered. Display during an alarm By setting the required value for the connected sensor, the sensor number and its name will be displayed on the monitor when the alarm is triggered. ... - Page 71 Heartbeat: Enable/disable the additional alert on alarm triggering on the internal monitor via SIP protocol. Notification occurs by sending SIP messages to the specified SIP number on which the BAS-IP Intercom application is installed for the specified interval in seconds.
-
Page 72: Advanced
Sensor #1-Sensor #16: A text entry field sent in a SIP message when a specific alarm sensor triggers. Advanced Enable/disable: Enable/disable advertisement in the standby mode URL: The line for entering a link to an advertisement. This can be either an RTSP string or a standard WEB page. - Page 73 There is 5 differnent types of modes are available in standby mode: clock, photo frame, IP camera single, IP camera tour, IP camera in the quad splitter. Photoframe With clock: Enable/disable clock display in the photo frame mode. Photos directory path: The path in the file system where the photos are located for display.
-
Page 74: Service Links
Select camera 1-4: Selection of IP cameras which will be displayed in the quad splitter mode. When using the quad splitter mode, you must specify the RTSP lines of the additional stream of cameras with a resolution of not more than 1024 * 600 pixels for correct display. -
Page 75: Settings
Settings Choose file: Select a monitor configuration file from the PC file system. Backup settings: Save and export monitor configuration files. Backup photo: Save and export all photos of visitors to the PC file system. Reset to default settings: Reset all internal monitor settings to factory settings. Reset records: Delete all calls from the the call menu. -
Page 76: Reboot
URL: The input field for the IP address or domain of the custom update server. Choose file: Select software update file from PC file system. Check file: File validation. Check for updates: Check for software update on BAS-IP server or user server. Update firmware: Start fimware update. ... - Page 77 Old password: Current password input field. By default, admin password is 123456. New: New password input field. Confirm: New password confirmation field. Configuration through web interface – 77...
-
Page 78: Installation And Connection
Installation and connection This page describes the process of mounting and connection the monitor. • Completeness check of the product (see page 78) • Electrical connection (see page 78) • Mechanical mounting (see page 79) • Connection of the additional modules (see page 80) Completeness check of the product Before installing the monitor, be sure to check that it is complete and all components are... -
Page 79: Mechanical Mounting
Mechanical mounting Before installation of a monitor, it is necessary to drill a hole or a recess into a wall with a 68 mm (2.68in) diameter under the standard mounting box for a 65x45 mm (2.56x2.13in) socket. It is necessary for switching of wires and installation of the monitor. Attach ... -
Page 80: Connection Of The Additional Modules
Protocol converter SH-61 or SH-71 • Light contol module SH-62 • Curtains control module SH-63 • Wireless switches SH-72, SH-73, SH-74, SH-75, SH-78 • Outdoor siren • Call button on one of the alarm loops. https://wiki.bas-ip.com/download/attachments/2752901/AG-04_AQ-07_AQ-07L_AR-07_AK-10.pdf? api=v2&modificationDate=1566306875992&version=2 Installation and connection – 80... -
Page 81: Integrations
Integrations The list of companies and their products that are integrated and work together with BAS-IP equipment: CCTV systems • Pelco • Milestone • Dahua • Hikvision Hikwatch • ITV Axxonsoft “Intellect” • DSSL “Trassir” • Macroscope • DevLine “Line”... - Page 82 • Inner Range • Sigur (Sphinx) • PERCo • Parsec • Kodos • Elsys • Iron Logic • Nedap • TSS • Legos • Guardian “A.C. Tech ” • StorkAccess Store • AxessTMC • Car “S2000, Orion, Aegis” • AlphaOpen “Alpha Logic” •...
Need help?
Do you have a question about the AK-10 and is the answer not in the manual?
Questions and answers