Table of Contents
Advertisement
Available languages
Available languages
Quick Links
Congratulations on your latest furniture purchase! Dorel Living furniture has been developed
with quality, convenience and style in mind. We trust it will provide you with many years of
exceptional comfort and service.
Before beginning assembly, we encourage you to familiarize yourself with your new furniture
piece by taking a few minutes to go through this booklet. It contains important information on
our warranty and care tips to keep your furniture looking as good as new.
Customer satisfaction is important to us at Dorel Asia. Our agents are available Monday to
Friday 8am to 5pm (EST) to answer any question you may have. For faster service, always
have the model number ready when calling our toll free number 1-800-295-1980 or emailing us
at das@dorel.com .
For more great furniture ideas, check out our website at
You can also keep up to date on all the latest trends by liking our
Date of Purchase: _____ / _____ / _____
DO NOT RETURN PRODUCT TO THE STORE. If a part is missing or damaged, contact our
customer service department. We will replace the part FREE of charge.
NOTE: THIS INSTRUCTION BOOKLET CONTAINS IMPORTANT SAFETY INFORMATION.
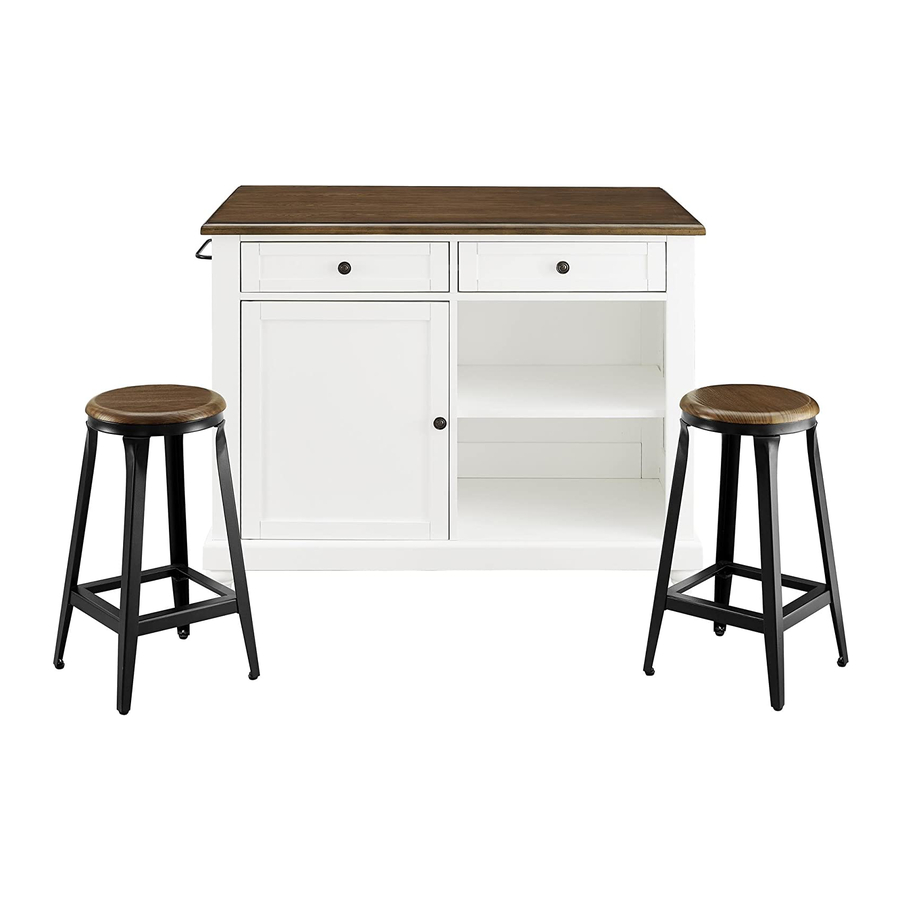
Kitchen Island with 2 Stools
Model Number:
DA7867
PLEASE READ AND KEEP FOR FUTURE REFERENCE.
UPC Code:
0-65857-17806-7
www.dorelliving.com
Lot Number:
(taken from carton)
Facebook
page.
Advertisement
Table of Contents

Related Manuals for Dorel DA7867


Summary of Contents for Dorel DA7867
- Page 1 Customer satisfaction is important to us at Dorel Asia. Our agents are available Monday to Friday 8am to 5pm (EST) to answer any question you may have. For faster service, always have the model number ready when calling our toll free number 1-800-295-1980 or emailing us at das@dorel.com .
- Page 2 LIMITED WARRANTY Dorel warrants its product to be free from defects in material and workmanship and agrees to remedy any such defect. This warranty covers 1 year from the date of original purchase. This warranty is valid only upon presentation of proof of purchase.
-
Page 3: Hardware List
Kitchen Island with 2 Stools DA7867 HARDWARE LIST ∅5/32"*1" CAM BOLT CAM LOCK FLAT HEAD SCREW 28 PCS 28 PCS 16 PCS ∅8*30mm ∅5/32"*7/8" ALLEN KEY WOOD DOWEL ROUND HEAD BOLT 1 PC 18 PCS 3 PCS ∅1/8"x12mm ∅32*20mm PLATE... - Page 4 Kitchen Island with 2 Stools DA7867 HARDWARE LIST ∅5/32"*5/8" DRAWER STOPPER ROUND HEAD SCREW SHELF SUPPORT 2 PCS 8 PCS 8 PCS ∅1/4"*1/2" ∅1/4"*1" ∅1/8"*1/2" BOLT BOLT ROUND HEAD SCREW 34 PCS 3 PCS 2 PCS...
-
Page 5: Parts List
Kitchen Island with 2 Stools DA7867 PARTS LIST LEFT SIDE PANEL RIGHT SIDE PANEL UPPER RAIL 1 PC 1 PC 1 PC BACK PANEL BOTTOM RAIL MIDDLE PANEL 1 PC 1 PC 1 PC BOTTOM PANEL BUN FOOT SUPPORT LEG... - Page 6 Kitchen Island with 2 Stools DA7867 PARTS LIST VERTICAL PANEL UPPER PANEL FRONT UPPER RAIL 1 PC 1 PC 1 PC TOP PANEL ADJUSTABLE SHELF DOOR PANEL 1 PC 2 PCS 1 PC DRAWER FRONT DRAWER SIDE DRAWER BACK 2 PCS...
- Page 7 Kitchen Island with 2 Stools DA7867 PARTS LIST DRAWER BOTTOM TOWEL RACK METAL SUPPORT 2 PCS 1 PC 3 PCS SEAT BOARD SEAT FRAME STRETCHER FRAME 2 PCS 2 PCS 2 PCS 8 PCS...
- Page 8 Kitchen Island with 2 Stools DA7867 STEP 1 Attach drawer sides (Q) to drawer front (P) with flat head screws (3). Slide drawer bottom (S) into the grooves of the drawer sides (Q) and drawer front (P). Attach drawer back (R) to drawer sides (Q) with flat head screws (3). Make sure the drawer bottom (S) fit into the groove of the drawer back (R).
- Page 9 Kitchen Island with 2 Stools DA7867 STEP 2 Insert cam bolts (1) into right side panel (B). Insert cam locks (2) into the upper rail (C) and bottom rail (E) as shown Attach upper rail (C) and bottom rail (E) to right side panel (B) and secure by rotating cam locks (2) 1/2-turn clockwise using Phillips head screwdriver (not included).
- Page 10 Kitchen Island with 2 Stools DA7867 STEP 3 Insert cam bolts (1) and wood dowels (5) into right side panel (B). Insert cam locks (2) into the middle panel (F). Attach middle panel (F) to right side panel (B) and secure by rotating cam locks (2) 1/2-turn...
- Page 11 Kitchen Island with 2 Stools DA7867 STEP 4 Insert cam bolts (1) into left side panel (A). Insert cam locks (2) into the middle panel (F), upper rail (C) and bottom rail (E) as shown below. Insert wood dowels (5) into the middle panel (F).
- Page 12 Kitchen Island with 2 Stools DA7867 STEP 5 Insert cam bolts (1) and wood dowels (5) into middle panel (F). Insert cam locks (2) into the upper panel (K). Attach upper panel (K) to the middle panel (F) and secure by rotating cam locks (2) 1/2-turn...
- Page 13 Kitchen Island with 2 Stools DA7867 STEP 6 Attach front upper rail (L) to left and right side panels (A & B) and upper panel (K) with bolts (14) as shown. Use Allen key (4) to tighten the bolts (14).
- Page 14 Kitchen Island with 2 Stools DA7867 STEP 7 With the help of another person, turn the assembled unit upside down. Insert cam bolts (1) and wood dowels (5) into middle panel (F) with a Phillips head screwdriver (not included). Insert cam locks (2) into the vertical panel (J).
- Page 15 Kitchen Island with 2 Stools DA7867 STEP 8 Insert cam bolts (1) into bottom panel (G) with a Phillips head screwdriver (not included.) Insert wood dowels (5) into side panels (A & B) and the vertical panel (J). Insert cam locks (2) into vertical panel (J), and side panels (A & B) as shown.
- Page 16 Kitchen Island with 2 Stools DA7867 STEP 9 Install bun feet (H) and support leg (I) to bottom panel (G) by rotating clockwise. With the help of another person, turn the unit upright.
- Page 17 Kitchen Island with 2 Stools DA7867 STEP 10 Attach drawer stops (10) to the middle panel (F) with round head screws (15) and a Phillips head screwdriver (not included). Insert cam bolts (1) into top panel (M). Insert wood dowels (5) into side panels (A & B).
- Page 18 Kitchen Island with 2 Stools DA7867 STEP 11 Attach knob (9) to door panel (O) with bolt (6). Attach metal plate (7) to door panel (O) with flat head screws (8). Install door (O) by pushing down the door pins and inserting the door into the holes on middle panel...
- Page 19 Kitchen Island with 2 Stools DA7867 STEP 12 Insert shelf supports (12) into the holes on the side panels (A & B) and vertical panel (J). Place adjustable shelves (N) onto the shelf supports (12) as shown below. Insert the previously assembled drawers into the unit.
- Page 20 Kitchen Island with 2 Stools DA7867 STEP 13 Attach metal support (U) to side panels (A & B) and upper rail (C) with bolts (13). Attach towel rack (T) to left side panel (A) with bolts (13). Use Allen key (4) to tighten the bolts (13).
- Page 21 Kitchen Island with 2 Stools DA7867 STEP 14 Attach legs (Y) to seat frame (W) with bolts (13). Leave the bolts loose. Attach stretcher frame (X) to the legs (Y) with bolts (13). Use Allen Key (4) to install the bolts (13).
- Page 22 Kitchen Island with 2 Stools DA7867 STEP 15 Attach seat frame (W) to seat board (V) with round head screws (11). NOTE: Screws (11) will make their own holes. Do not use power tools and do not over tighten the screws.
- Page 23 Kitchen Island with 2 Stools DA7867 NOTE - Feet (H) and stool legs (Y) are equipped with adjustable levelers. Rotate the adjustable levelers to make sure the kitchen island and stools rest evenly on the floor. adjustable leveler...
- Page 24 Kitchen Island with 2 Stools DA7867 CAUTION: This unit is intended for use only with the products and/or maximum weights indicated. Use with other products and/or products heavier than the maximum weights indicated may result in instability or cause possible injury.
-
Page 25: Customer Service
MODEL #: DA7867 Customer Service PLEASE DO NOT RETURN THIS PRODUCT TO THE STORE PLEASE CONTACT CUSTOMER SERVICE REPRESENTATIVES AT THE FOLLOWING NUMBERS SHOULD THERE BE ANY MISSING OR DEFECTIVE PART(S). Customer Service Phone Number 1-800-295-1980 Email: das@dorel.com Customer Service Fax Number 514-353-7819... - Page 26 0-65857-17806-7 DA7867 ¡Felicitaciones por su nueva compra de un mueble! Los muebles de la línea Dorel Living han sido diseñados con la calidad, la comodidad y el estilo en mente. Estamos seguros de que este mueble le servirá por muchos años con su comodidad excepcional.
-
Page 27: Cuidado Y Limpieza
GARANTÍA LIMITADA Dorel garantiza que el producto está libre de defectos de material y mano de obra y se compromete a remediar cualquier defecto de este tipo. Esta garantía cubre 1 año a partir de la fecha de compra original. -
Page 28: Lista De Accesorios
Isla de cocina con 2 taburetes DA7867 LISTA DE ACCESORIOS ∅5/32"*1" PERNO DE LEVA SEGURO DE LEVA TORNILLO DE CABEZA PLANA 28 PCS 28 PCS 16 PCS ∅8*30mm ∅5/32"*7/8" LLAVE ALLEN CLAVIJA DE MADERA PERNO DE CABEZA REDONDA 1 PC... - Page 29 Isla de cocina con 2 taburetes DA7867 LISTA DE ACCESORIOS ∅5/32"*5/8" TOPE DE CAJÓN SOPORTE DE ESTANTE TORNILLO DE CABEZA REDONDA 2 PCS 8 PCS 8 PCS ∅1/4"*1/2" ∅1/4"*1" ∅1/8"*1/2" PERNO PERNO TORNILLO DE CABEZA REDONDA 34 PCS 3 PCS...
-
Page 30: Lista De Piezas
Isla de cocina con 2 taburetes DA7867 LISTA DE PIEZAS LADO IZQUIERDO LADO DERECHO LARGUERO SUPERIOR 1 PC 1 PC 1 PC PANEL POSTERIOR LARGUERO INFERIOR PANEL CENTRAL 1 PC 1 PC 1 PC PANEL INFERIOR PATA CEBOLLA PATA DE SOPORTE... - Page 31 Isla de cocina con 2 taburetes DA7867 LISTA DE PIEZAS PANEL VERTICAL PANEL SUPERIOR SOPORTE SUPERIOR ANTERIOR 1 PC 1 PC 1 PC TAPA DE LA ISLA ESTANTE AJUSTABLE PUERTA 1 PC 2 PCS 1 PC FRENTE DE CAJÓN LADO DE CAJÓN LADO POSTERIOR CAJÓN...
- Page 32 Isla de cocina con 2 taburetes DA7867 LISTA DE PIEZAS FONDO DE CAJÓN TOALLERO SOPORTE DE METAL 2 PCS 1 PC 3 PCS ASIENTO CUADRO DE ASIENTO CUADRO TENSOR 2 PCS 2 PCS 2 PCS PATA 8 PCS...
- Page 33 Isla de cocina con 2 taburetes DA7867 ETAPA 1 Una los lados del cajón (Q) con el frente del cajón (P) con tornillos de cabeza plana (3). Deslice el fondo del cajón (S) en las ranuras de los lados del cajón (Q) y del frente del cajón (P).
- Page 34 Isla de cocina con 2 taburetes DA7867 ETAPA 2 Inserte pernos de leva (1) en el lado derecho (B). Inserte seguros de leva (2) en el larguero superior (C) y el larguero inferior (E) como ilustrado. Una el larguero superior (C) y el larguero inferior (E) con el lado derecho (B) y fíjelos girando los seguros de leva (2) ½...
- Page 35 Isla de cocina con 2 taburetes DA7867 ETAPA 3 Inserte pernos de leva (1) y clavijas de madera (5) en el lado derecho (B). Inserte seguros de leva (2) en el panel central (F). Una el panel central (F) con el lado derecho (B) y fíjelos girando los seguros de leva (2) ½ vuelta en sentido horario con un destornillador Phillips (no incluido).
- Page 36 Isla de cocina con 2 taburetes DA7867 ETAPA 4 Inserte pernos de leva (1) en el lado izquierdo (A). Inserte seguros de leva (2) en el panel central (F), en el larguero superior (C) y en el larguero inferior (E) como ilustrado más abajo.
- Page 37 Isla de cocina con 2 taburetes DA7867 ETAPA 5 Inserte pernos de leva (1) y clavijas de madera (5) en el panel central (F). Inserte seguros de leva (2) en el panel superior (K). Una el panel superior (K) con el panel central (F) y fíjelos girando los seguros de leva (2) ½ vuelta en sentido horario con un destornillador Phillips (no incluido).
- Page 38 Isla de cocina con 2 taburetes DA7867 ETAPA 6 Una el soporte superior anterior (L) con los lados izquierdo y derecho (A y B) y con el panel superior (K) con pernos (14) como ilustrado. Utilice la llave Allen (4) para ajustar los pernos (14).
- Page 39 Isla de cocina con 2 taburetes DA7867 ETAPA 7 Con la ayuda de otra persona, dé vuelta la unidad. Inserte pernos de leva (1) y clavijas de madera (5) en el panel central (F) con un destornillador Phillips (no incluido).
- Page 40 Isla de cocina con 2 taburetes DA7867 ETAPA 8 Inserte pernos de leva (1) en el panel inferior (G) con un destornillador Phillips (no incluido). Inserte clavijas de madera (5) en los lados (A y B) y en el panel vertical (J).
- Page 41 Isla de cocina con 2 taburetes DA7867 ETAPA 9 Coloque las patas cebolla (H) y la pata de soporte (I) en el panel inferior (G) girándolas en sentido hora Con la ayuda de otra persona, vuelva a colocar la isla sobre las patas.
- Page 42 Isla de cocina con 2 taburetes DA7867 ETAPA 10 Coloque los topes de cajón (10) en el panel central (F) con tornillos de cabeza redonda (15) y un destornillador Phillips (no incluido). Inserte pernos de leva (1) en la tapa de la isla (M).
- Page 43 Isla de cocina con 2 taburetes DA7867 ETAPA 11 Coloque el pomo (9) en la puerta (O) con un perno (6). Coloque la placa de metal (7) en la puerta (O) con tornillos de cabeza plana (8). Coloque la placa de metal (7) en la puerta (O) con tornillos de cabeza plana (8).
- Page 44 Isla de cocina con 2 taburetes DA7867 ETAPA 12 Inserte los soportes de los estantes (12) en los agujeros de los lados (A y B) y del panel vertical (J). Coloque los estantes ajustables (N) sobre los soportes de los estantes (12) como ilustrado más abajo.
- Page 45 Isla de cocina con 2 taburetes DA7867 ETAPA 13 Una el soporte de metal (U) con los lados (A y B) y con el larguero superior (C) con pernos (13). Coloque el toallero (T) en el lado izquierdo (A) con pernos (13).
- Page 46 Isla de cocina con 2 taburetes DA7867 ETAPA 14 Una las patas (Y) con el cuadro del asiento (W) con pernos (13). Deje los pernos un poco flojos. Una el cuadro tensor (X) con las patas (Y) con pernos (13).
- Page 47 Isla de cocina con 2 taburetes DA7867 ETAPA 15 Una el cuadro del asiento (W) con el asiento (V) con tornillos de cabeza redonda (11). NOTA: Los tornillos (11) perforarán sus propios agujeros. No utilice herramientas eléctricas y no ajuste demasiado los tornillos.
- Page 48 Isla de cocina con 2 taburetes DA7867 NOTA - Las patas (H) y las patas de los taburetes (Y) están dotadas de niveladores ajustables. Gire los niveladores ajustables para asegurarse de que la isla de cocina y los taburetes queden bien estables sobre el piso.
- Page 49 Si falta una pieza o está dañada, contacte nuestro departamento de servicio a la clientela. Reemplazaremos la pieza SIN cargo. NEED HELP! Tel #: 1-800-295-1980 CALL US FOR ASSISTANCE Correo electrónico: das@dorel.com 1-800-295-1980 Fax #: 514-353-7819 DO NOT RETURN PRODUCT TO E-MAIL:DAS@DOREL.COM...
-
Page 50: Servicio Al Cliente
MODELO #: DA7867 Servicio al Cliente POR FAVOR, NO DEVUELVA ESTE PRODUCTO A LA TIENDA POR FAVOR, CONTACTE LOS REPRESENTANTES DEL SERVICIO A LA CLIENTELA A LOS SIGUIENTES NÚMEROS SI FALTA UNA PIEZA O ESTÁ DEFECTUOSA. Número de teléfono del Servicio a la Clientela 1-800-295-1980 Email: das@dorel.com... - Page 51 0-65857-17806-7 DA7867 Félicitations pour votre dernier achat d’un meuble ! Les meubles de la ligne Dorel Living ont été conçus ayant en tête la qualité, la commodité et le style. Nous sommes convaincus que ce meuble vous servira durant de nombreuses années avec un confort exceptionnel.
-
Page 52: Soin Et Entretien
GARANTIE LIMITÉE Dorel garantit que son produit est exempt de vices de matériaux et de fabrication et s'engage à remédier à un tel défaut. Cette garantie couvre 1 an à partir de la date d'achat originale. Cette garantie n'est valable que sur présentation d'une preuve d'achat. - Page 53 Îlot de cuisine avec 2 tabourets DA7867 LISTE DE QUINCAILLERIE ∅5/32"*1" BOULON À CAME VERROUILLAGE À CAME VIS À TÊTE PLATE 28 PCS 28 PCS 16 PCS ∅8*30mm ∅5/32"*7/8" CLÉ ALLEN GOUJON DE BOIS BOULON À TÊTE ARRONDIE 1 PC...
- Page 54 Îlot de cuisine avec 2 tabourets DA7867 LISTE DE QUINCAILLERIE ∅5/32"*5/8" ARRÊT DE TIROIR VIS À TÊTE ARRONDIE SUPPORT À ÉTAGÈRE 2 PCS 8 PCS 8 PCS ∅1/4"*1/2" ∅1/4"*1" ∅1/8"*1/2" BOULON BOULON VIS À TÊTE ARRONDIE 34 PCS 3 PCS...
-
Page 55: Liste De Pièces
Îlot de cuisine avec 2 tabourets DA7867 LISTE DE PIÈCES CÔTÉ GAUCHE CÔTÉ DROIT SUPPORT SUPÉRIEUR 1 PC 1 PC 1 PC PANNEAU ARRIÈRE SUPPORT INFÉRIEUR PANNEAU CENTRAL 1 PC 1 PC 1 PC PIED EN FORME D’OIGNON PANNEAU INFÉRIEUR... - Page 56 Îlot de cuisine avec 2 tabourets DA7867 LISTE DE PIÈCES PANNEAU VERTICAL PANNEAU SUPÉRIEUR BARRE SUPÉRIEURE AVANT 1 PC 1 PC 1 PC DESSUS D’ÎLOT ÉTAGÈRE AJUSTABLE PORTE 1 PC 2 PCS 1 PC DEVANT DE TIROIR CÔTÉ DE TIROIR CÔTÉ...
- Page 57 Îlot de cuisine avec 2 tabourets DA7867 LISTE DE PIÈCES FOND DE TIROIR PORTE SERVIETTE SUPPORT DE MÉTAL 2 PCS 1 PC 3 PCS SIÈGE CADRE DE SIÈGE CADRE TENDEUR 2 PCS 2 PCS 2 PCS PIED 8 PCS...
- Page 58 Îlot de cuisine avec 2 tabourets DA7867 ÉTAPE 1 Attachez les côtés du tiroir (Q) avec le devant du tiroir (P) avec des vis à tête plate (3). Glissez le fond du tiroir (S) dans les rainures des côtés du tiroir (Q) et du devant du tiroir (P).
- Page 59 Îlot de cuisine avec 2 tabourets DA7867 ÉTAPE 2 Insérez des boulons à came (1) dans le côté droit (B). Insérez des verrouillages à came (2) dans le support supérieur (C) et le support inférieur (E) tel qu’illustré. Attachez le support supérieur (C) et le support inférieur (E) au côté droit (B) et fixez-les en tournant les verrouillages à...
- Page 60 Îlot de cuisine avec 2 tabourets DA7867 ÉTAPE 3 Insérez des boulons à came (1) et des goujons de bois (5) dans le côté droit (B). Insérez des verrouillages à came (2) dans le panneau central (F). Attachez le panneau central (F) avec le côté droit (B) et fixez-les en tournant les verrouillages à came (2) ½...
- Page 61 Îlot de cuisine avec 2 tabourets DA7867 ÉTAPE 4 Insérez des boulons à came (1) dans le côté gauche (A). Insérez des verrouillages à came (2) dans le panneau central (F), dans le support supérieur (C) et dans le support inférieur (E) tel qu’illustré ci-dessous.
- Page 62 Îlot de cuisine avec 2 tabourets DA7867 ÉTAPE 5 Insérez des boulons à came (1) et des goujons de bois (5) dans le panneau central (F). Insérez des verrouillages à came (2) dans le panneau supérieur (K). Attachez le panneau supérieur (K) avec le panneau central (F) et fixez-les en tournant les verrouillages à...
- Page 63 Îlot de cuisine avec 2 tabourets DA7867 ÉTAPE 6 Attachez la barre supérieure avant (L) aux côtés gauche et droit (A et B) et au panneau supérieur (K) avec des boulons (14) tel qu’illustré. Servez-vous de la clé Allen (4) pour serrer les boulons (14).
- Page 64 Îlot de cuisine avec 2 tabourets DA7867 ÉTAPE 7 Avec l’aide d’une autre personne, tournez l’unité déjà assemblée à l’envers. Insérez des boulons à came (1) et des goujons de bois (5) dans le panneau central (F) avec un tournevis cruciforme (non compris).
- Page 65 Îlot de cuisine avec 2 tabourets DA7867 ÉTAPE 8 Insérez des boulons à came (1) dans le panneau inférieur (G) avec un tournevis cruciforme (non compris). Insérez des goujons de bois (5) dans les côtés (A et B) et dans le panneau vertical (J).
- Page 66 Îlot de cuisine avec 2 tabourets DA7867 ÉTAPE 9 Installez les pieds en forme d’oignon (H) et le pied de support (I) dans le panneau inférieur (G) en tournant dans le sens horaire. Avec l’aide d’une autre personne, tournez l’îlot à l’endroit.
- Page 67 Îlot de cuisine avec 2 tabourets DA7867 ÉTAPE 10 Installez les arrêts de tiroir (10) sur le panneau central (F) avec des vis à tête arrondie (15) et un tournevis cruciforme (non compris). Insérez des boulons à came (1) dans le dessus de l’îlot (M).
- Page 68 Îlot de cuisine avec 2 tabourets DA7867 ÉTAPE 11 Placez un bouton (9) sur la porte (O) avec un boulon (6). Fixez la plaque de métal (7) à la porte (O) avec des vis à tête plate (8). Installez la porte (O) en poussant vers le bas les tiges de la porte et en insérant la porte dans les trous...
- Page 69 Îlot de cuisine avec 2 tabourets DA7867 ÉTAPE 12 Insérez les supports à étagères (12) dans les trous situés dans les côtés (A et B) et dans le panneau vertical (J). Placez les étagères ajustables (N) sur les supports à étagères (12) tel qu’illustré ci-dessous.
- Page 70 Îlot de cuisine avec 2 tabourets DA7867 ÉTAPE 13 Attachez le support de métal (U) aux côtés (A et B) et au support supérieur (C) avec des boulons (13). Fixez le porte serviette (T) au côté gauche (A) avec des boulons (13).
- Page 71 Îlot de cuisine avec 2 tabourets DA7867 ÉTAPE 14 Fixez les pieds (Y) au cadre du siège (W) avec des boulons (13). Laissez les boulons desserrés. Fixez le cadre tendeur (X) aux pieds (Y) avec des boulons (13). Servez- vous de la clé Allen (4) pour installer les boulons (13).
- Page 72 Îlot de cuisine avec 2 tabourets DA7867 ÉTAPE 15 Fixez le cadre du siège (W) au siège (V) avec des vis à tête arrondie (11). NOTE : Les vis (11) perceront leurs propres trous. Ne pas utiliser des outils électriques et ne pas trop serrer les vis.
- Page 73 Îlot de cuisine avec 2 tabourets DA7867 NOTE : Les pieds (H) et les pieds des tabourets (Y) sont équipés des niveleurs ajustables. Tournez les niveleurs ajustables pour vous assurer que l’îlot et les tabourets soient stables et posés bien à plat.
- Page 74 Îlot de cuisine avec 2 tabourets DA7867 ATTENTION: Cette unité est conçue pour être utilisée seulement avec les produits et/ou les poids maximum indiqués. L'utilisation avec d'autres produits et/ou des produits plus lourds que les poids maximum indiqués peut entraîner de l'instabilité et causer des blessures.
-
Page 75: Service À La Clientèle
MODÈLE # : DA7867 Service à la clientèle S.V.P. NE PAS RETOURNER CE PRODUIT AU MAGASIN VEUILLEZ CONTACTER UN REPRÉSENTANT DU SERVICE À LA CLIENTÈLE À L'UN DES NUMÉROS SUIVANTS SI DES PIÈCES SONT MANQUANTES OU DÉFECTUEUSES. Numéro de téléphone du Service à la clientèle : 1-800-295-1980 Courriel : das@dorel.com...
Need help?
Do you have a question about the DA7867 and is the answer not in the manual?
Questions and answers