
Related Manuals for PDi medTV SMART A Series


Summary of Contents for PDi medTV SMART A Series
- Page 1 USER MANUAL Document Number: PD196-389R2 PDi A-Series Televisions A24, A32, A42, A43, A55 mymedTV.com...
-
Page 2: Table Of Contents
Clear Service Level ................................................17 Channel List ....................................................17 Auto Channel Aliasing .................................................18 Fill Analog Gaps with Digital Channels........................................18 Channel Override ...................................................18 Features ......................................................18 www.pdiarm.com www.mymedTV.com PDi Communication Systems, Inc. ▪ 40 Greenwood Ln ▪ Springboro, Ohio 45066 USA ▪ ▪ Phone 800.628.9870... - Page 3 Input Method ...................................................28 Permission Manage ................................................28 System Upgrade ..................................................28 System Recovery ..................................................29 Bluetooth function ................................................30 Product Information................................................31 Troubleshooting Tips .................................................31 Limited Warranty ..................................................31 www.pdiarm.com www.mymedTV.com PDi Communication Systems, Inc. ▪ 40 Greenwood Ln ▪ Springboro, Ohio 45066 USA ▪ ▪ Phone 800.628.9870...
- Page 4 If this equipment does cause harmful the United States and Canada. www.pdiarm.com www.mymedTV.com PDi Communication Systems, Inc. ▪ 40 Greenwood Ln ▪ Springboro, Ohio 45066 USA ▪ ▪ Phone 800.628.9870...
-
Page 5: Important Safety Instructions
When a cart is used, use caution when moving cart/apparatus combination to avoid injury from tip-over. www.pdiarm.com www.mymedTV.com PDi Communication Systems, Inc. ▪ 40 Greenwood Ln ▪ Springboro, Ohio 45066 USA ▪ ▪ Phone 800.628.9870... -
Page 6: Safety Instructions (French)
Lorsqu’un chariot est utilisé, faire attention lors du déplacement de l'ensemble chariot/appareil afin d’éviter des blessures en cas de basculement. www.pdiarm.com www.mymedTV.com PDi Communication Systems, Inc. ▪ 40 Greenwood Ln ▪ Springboro, Ohio 45066 USA ▪ ▪ Phone 800.628.9870... -
Page 7: Connections
SPEAKER DRIVE DVD Connection (Module) The A Series television are made to accept the PDi DVD module, PD251-043-1. This mounts on the back of the television with side access. Detailed installation instructions are available with the DVD. Side-Panel Buttons The buttons on the right side of the TV can be used to control a limited number of the television’s basic operating functions. -
Page 8: Remote Controls
Wizard to help with initial set up. To continue, press the right navigation arrow, ►. Press ▲ or ▼ to s elect Language and press OK. www.pdiarm.com www.mymedTV.com PDi Communication Systems, Inc. ▪ 40 Greenwood Ln ▪ Springboro, Ohio 45066 USA ▪ ▪ Phone 800.628.9870... - Page 9 5. Press the SETUP button to return to the previous menu. To exit, press SETUP until the programming menus disappear. Press ▲ or ▼ to select Time Zone and press OK. www.pdiarm.com www.mymedTV.com PDi Communication Systems, Inc. ▪ 40 Greenwood Ln ▪ Springboro, Ohio 45066 USA ▪ ▪ Phone 800.628.9870...
-
Page 10: Main Menu Screen
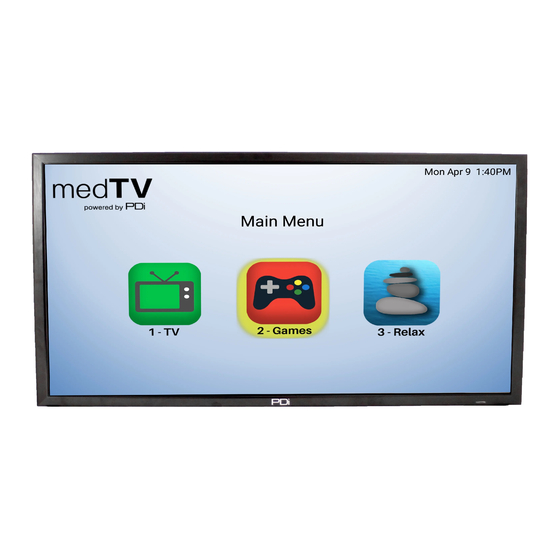
When the television is powered on the screen that will come up first will be the Main Menu screen. Press “one” to watch TV. To return to the Main Menu, press *, or Exit on the PD108-210. www.pdiarm.com www.mymedTV.com PDi Communication Systems, Inc. ▪ 40 Greenwood Ln ▪ Springboro, Ohio 45066 USA ▪ ▪ Phone 800.628.9870... -
Page 11: Programming
The SETUP menu is the first menu that appears. All the other menus and all the settings can be accessed through it. This manual explains and shows how to setup the different features of the PDI-A Series LED TV. Sub Menu Overview Source: TV, DVD, HDMI 1, HDMI 2, Media, and Android. -
Page 12: Source
3. Press ◄ or ► to the desired number. 4. Press SETUP to return to the previous menu. To exit, press SETUP until the programming menus disappear. www.pdiarm.com www.mymedTV.com PDi Communication Systems, Inc. ▪ 40 Greenwood Ln ▪ Springboro, Ohio 45066 USA ▪ ▪ Phone 800.628.9870... -
Page 13: Noise Reduction
1. Press the SETUP button on the remote control. 2. Press ► on to highlight Sound. 3. Press ▲ or ▼to enter the Sound sub-menu. www.pdiarm.com www.mymedTV.com PDi Communication Systems, Inc. ▪ 40 Greenwood Ln ▪ Springboro, Ohio 45066 USA ▪ ▪ Phone 800.628.9870... -
Page 14: Default Volume
NOTE: If Power on Volume is set to Last and the physical power is removed, the TV will power on with a volume equal to the minimum volume setting. www.pdiarm.com www.mymedTV.com PDi Communication Systems, Inc. ▪ 40 Greenwood Ln ▪ Springboro, Ohio 45066 USA ▪ ▪ Phone 800.628.9870... -
Page 15: Avc
2. Press ▲ or ▼ to highlight Antenna Type. 3. Press ◄ or ► to select Air, or Cable. 4. Now perform Auto Scan. www.pdiarm.com www.mymedTV.com PDi Communication Systems, Inc. ▪ 40 Greenwood Ln ▪ Springboro, Ohio 45066 USA ▪ ▪ Phone 800.628.9870... -
Page 16: Service Levels
6. The screen below will show the progress of the channel search. Auto programming requires several minutes to complete. 7. Press the SETUP button to return to normal TV viewing. www.pdiarm.com www.mymedTV.com PDi Communication Systems, Inc. ▪ 40 Greenwood Ln ▪ Springboro, Ohio 45066 USA ▪ ▪ Phone 800.628.9870... -
Page 17: Copy Service Level
2. Press ▲ or ▼ to highlight Service Level. 3. Press ▼ to highlight Channel List. 4. Press OK 3. Press ► to select it. www.pdiarm.com www.mymedTV.com PDi Communication Systems, Inc. ▪ 40 Greenwood Ln ▪ Springboro, Ohio 45066 USA ▪ ▪ Phone 800.628.9870... -
Page 18: Auto Channel Aliasing
SETUP until the programming menus disappear. Features Changing Password Note: Factory preset Password is “1234” which will allow you to change to your desired password. www.pdiarm.com www.mymedTV.com PDi Communication Systems, Inc. ▪ 40 Greenwood Ln ▪ Springboro, Ohio 45066 USA ▪ ▪ Phone 800.628.9870... -
Page 19: System Lock
Press OK to or Unlock. Press ► to Parental Control Press “OK” Press the SETUP button to return to normal TV viewing. www.pdiarm.com www.mymedTV.com PDi Communication Systems, Inc. ▪ 40 Greenwood Ln ▪ Springboro, Ohio 45066 USA ▪ ▪ Phone 800.628.9870... -
Page 20: Canadian Parental Control
Language, Sex, and Violence Scenes. Mature Audience Adults only, may contain: Strong Dialog, Bad Language, Sex, and TV-MA Only Violence Scenes. www.pdiarm.com www.mymedTV.com PDi Communication Systems, Inc. ▪ 40 Greenwood Ln ▪ Springboro, Ohio 45066 USA ▪ ▪ Phone 800.628.9870... - Page 21 NOTE: Parental Control will automatically block any category that is rated for older audiences. For example, if you block the PG- 13 category, then R, NC-17 and X will be automatically blocked also. www.pdiarm.com www.mymedTV.com PDi Communication Systems, Inc. ▪ 40 Greenwood Ln ▪ Springboro, Ohio 45066 USA ▪ ▪ Phone 800.628.9870...
-
Page 22: Keypad Lock
NOTE: The source must be enabled before it can be chosen as a power on source. The Last entry causes the TV to power on to the Last source selected. www.pdiarm.com www.mymedTV.com PDi Communication Systems, Inc. ▪ 40 Greenwood Ln ▪ Springboro, Ohio 45066 USA ▪ ▪ Phone 800.628.9870... -
Page 23: Common
TV to a USB memory stick (thumb drive) and then uploading the setup information to another TV. Alternatively, clone files can be loaded to the RF-HEMiS Head-end TV Server by PDi and distributed to other TVs. -
Page 24: Sleep Timer
Press ▲ or ▼ to lock or unlock on the switch The TV will be all blue when no signal is present, otherwise the panel will be black in color. www.pdiarm.com www.mymedTV.com PDi Communication Systems, Inc. ▪ 40 Greenwood Ln ▪ Springboro, Ohio 45066 USA ▪ ▪ Phone 800.628.9870... -
Page 25: Auto Power On
3. Press ◄ or ► to make selection. 4. Press SETUP to return to the previous menu. To exit, press SETUP until the programming menus disappear. www.pdiarm.com www.mymedTV.com PDi Communication Systems, Inc. ▪ 40 Greenwood Ln ▪ Springboro, Ohio 45066 USA ▪ ▪ Phone 800.628.9870... -
Page 26: System Info
3. Press ► to will erase all the channel that is programed into the TV. 4. Proceed with the auto scan. www.pdiarm.com www.mymedTV.com PDi Communication Systems, Inc. ▪ 40 Greenwood Ln ▪ Springboro, Ohio 45066 USA ▪ ▪ Phone 800.628.9870... -
Page 27: Advance Setting
3. Press ◄ or ► to select Auto, On, or Off depending on whether or not your viewing area observes Daylight Savings Time. 4. Press SETUP to return to the previous menu. To exit, press SETUP until the programming menus disappear. www.pdiarm.com www.mymedTV.com PDi Communication Systems, Inc. ▪ 40 Greenwood Ln ▪ Springboro, Ohio 45066 USA ▪ ▪ Phone 800.628.9870... -
Page 28: Common
3. Press ►for the OTA Settings. 4. Press the SETUP button to return to the previous menu. To exit, press SETUP until the programming menus disappear. www.pdiarm.com www.mymedTV.com PDi Communication Systems, Inc. ▪ 40 Greenwood Ln ▪ Springboro, Ohio 45066 USA ▪ ▪ Phone 800.628.9870... -
Page 29: System Recovery
Press ►for Recovery. Press OK to start the process or press OK when it is on Cancel to stop the process. Press the SETUP button to return to the previous menu. To exit, press SETUP until the programming menus disappear. www.pdiarm.com www.mymedTV.com PDi Communication Systems, Inc. ▪ 40 Greenwood Ln ▪ Springboro, Ohio 45066 USA ▪ ▪ Phone 800.628.9870... -
Page 30: Bluetooth Function
User Manual Page 30 of 31 Bluetooth function Wireless Audio provides sound to Headsets, PDI Table Radio, or other similar wireless devices. 1. Enter the Advance Settings Menu 2. Press ► to select Network Setting and click Ok 3. Press ▲ or ▼ to select Wireless 3. -
Page 31: Product Information
PDi Communication Systems Inc., (“PDi”) standard warranty information is found at pdiarm.com. For information regarding authorized servicing and all other information pertaining to this warranty, please contact PDi COMMUNICATION SYSTEMS, INC. at 40 Greenwood Ln, Springboro, Ohio 45066 or phone 800-628-9870 and ask for the PDi ProServices team.
Need help?
Do you have a question about the medTV SMART A Series and is the answer not in the manual?
Questions and answers
bypass welcome screen on power up (need tv to start up on HDMI 1). even when everything disabled except HDMI1 and it is set to HDMI1 , still powers back on to home, any help?